When attempting to upgrade to Windows 11 24H2, encountering the error code 0xc1900101 can be frustrating. This error typically occurs due to compatibility issues or problems with device drivers. However, it can be fixed by following a few troubleshooting steps, such as updating drivers, disabling third-party antivirus software, performing a clean boot, etc. In this article, we’ll see how to fix error 0xc1900101 while updating Windows 11.
Page Contents
Fix: Error 0xc1900101 while updating to Windows 11 24H2
Fix 1: Run the SFC Scan
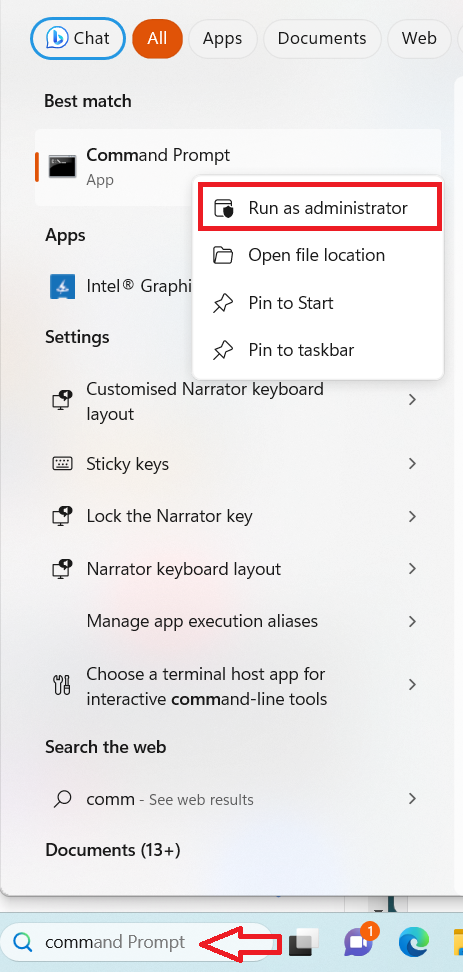
1. Search the Command prompt in the Search box and right-click on the Command Prompt option shown in the list that appeared. Then choose Run as administrator.
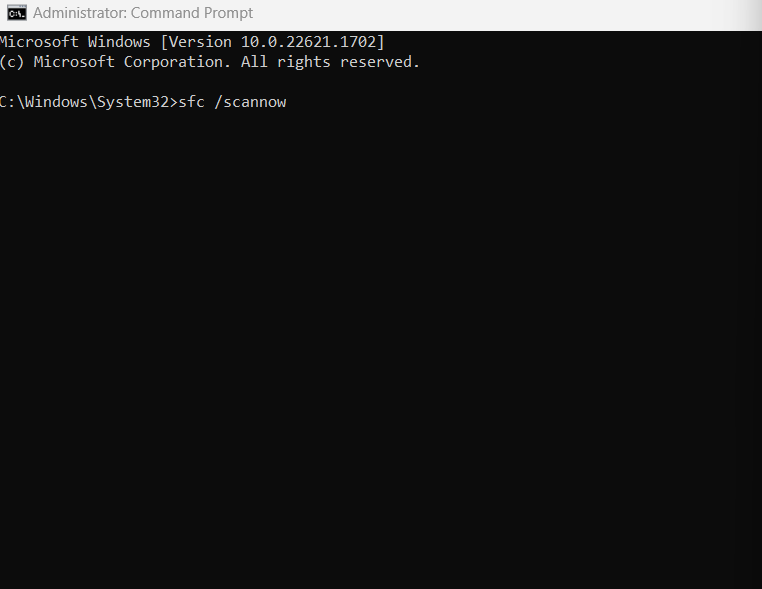
2. Type sfc /scannow and hit Enter.
Fix 2: Disable or Uninstall Antivirus Apps
If you encounter the error code 0xc1900101 while trying to update Windows 11, one potential solution is to disable or uninstall your antivirus software temporarily. Antivirus apps are designed to protect your computer from potential threats, but in some cases, they can interfere with the update process and cause errors to occur.
By disabling or uninstalling your antivirus software, you eliminate any potential conflicts it may be causing during the update. This action allows Windows 11 to proceed with the installation smoothly. Once the update is complete, you can reinstall or enable your antivirus app to ensure ongoing protection for your system.
Fix 3: Update all device drivers
1. Open Settings by pressing Win + I keys.
3. Then click on Windows Update.
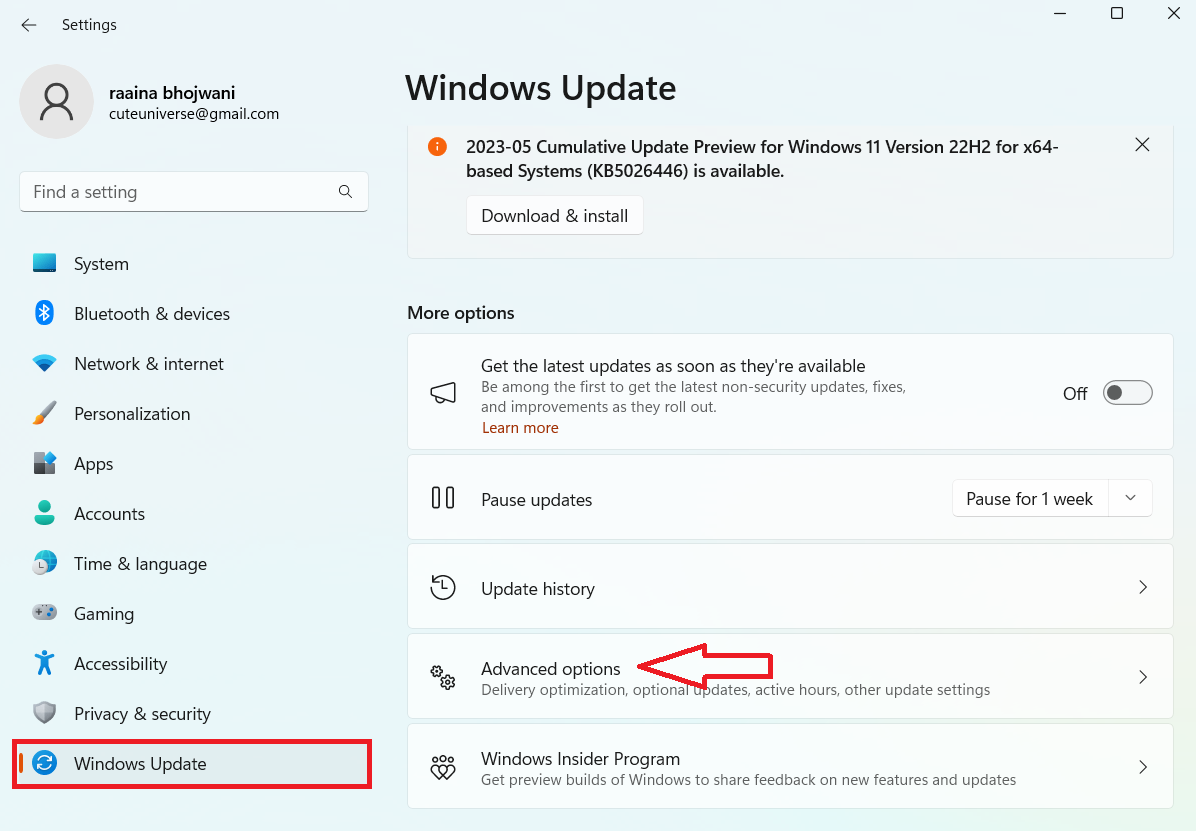
3. Next click on Advanced options and then click Optional updates.
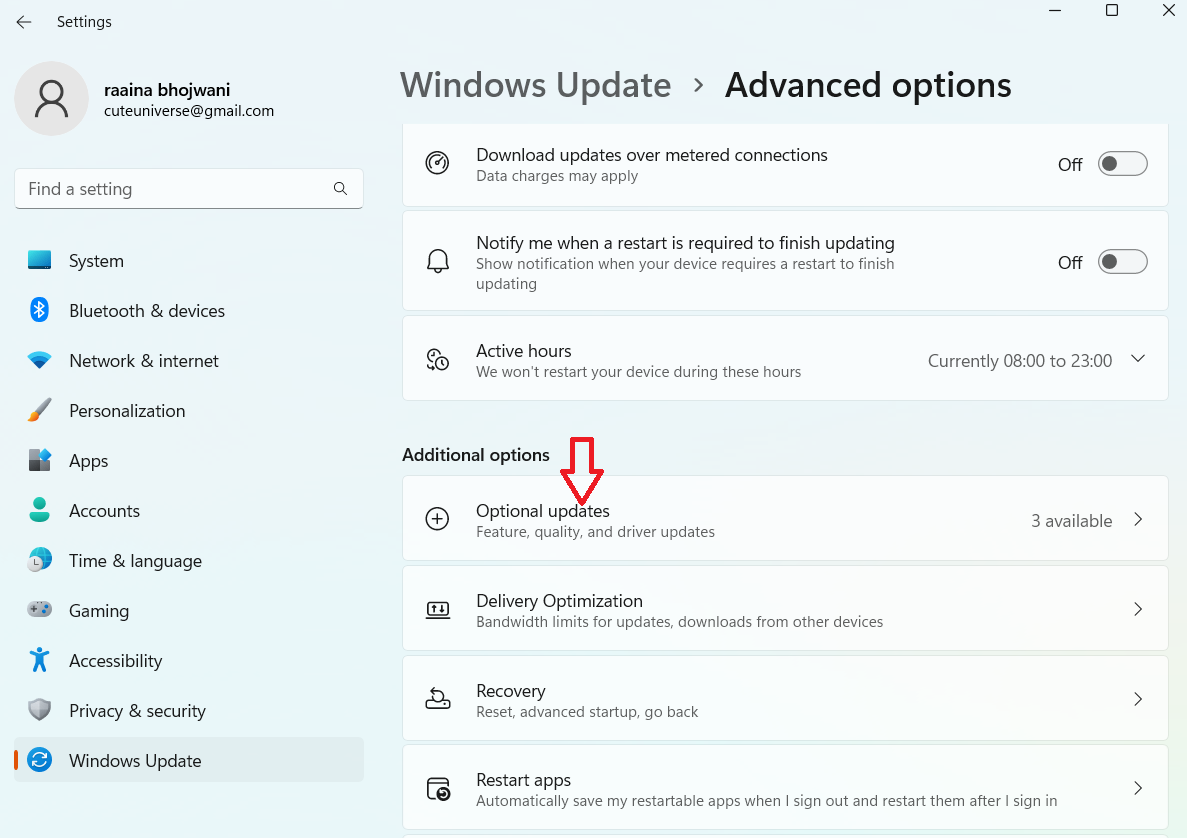
4. Now click on Driver Updates.
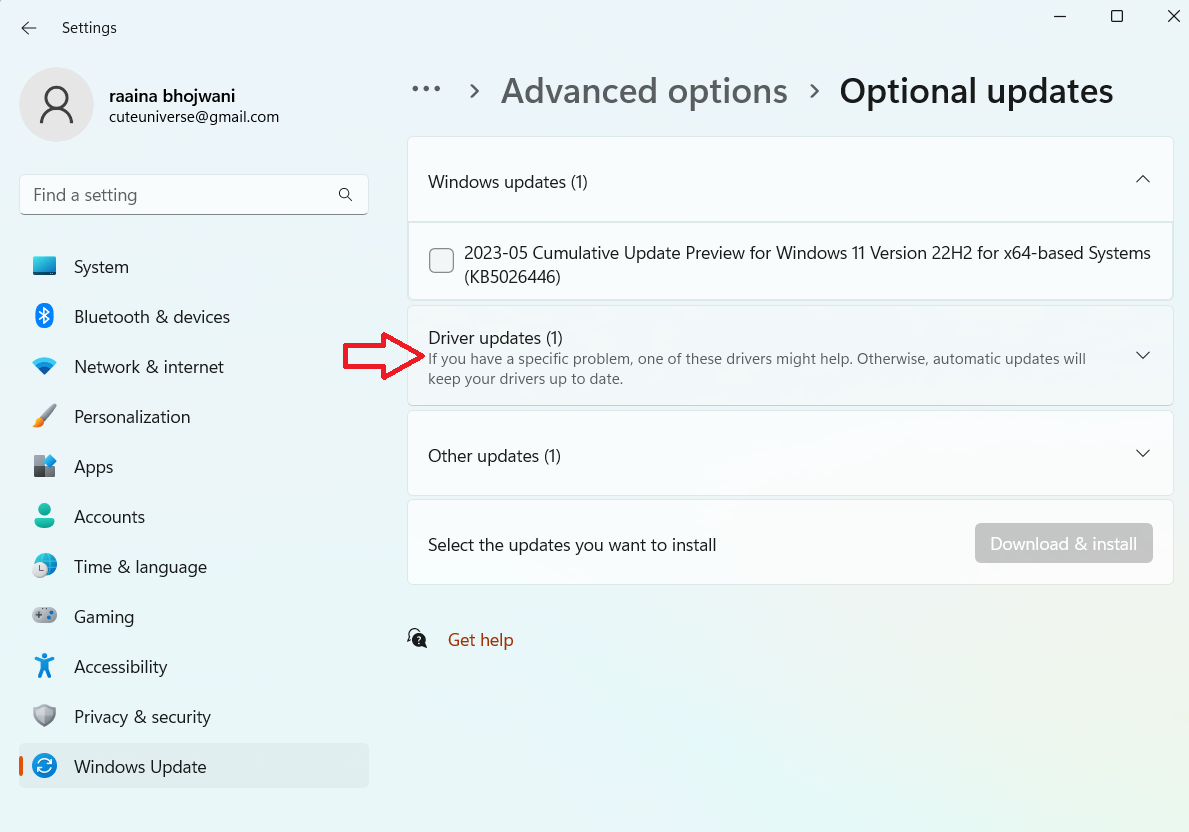
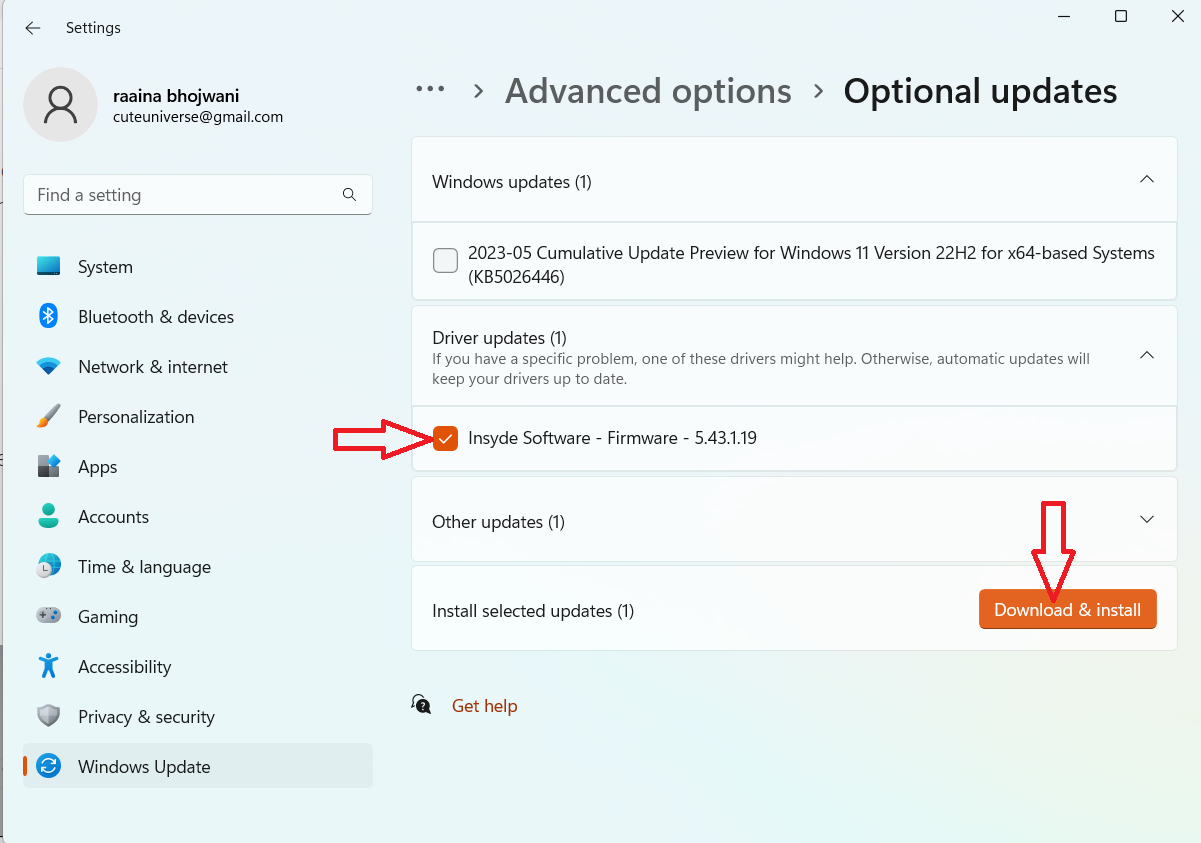
5. Next check the checkboxes showing under the Driver updates section and click on Download & install.
Fix 4: Make space in the Internal storage
Find out the drive that stores the operating system in your computer. Usually, it is stored in a C drive. To open that drive click on This PC. You can see all the drives available on your computer. There should be 40 GB of space for Windows updates.

Fix 5: Clean Boot into Windows
1. Press keys Win + R and type msconfig.

2. Then click on the Services tab and check on the Hide all Microsoft services checkbox and click on Disable All.

3. Now click on Open Task manager.
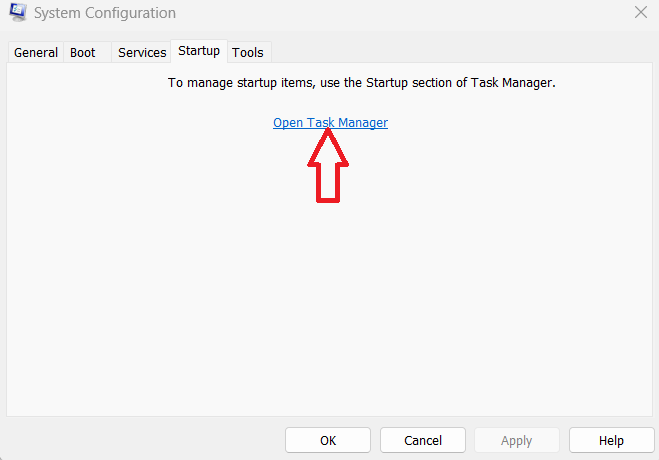
4. Next, click on all third-party services and then click Disable button at the top.
5. Now come back to the System Configuration window and click OK.
6. Restart your computer.
Fix 6: Disable unused hardware drivers
1. Open Device Manager.
2. Click on the View tab and select Show hidden devices.

3. Then double-click on each device name to expand. As you see any grey-colored device, right-click on it and choose Uninstall device.
4. Do this for all greyed devices that you don’t need.
Fix 7: Run the update troubleshooter
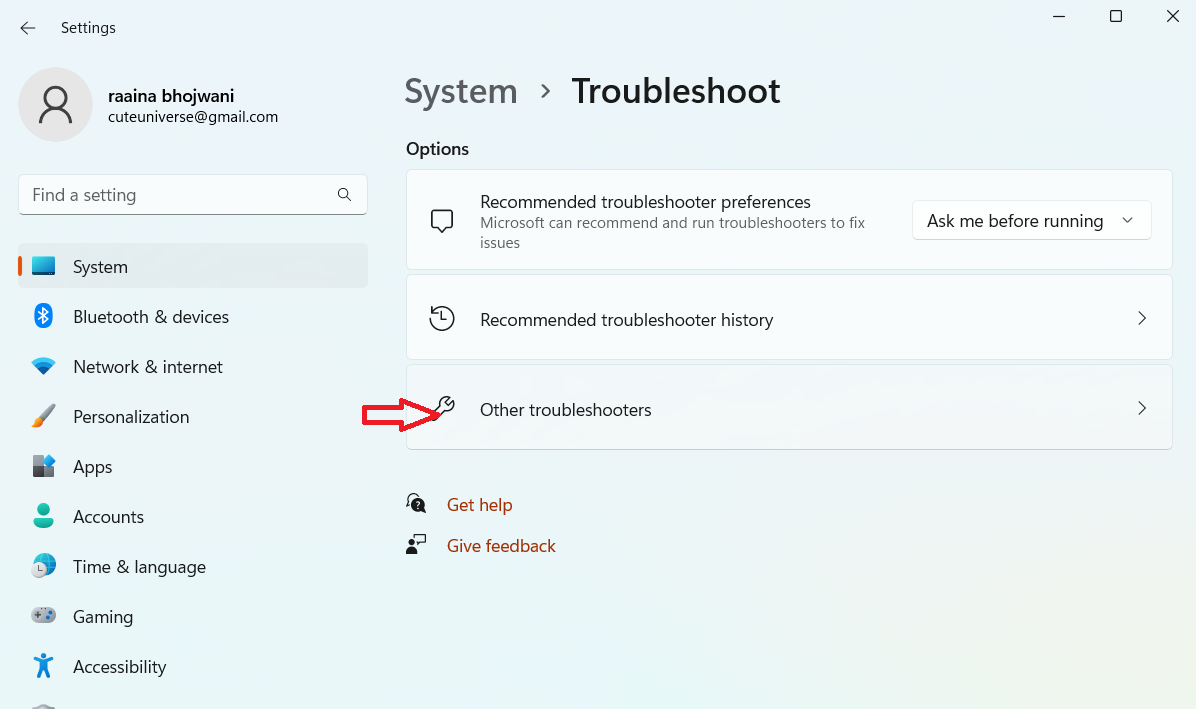
1. Open Settings and then click on System > Troubleshoot.
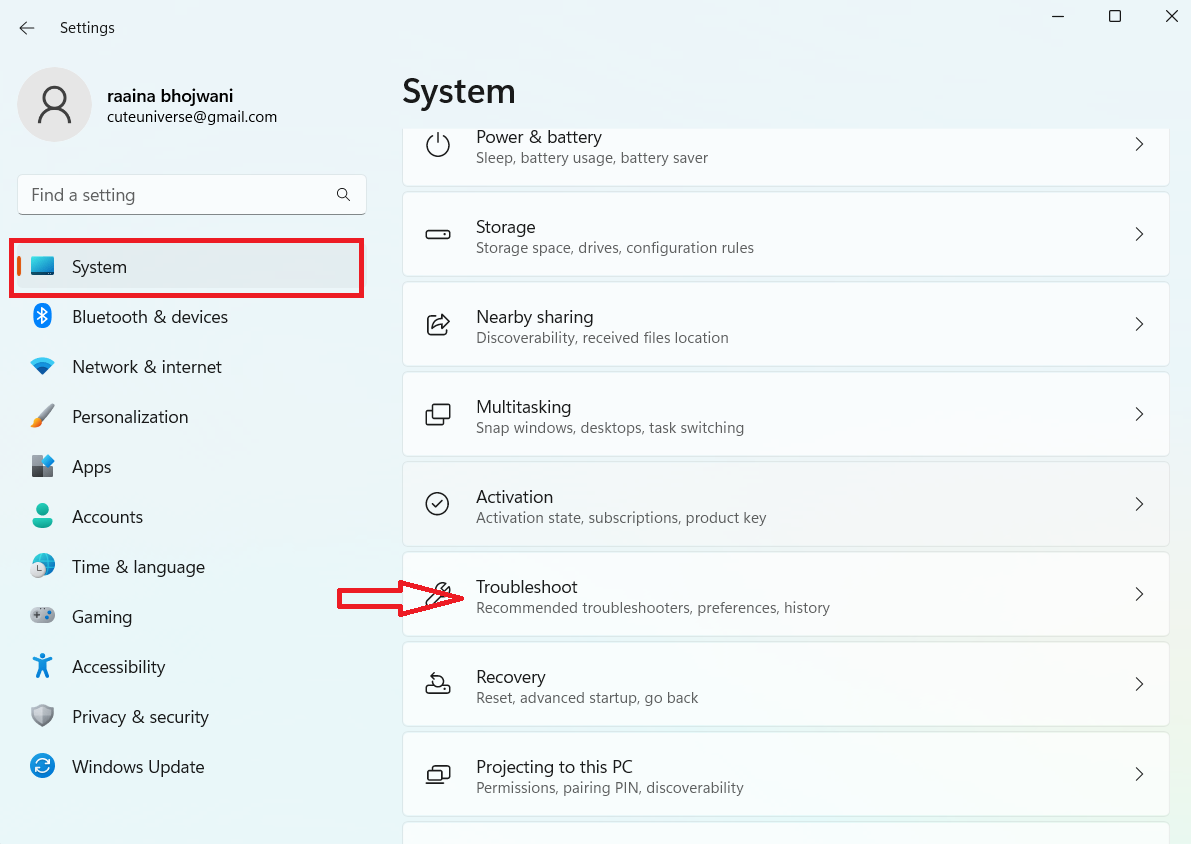
2. Next click on Other troubleshooters.
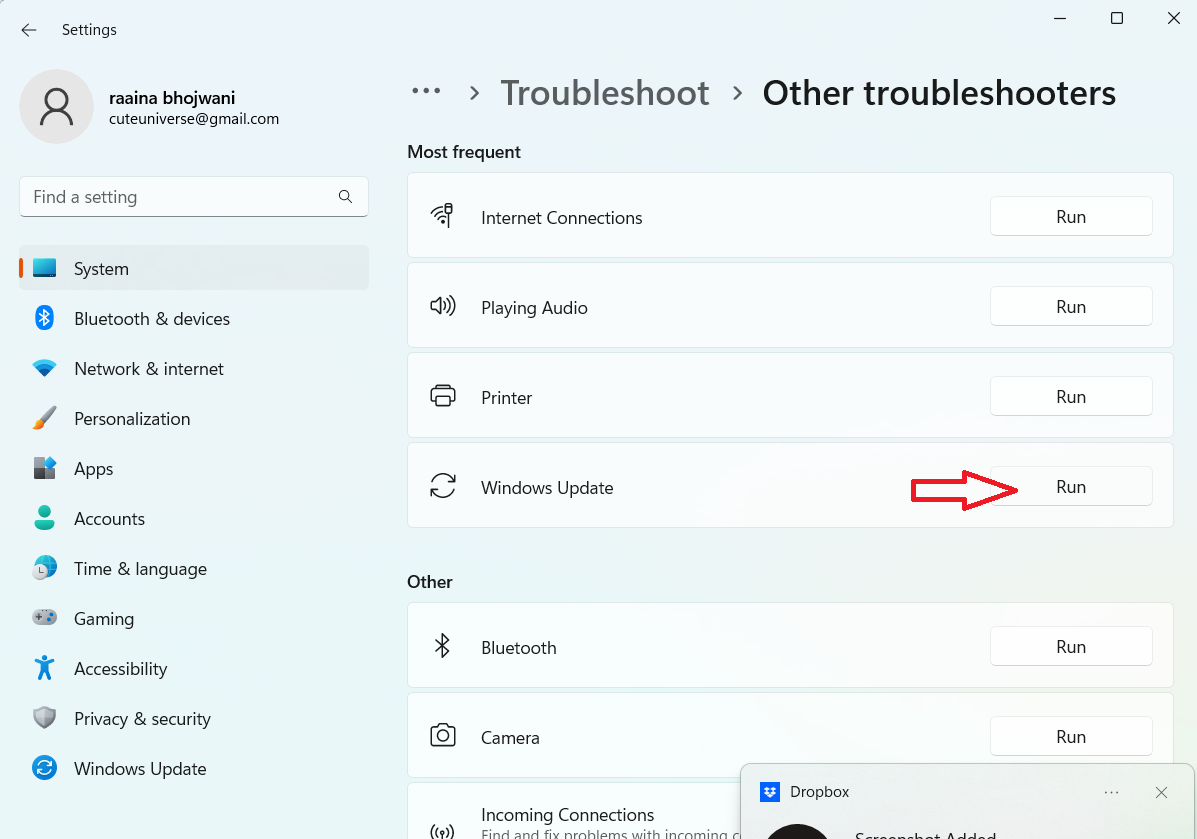
3. Now click on Run next to Windows Update.
Fix 8: Install the latest .NET Framework
1. Press the Win + R keys to open Run and type appwiz.cpl. Press Enter.

2. Uninstall .NET Framework appearing in the list.
3. Now go to the website of NET Framework. and go to Supported versions.
4. Then click on the link that says recommended.
5. Now download the runtime version of the .NET Framework for non-developers.
Fix 9: Run the DISM command
1. Search the Command prompt in the Search box and right-click on the Command Prompt option shown in the list that appeared. Then choose Run as administrator.

2. Now type the below command and press Enter.
DISM.exe /Online /Cleanup-image /Restorehealth
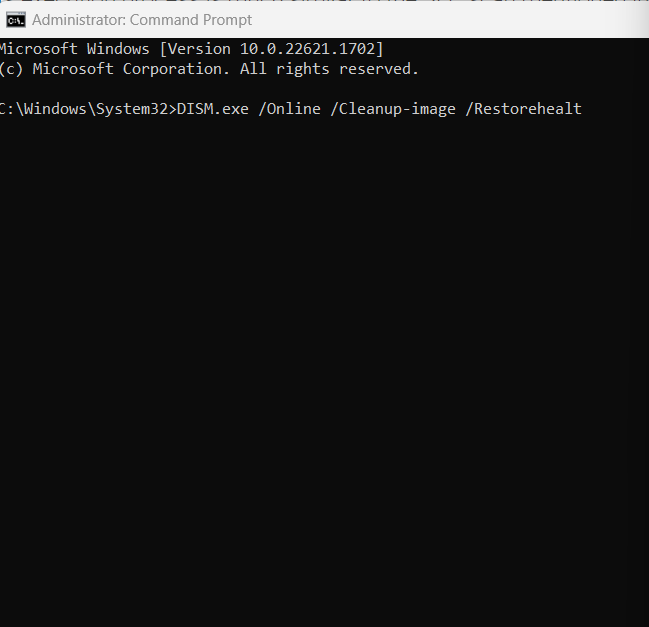
3. After the process completes, restart your computer.
Fix 10: Reset the update components
1. Open Command prompt as administrator by right-clicking on Command Prompt and choosing Run as administrator.
2. Type the commands below and press Enter after each command:
net stop wuauserv
net stop cryptSvc
net stop bits
net stop msiserver
Ren C:\Windows\SoftwareDistribution SoftwareDistribution.old
Ren C:\Windows\System32\catroot2 Catroot2.old
net start wuauserv
net start cryptSvc
net start bits
net start msiserver
3. Check again for updates.
That’s it!
![KapilArya.com is a Windows troubleshooting & how to tutorials blog from Kapil Arya [Microsoft MVP (Windows IT Pro)]. KapilArya.com](https://images.kapilarya.com/Logo1.svg)


![[Latest Windows 10 Update] What’s new in KB5055612? [Latest Windows 10 Update] What’s new in KB5055612?](https://www.kapilarya.com/assets/Windows10-Update.png)


Leave a Reply