When seeking to keep your Windows 11 system running smoothly, Disk Cleanup plays a vital role. Yet, if you’ve found it not working, it can be frustrating. This article explores why Disk Cleanup may fail on Windows 11 and provides simple solutions to fix Disk Cleanup not working on Windows 11 to get it back on track for optimal system performance.
Page Contents
Disk Cleanup in Windows 11
Disk Cleanup is a valuable tool on Windows 11, tasked with optimizing system performance by removing unnecessary files. Sometimes, Disk Cleanup fails to execute as expected. Understanding the root causes of this issue is crucial for effective troubleshooting.
Below are some common reasons for Disk Cleanup Malfunction:
- Corrupted System Files: Disk Cleanup relies on the integrity of various system files. If any of these files become corrupted, it can disrupt the tool’s functionality.
- Conflicts with Other Applications: Some applications may interfere with Disk Cleanup processes, causing conflicts that prevent them from running smoothly.
- Technical Glitches: Windows 11, like any software, can encounter technical glitches. These hiccups might hinder Disk Cleanup’s ability to function correctly.
Fix: Disk Cleanup not working on Windows 11
Below, you’ll find effective solutions to resolve the Disk Cleanup issue on Windows 11:
Solution 1: Empty Temp folder
1. Press the Windows key + R. Type “%temp%” and click OK.
2. select all the files and click the trash icon.
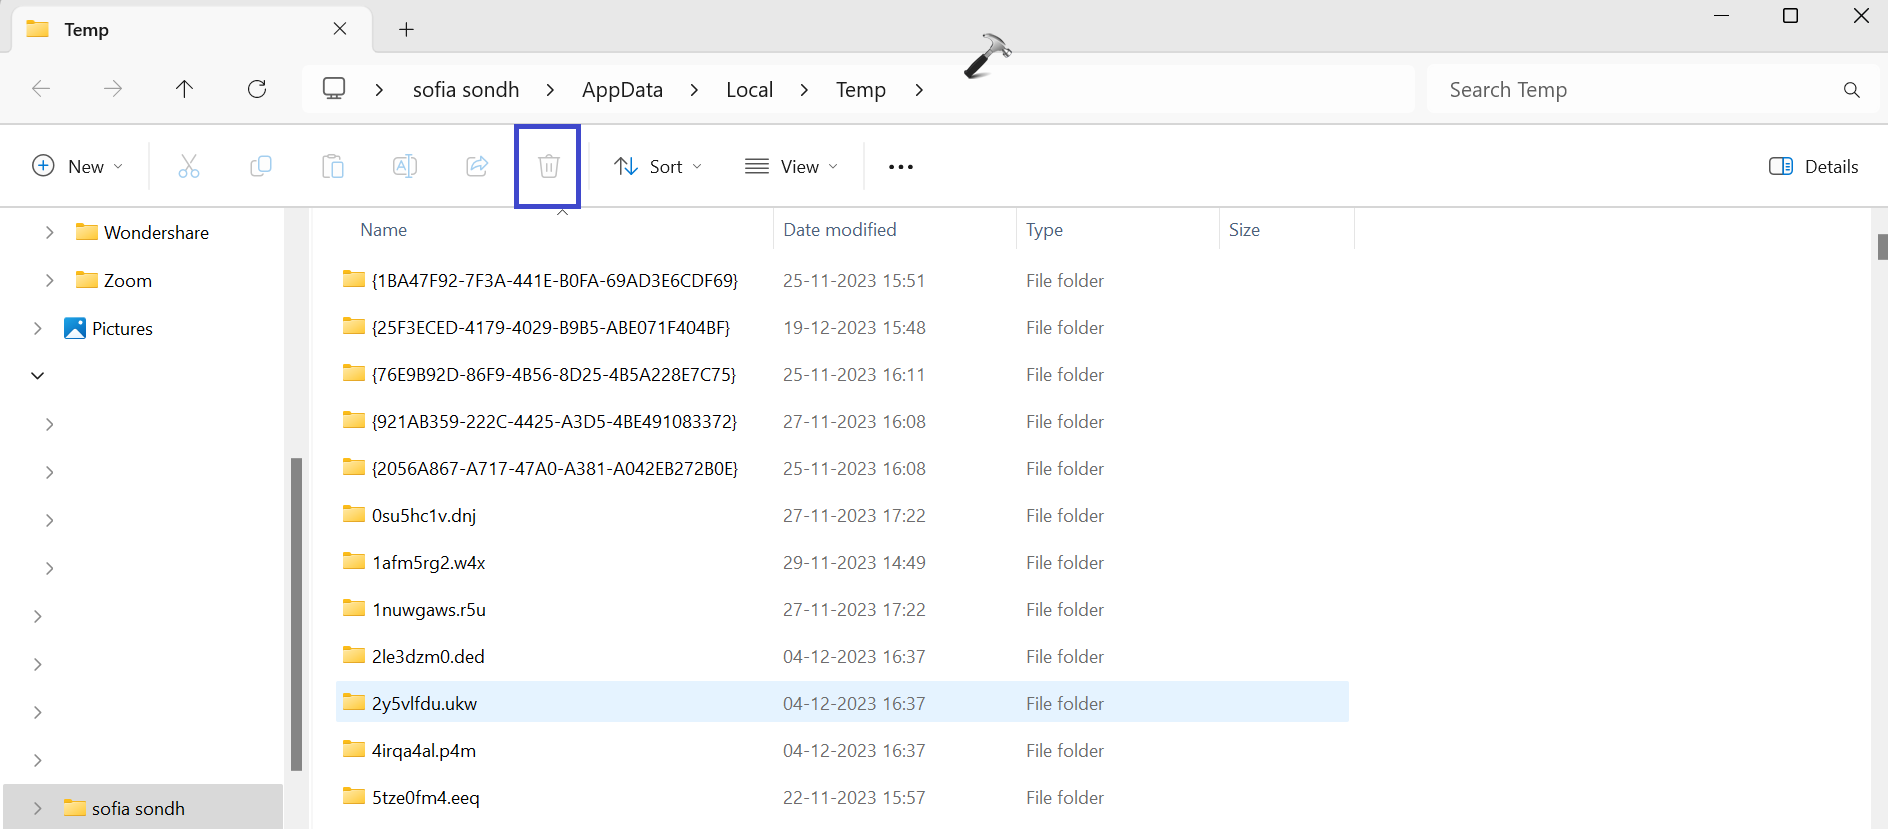
Close all the Windows. Run the Disk Cleanup tool and check whether it works or not. If not, then you can try the next solution.
Solution 2: Try Clean Boot Mode
1. Press the Windows key + R. Type “msconfig.msc” and click OK.
2. Under the Services section, check the “Hide all Microsoft services” box and click the “Disable all” button.
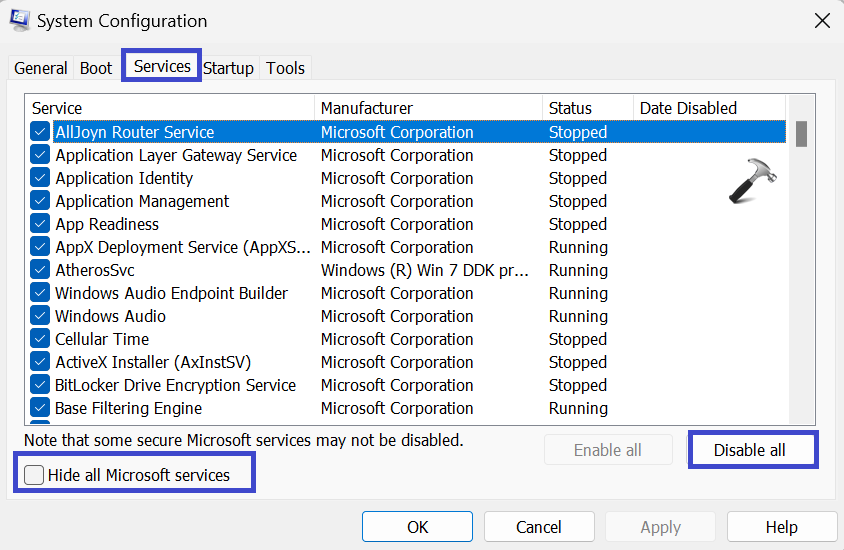
3. Now, under the startup section, click on the “Open Task Manager” option.
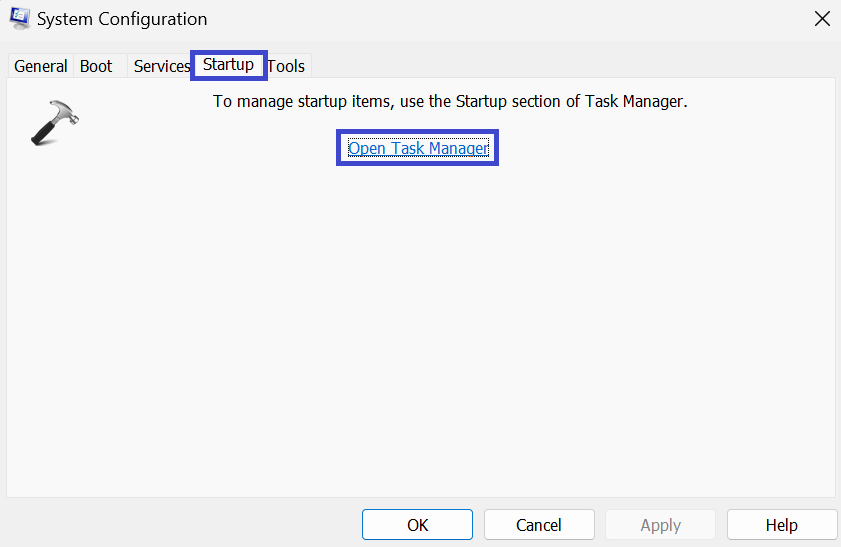
4. The Task Manager window will appear. Here, select all the third-party apps or programs and click on “Disable“.
After disabling all the third-party apps, restart the PC and try to run the disk cleanup.
Solution 3: Check System Files
1. Open the Command prompt and run as administrator.
2. Copy and paste the below command:
SFC /scannow

Press Enter.
3. Now, copy and paste the below commands one by one:
DISM /Online /Cleanup-Image /CheckHealth

DISM /Online /Cleanup-Image /ScanHealth

DISM /Online /Cleanup-Image /RestoreHealth

4. After executing all the above commands, restart the PC.
Solution 4: Open Disk Cleanup with Admin Rights
1. Open the Search bar and type “Disk cleanup“. Click on the “Run as administrator” option.

2. A prompt box will appear. Select the drive you want to clean and then click OK.

3. Now, from the given list, select the files you want to remove. Click OK.
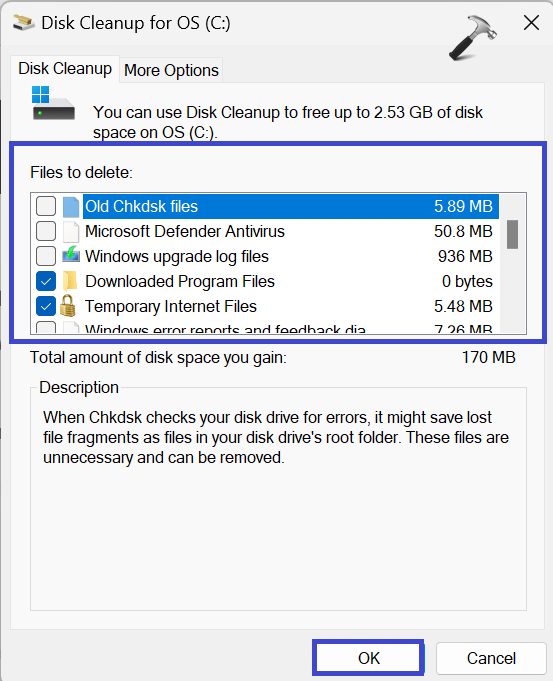
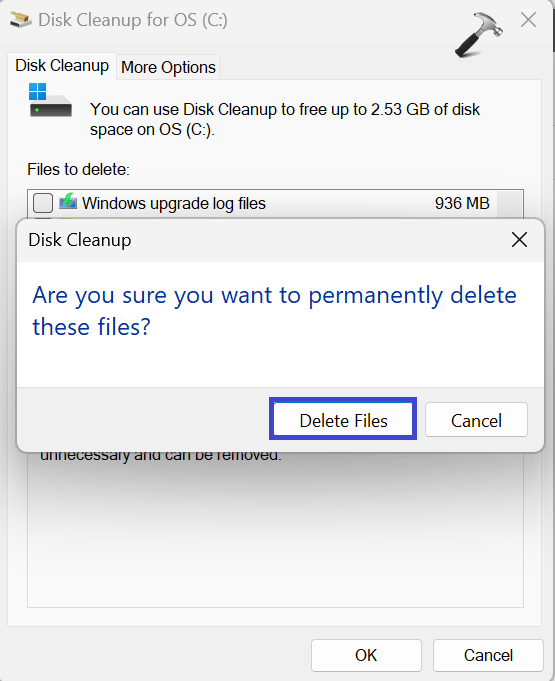
4. Click “Delete Files” to confirm.
Solution 5: Scan for Malware
1. Open the Search bar and type “Windows Security“. Click “open”.
2. Now, click on “Virus & threat protection“.

3. Click on “Scan options“.

4. Select the “Full scan” option and click “Scan now“.

Wait till the scanning is complete. It might take some time for the full scan.
That’s It!
![KapilArya.com is a Windows troubleshooting & how to tutorials blog from Kapil Arya [Microsoft MVP (Windows IT Pro)]. KapilArya.com](https://images.kapilarya.com/Logo1.svg)


Leave a Reply