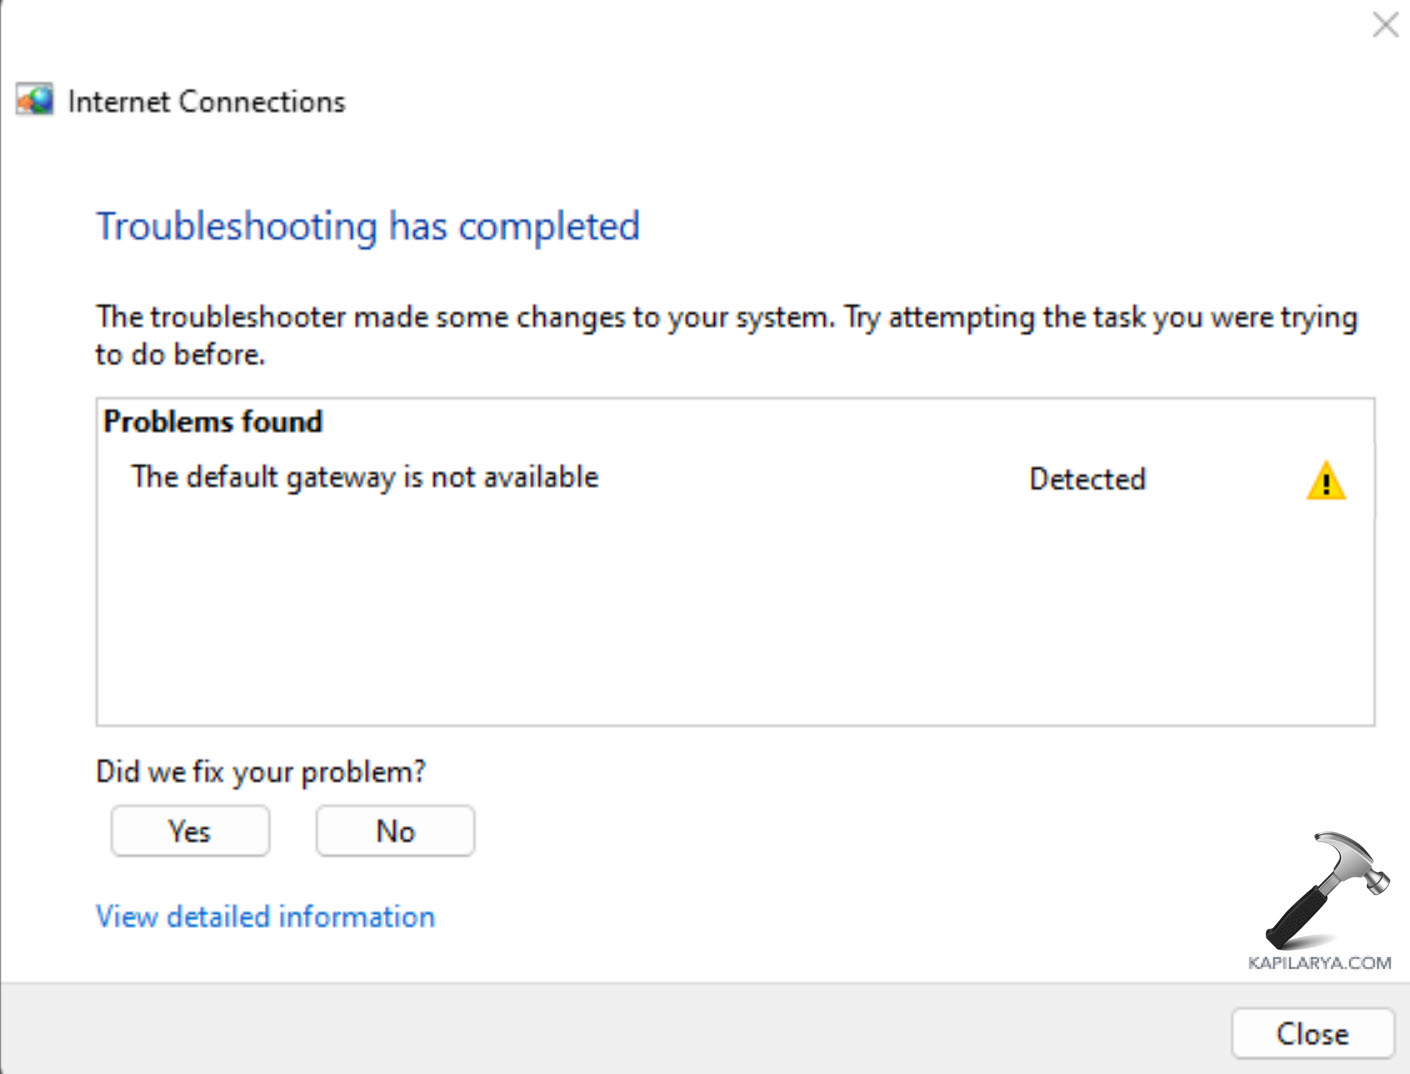
“Default gateway is not available” error in Windows 11 is baffling. Such an error can block your internet connection and thus bring your online activities to a standstill, a situation that is quite inconvenient. It means that knowing the causes of this error could help to find the ways by which it could be solved quickly.
Page Contents
Causes of “Default gateway is not available” Error
1. Outdated or Corrupted Network Drivers: These drivers interface the operating system of your computer with the network hardware. Such drivers include the Ethernet controllers and others, if these drivers are old or corrupted then problems such as default gateway may occur.
2. Incorrect Network Settings: Other anomalies include having wrong IP address or Domain Name System (DNS) server settings. This can deprive a device from properly connecting to the Internet.
3. Interference from Third-Party Software: Some of the antivirus programs, firewalls or any other related security software can often hinder the network connections and cause the defaults gateways behind.
In this article, let’s explore the seven most effective and simple steps to resolve the “Default gateway is not available” error on Windows 11.
Fix Default gateway is not available on Windows 11
Fix 1: Update Network Drivers
1. Open the Device Manager from the Windows Search bar.
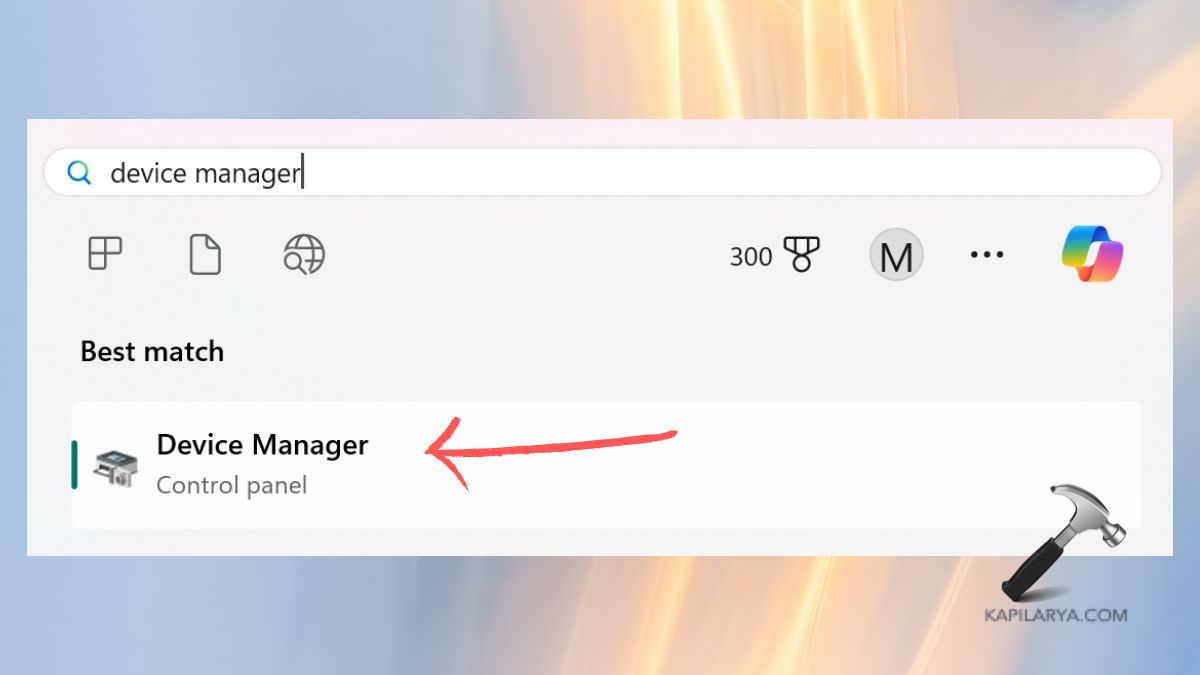
2. Locate the Network Adapters list. Right-click on one network adapter and choose “Update driver”.
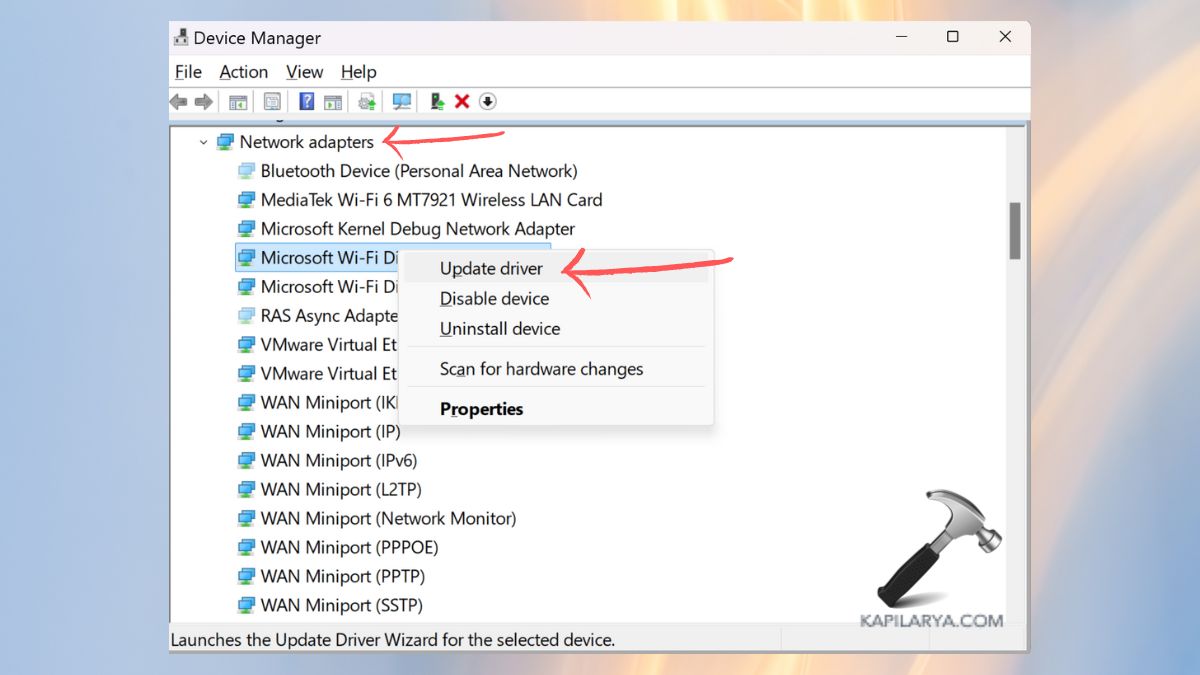
3. Now, select “Browse my computer for drivers”.

4. On the next screen, select the path and tap “Let me pick from a list of available drivers…”.

5. Now, uncheck the “Show compatible hardware” option.

6. Choose the network driver and tap “Next”.
Fix 2: Disable Third-Party Antivirus or Firewall
Anti-virus software and firewalls from third-party are required for the shield against malicious programs and attacks. However, in certain cases, these security applications can alter your network settings, and this can be the main cause of connection problems such as the “Default gateway is not available” error in Windows 11.
Suspending these programs for a while could assist you in diagnosing if they are the culprits. This form of error is frequent when the internet connection is live, once you disable the security software, check your internet connection to see if this type of error is continuously repeated. Next, you can attempt to go online or use an application to check the connectivity.
Fix 3: Change Network Adapter Power Settings
1. Open the Device Manager from the Windows Search bar.
2. Locate the Network Adapters list. Right-click on one network adapter and choose “Properties”.

3. In the “Power Management” section, uncheck the “Allow the computer to turn off this device to save power”.

4. Tap “OK” and check if the error is resolved. If not, try the next solutions given in this article.
Fix 4: Reinstall Network Driver
1. Again, open the Device Manager > Network Adapter as given in the previous solution.
2. Right-click on the system’s network driver and tap “Uninstall driver”.
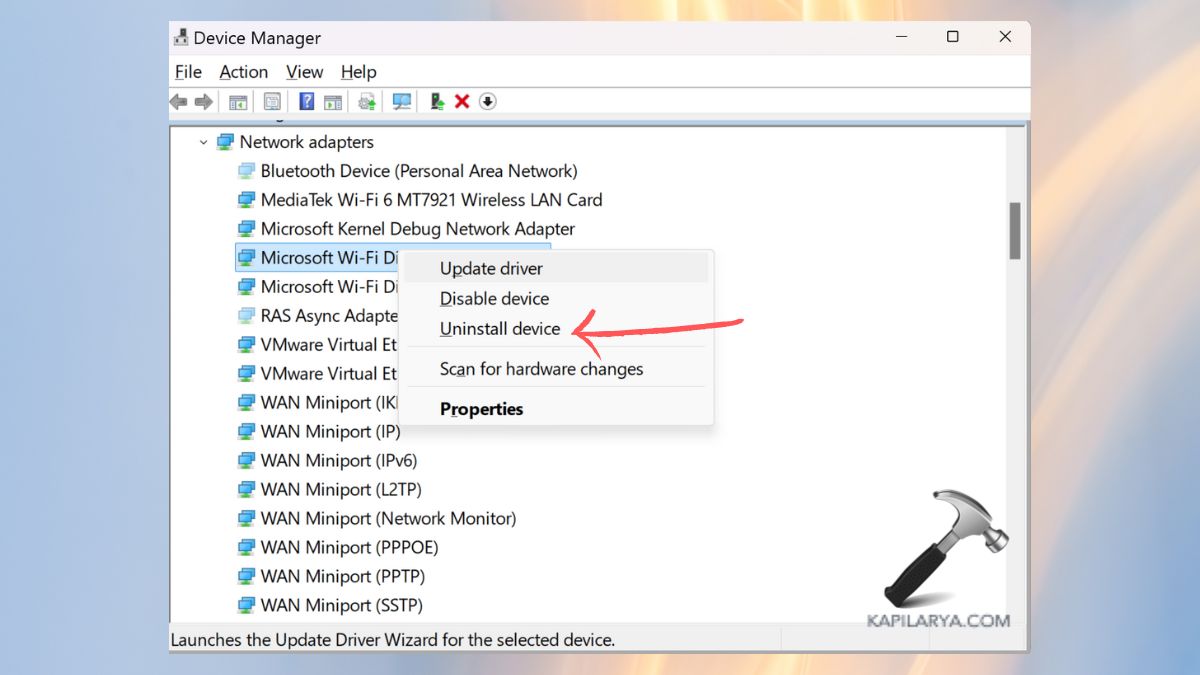
3. Give the PC a restart and it will automatically reinstall the required network adapter. Now, Please check to see if the error has been resolved.
Fix 5: Change DNS Server
1. Go to the Windows Settings > Network & Internet > Advanced network settings.
2. Expand the using network adapter. Tap “Edit” on the “More adapter options”.

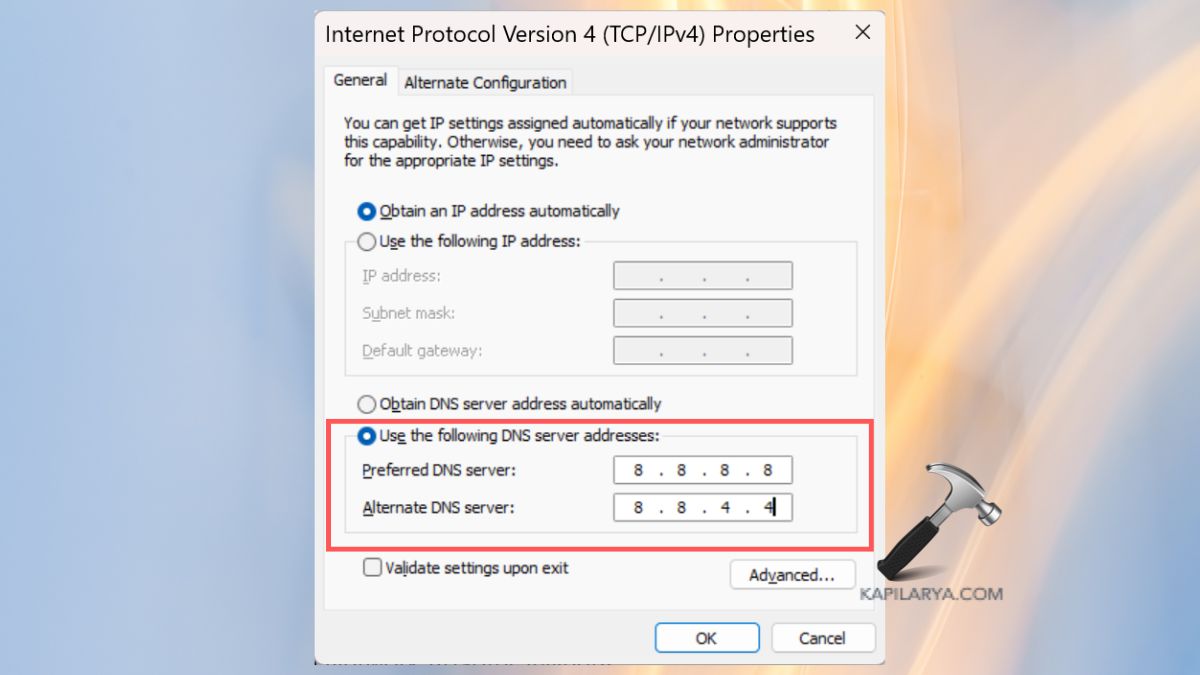
3. Double click the “Internet Protocol Version 4(TCP/IPv4)” from the list.

4. Tap “Use the following DNS Server”. Now, enter the below server address as given in the image and tap “OK”.
Google- 8.8.8.8 8.8.4.4
Cloudflare- 1.1.1.1 1.0.0.1
Fix 6: Reset IP Settings
1. Right-click and tap “Run as Administrator” to open the Command Prompt from the Windows search bar.
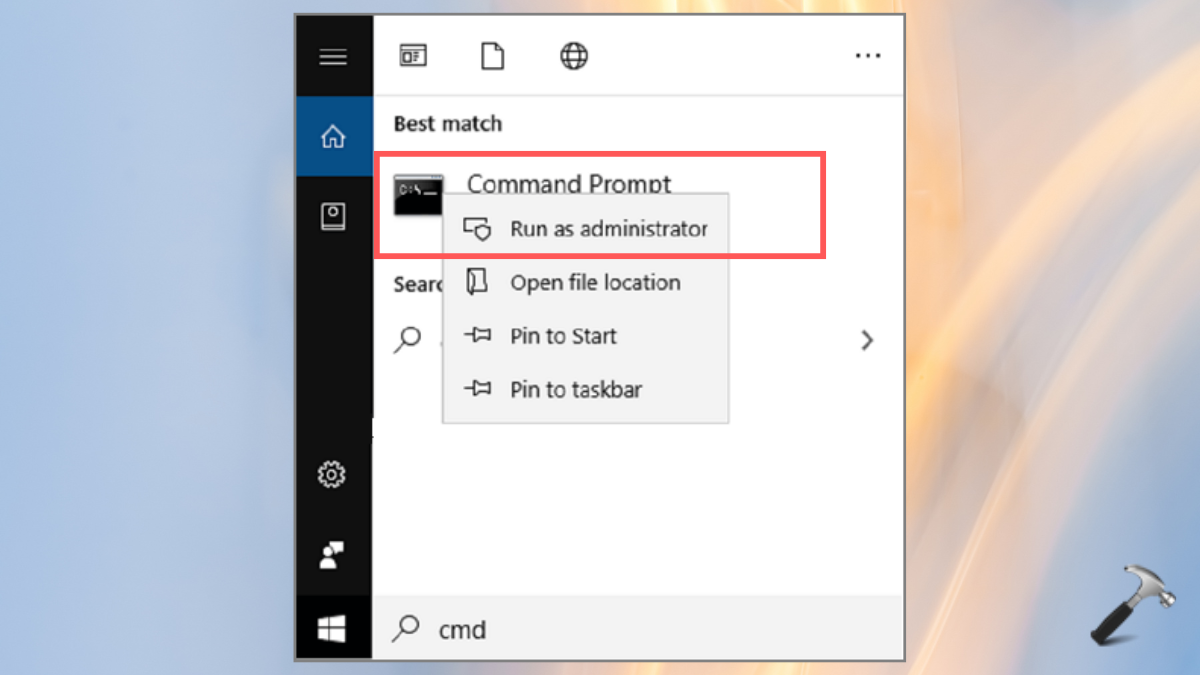
2. Copy and paste the below commands one by one and make sure to press Enter key after pasting each command.
netsh int ip reset C:\resetlog.txt
netsh winsock reset
ipconfig /flushdns
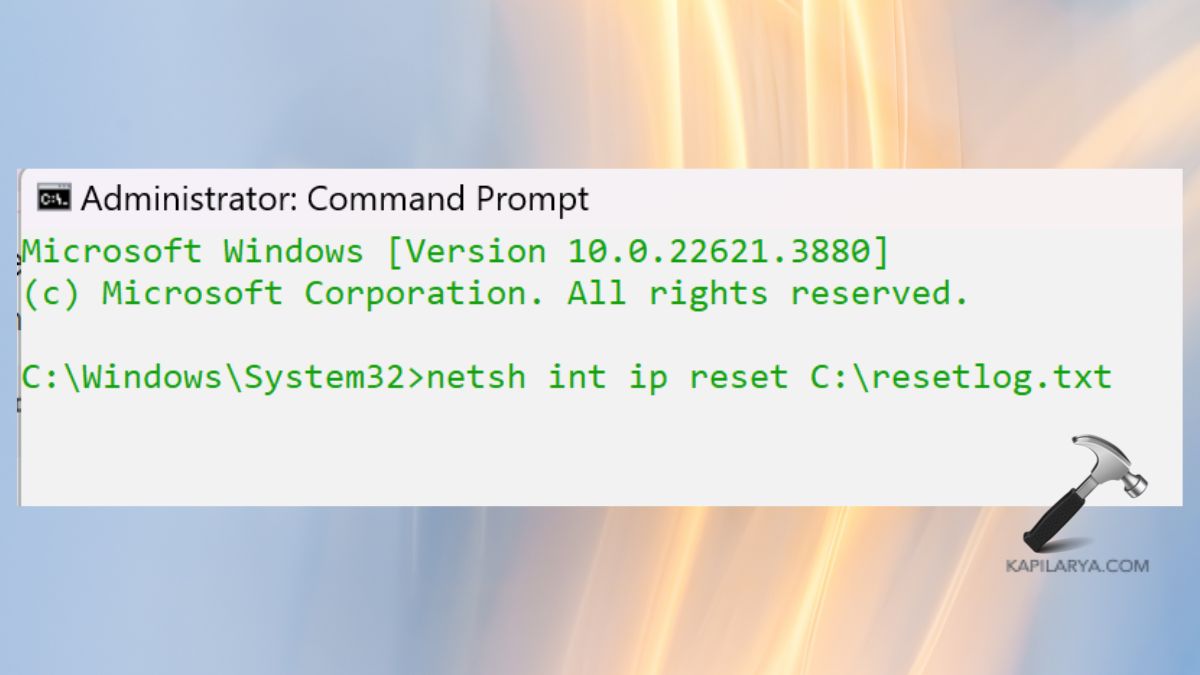
3. Afterwards, restart the PC to solve the error.
Fix 7: Perform Clean Boot
1. On the Windows search bar, type “system configuration” and click open the best match result.

2. In the next screen, go to the “Services” tab. Select “Hide all Microsoft services and then tap the “Disable all” option. Select “Apply”.

3. Now, go to the “Startup” tab. Select “Open task manager”.

4. Here, right-click each app on-by-one and tap “Disable”.

5. Now, restart the PC to perform a clean boot.
That’s it!
![KapilArya.com is a Windows troubleshooting & how to tutorials blog from Kapil Arya [Microsoft MVP (Windows IT Pro)]. KapilArya.com](https://images.kapilarya.com/Logo1.svg)



![[Latest Windows 10 Update] What’s new in KB5055612? [Latest Windows 10 Update] What’s new in KB5055612?](https://www.kapilarya.com/assets/Windows10-Update.png)


Leave a Reply