Ever since Windows 7, Microsoft has made it a default setting that the Windows 11 or 10 Check Disk tool, CHKDSK always runs at startup. That means it will now perform automatically each time you start up your device if prior start-ups ended with the system still running. Even though CHKDSK is a very convenient tool that prevents and fixes the errors on the hard disks, its constant running in startup mode decreases the boot speed and suggests that there may be serious issues to fix. Here you will find how to stop CHKDSK from running on start up on Windows 11/10.
Page Contents
Fix: CHKDSK always runs at startup on Windows 11/10
Fix 1: Let it run
Sometimes, CHKDSK runs at startup because the operating system has found to fix some issues with the hard drive. These disk errors could be solved and latest CHKDSK stopped running at successive booting by making it to finish scanning and repairing the disk. Quite often this stops the issue and prevents it from persistently hinder the startup process of your application.
Fix 2: Press Any Key to Cancel the Disk Check
If CHKDSK starts at startup, but you do not want it to run a disk check, simply press any key to cancel it. Thus, if the user wants to cancel CHKDSK, he or she needs to press a key on the keyboard in the course of the time that is counted. This option comes handy if you think that the disk check is unrequired or if it has started running in a loop and does not solve the issue.

Fix 3: Modify the Registry Editor
As for Windows OS, it is possible to prevent CHKDSK from running automatically with the help of Windows Registry.
Note: It is advisable to be very careful when processing the Windows Registry. As noticed, when working with options/ parameters the wrong changes can lead to instabilities in a system. It is always advised to always create a backup of the registry before applying any change.
1. Create Backup-
a. Open the Registry Editor from Windows console.

b. On the top left corner, click on “File” and choose “Export”. Save it in any location of your choice.

2. Change Registry Editor’s entry-
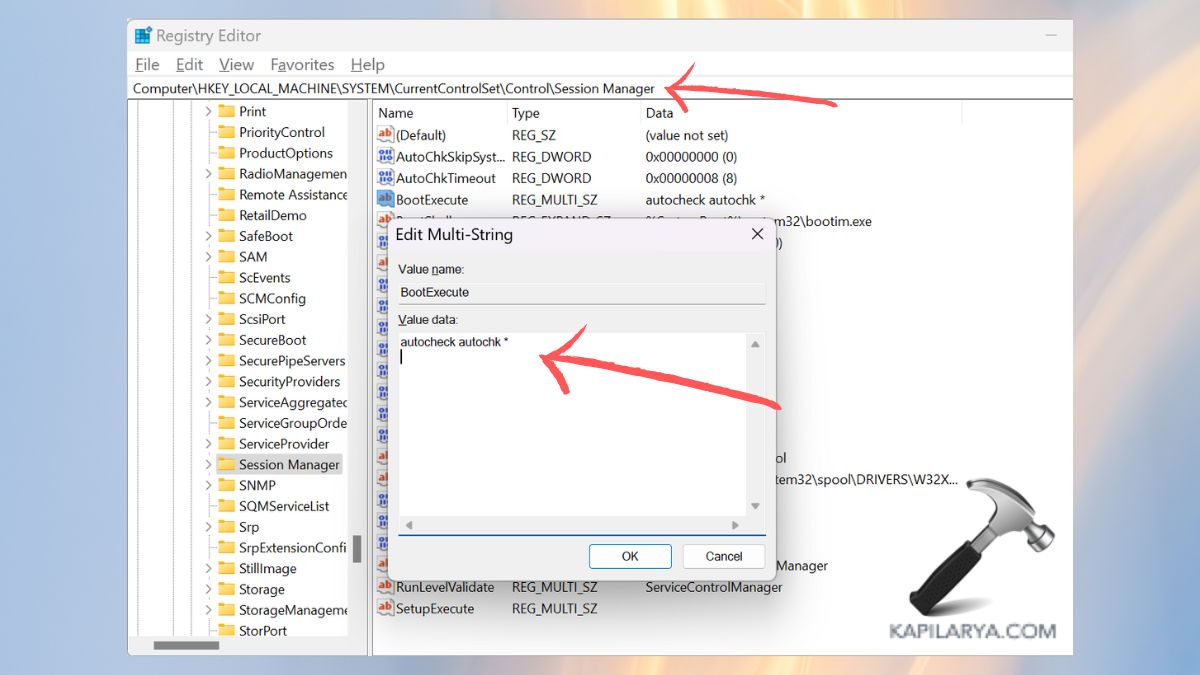
a. Now, look for the below path in Registry Editor-
Computer\HKEY_LOCAL_MACHINE\SYSTEM\CurrentControlSet\Control\Session Manager
b. Find “BootExecute” and change its value data as follow-
autocheck autochk *

Then, click “OK” and restart the system.
Fix 4: Cancel the scheduled scan
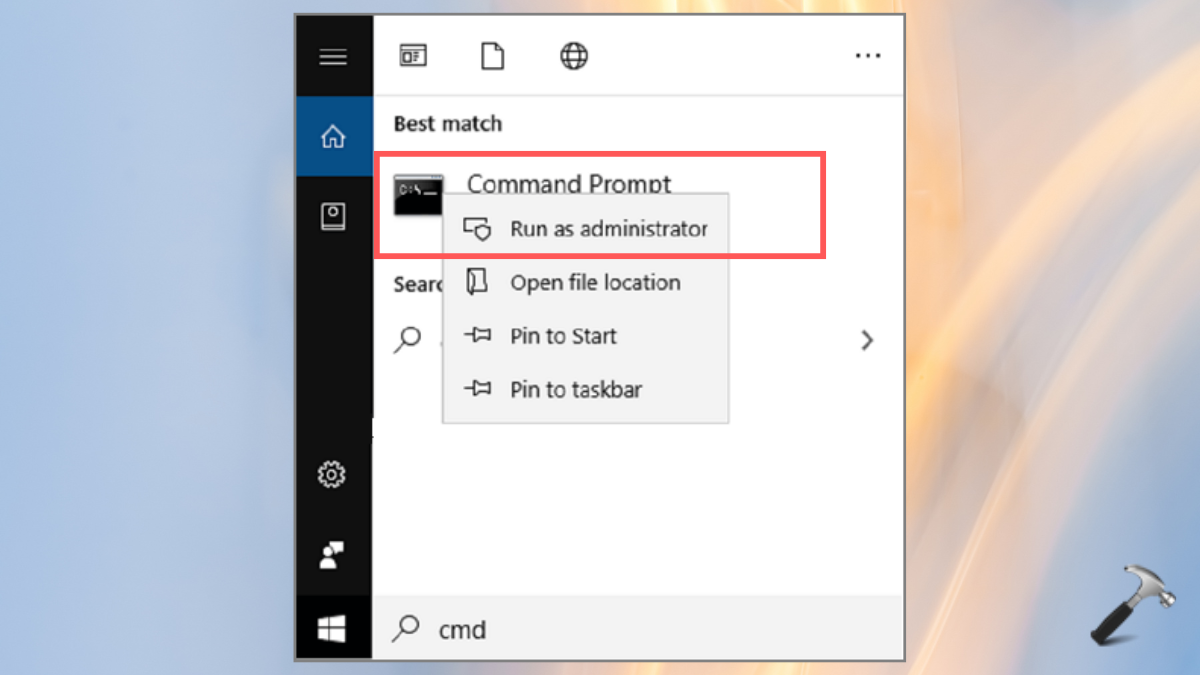
1. Again, open the Windows search console and type “cmd”. Right click on “Command Prompt” listed first in best match result and choose “Run as Administrator”.

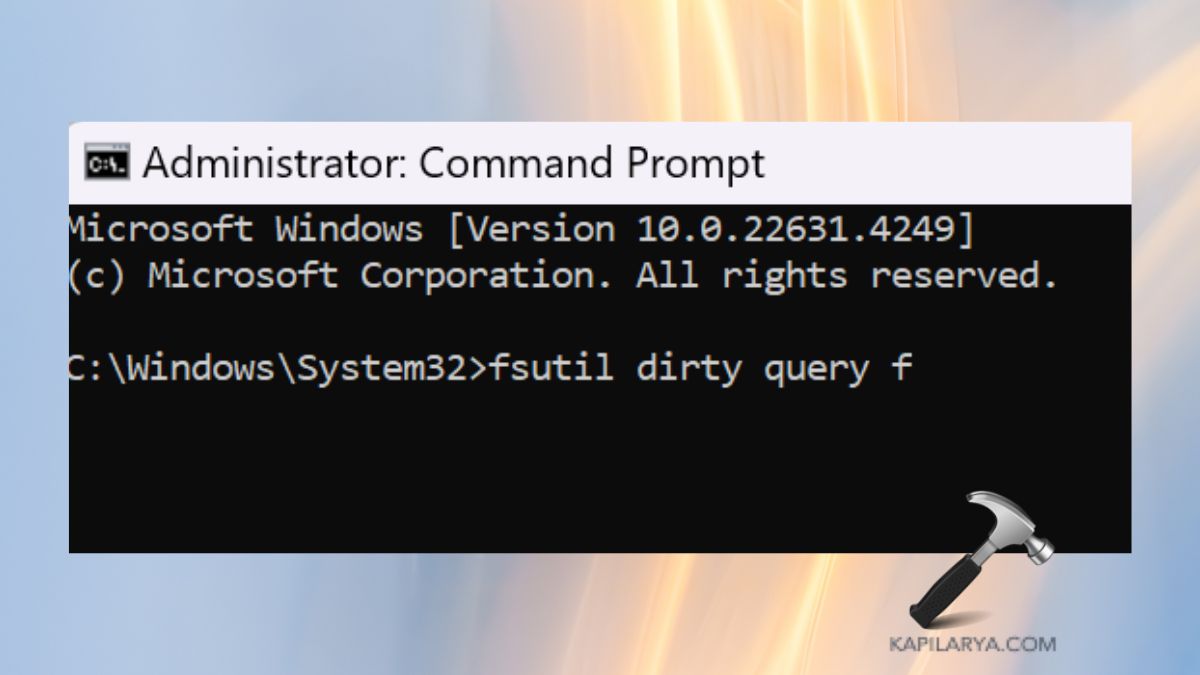
2. Type in the below command one by one. And, make sure to replace “drive letter” with the real one of the drive.
fsutil dirty query "drive letter">
CHKNTFS /X "drive letter":
Do press Enter key after pasting each command.

Fix 5: Stop CHKDSK on Startup via Command Prompt
1. For this, again open the Command Prompt with Admin rights.
2. Now, paste these commands one by one into CMD and press Enter key.
fsutil dirty query C:
chkntfs /x c:

Though, if you experience any error while performing any of these methods to fix CHKDSK always runs at startup on Windows 11/10, leave a comment below so we can help you out.
That’s it!
![KapilArya.com is a Windows troubleshooting & how to tutorials blog from Kapil Arya [Microsoft MVP (Windows IT Pro)]. KapilArya.com](https://images.kapilarya.com/Logo1.svg)


Leave a Reply