BitLocker is a built-in security feature that encrypts your hard drive and prevents your data from being stolen. It can sometimes activate automatically. So, if you can’t turn off BitLocker on your Windows 11/10 PC, even after it’s been manually enabled, here are eight methods to help you disable it.
Page Contents
Fix: Can’t Turn off BitLocker in Windows 11/10
Solution 1: Turn off BitLocker using the Control Panel
1. Open the Start menu, type “Control Panel“, and select the tool from the results.
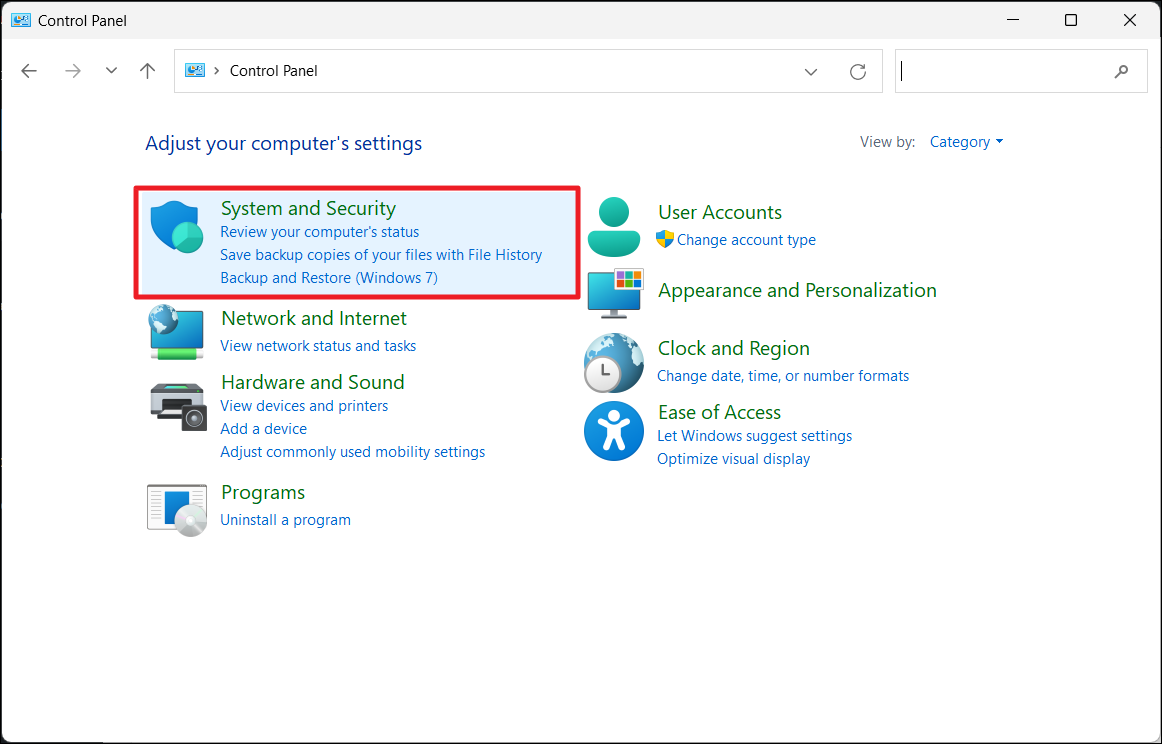
2. Select the “System and Security” option.

3. Click on “BitLocker Drive Encryption” from the right pane.

4. Then, click the “Turn off BitLocker” option under the encrypted drive.

Solution 2: Disable BitLocker with the Command Prompt
1. Search “Command Prompt” in the Windows Search and select “Run as Administrator“.
2. First, type the following command and press Enter to check the status of the encrypted drive:
manage-bde -status

3. Find the encrypted drive and check its Lock Status. If the Lock Status is Locked, proceed to the below command. Run the following command to unlock the encrypted drive. If it’s unlocked, skip this command and run the next command instead. Replace <Driveletter> with your encrypted drive’s letter and [48-digit recovery password] with the recovery key you created during encryption.
manage-bde -unlock <Driveletter> -RecoveryPassword [48-digit recovery password]
Example:
manage-bde -unlock C: -RecoveryPassword 028545-059807-564821-672397-632584-183293-236985-278707

4. Run the following command once the drive is unlocked to turn off the encryption.
manage-bde -off <Driveletter>
Example:
manage-bde -off C:
Solution 3: Turn off BitLocker from File Explorer
1. Open File Explorer and click “This PC” on the left navigational panel.
2. Right-click on the drive you want to turn off BitLocker and select “Manage BitLocker“.

3. Now, click the “Turn Off BitLocker“.

Solution 4: Turn off BitLocker using System Configuration
1. Open the Run dialog box, type “msconfig” and press Enter.

2. Switch to the “Services” tab.
3. Find and uncheck the “BitLocker Drive Encryption Service” service and click “Apply“.

4. Click “OK” and then click “Restart” in the prompt to apply the changes.
Solution 5: Use Group Policy Editor to turn off BitLocker
1. Open Group Policy Editor by searching for “gpedit.msc” and press Enter.
2. Navigate to the below location:
Computer Configuration > Administrative Templates > Windows Components > BitLocker Drive Encryption > Removable Data Drives
3. Double-click “Control use of BitLocker on removable drives” policy.

4. Select “Disabled” and click “Apply” to prevent BitLocker activation on external drives.

Solution 6: Use Registry Editor to turn off BitLocker
1. Open Registry Editor by searching for “regedit” in the Start menu and press Enter.
2. In the Registry Editor, copy-paste the following path in the address bar and press Enter:
Computer\HKEY_LOCAL_MACHINE\SYSTEM\CurrentControlSet\Control\BitLocker
3. On the right pane, right-click and select “New” > “DWORD (32-bit) Value“.

4. Rename the new DWORD “PreventDeviceEncryption“.
5. Double-click the “PreventDeviceEncryption” DWORD and set the value to “1“.

6. Click “OK” and restart your PC.
Solution 7: Turn Off BitLocker using Services
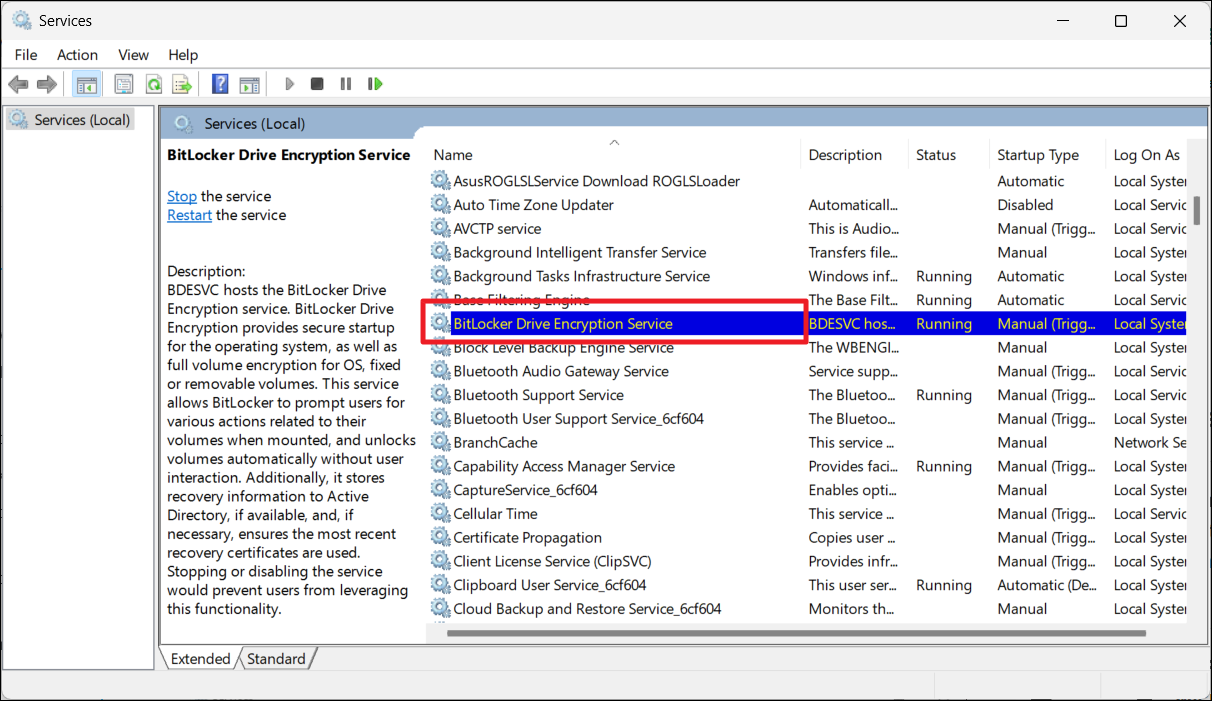
1. Press Windows + R, type “Services.msc” and hit Enter.
2. Double-click the “BitLocker Drive Encryption Service” service.
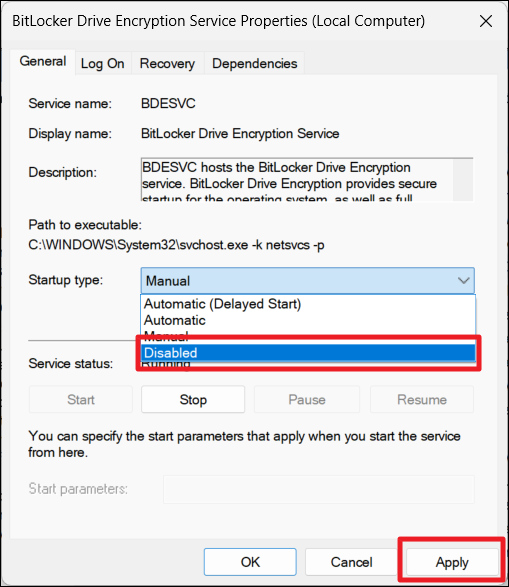
3. In the Properties window, select “Disabled” from the Startup type and click “Apply“.

4. Click “OK“.
Solution 8: Turn off BitLocker with PowerShell
1. Open Windows PowerShell as administrator.
2. Then, run the following command to disable the BitLocker:
Disable-BitLocker -MountPoint <Drive_letter>:
Make sure to replace <Drive_letter> with your encrypted drive letter.
Example:
Disable-BitLocker -MountPoint C:

That’s it.
![KapilArya.com is a Windows troubleshooting & how to tutorials blog from Kapil Arya [Microsoft MVP (Windows IT Pro)]. KapilArya.com](https://images.kapilarya.com/Logo1.svg)


Leave a Reply