By default, Windows will automatically download and install updates available for you. However, if you like, you can pause updates. Windows offers ability to pause updates for a short period of time. Once you have consumed all the limits for pausing updates, you need to install updates. Then once you install updates, you again have ability to pause updates if you want. In case, if you are stuck in a situation like you can’t resume updates in Windows 11 and can’t check for new updates, this article will help you to fix it.
Here you can see screenshot for this condition. The Windows Update page on Settings shows no ability to pause updates anymore. Also, the Check for updates is missing, so can’t check for new updates.
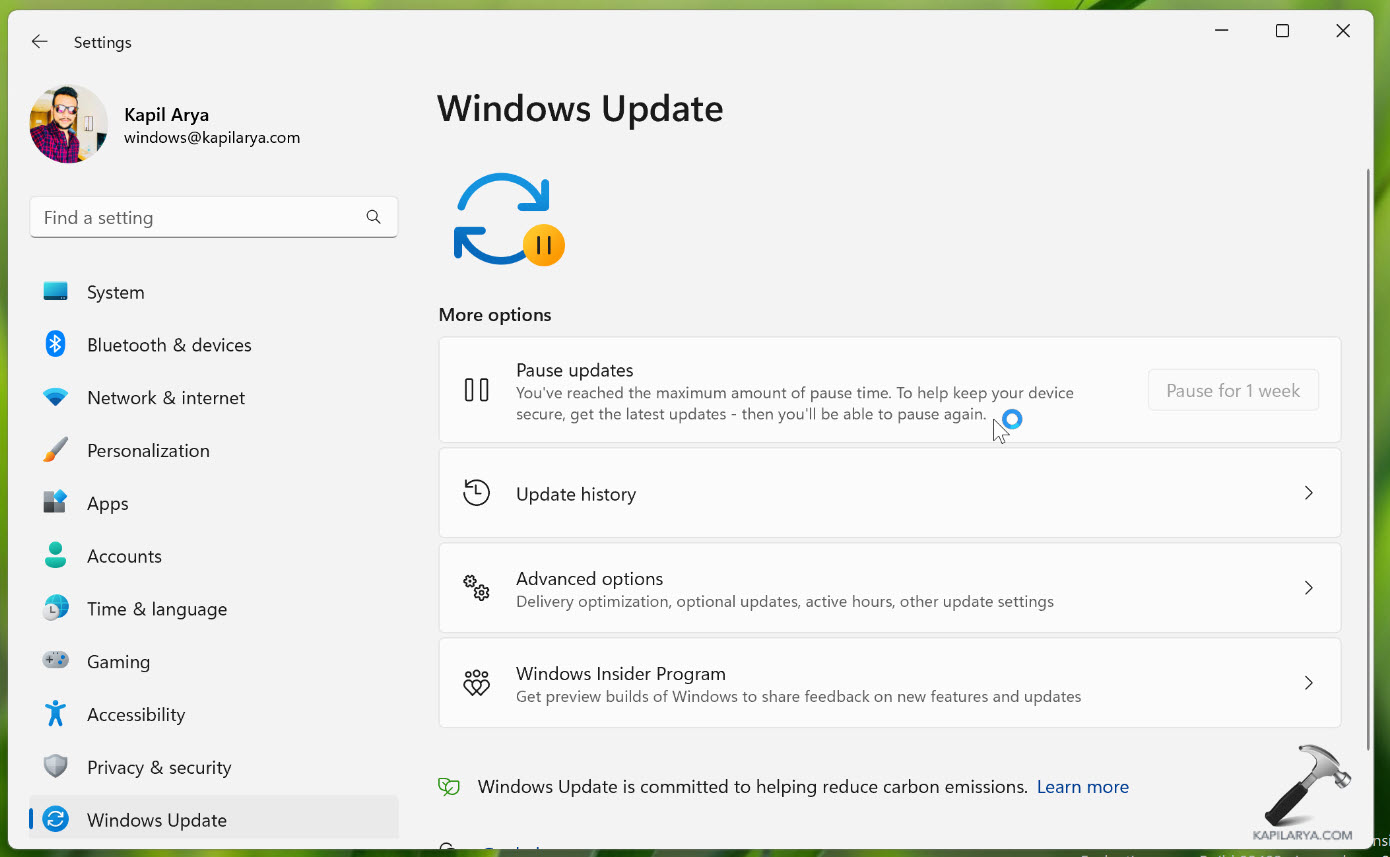
So how to resume updates in this situation? Well, here is the solution.
Page Contents
Fix: Can’t resume updates in Windows 11
1. Right click on Start button and select Run.
2. Type regedit and click OK to open Registry Editor.
3. Go to following registry key:
HKEY_LOCAL_MACHINE\SOFTWARE\Microsoft\WindowsUpdate\UpdatePolicy\Settings
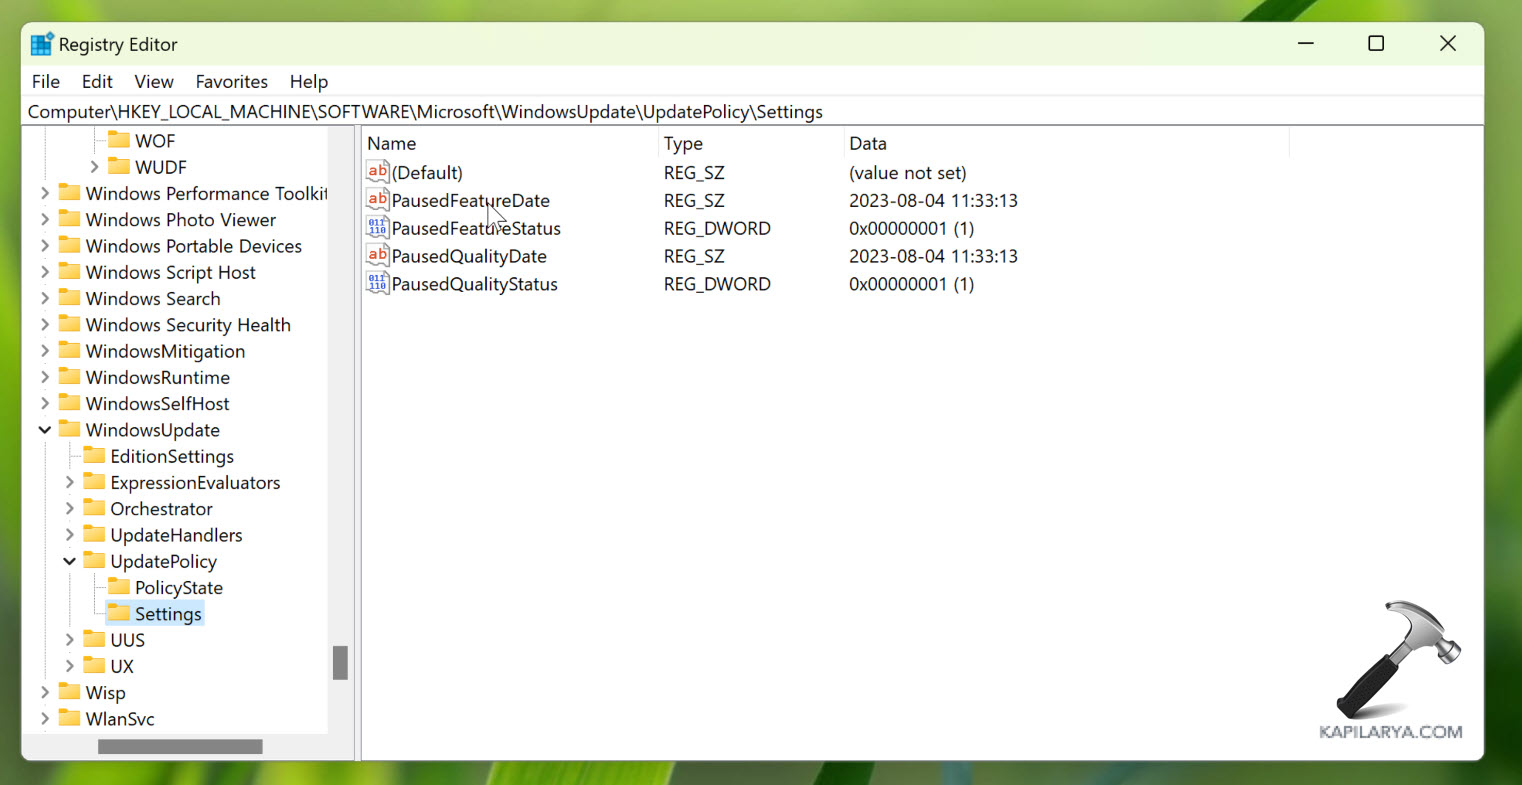
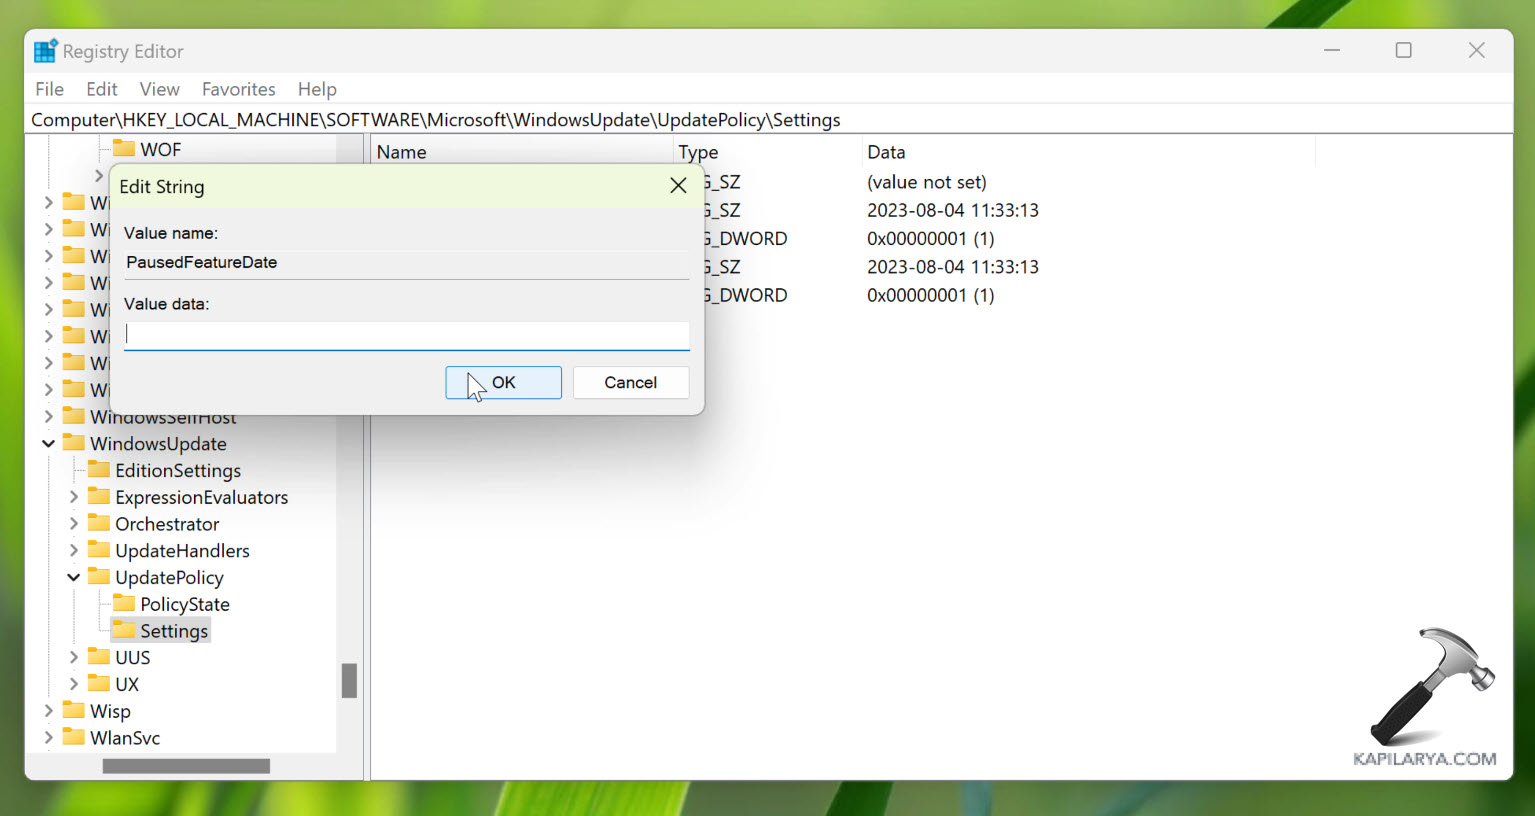
4. Double click on PausedFeatureDate registry string and empty its Value data. Repeat this for PausedQualityDate registry string as well.
5. Then navigate here:
HKEY_LOCAL_MACHINE\SOFTWARE\Microsoft\WindowsUpdate\UX\Settings
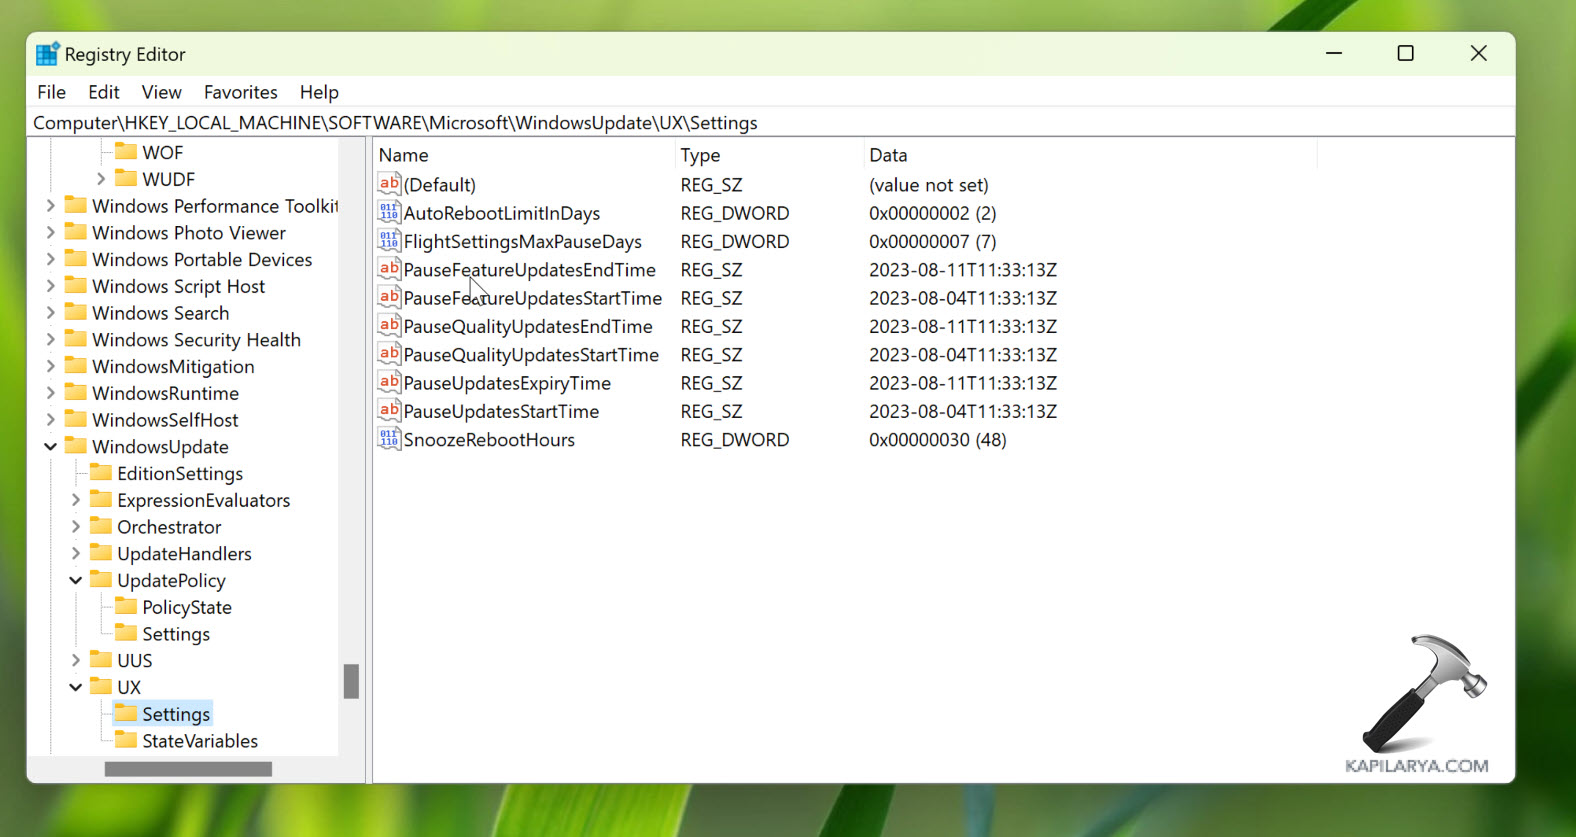
6. Delete following registry strings at this location one-by-one. You might have to confirm this operation for each registry string. Make sure you remove only these registry strings:
- PauseFeatureUpdatesEndTime
- PauseFeatureUpdatesStartTime
- PauseQualityUpdatesEndTime
- PauseQualityUpdatesStartTime
- PauseUpdatesExpiryTime
7. Close Registry Editor.
Now you can go to Windows Update section in Settings app. You’ll find that Check for updates button is now back. But don’t hit Check for updates at this stage. Doing so will allow Windows to auto-install pending updates.
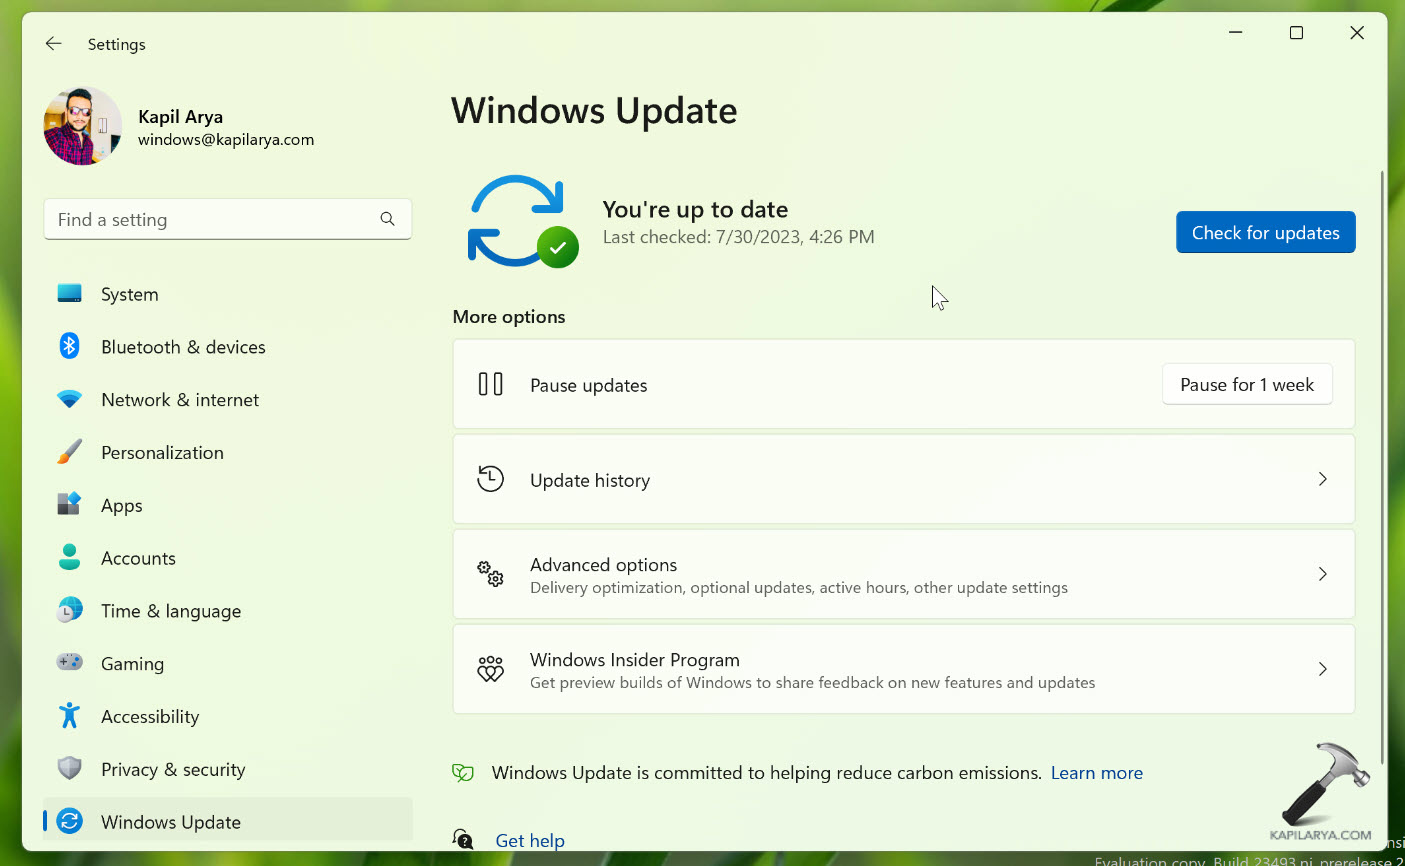
Simply restart your system and let Windows check for updates then. Now it should install latest updates automatically.
Video fix
Here’s the live illustration of above shared registry method:
That’s it!
![KapilArya.com is a Windows troubleshooting & how to tutorials blog from Kapil Arya [Microsoft MVP (Windows IT Pro)]. KapilArya.com](https://images.kapilarya.com/Logo1.svg)





Leave a Reply