System Restore is well known recovery option for Windows. It helps you to restore last known good configuration, whenever your system is in trouble and you can’t use it, like you want. However, Windows 10 doesn’t comes System Restore enabled by default. For this, you have to turn on System Protection first.
Here’s how to enable System Protection and use System Restore:
Configure and use System Restore in Windows 10
Once System Protection is turned on, your Windows will start creating restore points automatically at crucial events. See this fix, if find System Restore is disabled by administrator.
Okay, so today in this article we’re talking about another issue related to System Protection. Actually, after installing some updates, I found that one of my Windows 10 machine have Turn on System Protection option greyed out:
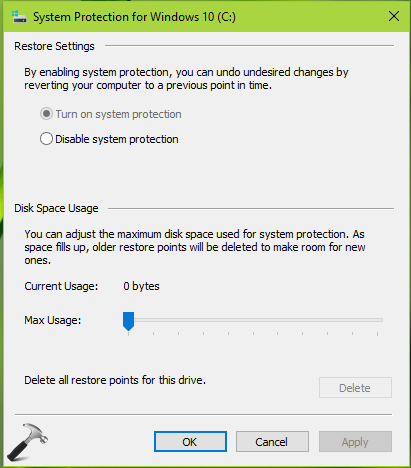
Due to this, I can no longer utilize System Restore. If you’re also facing this problem, here’s how to fix it:
Page Contents
FIX: Can’t Enable System Protection In Windows 10/8/7
FIX 1 – Via Group Policy
1. Press  + R and put gpedit.msc in Run dialog box to open Local Group Policy Editor. Click OK.
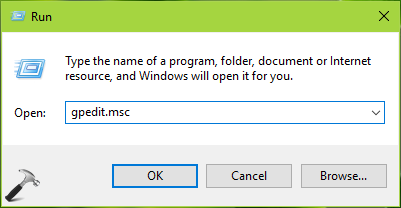
2. Next, in the GPO snap-in window, navigate here:
Computer Configuration > Administrative Templates > System > System Restore
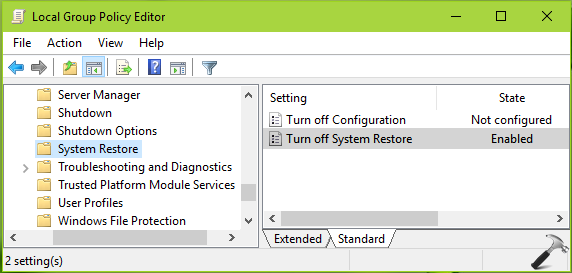
3. In the right pane of System Restore, look for the Turn off System Restore setting. If it is set to Enabled, double click on the policy and set the status to Disabled or better to Not Configured. Click Apply followed by OK.
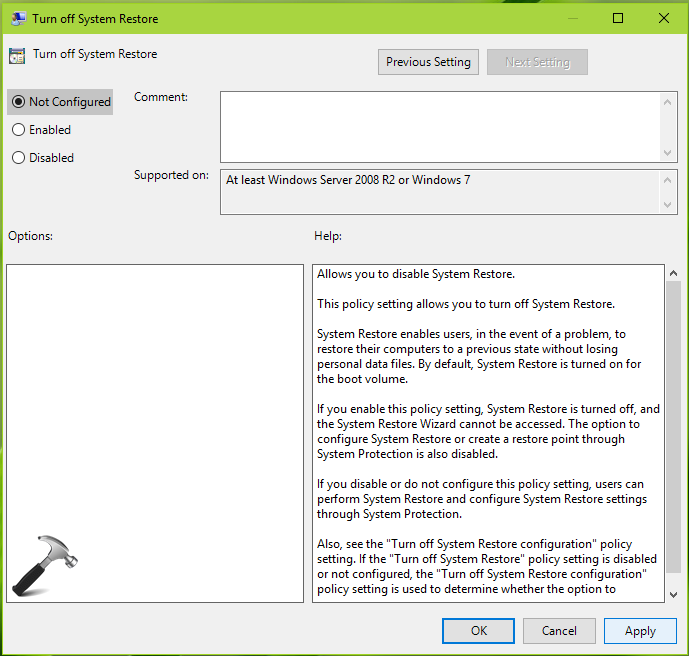
Close the Group Policy Editor and see if you can turn on the System Protection now. If issue still persists, try FIX 2.
FIX 2 – Via Windows PowerShell
1. Right click on Start Button or press  + X keys and select Windows PowerShell (Admin). Open administrative Windows PowerShell this way.
2. Run following commands one-by-one and press Enter key after each.
Enable-ComputerRestore -drive "C:\"
*Replace C: with your system root drive.
vssadmin resize shadowstorage /on=c: /for=c: /maxsize=10%
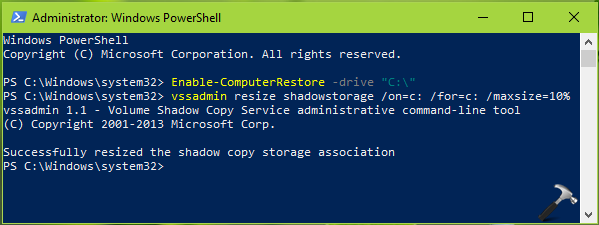
3. Close PowerShell window, and check with System Protection. This time you should be able to turn on System Protection.
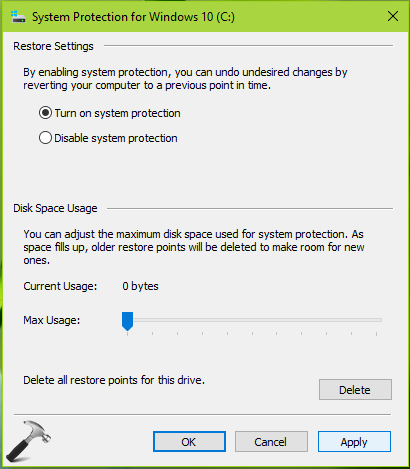
That’s it!
![KapilArya.com is a Windows troubleshooting & how to tutorials blog from Kapil Arya [Microsoft MVP (Windows IT Pro)]. KapilArya.com](https://images.kapilarya.com/Logo1.svg)


![[Latest Windows 10 Update] What’s new in KB5055612? [Latest Windows 10 Update] What’s new in KB5055612?](https://www.kapilarya.com/assets/Windows10-Update.png)


13 Comments
Add your comment
Kapil: Thank you, thank you, thank you. FIX 1 – Via Group Policy did not work for me, but FIX 2 – Via Windows PowerShell did, and it was easy via your instructions. I looked at a bunch of suggestions on the web, all or most of which were quite complicated, and it was driving me crazy. Then I found your page. Your power shell procedure was quick and easy. And, it worked! Thanks again.
^^ Glad to help Bob 😎
Mine cannot, it prompted : “Acess denied…..bla, bla, bla…
Got it, thanks a lot Mr Kapil Arya! Just now was mistakenly select windows powershell instead of Administrator windows powershell…you’ve made my day!
^^ Happy to help 😊
Thanks Bro <3
^^ Glad I could help!
I tried everything. PowerShell worked! Thank you so very much!!
^^ Glad to help Johnathan 😊
bro i am not able to do FIX2 process with drive D and drive E…. it worked with drive C. can u help with oher 2 drives please……
^^ What exactly happens when you run commands for D and E drives?
Enable-ComputerRestore : Access denied
At line:1 char:1
+ Enable-ComputerRestore -drive “C:\”
+ ~~~~~~~~~~~~~~~~~~~~~~~~~~~~~~~~~~~
+ CategoryInfo : InvalidOperation: (:) [Enable-ComputerRestore], ManagementException
+ FullyQualifiedErrorId : GetWMIManagementException,Microsoft.PowerShell.Commands.EnableComputerRestoreCommand
help me pls
^^ Make sure you run PowerShell as administrator.