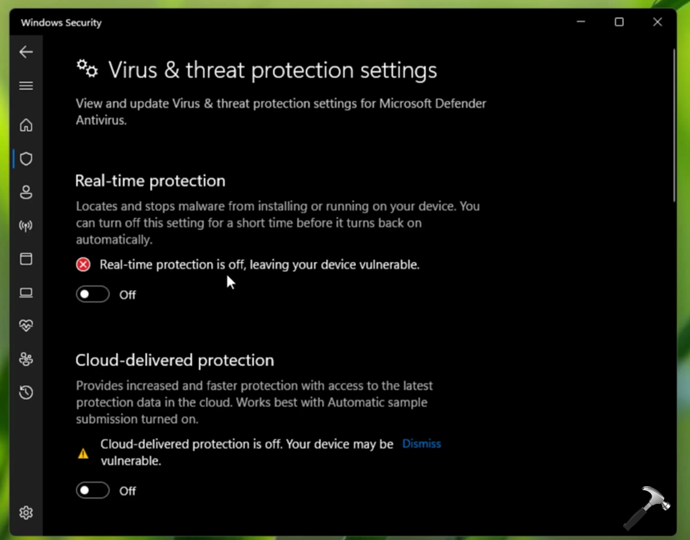
If you can’t enable real-time protection in Windows Security or Defender app, this article is for you. Recently, I faced this problem on my system. In this case, when I go to Virus and threat protection area of Windows Security app, this entire area was not manageable. For instance, the recent protection history was not showing up there. Additionally, when I tried to turn on the real-time production, the dedicated UI option was not retaining its value. That means, if I try to turn On that option, it was not remaining On and gets turned Off automatically. Due to this, Windows Security app was not able to protect the system and it was being vulnerable. If you are also facing the same and exact problem on your system, in this article, we will see how you can fix it.
The below shown screenshot shares this situation. Here, the Real-time protection won’t remain On. Same happens with the Cloud-delivered protection option.

Here is how you can fix this annoying problem.
Page Contents
Fix: Can’t enable real-time protection in Windows Security in Windows 11/10
Fix 1: Using Services snap-in
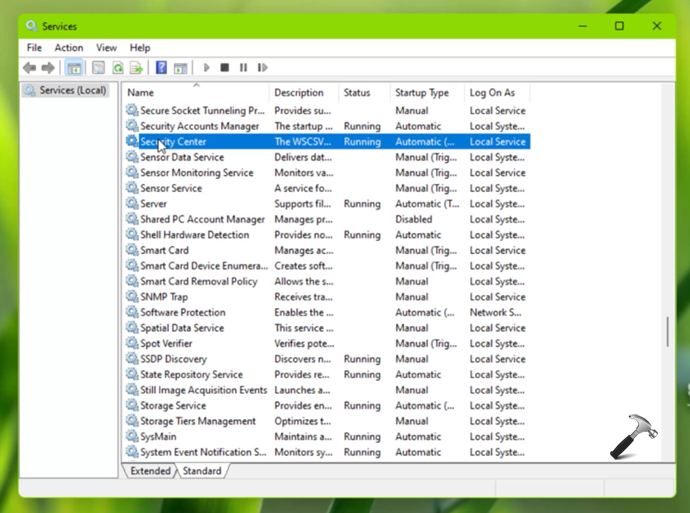
1. Open Services snap-in by running services.msc command.
2. In Services, scroll down and locate the Security Center service. As you are facing this problem, the service might not be running and may be set to Disabled.

3. You have to right click or double click on this service and select Start. Also, set its Startup type to Automatic.
Once the service is running, you will no longer face this problem again.
Fix 2: Using Registry
 Registry Disclaimer: It is recommended to create a System Restore point first, if you’re not familiar with registry manipulation.
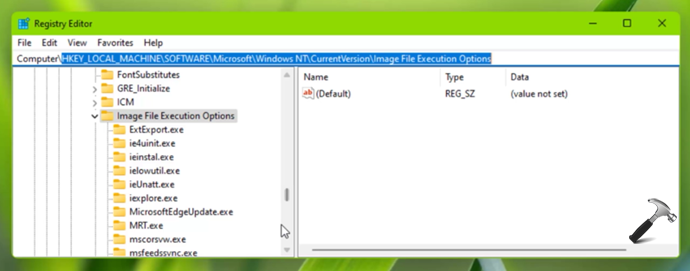
1. Run regedit command to open Registry Editor.
2. In left pane of Registry Editor window, navigate to:
HKEY_LOCAL_MACHINE\Software\Microsoft\Windows NT\CurrentVersion\Image File Execution Options
3. Under this key, if you find any registry sub-key for MSASCui.exe and/or MpCmdRun.exe then right click on it and click on Delete. If you do not find either of them then it is quite normal here and you don’t need to do anything.

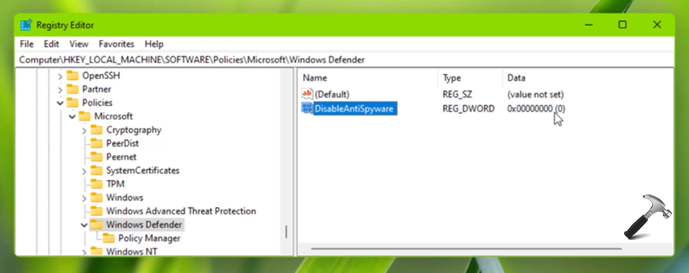
4. Next, go to this registry location:
HKEY_LOCAL_MACHINE\SOFTWARE\Policies\Microsoft\Windows Defender

5. In the right pane, create or edit registry DWORD named DisableAntiSpyware and set it to 0.
6. Close Registry Editor and reboot your system.
After restart, issue must be resolved, finally!
Video fix
You can check out the live illustration of above steps in this video:
That’s it!
Related fix: Windows Defender won’t open in Windows 11.
![KapilArya.com is a Windows troubleshooting & how to tutorials blog from Kapil Arya [Microsoft MVP (Windows IT Pro)]. KapilArya.com](https://images.kapilarya.com/Logo1.svg)


1 Comment
Add your comment
why none of that works for me?