By default, you have to enter your password or any other sign-in option to login in to your Windows 10. If you do not want to enter your password/PIN etc. every time you login, you can make Windows 10 auto logon using this guide. If you have earlier made your Windows 10 auto login but you can’t disable it now, this article is for you.
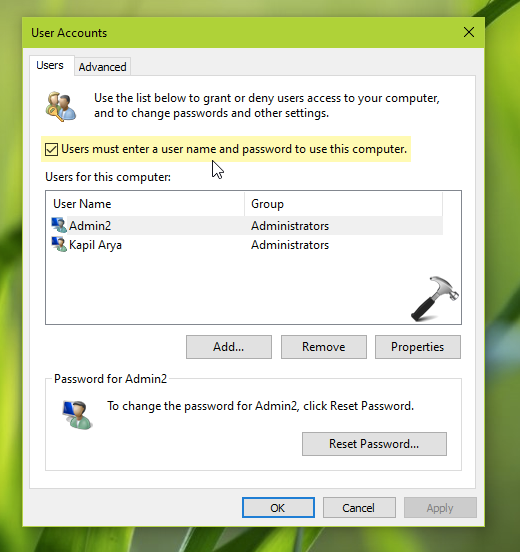
So recently one of my reader approached me with an issue related to auto login. Actually when he was in User Accounts window, the Users must enter a username and password to use this computer option was checked in. Still when he restarted the system, Windows 10 automatically logged him in. In this way, he was unable to disable auto login. Because he wanted to share the system with some other clients and has created multiple accounts on the machine. But because of auto login enabled, even other users could not able to use the system. So in case if you are also facing the similar problem, we will see how you can fix it in this post.

This problem can happen when you configure auto login using registry. And then when you use the User Accounts window, you could not disable auto login because it is still enabled in the registry. Here is how to fix this problem.
Fix: Can’t disable auto login in Windows 10
1. Open Registry Editor using regedit command.
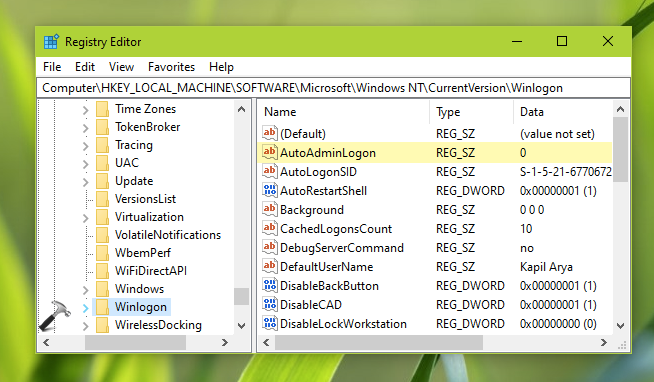
2. In Registry Editor window, go to the following registry key:
HKEY_LOCAL_MACHINE\SOFTWARE\Microsoft\Windows NT\CurrentVersion\Winlogon
3. In the right pane of Winlogon registry key, locate the AutoAdminLogon registry string. Since you are facing this issue, the Value data for this registry string should be corresponding to 1. Double-click on the registry string and change the Value data to 0.

4. Now close the Registry Editor and restart your system.
After rebooting your system, you will find that you are now asked to enter password or other sign-in options you have configured. So in this way, you have disabled auto login successfully.
Check this video to illustrate above shared solution:
That’s it!
![KapilArya.com is a Windows troubleshooting & how to tutorials blog from Kapil Arya [Microsoft MVP (Windows IT Pro)]. KapilArya.com](https://images.kapilarya.com/Logo1.svg)


![[Latest Windows 10 Update] What’s new in KB5055612? [Latest Windows 10 Update] What’s new in KB5055612?](https://www.kapilarya.com/assets/Windows10-Update.png)


Leave a Reply