Many times we are not able to rename files in Windows 11. In most instances, restricted access to the folder causes the problem. This can also occur because of malicious files, glitchy File Explorer, an outdated Windows OS, and even hidden malware. In this article, we will fix cannot rename files or folders in Windows 11/10.
Page Contents
Fix: Cannot Rename Files or Folders in Windows 11/10
If you have trouble renaming the files or folders in Windows 11/10, you can try the below solutions:
Option 1: Cannot Rename File or Folder when File is running in background
When your file is running in background or folder is already opened somewhere and you are trying to rename that particular file. See the below image:
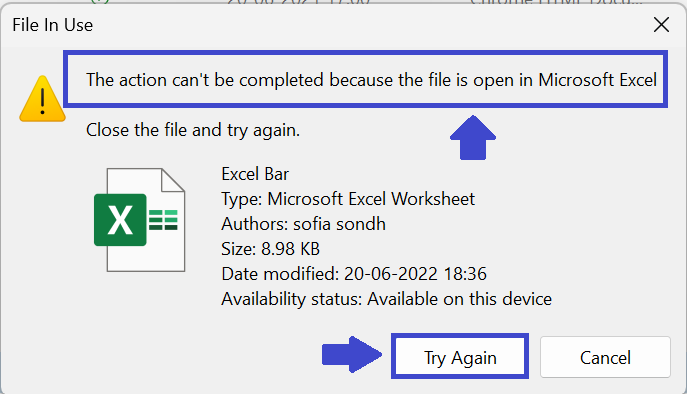
To determine whether a process is running in background or not, you can see Task Manager.
1. Right-click on the Taskbar and select Task Manager.
2. Once you’ve located the program, right-click it and click End task.
Option 2: Cannot Rename File or Folder when File Access Denied
If you are seeing this error message and it is your own file, then you can change the owner of the file to your admin account. Follow the steps mentioned below to take ownership of the file.
1. Right-click on the file that you are trying to rename and choose Properties.
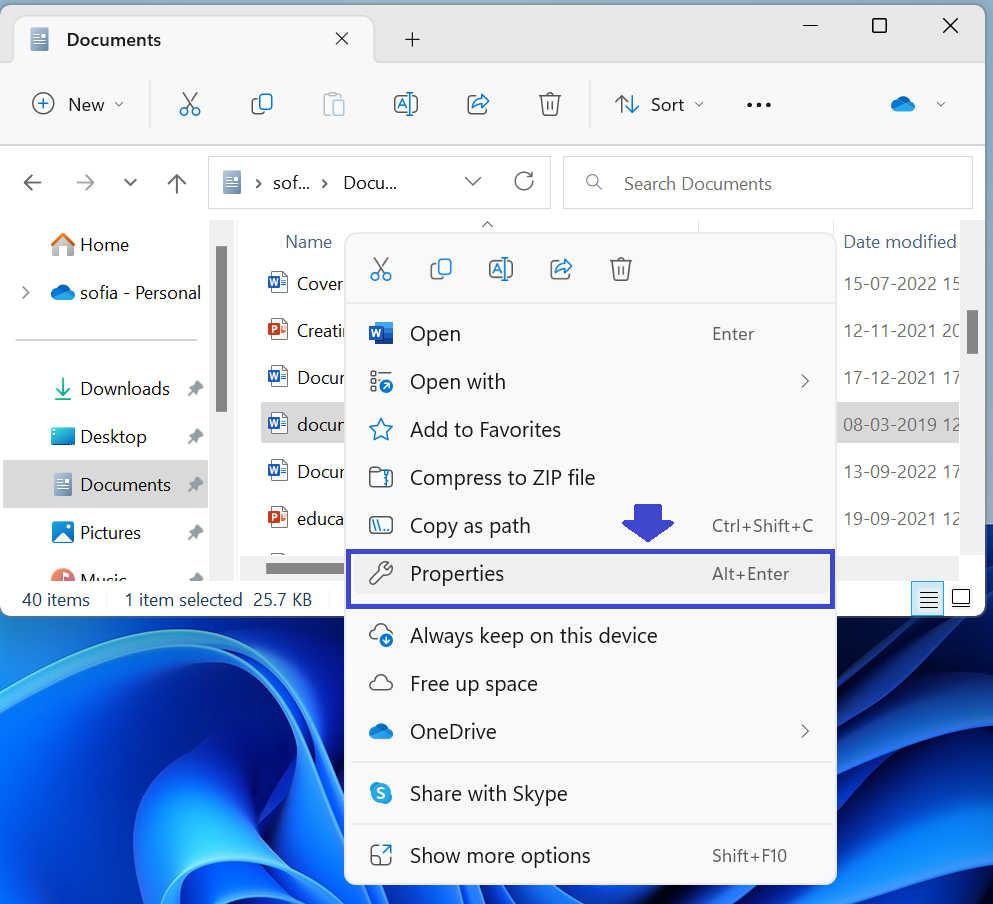
2. Go to the Security tab in the Properties window. (see the below image)
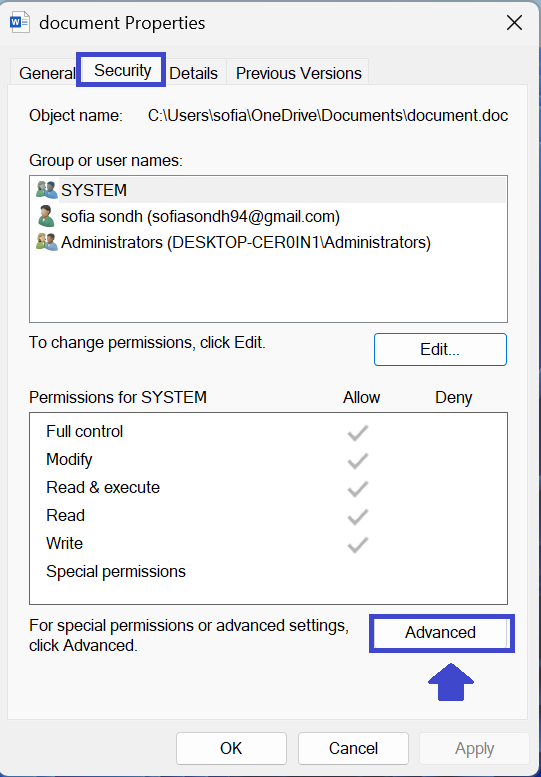
3. In the above image, you will see that you don’t have permission to make any changes to the file. To take ownership of the file, click on the Advanced button.
4. In the Advanced security settings window, click on the Change link next to the Owner name that is displayed.
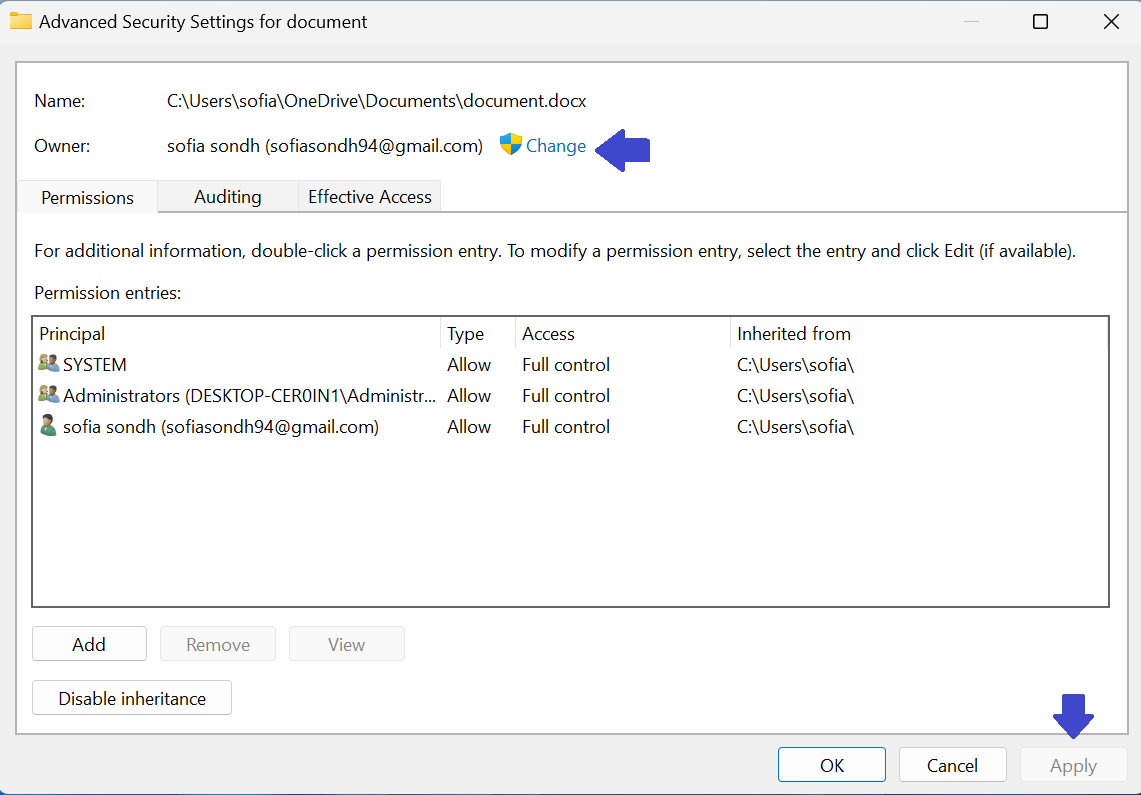
5. In the Select User or Group window, click on the Advanced button.
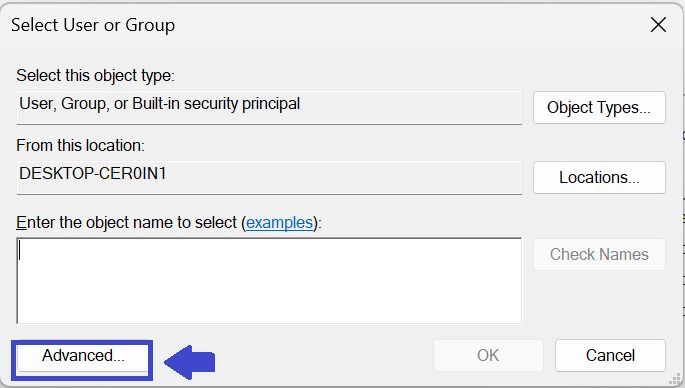
6. In the pop-up window, click on Find Now.
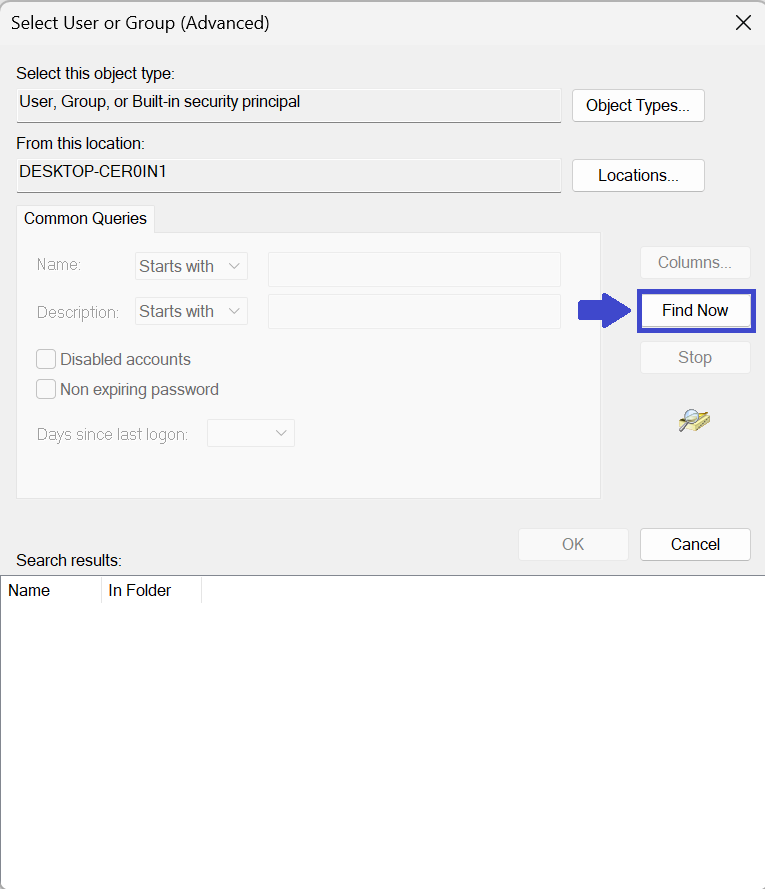
7. In the Search results displayed below, search for your name in the list and select it. Click on OK. Back in the Select User or Group window, click on OK to confirm the object name.
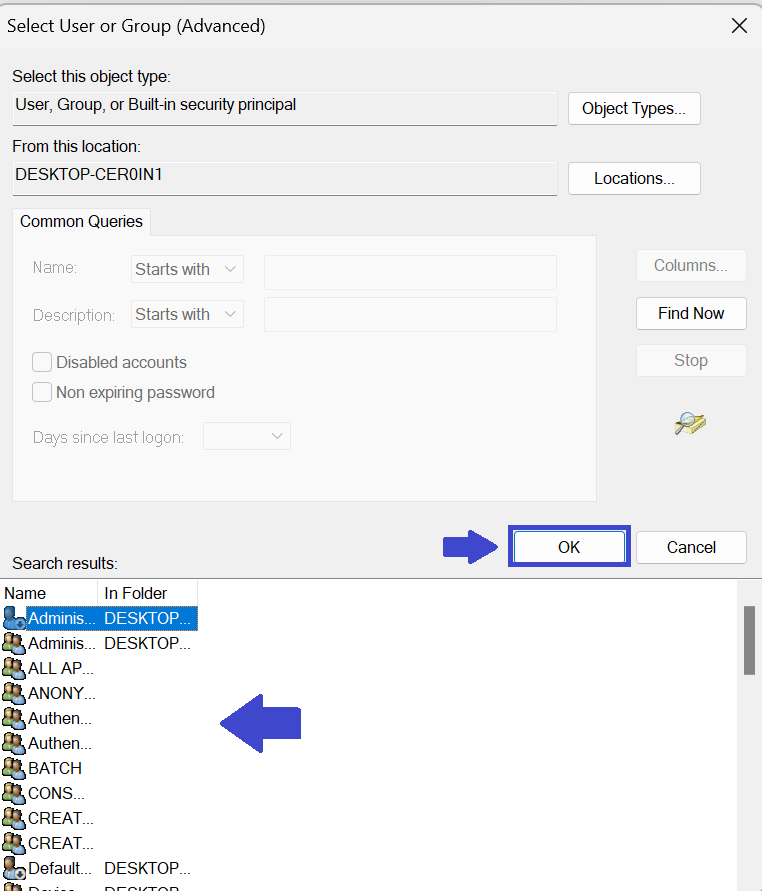
8. You will notice that the Owner’s name has changed to your name and click on Apply, In the warning message, click on Yes to continue with this operation. Click on OK two times to complete the change of permission process.
9. You can click on Change permissions to add multiple objects and inherit permissions.
10. To add a new object, click on Add => Select a principal. Now type in the Object name. Here, you need to enable the Basic permissions by checking the boxes next to them and click on OK.
11. To inherit permissions for an object, click on the Enable inheritance button.
Now, Close the Properties window and Check if you are able to rename the file.
Option 3: Cannot Rename File or Folder on Desktop
On your Windows 11 PC, if you are trying to rename a file on your desktop and are not able to do so, then try any one of the methods mentioned below.
Method 1: Click once on the file to select it and then press the F2 key on your keyboard to rename the file. Type a new name for the file.
Method 2: Right-click on the file on the desktop that is to be renamed. Then, click on the Rename option in the context menu that opens.
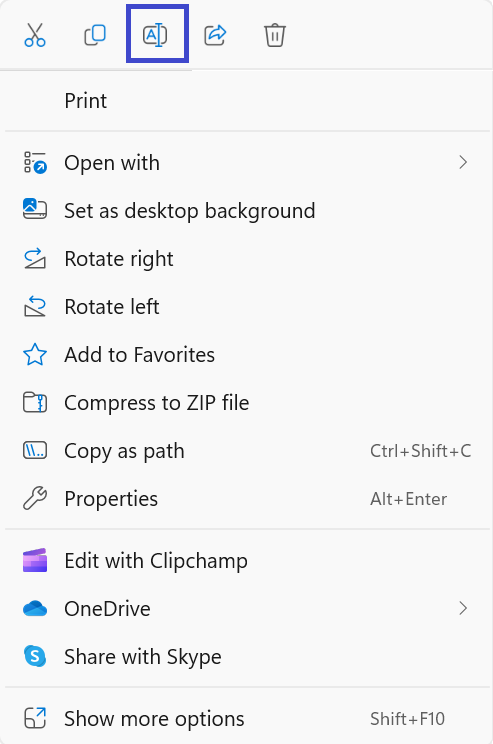
Method 3: Right-click on the file and click on the option Show more options. (See the above image).
Option 4: Cannot Rename File or Folder when File Name is too long
We can face issues when our file name is too long. This issue occurs when number of characters in the file name is above 255. Windows will not allow you to rename the file and will show you the error “The file name is too long”. In this case, you will need to cut short the filename to reduce the number of characters in it.
Still Facing issues while renaming the file? Try following methods to Fix: Cannot Rename Files or Folders in Windows 11/10
Restart File Explorer
File Explorer (also called as Windows Explorer) provides users with a graphical interface to browse through files and folders and make necessary changes to them, such as moving, copying, deleting, etc. A temporary glitch in File Explorer can also make renaming difficult.
Follow the steps below to restart File Explorer:
1. Right-click on the Windows Start button and click on Task Manager.
2. Right-click on the Windows Explorer and click Restart.
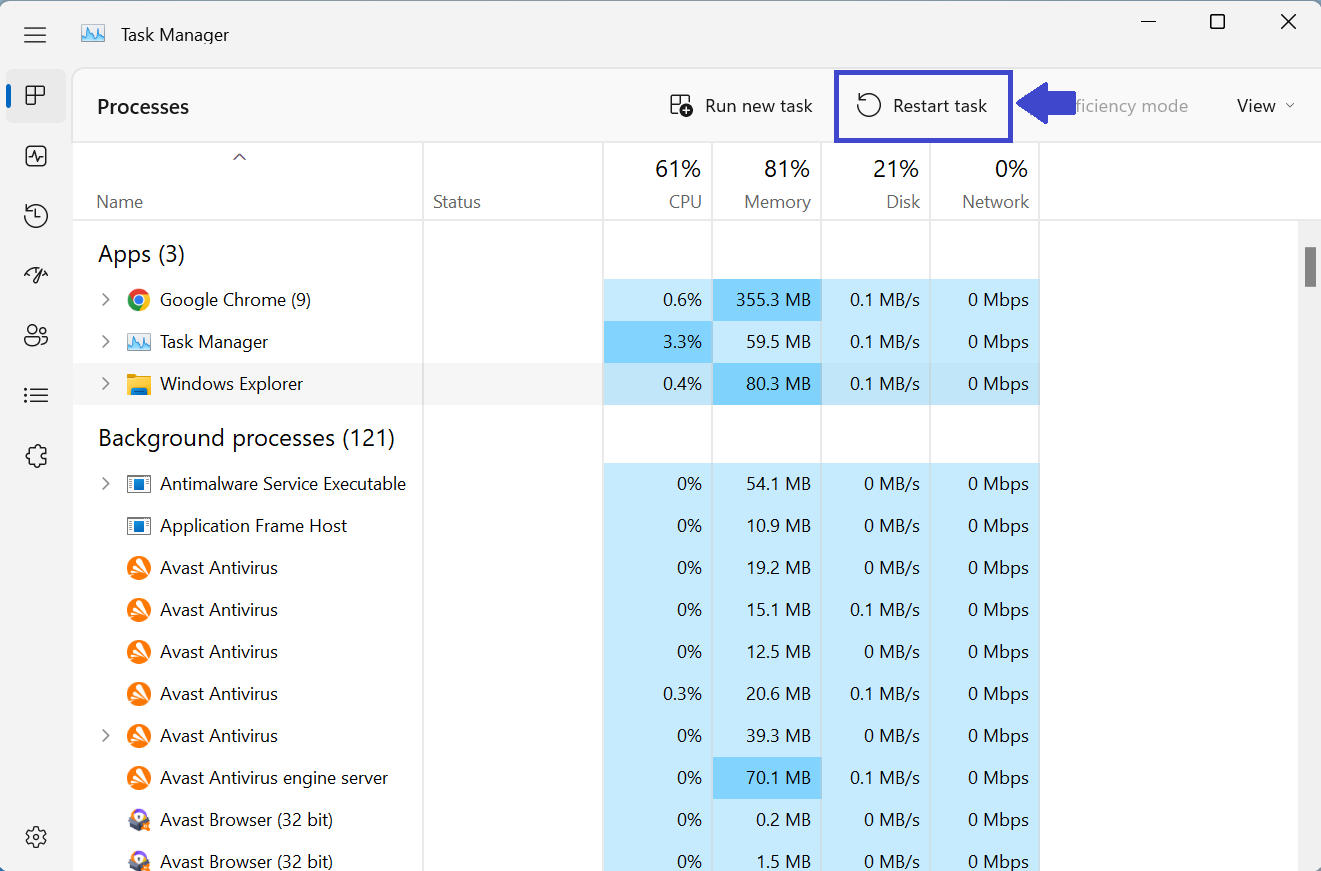
3. Run a malware scan if this fix doesn’t work.
Run malware scan
Hidden malware in your system can also cause unforeseen problems. To ensure that’s not the culprit here, finding traces of viruses and eliminating them once and for all is imperative.
Although there are different ways to run a malware scan, we recommend using Microsoft Defender’s Offline Scan since it’s a built-in tool, so there will be no additional charges.
Once the malware has been removed and your computer is clean, you should update your operating system to repair any damage the virus may have caused.
Check Windows Update
If your Windows is not up-to date, then also it can cause some issues. Below are the steps from where to can check for the updates and also can repair any damage viruses may have caused:
1. Go to Settings.
2. In the left panel, click Windows Update.
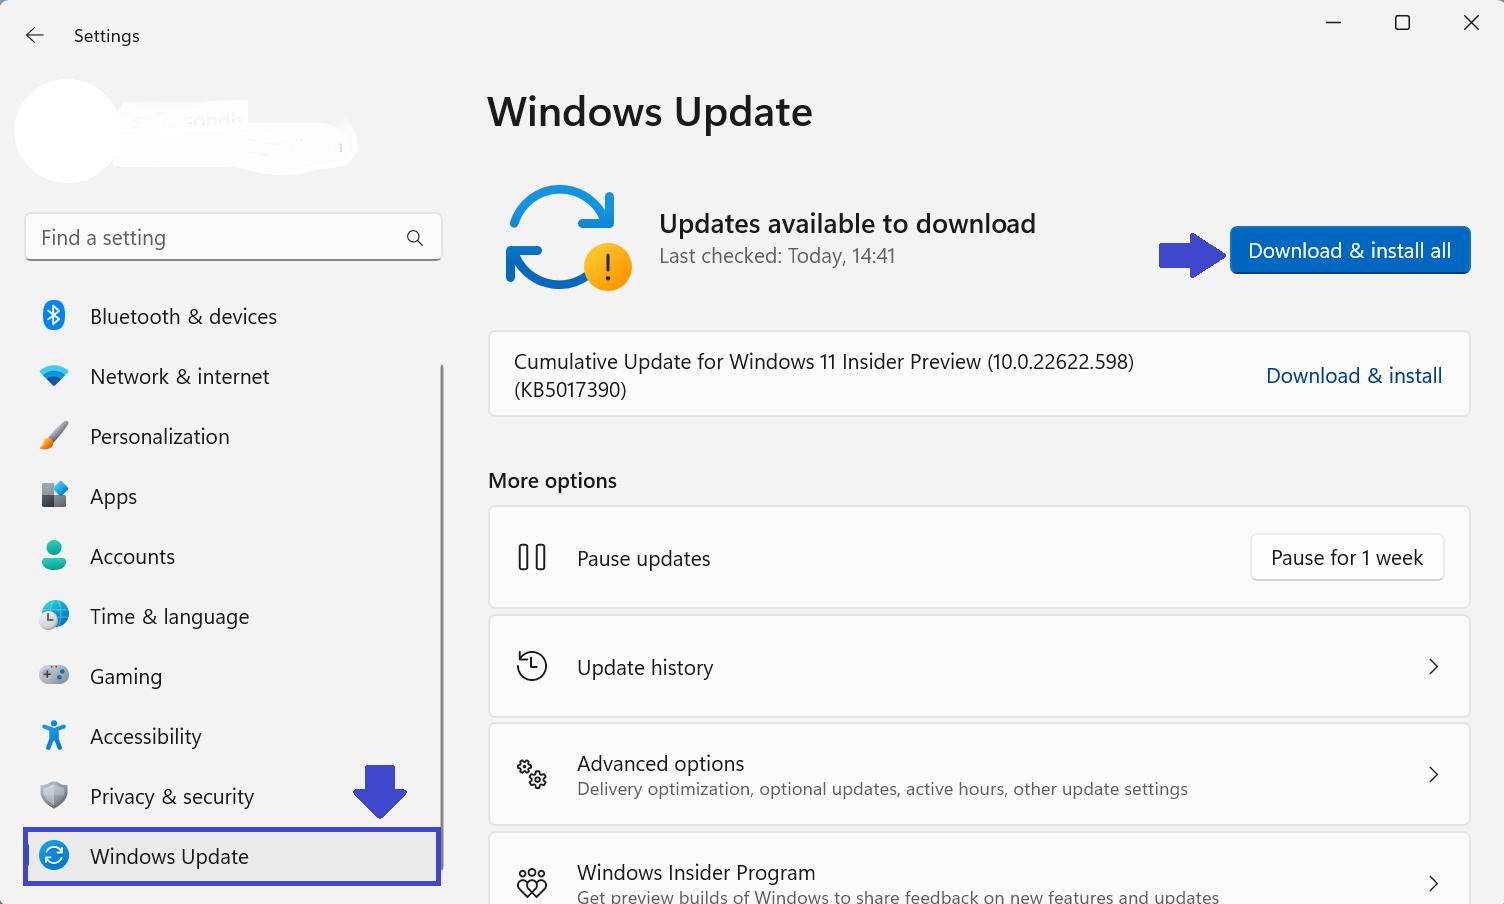
3. It will show you the required updates. Like in the above image, it is showing for the update.
That’s it!
![KapilArya.com is a Windows troubleshooting & how to tutorials blog from Kapil Arya [Microsoft MVP (Windows IT Pro)]. KapilArya.com](https://images.kapilarya.com/Logo1.svg)


![[Latest Windows 10 Update] What’s new in KB5055612? [Latest Windows 10 Update] What’s new in KB5055612?](https://www.kapilarya.com/assets/Windows10-Update.png)


Leave a Reply