

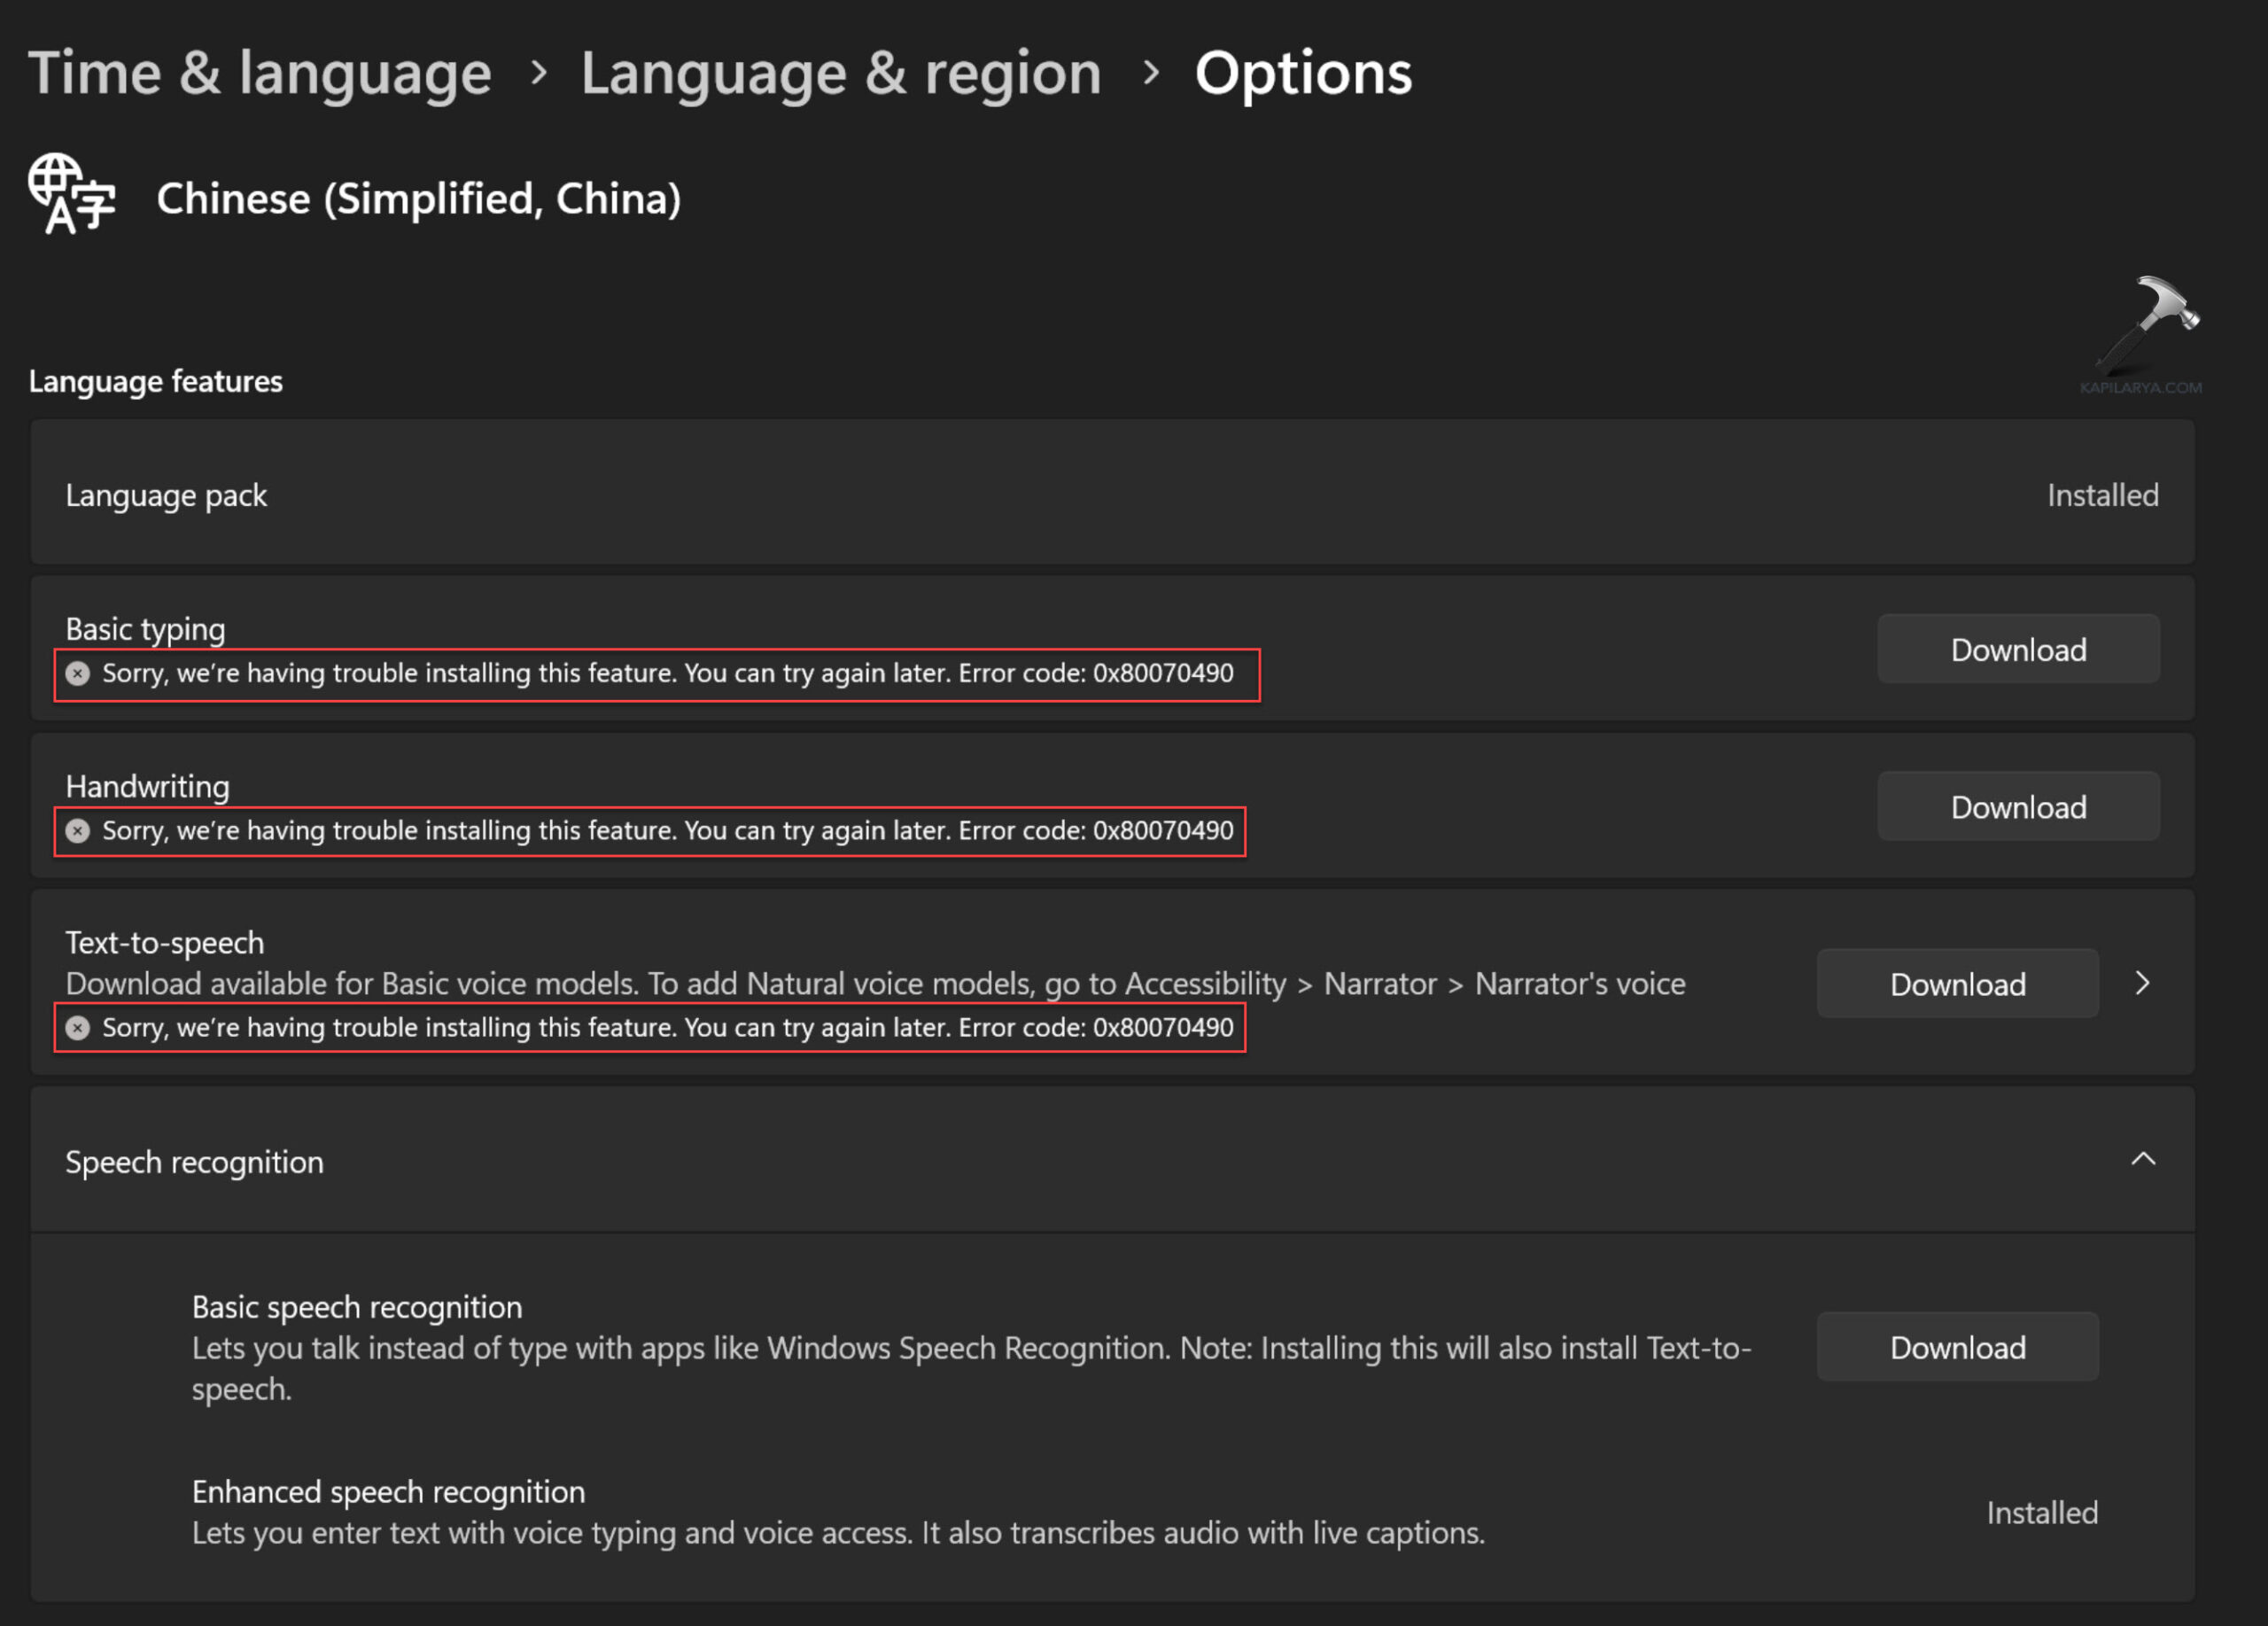
Having trouble adding a language pack to your Windows computer? Don’t worry, you’re not alone. Several common error codes can pop up during installation, such as 0X80070490, 0x8073D01, 0x8034500C, 2145103860, 0x800F0908, or 0x800f0954. If you cannot Install a language pack on Windows 11 or 10, this guide can help you fix the issue and get it installed successfully.
Page Contents
Fix: Cannot Install Language Pack in Windows 11
Method 1: Disable Metered Connection
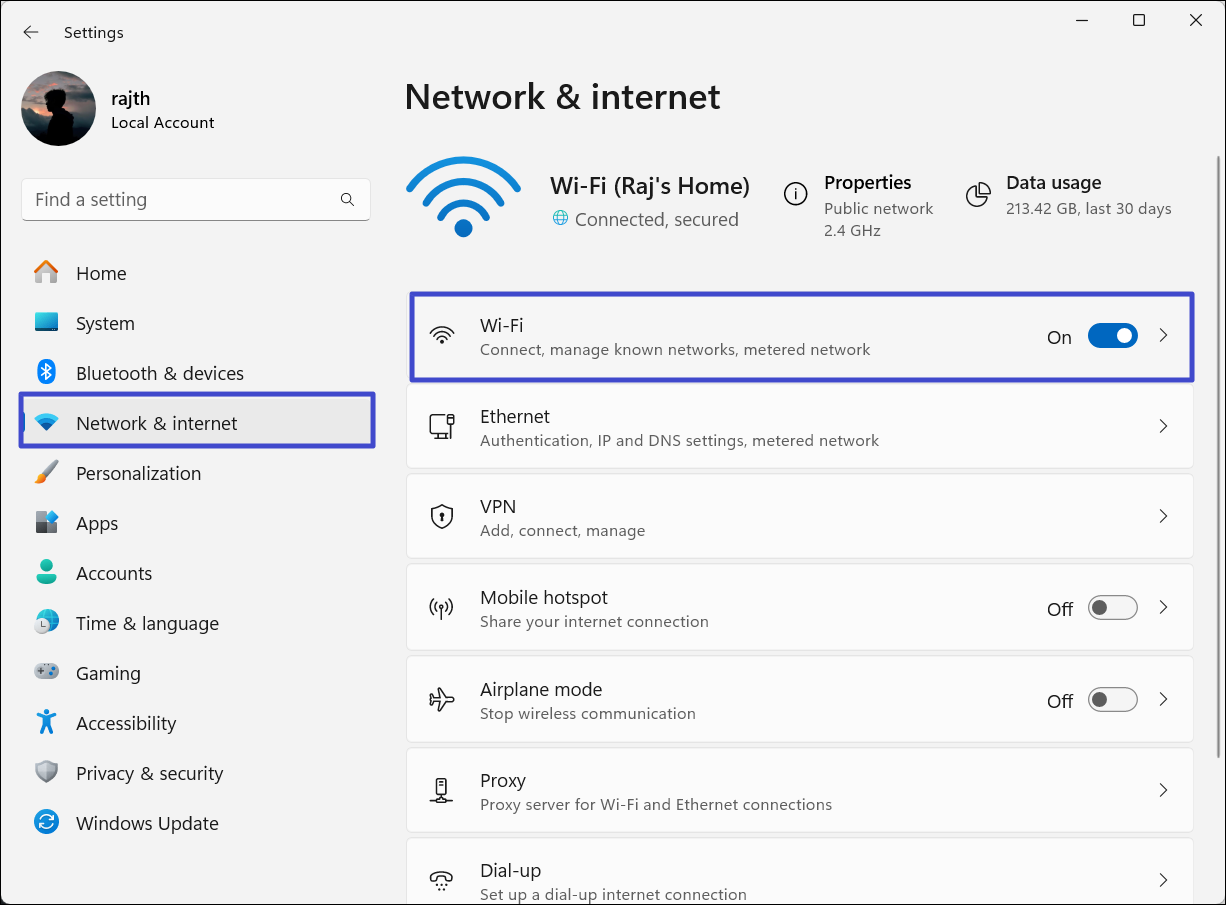
1. Open Windows Settings with Win + I.
2. Go to “Network & internet” settings and select your connection type (Ethernet, WiFi, etc.).
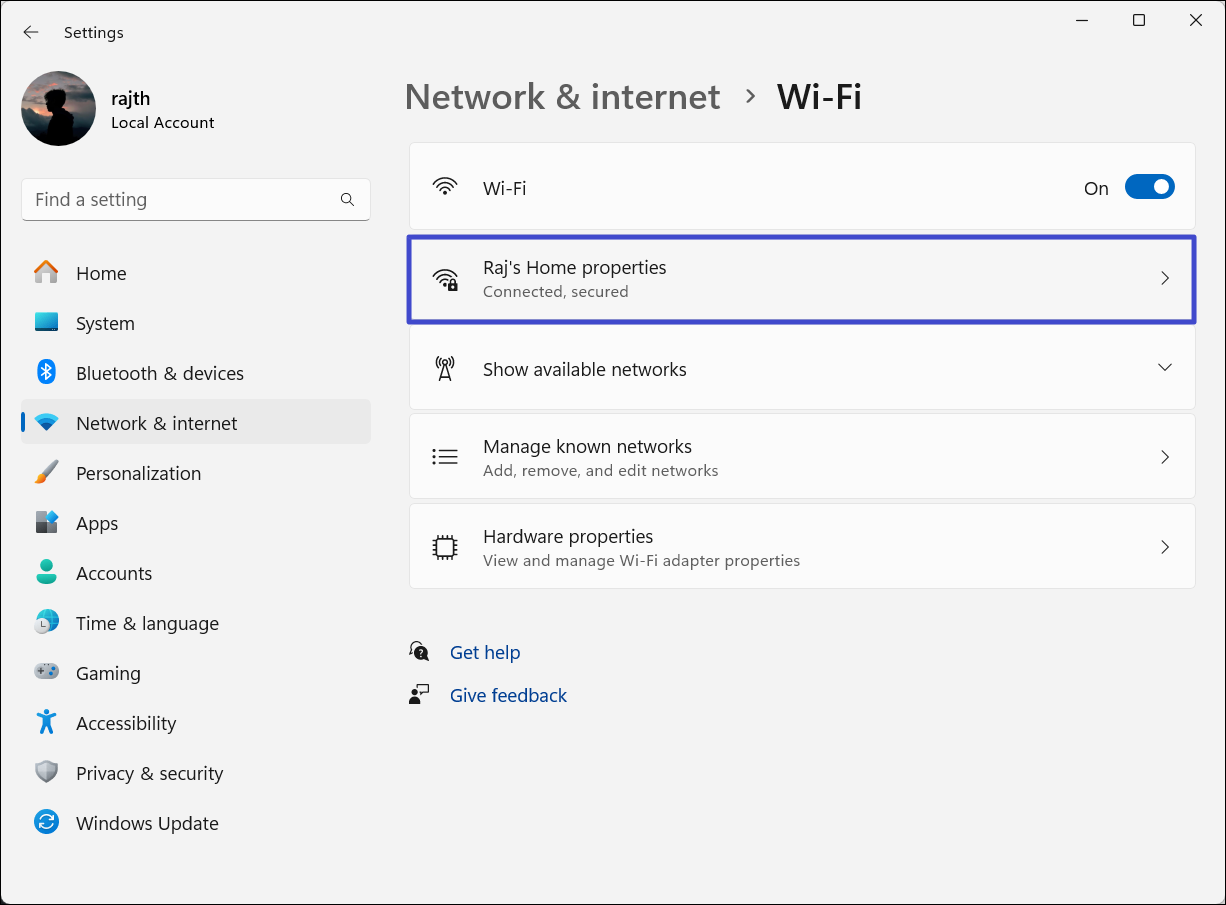
3. Then, choose the network connection you’re using right now.
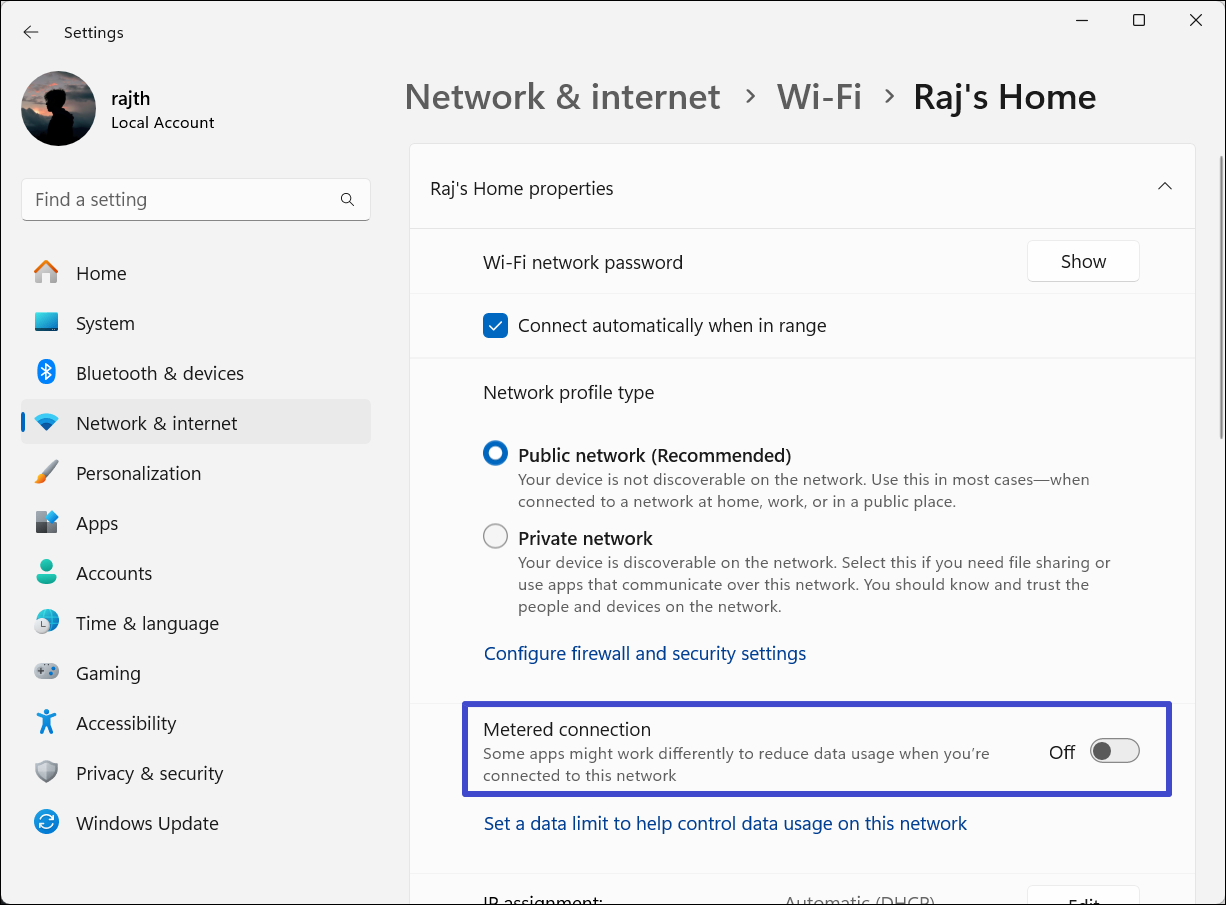
4. Disable the “Set as metered connection” or “Metered connection“.
Method 2: Change Group Policy
1. Press Windows + R to open the Run Command box, type “gpedit.msc”, and press Enter.
2. Navigate to “Computer Configuration” > “Administrative Templates” > “System”.
3. Find and double-click the “Specify settings for optional component installation and component repair” setting.

4. Change the setting to “Enabled” and click “Apply“, then “OK“.

5. Then, open Command Prompt as administrator and run these commands:
gpupdate /force
net stop wuauserv
net start wuauserv
Method 3: Run SFC and DISM Scans
1. Open Command Prompt as administrator.
2. In the Command Prompt, run the following command:
sfc /scannow
3. After the system file checker finished scanning, run the below command to check your Windows Image health:
Dism / Online / Cleanup-Image / RestoreHealth

Method 4: Clear Windows Update Cache
1. Open Command Prompt as Administrator.
2. In the Command Prompt window, run the following commands sequentially:
net stop wuauserv
net stop bits
net stop appidsvc
net stop cryptsvc
Ren %systemroot%\SoftwareDistribution SoftwareDistribution.bak
Ren %systemroot%\system32\catroot2 catroot2.bak
net start bits
net start wuauserv
net start appidsvc
net start cryptsvc

3. After running the above commands, restart your computer.
Method 5: Change Windows Update Registry
1. Open the Run dialog box, type “regedit” and hit Enter.

2. Once the Registry Editor opens, navigate to the given location:
HKEY_LOCAL_MACHINE\SOFTWARE\Policies\Microsoft\Windows
3. Then, open the “WindowsUpdate” key under Windows. If the key doesn’t exist, right-click the Windows key and select “New” > “Key“.

4. Rename the key to “WindowsUpdate”.

5. On the right side of the WindowsUpdate key, check if the “DoNotConnectToWindowsUpdateInternetLocations” DWORD exists. If it doesn’t, right-click an empty space and select “New” > “DWORD (32-bit) Value“.

6. Rename the value as “DoNotConnectToWindowsUpdateInternetLocations“.
7. Double-click that DWORD Value and set its value to “0″.

8. Restart your PC.
That’s it.


Leave a Reply