Some Windows 11 users have trouble creating or adding a new user account as other users on their Windows 11 computer. If you’re one of those who cannot create a new user account on your Windows 11 system, here are some easy solutions to fix the issue.
Page Contents
Method 1: Replace the Corrupt Default Directory
Sometimes, this error occurs if the default user directory is corrupted. So, deleting and re-creating the directory should help.
1. Open File Explorer and go to the Users directory (C:\Users).
2. Now, copy the Default folder and paste it somewhere else as a backup.
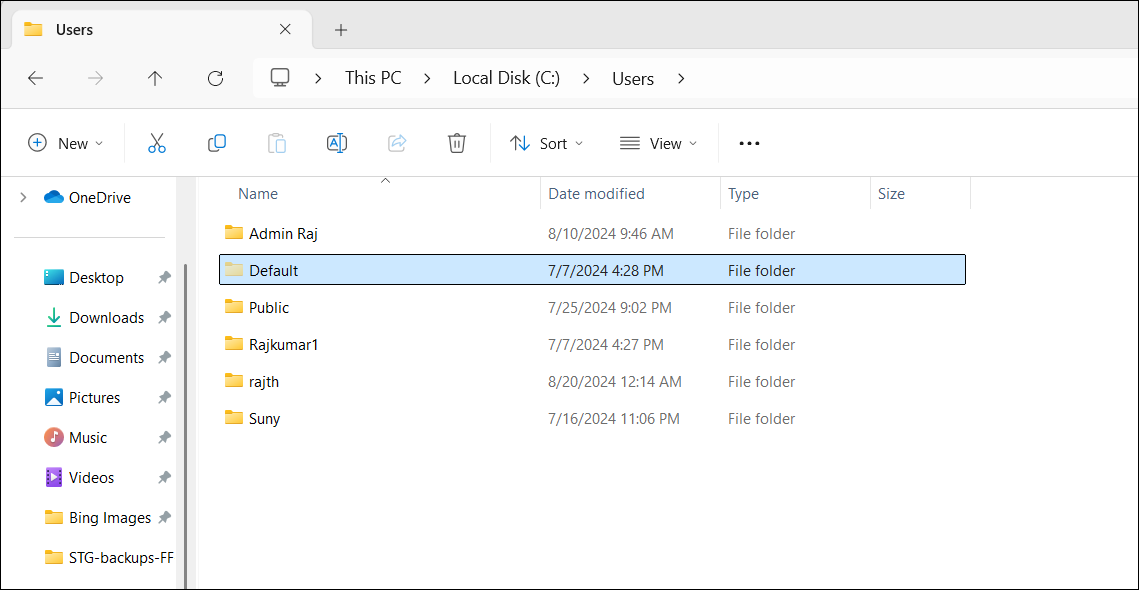
3. Then, delete the entire Default folder from the Users directory.
If the Default directory is not visible, click the “View” menu, hover over “Show“, and click/tick the “Hidden items” option.
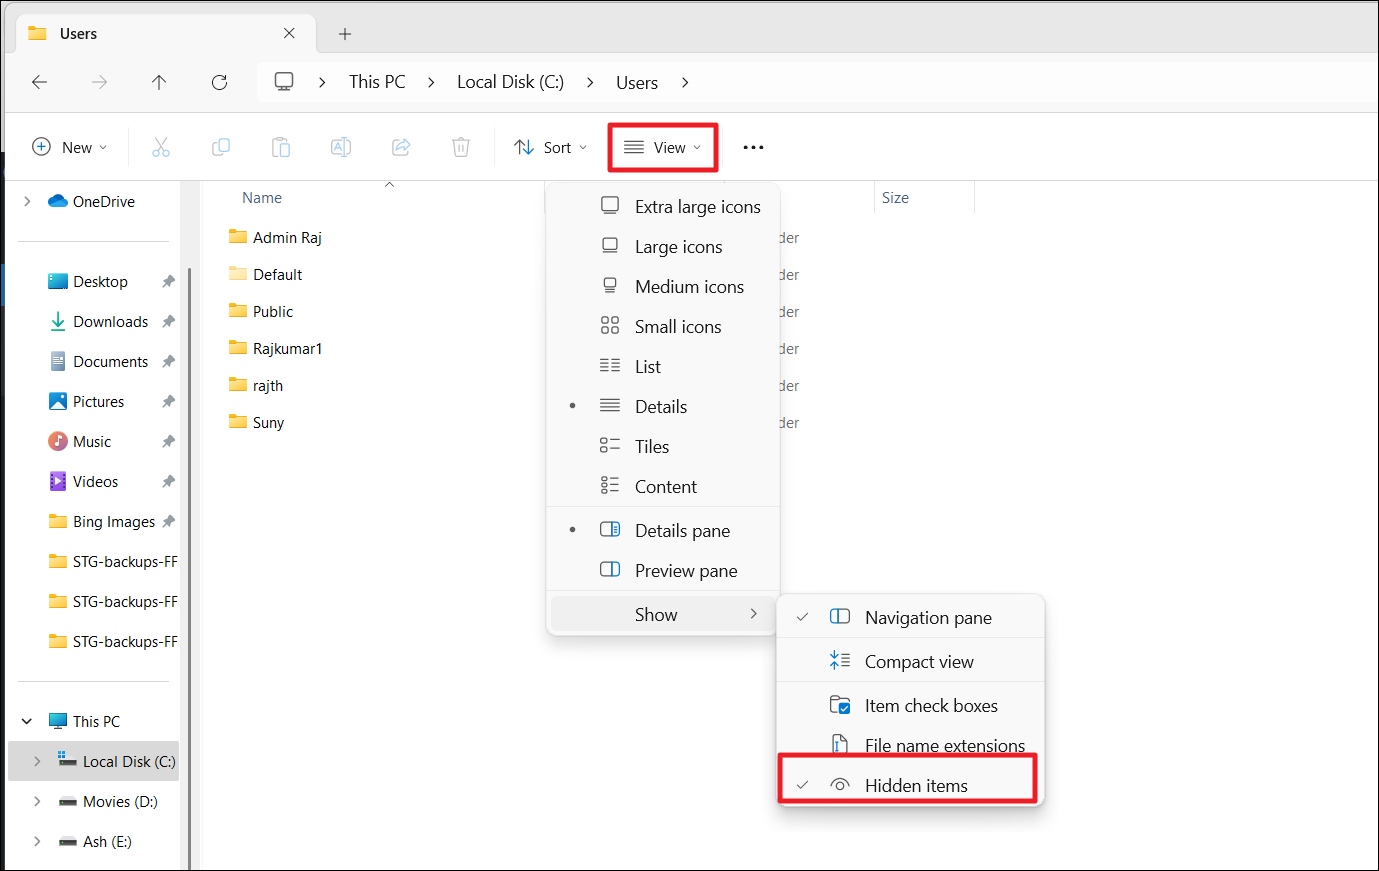
Deleting the Default directory will also remove any custom settings and preferences. But don’t worry! Windows will automatically create a new one with the default settings upon restart.
4. After the restart, try creating a new user using Windows settings.
Method 2: Create a User Account using CMD
1. Type “CMD” in the Start menu, and click “Run as Administrator” on the right.
2. In the Command Prompt, run the below command to create an account without a password:
net user accountname /add
Make sure to replace the accountname with the account name you want.
Example:
net user Riley /add

You will see the ‘The command was completed successfully’ message, which means a new account has been created but without a password.
3. If you would like to create an account with a password, run this instead:
net user accountname password /add
Here, replace accountname and password with your desired account name and password.
Example:
net user Swann Tre5487! /add
Method 3: Add a New Account using the Computer Management
1. Right-click the Start menu and select “Computer Management“.

2. Once the Computer Management tool opens, select the “Local Users and Groups” on the left panel.

3. Right-click on the “Users” folder and choose “New user...”.
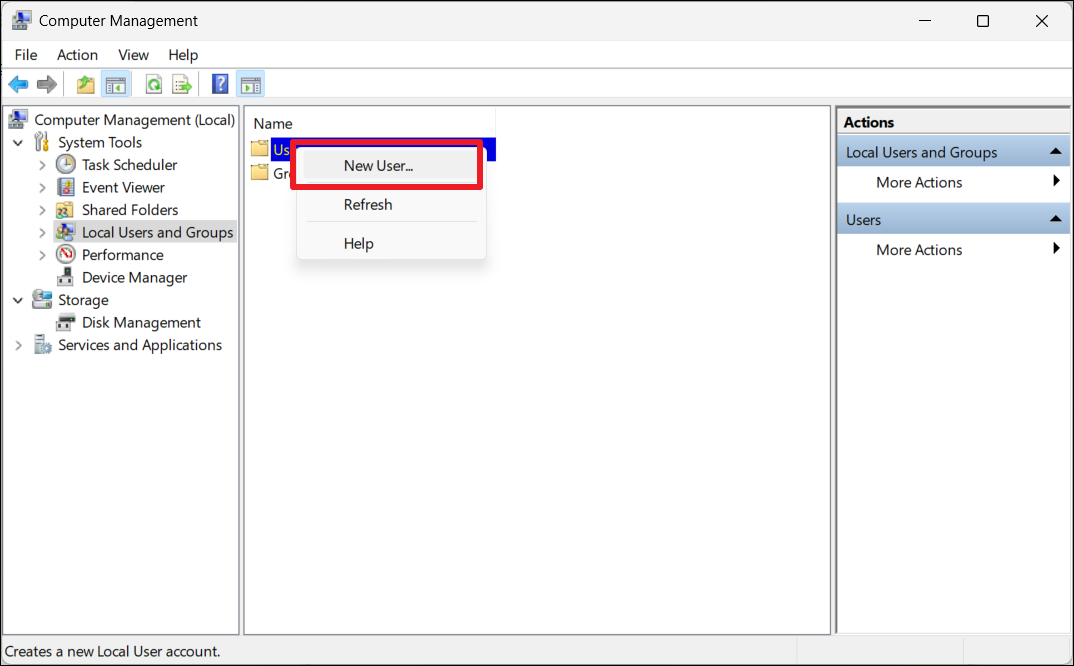
4. Enter your username, full name, and password. Then, click the “Create” button.

5. To confirm, select the Users folder under Local Users and Groups to see the list of users. This should fix the
Method 4: Add an Account using Netplwiz
If you cannot create a user account through Windows Settings, the netplwiz feature is another method you can use.
1. Press Windows + R to open the Run dialog box. Type “netplwiz” and hit Enter.

2. In the User Accounts window, click “Add…“.

3. Now, you have two options. If you wish to create a Microsoft account, enter your Microsoft email address and click “Next“.To create a local account, click on “Sign in without a Microsoft account (not recommended)“.

4. If you want to create a local account, click “Local account“.
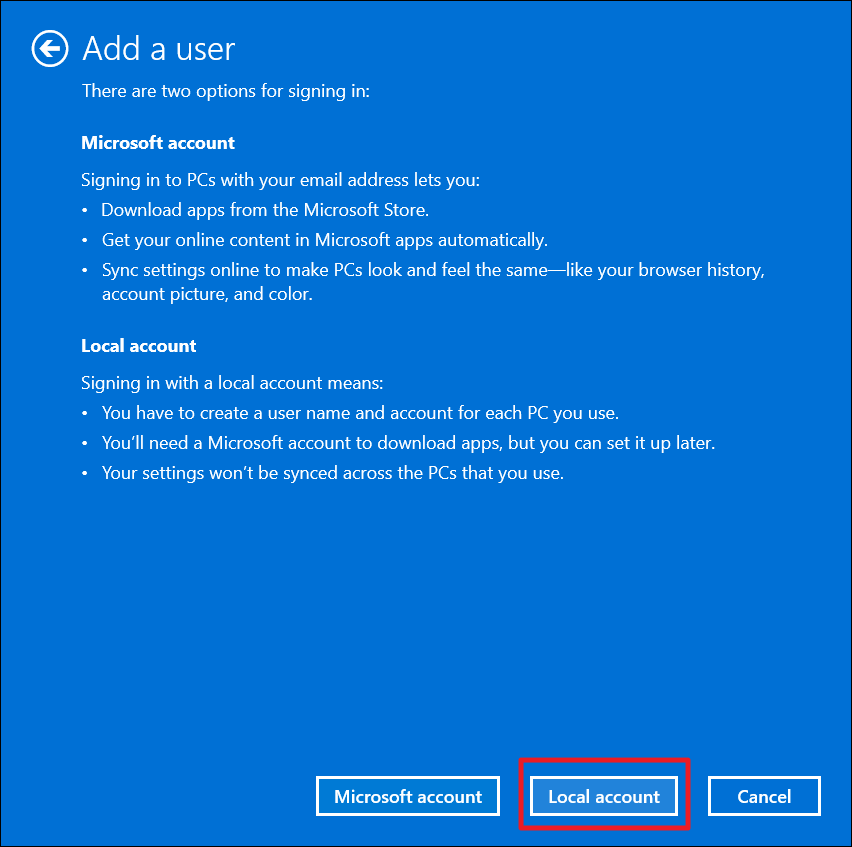
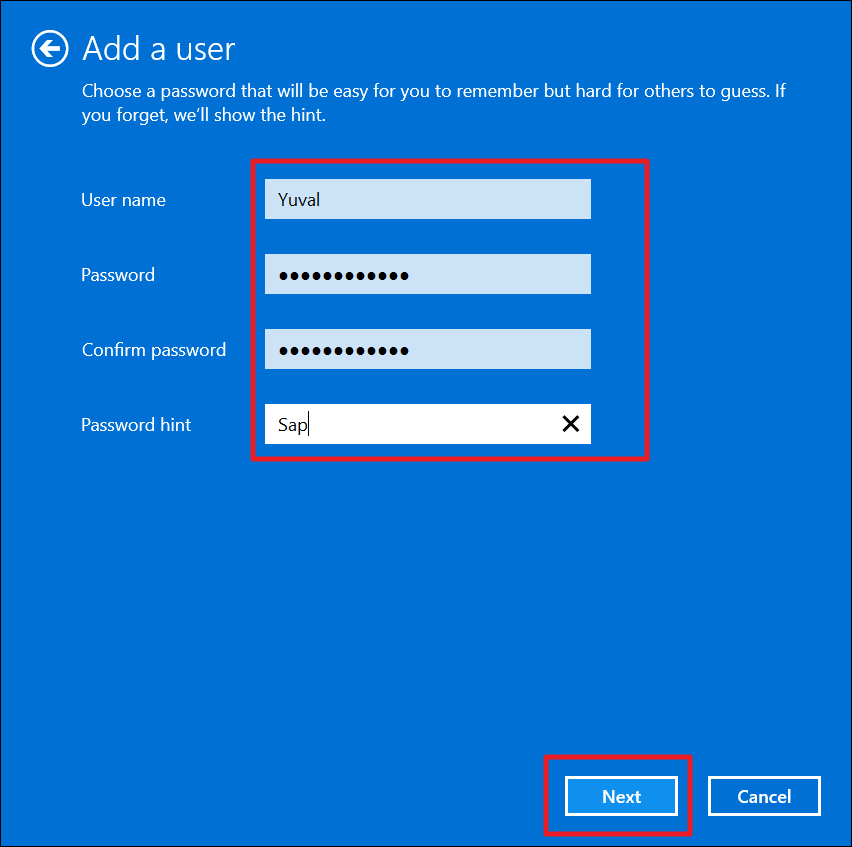
5. Now, fill in the User name, Password, Confirm password, and Password hint fields as per your choice and click “Next“.
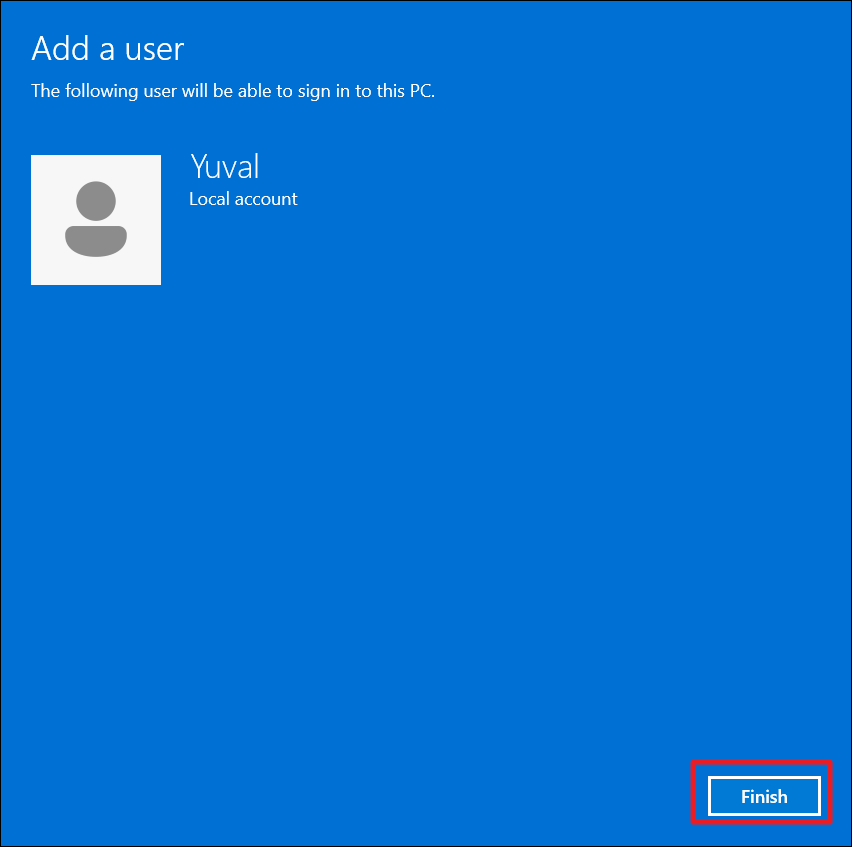
6. Finally, click “Finish“.
Method 5: Disable Running Services
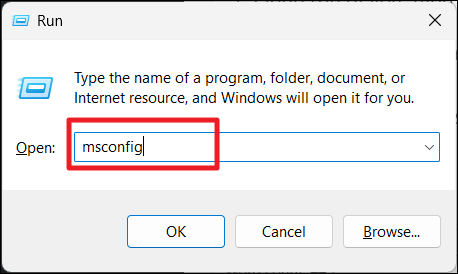
1. Open the dialog, type “msconfig,” and press Enter.
2. Under the General tab, select “Selective startup,” and check “Load system services” and “Load startup items.”

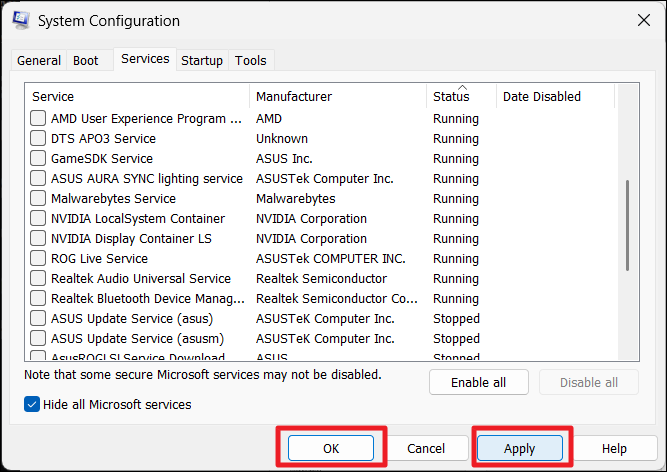
3. Switch to the “Services” tab and check “Hide all Microsoft services.”

4. Click “Status” at the top, and check all the running services. Then, click “Disable all“.

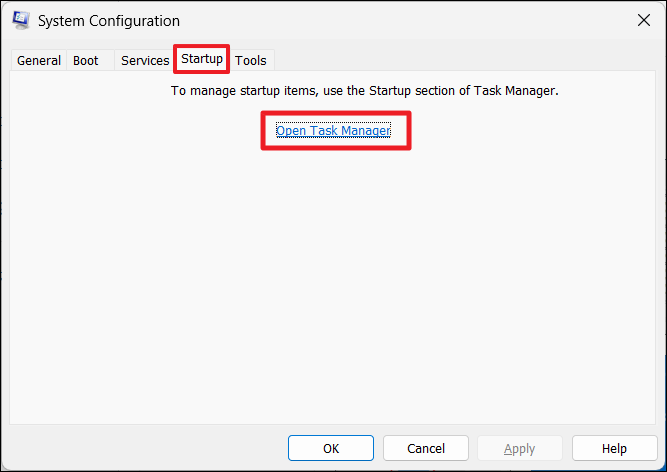
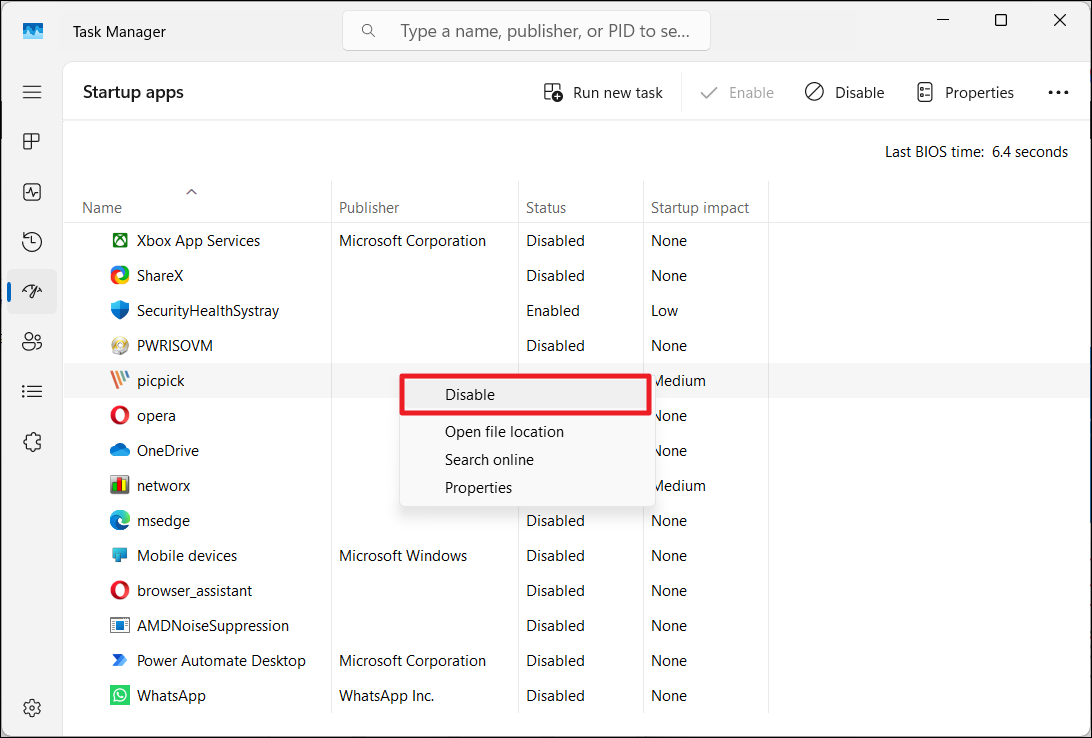
5. Move to the “Startup” tab, and click “Open Task Manager“.
6. In the Task Manager, right-click each unnecessary app and select “Disable“.
7. Get back to the System Configuration window and click “Apply,” then “OK“.
8. Click “Restart” in the prompt box to reboot your computer.
9. After the restart, try adding a new account via Windows Settings or using one of the above methods.
That’s it.
![KapilArya.com is a Windows troubleshooting & how to tutorials blog from Kapil Arya [Microsoft MVP (Windows IT Pro)]. KapilArya.com](https://images.kapilarya.com/Logo1.svg)


Leave a Reply