Using a shared folder or drive, you can instantly share content to other systems in your work environment. This helps you to remotely share or access the content which is quite handy. However, if you cannot access shared folder or drive in Windows 10/Server, this article will show you how to fix it.
Usually, when you can’t access shared folder/drive, you may get Windows cannot access \\computer’s name, shared folder, drive message. Additionally, you do not have permissions to access is also mentioned with this. It is suggested that you contact your network admin to request access.
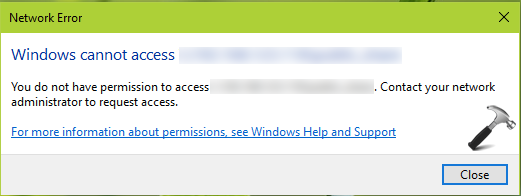
This problem generally occurs due to lack of required permissions to access the share. If the required permissions is properly configured for the client or person accessing the share, the issue can be easily resolved. So in case if you are also facing this problem, here is how you can fix it.
Page Contents
Fix: Cannot access shared folder or drive in Windows 10/Server
FIX 1 – Using Services snap-in
Before we actually fix the permissions, it is very important that you make sure all the required background services are running to facilitate accessing the share. First, confirm that Network Discovery is turned on. Also, try below mentioned steps:
1. Press  + R and type
 services.msc in the Run dialog box, hit Enter key to open Services snap-in.
2. Ensure that these services are running and have Startup type set to Manual or Automatic:
- Function Discovery Provider Host (fdPHost)
- Function Discovery Resource Publication (FDResPub)
- Network Connections (NetMan)
- UPnP Device Host (UPnPHost)
- Peer Name Resolution Protocol (PNRPsvc)
- Peer Networking Grouping (p2psvc)
- Peer Networking Identity Manager (p2pimsvc)
3. Once you’ve configured above mentioned services, you can close Services snap-in.
FIX 2 – Using share properties
If you’re client machine, you need to ask your network admin to fix the issue for you. In case if you’re the network admin, you can try these steps to fix the problem for your clients.
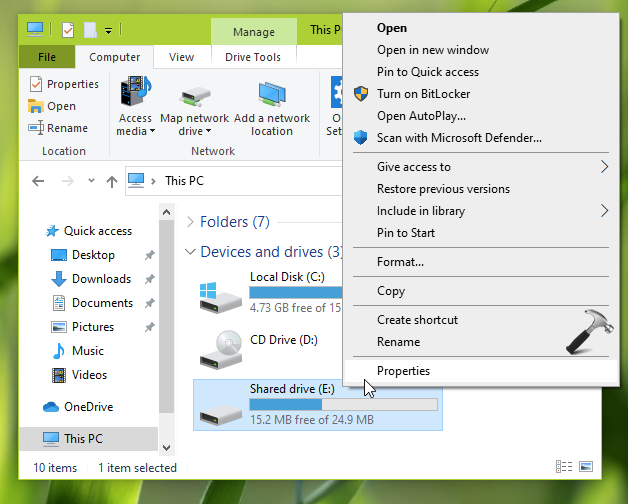
1. Open File Explorer. Right click on the shared folder or drive and select Properties.
2. In the property sheet, go to Sharing tab. Click on Advanced Sharing button there.
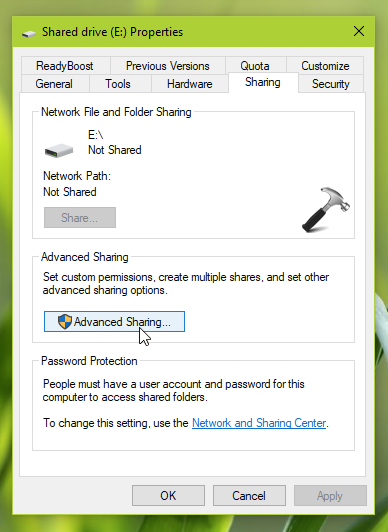
3. Under Advanced Sharing, check Share this folder and click Permissions.

4. Next, under Permissions, click on Add.
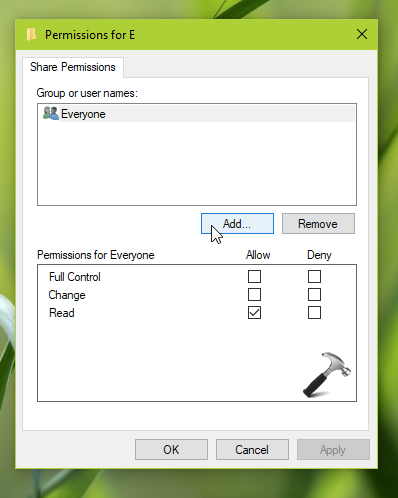
5. Moving on, under Select Users or Groups, type in the client or group user name and click Check Names. Click OK.

6. Once you locate the user or group for which you’re sharing the folder or drive, provide them required permissions and click Apply, OK.

Now when the client or group accessing that shared folder or drive, they will no longer face the issue.
Hope this helps!
![KapilArya.com is a Windows troubleshooting & how to tutorials blog from Kapil Arya [Microsoft MVP (Windows IT Pro)]. KapilArya.com](https://images.kapilarya.com/Logo1.svg)





Leave a Reply