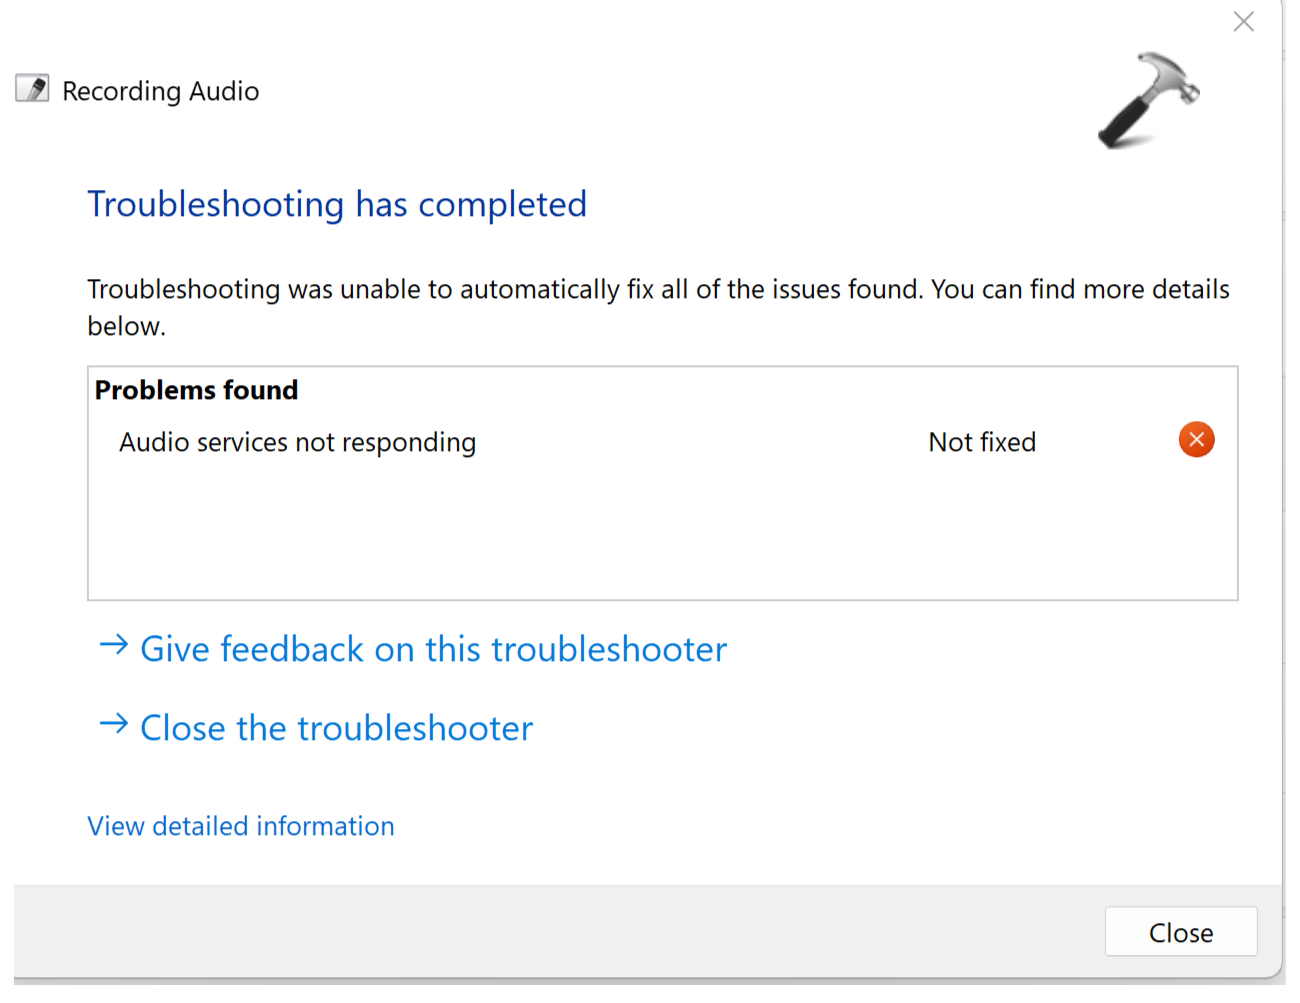
Windows 11 users sometimes encounter an error with audio services. They see an error message saying audio services not responding. No need to worry. This article shows you different ways you can try to get rid of this issue. Follow this article to fix audio services not responding in Windows 11/10.
Page Contents
Fix: Audio services not responding in Windows 11/10
Option 1: Check Microphone access
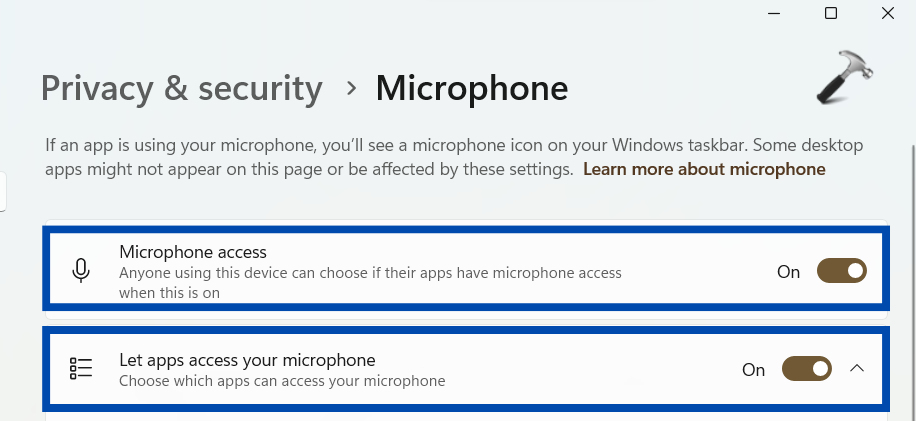
- In the Settings app, search for Microphone Privacy Settings.
- Check that the toggles next to Microsoft access and App access are turned on.
Option 2: Use Msconfig
- Search for
msconfigin the Start menu and open the app. - Go to the Services tab. Locate Windows Audio Endpoint Builder and Windows Audio in the list. Make sure that they are checked. If they are not, check them.
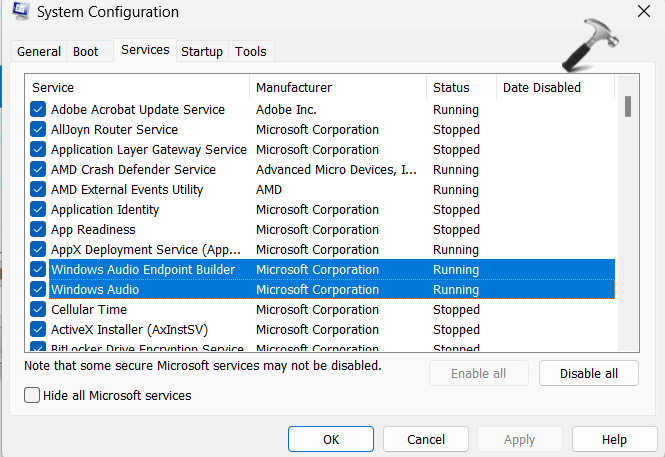
- Click on Apply and close the Window.
Option 3: Service Manager
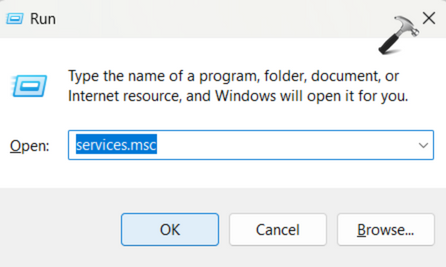
- Press shortcut keys Win + R to open Run. Search for
services.mschere and click OK.
- Here, locate Windows Audio in the service list. Right click on it and select Properties.

- Check that the Service is running, and Startup type is set as Automatic. If not, make it so. Then click OK.
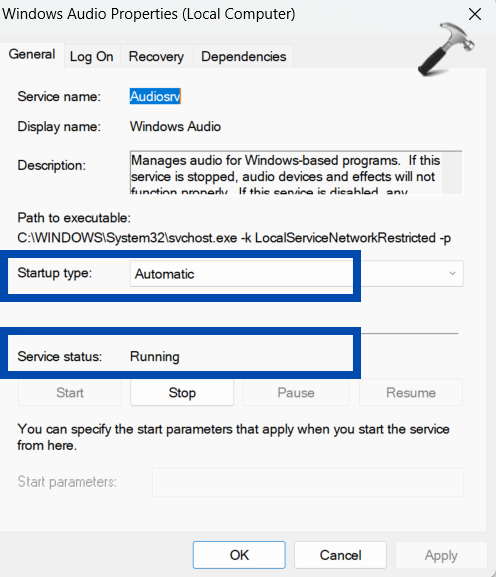
- Now, right click on the Windows Audio and select Restart.

- Repeat steps 2 to 4 with the following services as well.
- Windows Audio Endpoint Builder
- Plug and Play
For the following three services, you just need to make sure that their status is Running. If not, simply right click on them and choose Start.
- DCOM Server Process Launcher
- RPC Endpoint Mapper Remote
- Procedure Call (RPC)
Option 4: Command Prompt
- Search for Command Prompt in the Start menu click on Run as administrator.
- Type the command below and hit enter.
net localgroup Administrators /add networkservice
- Now, enter the following command and again hit enter.
net localgroup Administrators /add localservice
Now restart your computer and check if the issue is resolved.
Option 5: Registry Editor
- Search for Regedit in the Start menu and open Registry Editor.
- Go to the following location in there.
HKEY_LOCAL_MACHINE\SYSTEM\CurrentControlSet\Services\AudioEndpointBuilder\Parameters
- Double click on ServiceDII. Make sure that in the Value data, you see the following.
%SystemRoot%\System32\AudioEndpointBuilder.dll
If not, change it and click OK.
 `
`
Option 6: Install high-definition audio device
- In the Start menu, search for Device manager to open it.
- Expand the Sound, video and game controllers. Locate your audio device and right click on it. Select update.
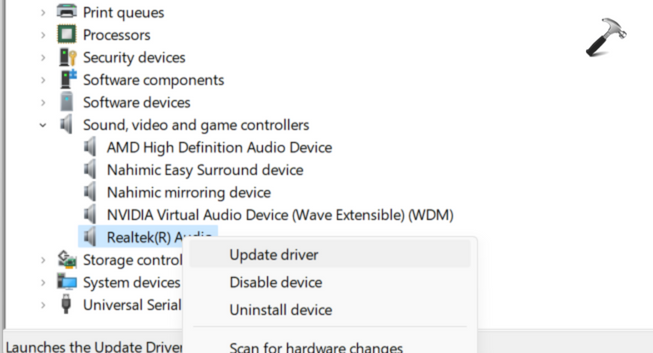
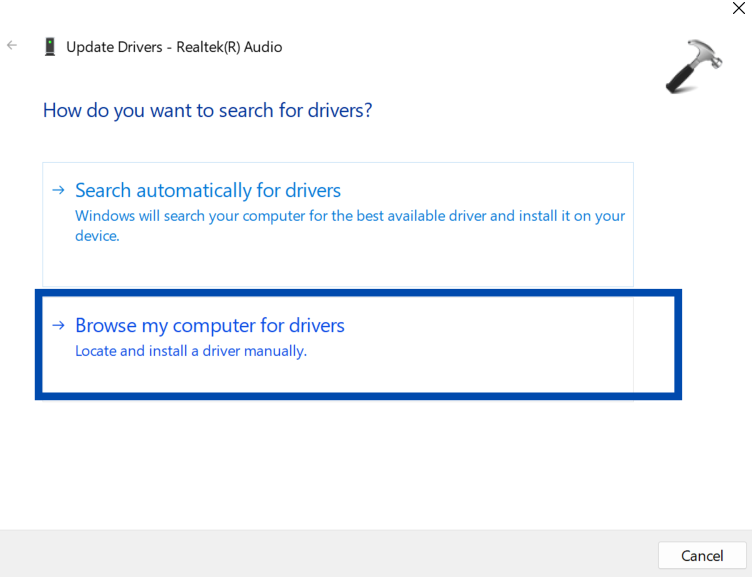
- Now click on Browse my computer for Drivers > Let me pick from a list of available drivers.
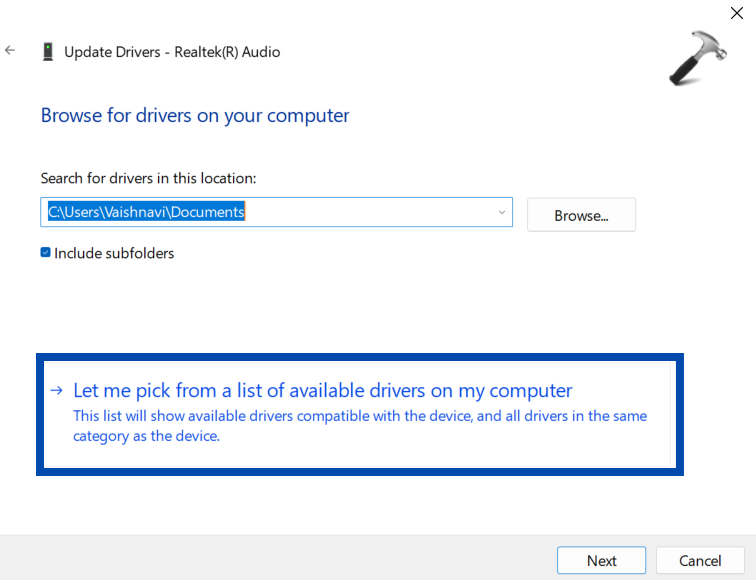
- Now, select High-definition Audio device from the list and click Next.
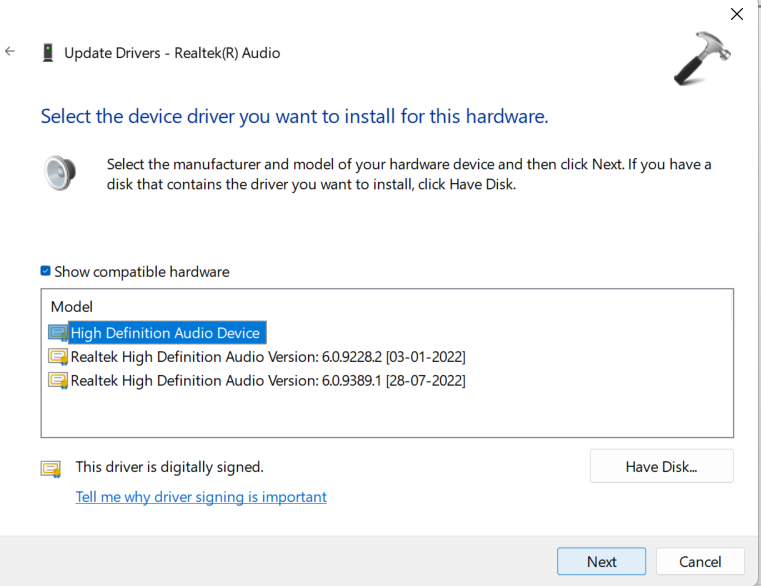
Now, it will automatically install the basic audio device from your PC. Check if the issue is resolved once it is done.
Option 7: System Properties
- Open Run and search for
sysdm.cpl.

- Go to the hardware tab and then click on Device Installation Settings.
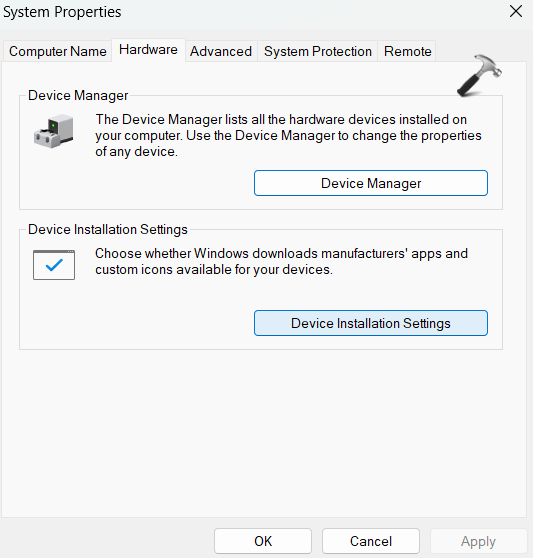
- Here, choose the second option No (your device might not work as expected) and then Save Changes.

- Press Win + X shortcut and click on Device Manager to open it.

- Expand the Sound, video and game controllers. Right click on your audio device. Select Uninstall device.

- Now click on Action and then Scan for hardware changes.

Option 8: Restore PC
- Open Run and search for
rstruiby typing it and then selecting OK.

- Now, Restore your PC to an earlier date.
One of these options will solve the issue you are facing.
![KapilArya.com is a Windows troubleshooting & how to tutorials blog from Kapil Arya [Microsoft MVP (Windows IT Pro)]. KapilArya.com](https://images.kapilarya.com/Logo1.svg)


![[Latest Windows 10 Update] What’s new in KB5055612? [Latest Windows 10 Update] What’s new in KB5055612?](https://www.kapilarya.com/assets/Windows10-Update.png)


2 Comments
Add your comment
uauuu! Really help me!!! Lenovo wants me to format my PC and your post was the solution to the problem!!! thank you so much!
^^ Glad it helped 😎