Antimalware Service Executable (MsMPEng.exe) is a Windows service that protects your computer by remaining active in the background. Many users report it causing high CPU usage. This article presents five different ways to fix Antimalware Service Executable high memory usage issue in your Windows 11/10 PC.
Page Contents
Fix: Antimalware Service Executable high memory usage
The Antimalware Service Executable generally consumes high CPU & RAM, but only when Windows security is performing a real time full system scan of updating virus definitions. However, if your computer is consistently freezing or slowing down due to high memory usage by this service, here are some fixes you can try.
Fix 1: Disable Scheduled Tasks
- Search for Task Scheduler in the Start menu and open it.
- Go to Task Scheduler Library > Microsoft > Windows > Windows Defender in the left pane.
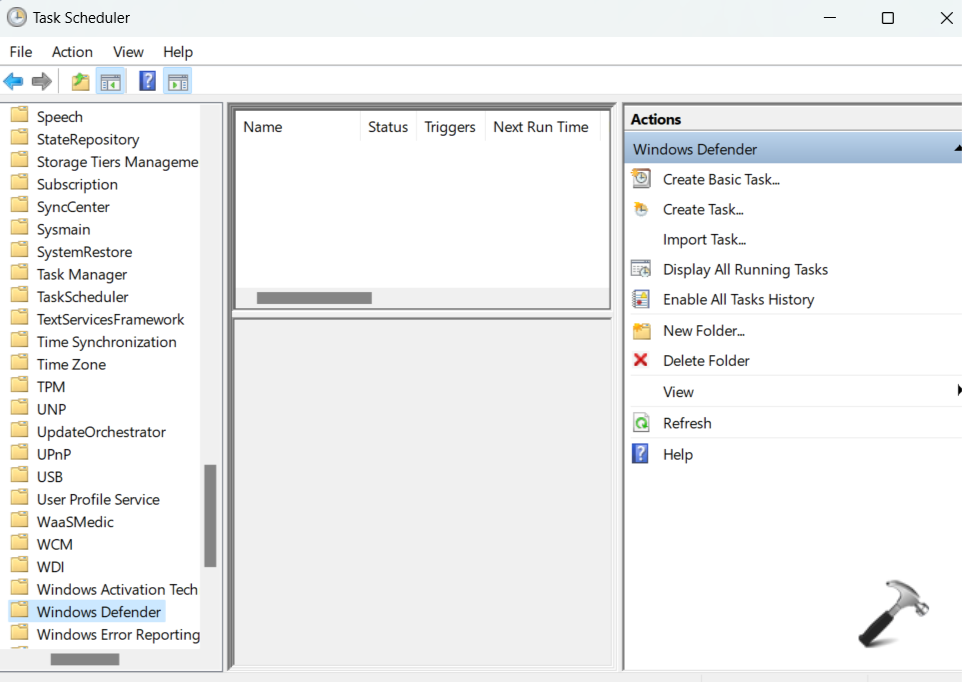
- the right pane in the Windows Defender may be showing some Windows Defender Tasks. Right click on them and select Disable.
This should result in the reduction in CPU & RAM usage by this service.
Fix 2: Disable Real Time Protection in Settings
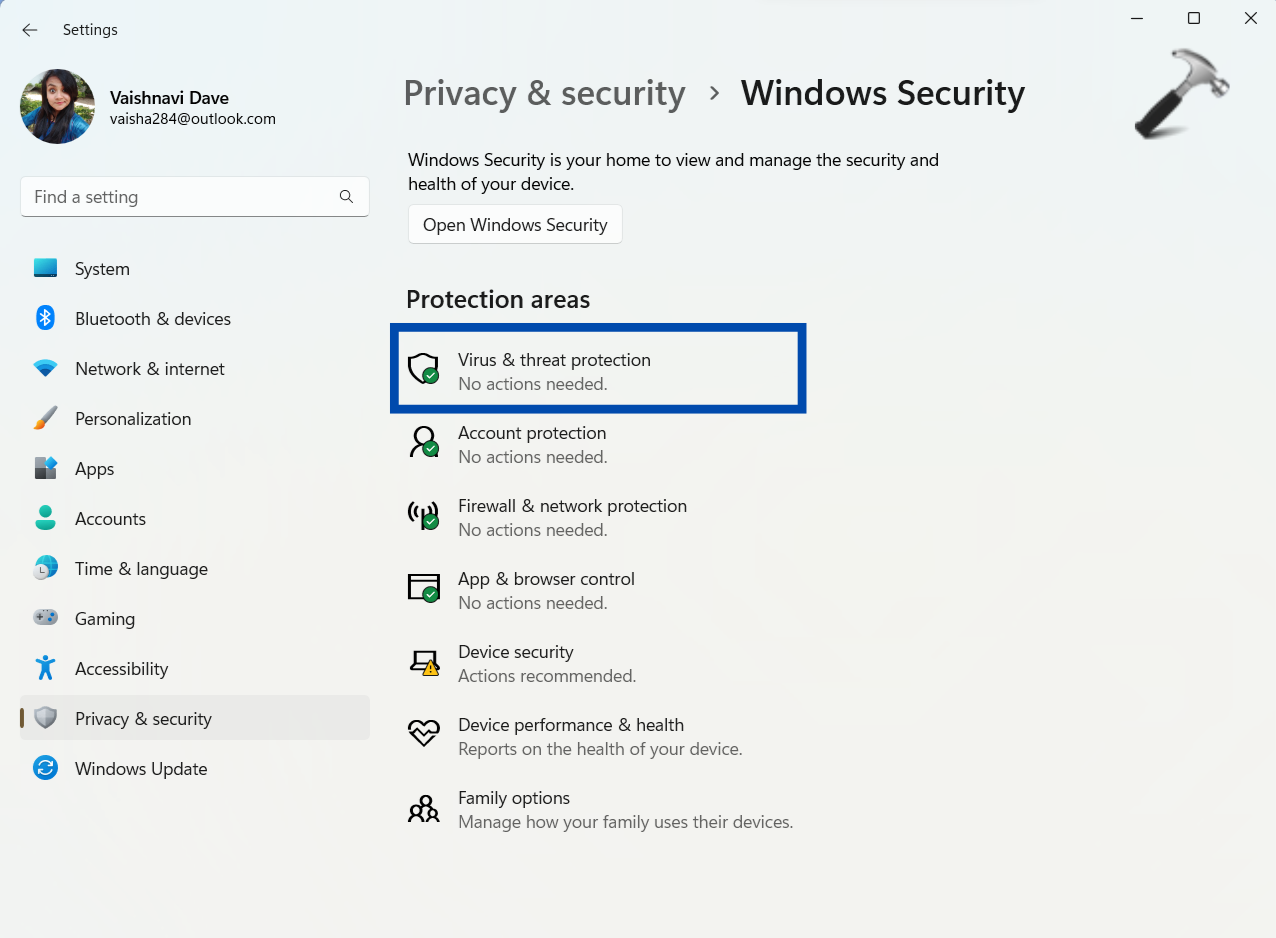
- Open Settings app and go to Privacy & security > Windows Security.
- Click on virus & threat protection.
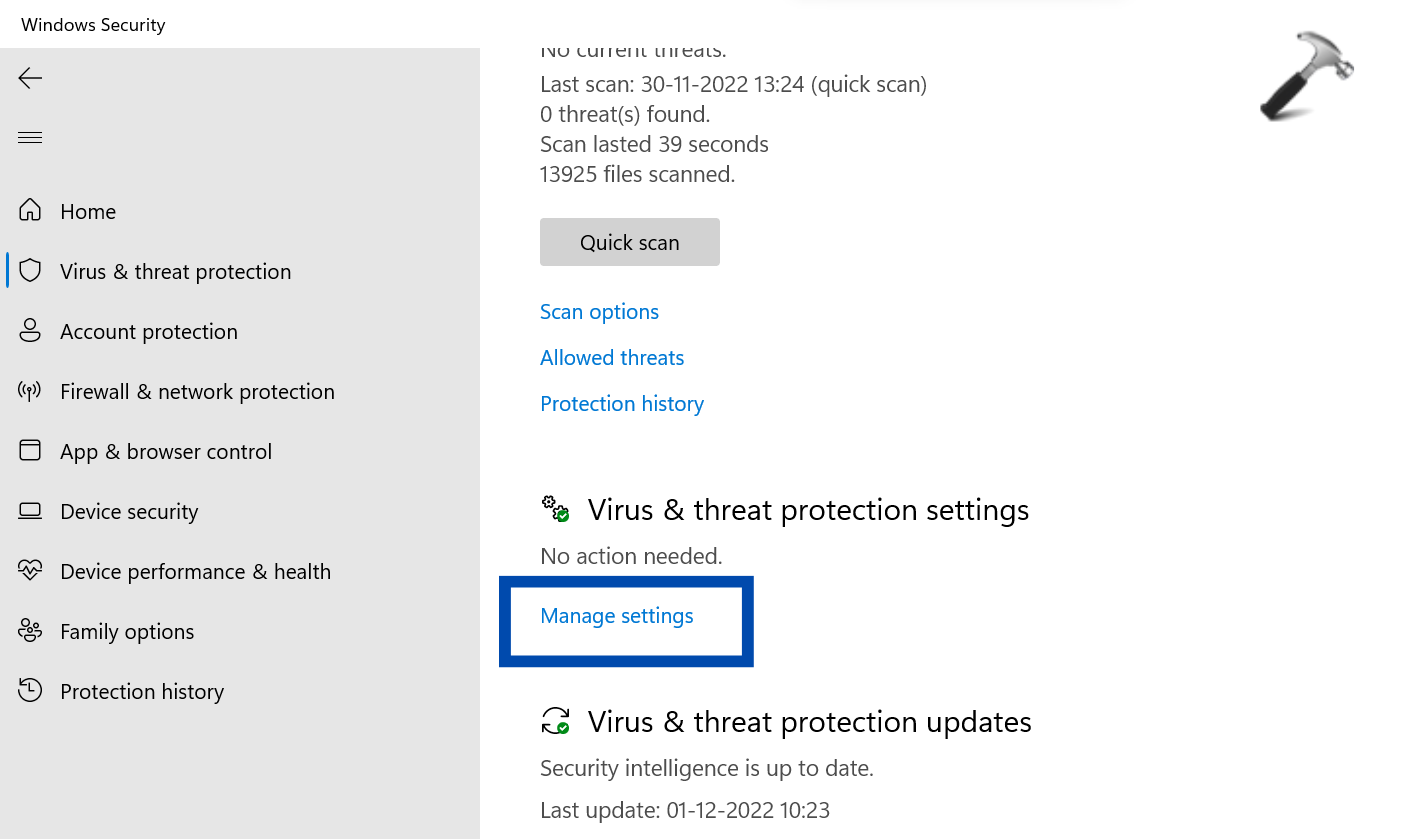
- Select Manage Settings link.
- In the next screen, turn off the real-time protection.
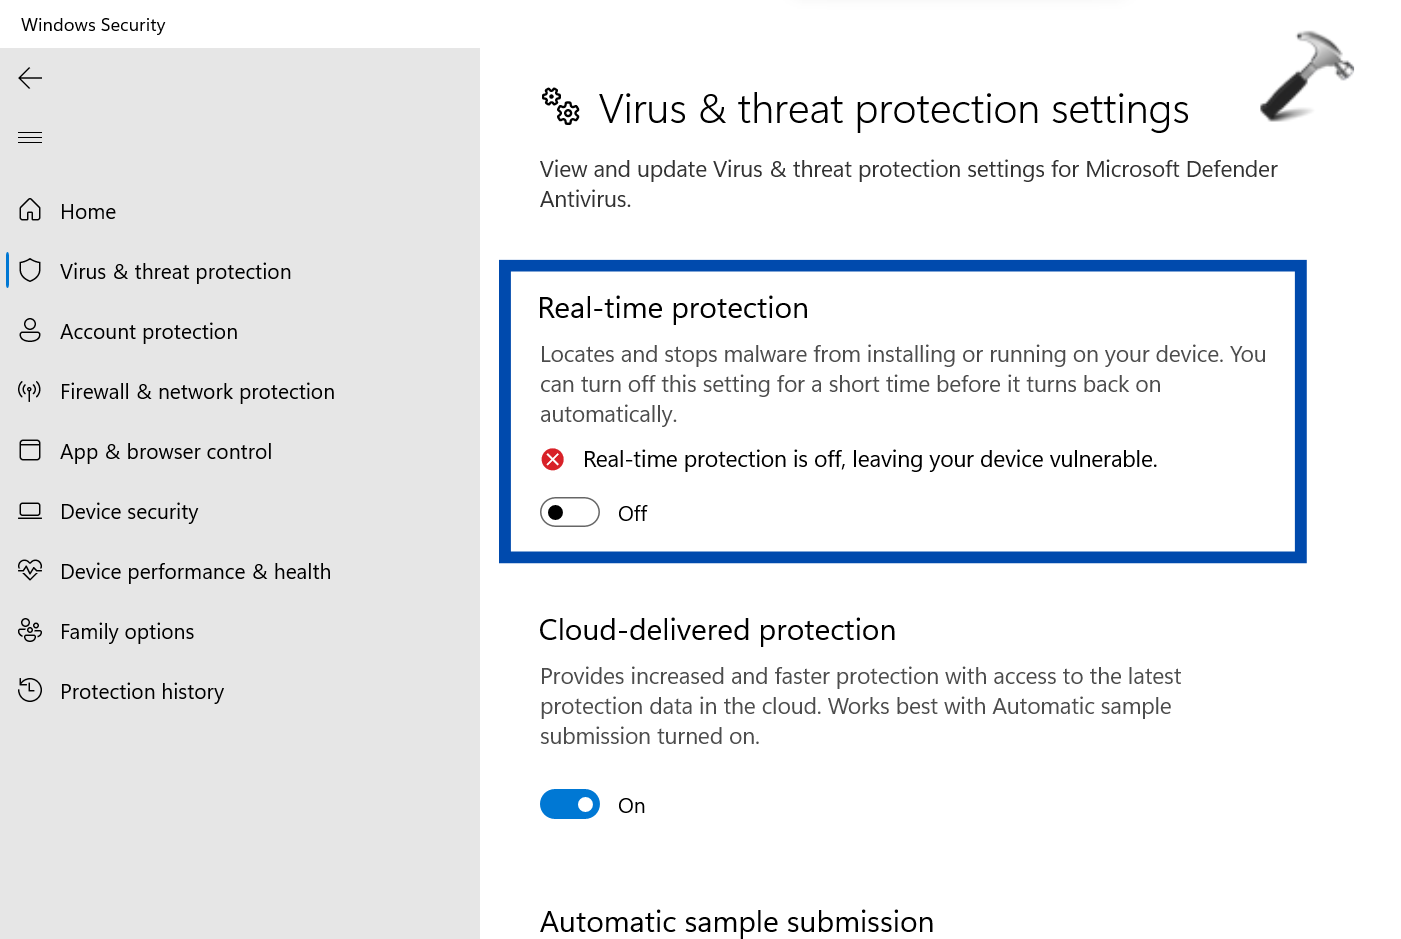
However, this is temporary only. Windows will enable this again automatically when you log in to the computer the next time.
Fix 3: Disable Windows Defender AntiSpyware Function in Registry Editor
- Press Win + R to and search for Regedit in the Run dialogue box that opens. This will open the Registry Editor.

- In the Registry Editor go to the following path.
HKEY_LOCAL_MACHINE\SOFTWARE\Policies\Microsoft\Windows Defender
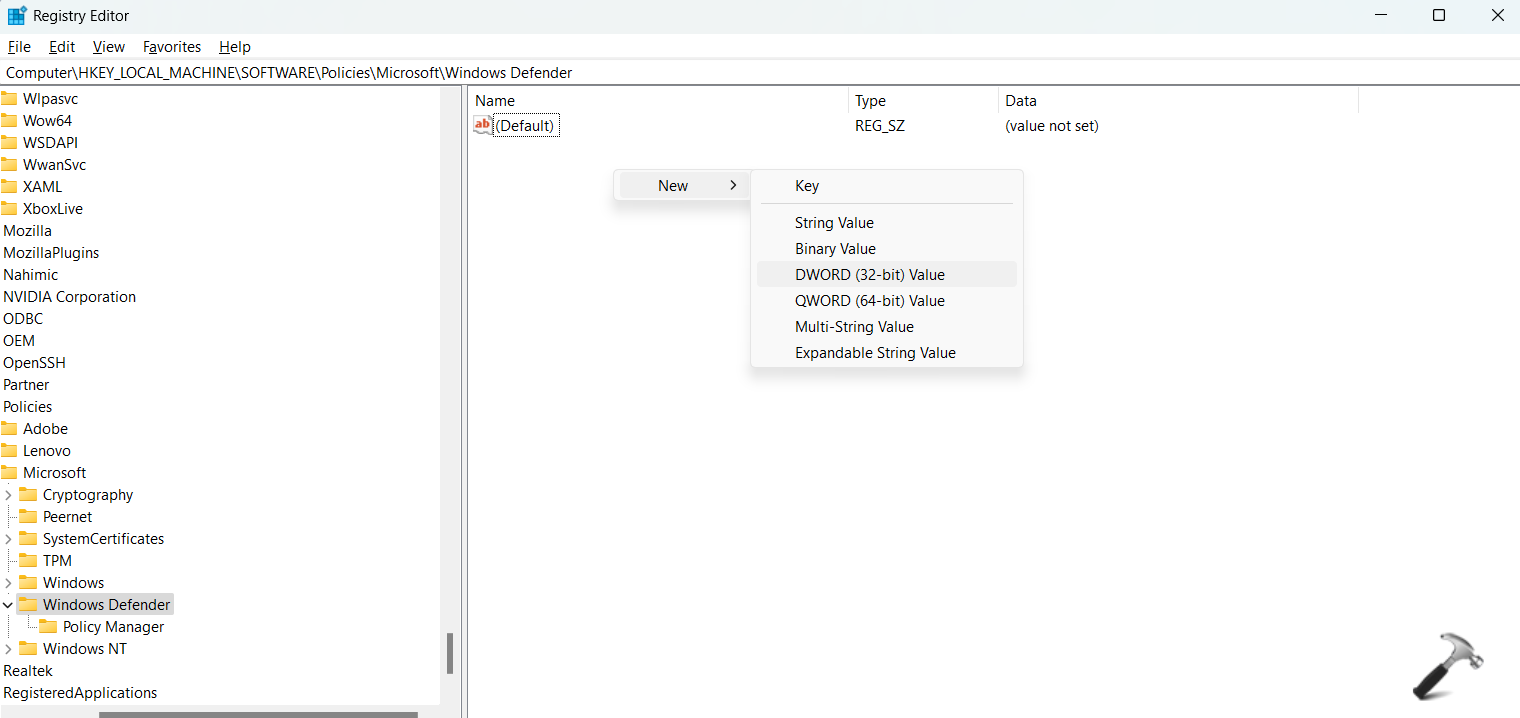
- You will find a DWORD called DisableAntiSpyware in the right panel. Double click on it to change its value from 0 to 1.
If you do not see the DWORD, create a new one by right clicking on the empty space and selecting New > DWORD (32-bit) Value. Name it as DisableAntiSpyware and enter its value as 1 in the Value Data field.

Fix 4: Prevent the Executable from Scanning its own folder
- Open the Settings app and go to Privacy & Security > Windows Security > Virus & threat Protection > Manage Settings as shown in the second fix.
- On the next screen, go to the Exclusions section and select Add or remove exclusions.
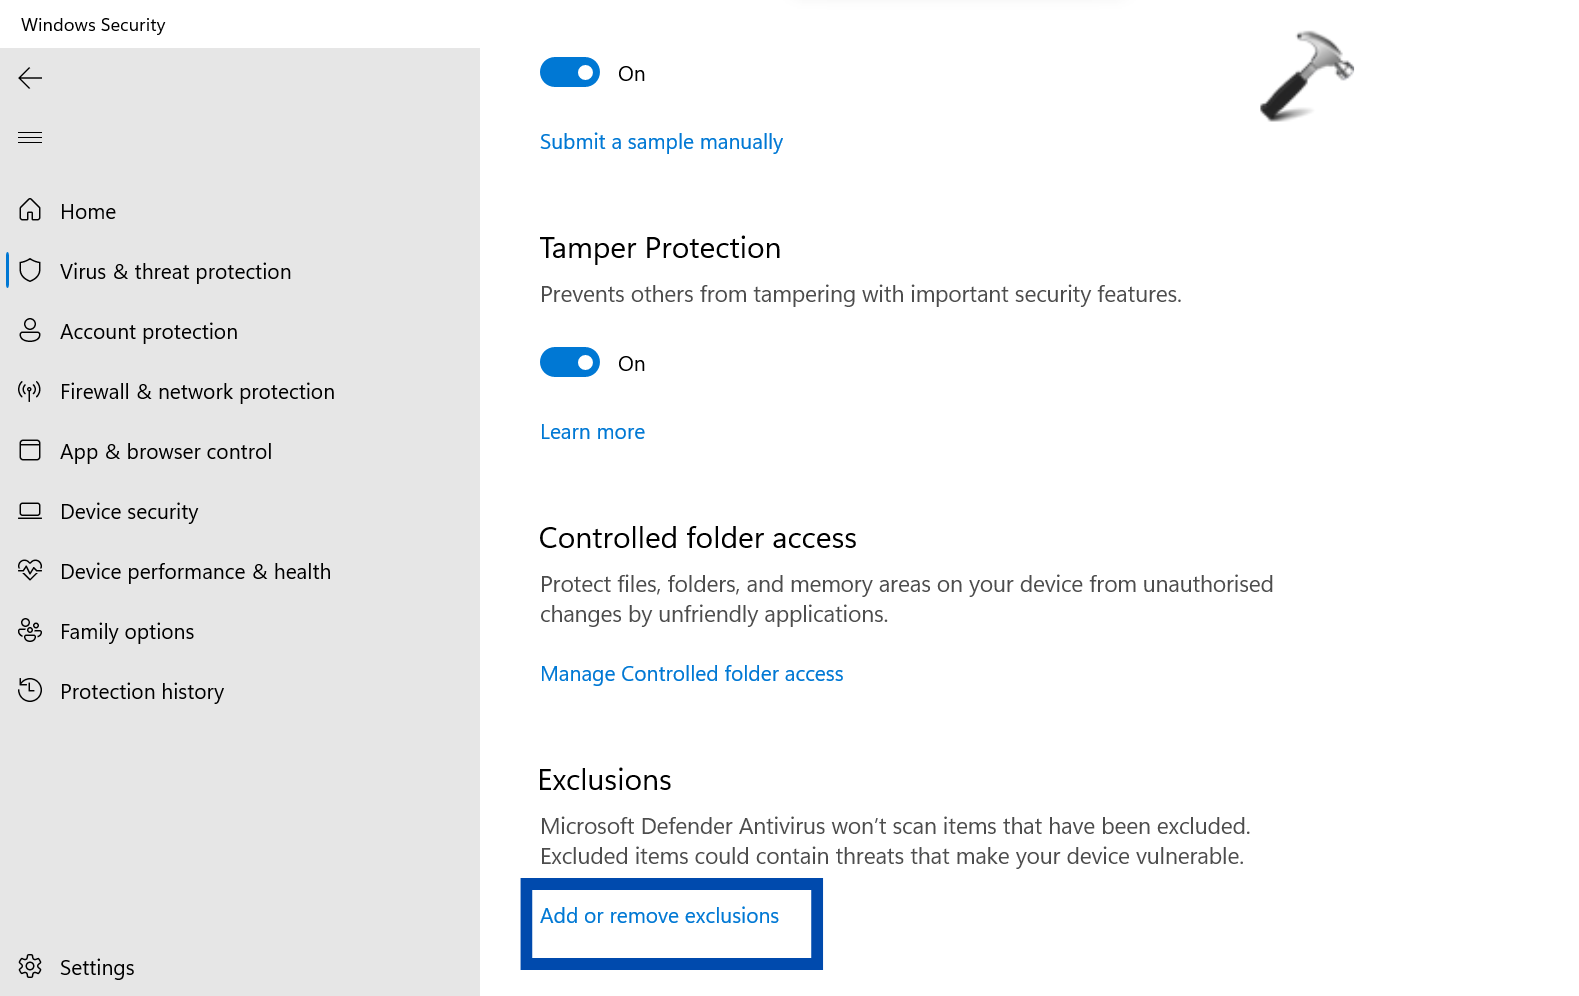
- Now, click on Add an Exclusion and select Folder.

- You will be asked to navigate to the folder now, go to C: Program Files > Windows defender and click on Select Folder. If prompted by the UAC, select Yes.
Now, you restart your computer to check if the issue is resolved.
Fix 5: Install third party Antivirus Program
This last and the easiest option means you install a new third-party antivirus program. Windows Defender will automatically disable itself upon installation. It will no longer be running in the background and slowing down your computer because of high memory usage.
You can also checkout this video fix:
Hope one of these suggested fixes solve the issue you are facing!
Also check: How to Disable Antimalware Service Executable in Windows 11.
![KapilArya.com is a Windows troubleshooting & how to tutorials blog from Kapil Arya [Microsoft MVP (Windows IT Pro)]. KapilArya.com](https://images.kapilarya.com/Logo1.svg)


2 Comments
Add your comment
Thank u so much this worked weel I tried many methods nothing worked your method worked well
^^ Glad to help 😎