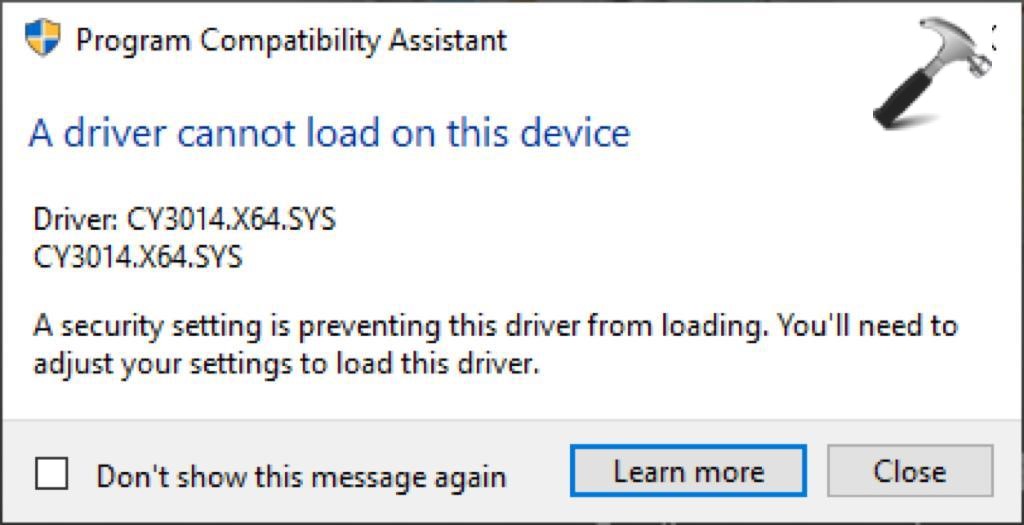
Have you received an error A driver can’t load on this device while turning on your PC? If yes, then this article will prove to be of great help to you. As we have provided a number of effective methods that are helpful if you wish to fix A driver can’t load on this device in Windows 11 issue.
Page Contents
Fix: A driver can’t load on this device in Windows 11
Method 1: Temporarily disable Memory Integrity
1. Open Settings directly or by pressing Windows + I keys together.
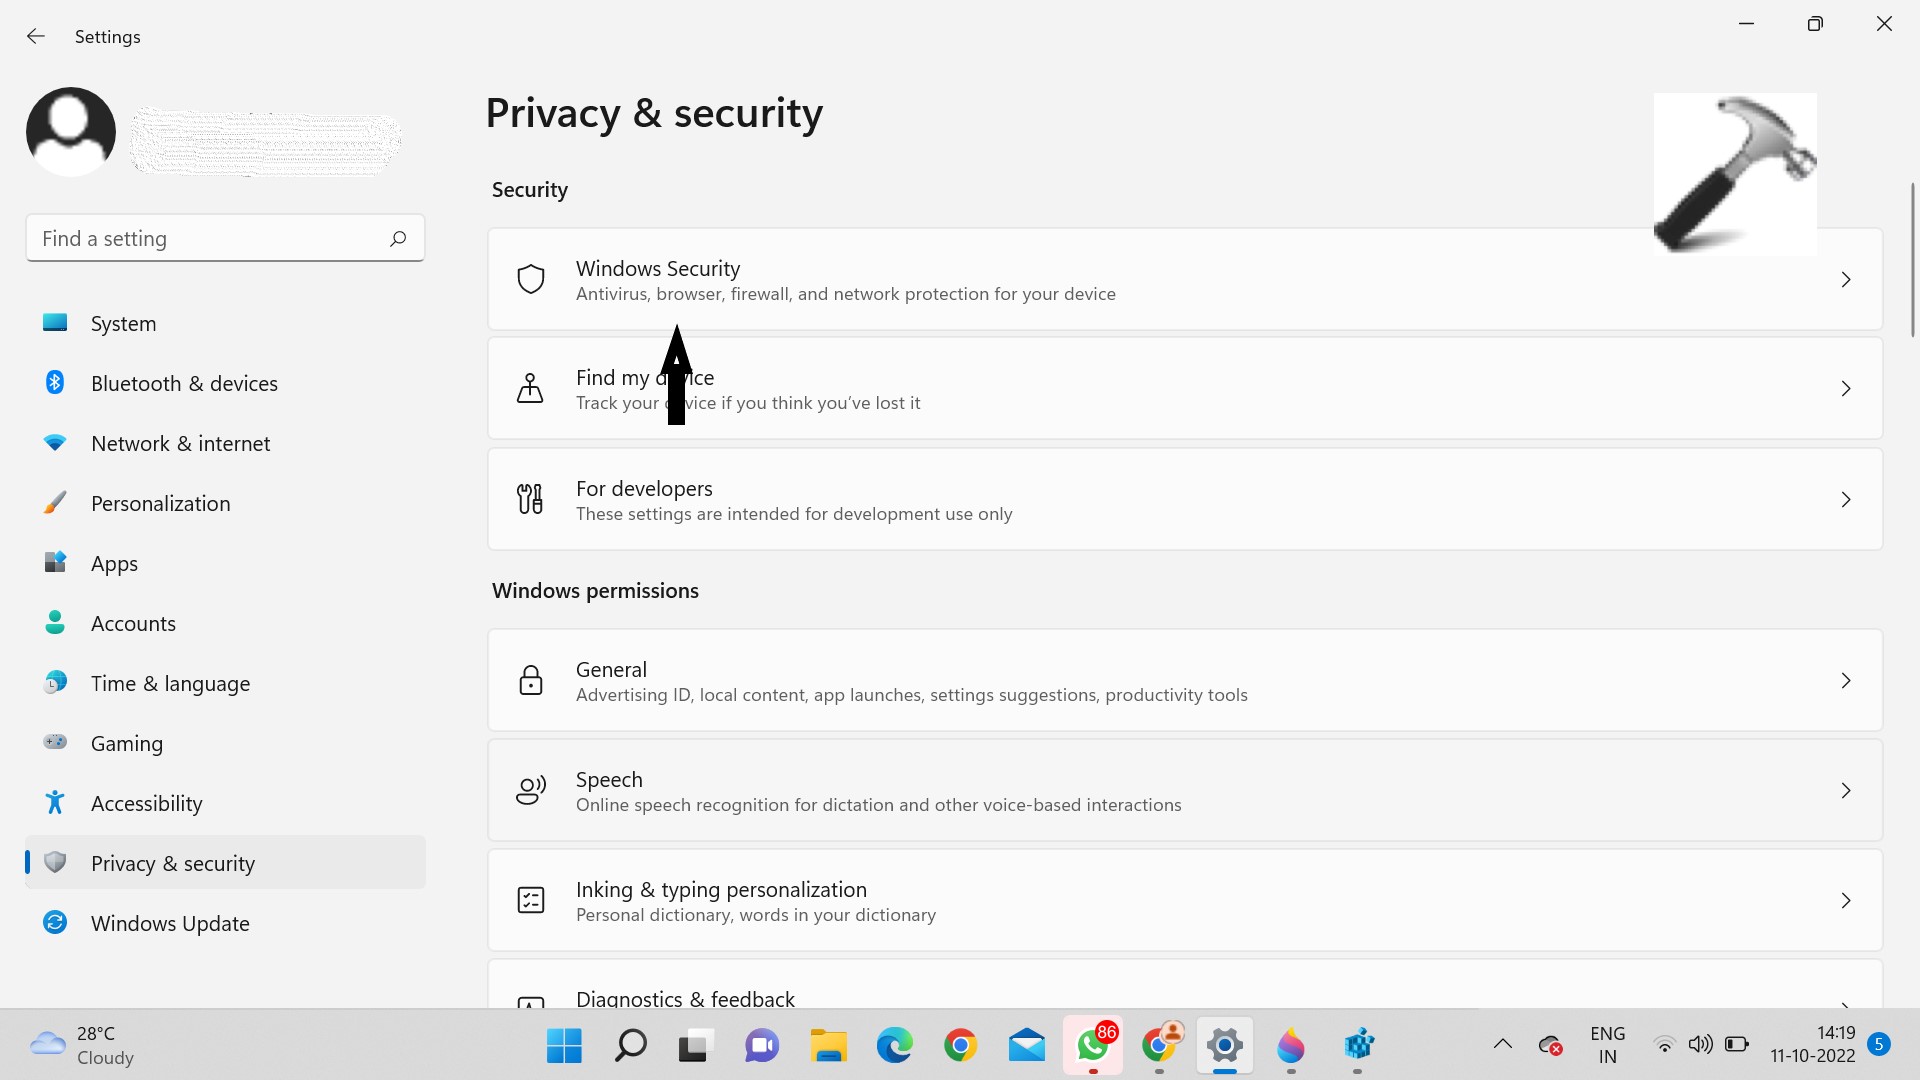
2. Select Privacy & security from the left pane.
3. Click on Windows Security from the right.
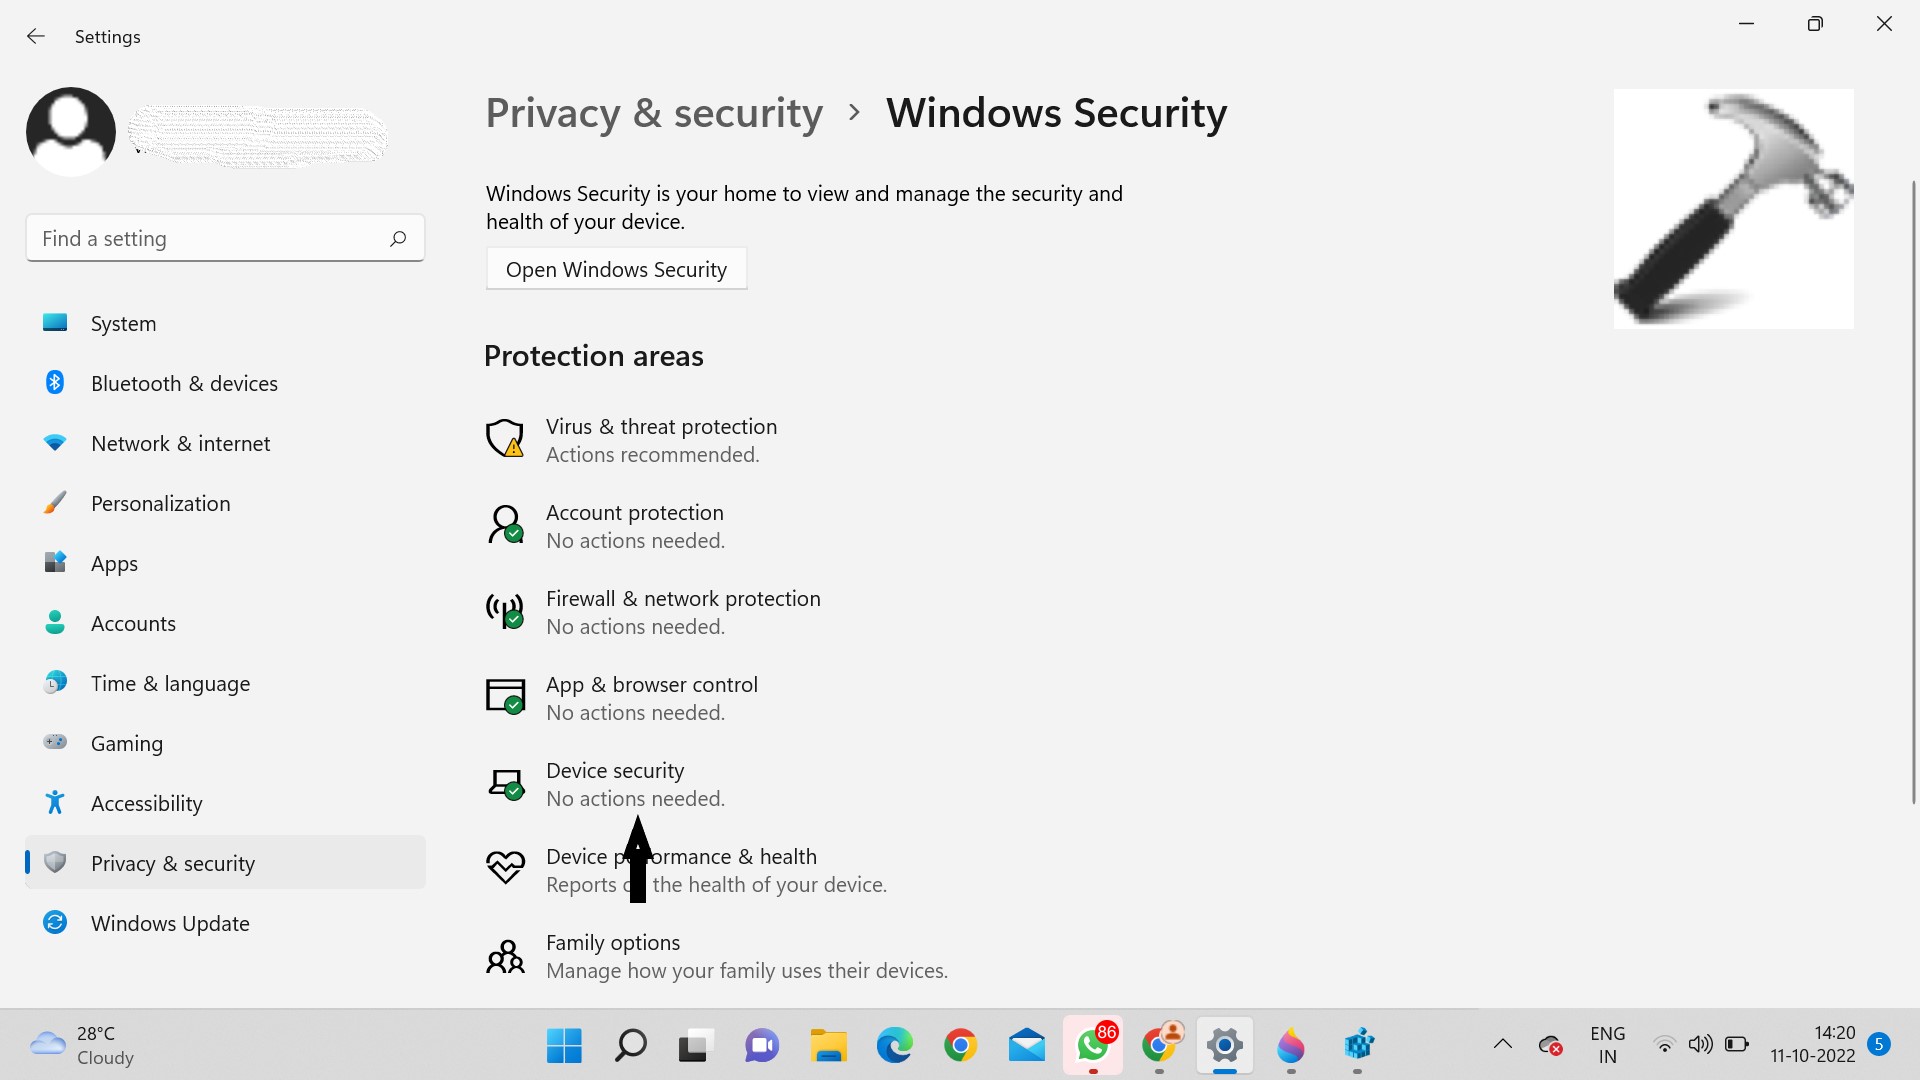
4. Now, click on Device Security.
5. Click on the Core isolation details under Core isolation.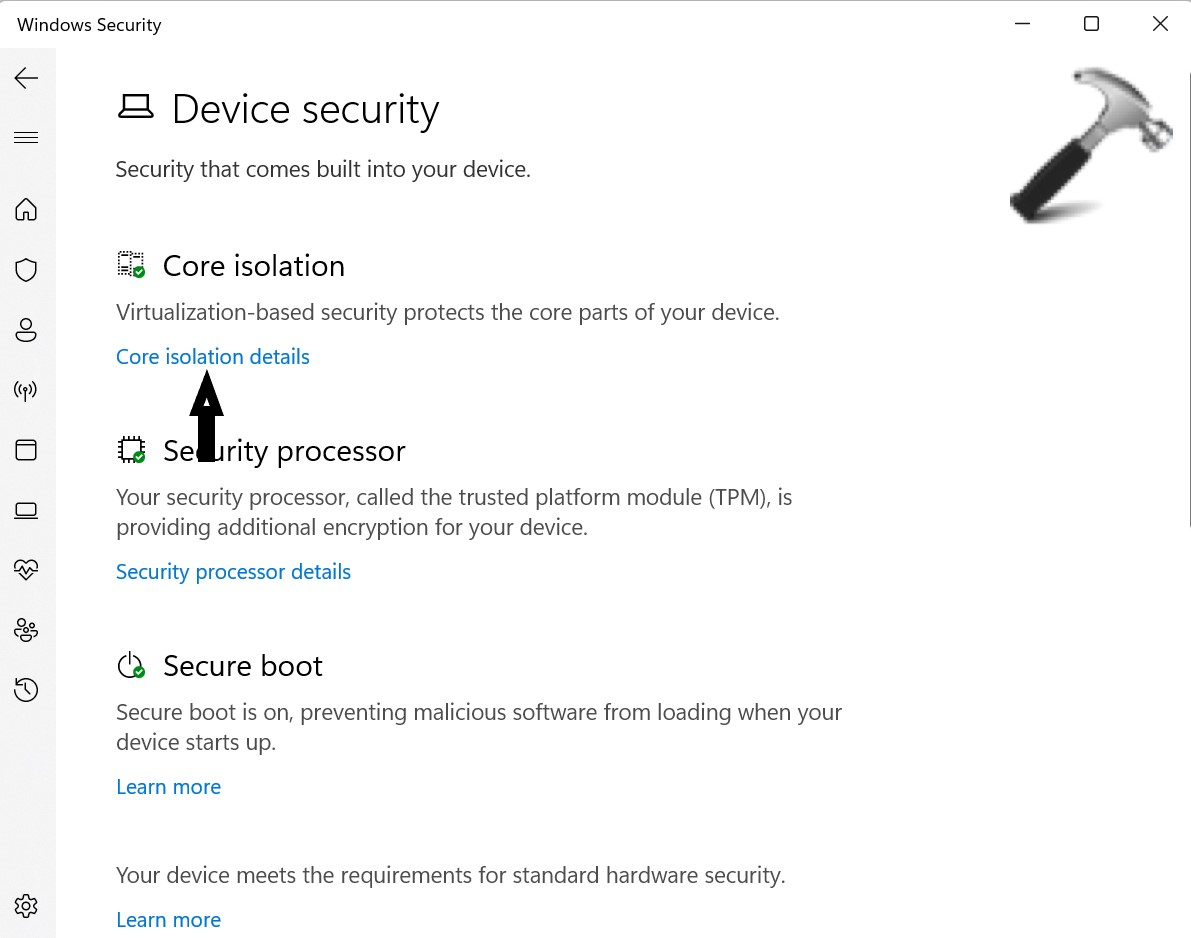
6. Now, toggle off Memory integrity.
Method 2: Using Run Program Compatibility Troubleshooter
1. Open Settings directly or by pressing Windows + I keys together.
2. Select System from the right pane, followed by selecting Troubleshoot from the left.
3. Click on Other troubleshooters.
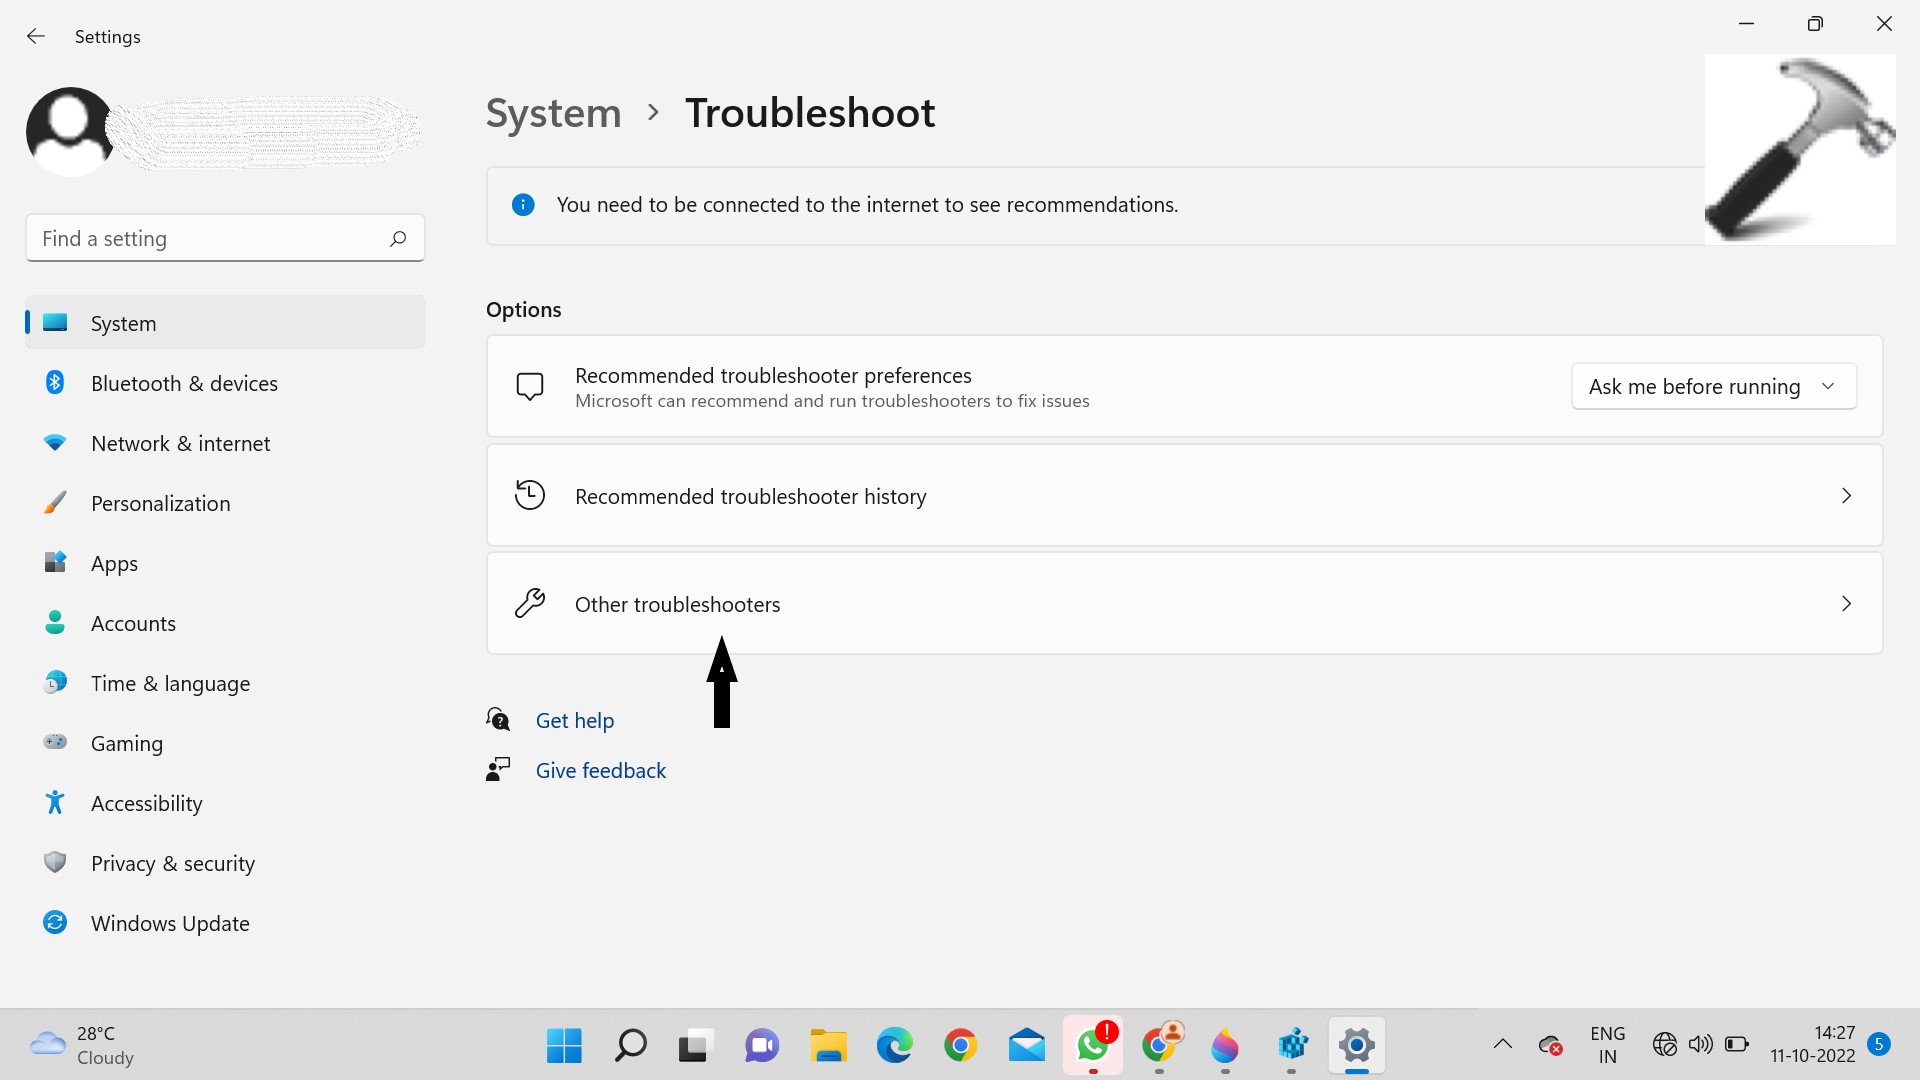
4. Now, scroll down and click on Run beside Program Compatibility Troubleshooter.

5. Follow on-screen instructions and apply any recommended fixes.
Method 3: Using Run Hardware and Devices Troubleshooter to resolve A driver can’t load issue
Tools like File Signature Verification or DirectX Diagnostic can be used to check if a driver is digitally signed. If the issue still exists after the drivers are signed then incorrect hardware settings or outdated driver can be the reason for occurrence of this issue.
Run Hardware and Devices Troubleshooter to resolve this issue. You can even manually check the recently installed hardware for faulty components. You may be even required to update the drivers manually. However, if the latest driver is installed in your device, then you can easily roll back the driver or download and install an earlier version of the driver for your device.
Method 4:By deleting UpperFilters and LowerFilters registry keys for the device
For this method, you must know the correct Class GUID, followed by deleting the registry Filter keys for the problematic device.
Follow these steps for the former process.
1. Open Run by pressing Windows + R keys together.
2. Enter devmgmt.msc and press OK to open Device Manager.
3. Now, expand the device category for which you want to view Class GUID.
4. Right click on the device driver and select Properties.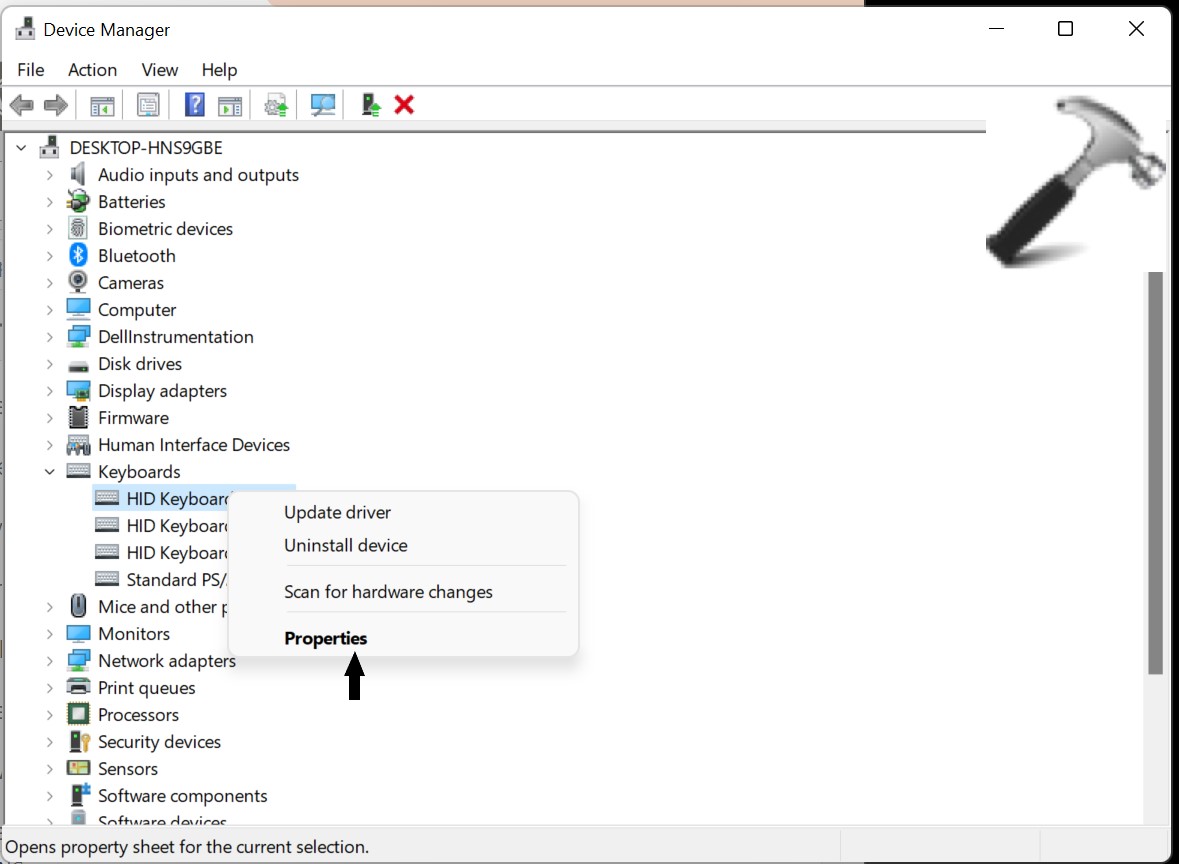
5. Click on Details tab.
6. Open drop-down menu and choose Class GUID.
Follow these steps for the latter process.
1. Open Run by pressing Windows + R keys together.
2. Enter regedit and press OK to open Registry Editor.

3. Now, copy and paste.
HKEY_LOCAL_MACHINE\SYSTEM\CurrentControlSet\Control\Class\DeviceDriverGUID

4. Right click on the UpperFilters value and choose Delete.
5. Press Yes to confirm the action.
6. Now, delete the LowerFilters value if it exists for the same GUID class subkey.
7. Exit Registry Editor when done.
8. Restart your PC.
Method 5: By Temporarily disabling Driver Signature Enforcement
Driver Signature Enforcement makes sure that only drivers that have been sent to Microsoft foe signing will load into Windows kernel during the boot process, preventing viruses from infecting the Windows kernel.
This solution normally applies to driver developers that can use various methods to load an unsigned driver and install during the development and testing. The end-users can even temporarily disable Driver Signature Enforcement and observe if the driver can be loaded or manually installed on the computer.
You can easily select any of the above mentioned methods to fix, A driver can’t load on this device in your Windows 11 system.
![KapilArya.com is a Windows troubleshooting & how to tutorials blog from Kapil Arya [Microsoft MVP (Windows IT Pro)]. KapilArya.com](https://images.kapilarya.com/Logo1.svg)


Leave a Reply