Earlier, we have seen how to enable .NET Framework in Windows 10, in following article:
How to enable .NET Framework 3.5 on Windows 10
However the PowerShell method discussed in above mentioned article requires you to specify the source files using Windows 10 ISO file. But if you’ve upgraded your earlier version of Windows to Windows 10, you may not have the source files with you. In that case, you can try enabling .NET Framework via Turn Windows Features On or Off page in Control Panel. However, when we tried to enable .NET 3.5 from there, we got this message:
Page Contents
Windows couldn’t complete the requested changes.
Windows couldn’t find required files to complete the requested changes. Make sure you’re connected to the Internet and try again.
Error: 0x800F0907
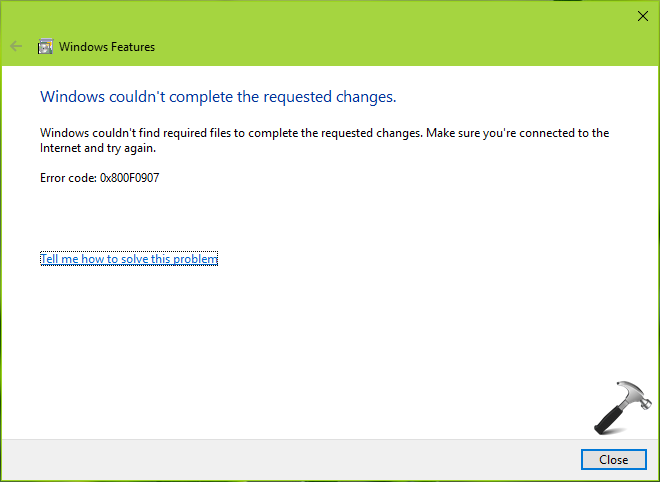
Closing the message ends operation with this message:
An error has occurred. Not all of the features were successfully changed.

When you try to enable the .NET 3.5 from Control Panel, Windows 10 try to activate the feature by installing some required Windows Updates. This issue can be easily solved by configuring the alternative source path which can help Windows to enable the feature without much relying on Windows Update. If you’ve source path located on some network share, you can use it here. This issue can also occur if your system is configured to get upgrades via Windows Server Update Services (WSUS) instead Windows Updates. Whatever is the case, the steps mentioned below will help you to fix this error.
FIX : Error 0x800F0907 While Installing .NET Framework 3.5 In Windows 10
1. Press  + R and put gpedit.msc in Run dialog box to open Local Group Policy Editor. Click OK.
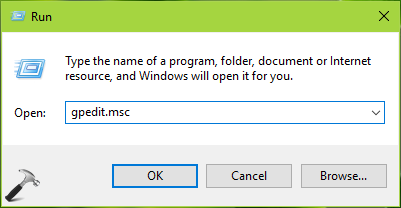
2. Next, in the Local Group Policy Editor window, navigate here:
Computer Configuration > Administrative Templates > System
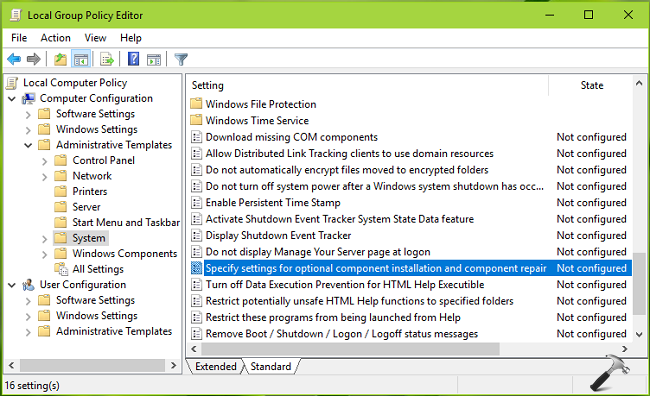
3. In the right pane of System, look for Setting named Specify settings for optional component installation and component repair. Double click on this setting to modify it:
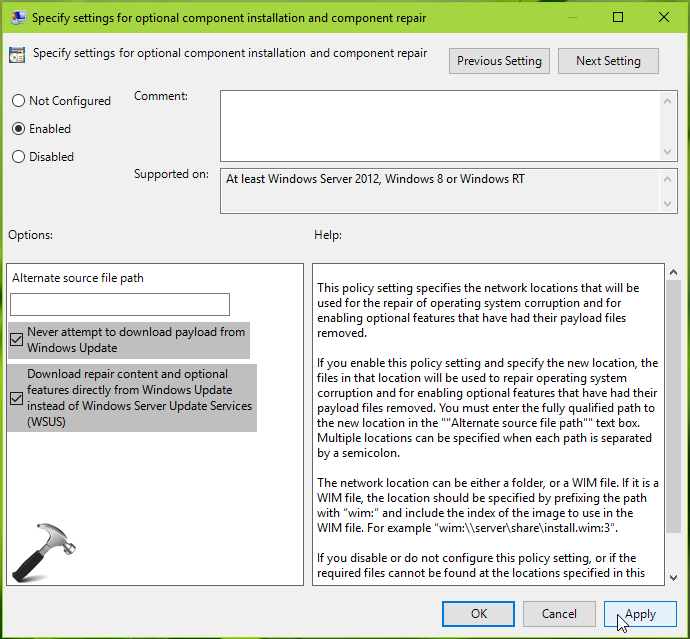
4. In the policy configuration window shown above, click on Enabled to activate the policy. Then in Options, you can specify valid alternate source file path which could have .NET Framework feature files which we’re required to enable it. You can refer policy explanation for detailed info about adding alternative source here. Also make sure Never attempt to download payload from Windows Update and Download repair content optional features directly from Windows Update instead of Windows Server Update Services (WSUS) options are checked here. Click Apply followed by OK. Close Local Group Policy Editor.
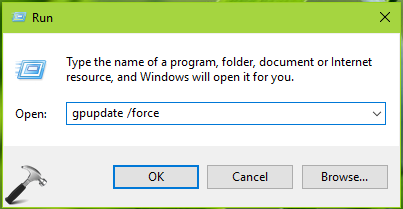
5. Press  + R and put gpupdate /force in Run dialog box to update Group Policy engine. Click OK.
After updating policies, re-try to enable .NET Framework and this time it should get activated without pushing any error code.
Hope this helps!
![KapilArya.com is a Windows troubleshooting & how to tutorials blog from Kapil Arya [Microsoft MVP (Windows IT Pro)]. KapilArya.com](https://images.kapilarya.com/Logo1.svg)


6 Comments
Add your comment
This didn’t work
This saved my day. Awesome
^^ Happy to help!
did not work for me
i am getting error
.NET Framework 3.5 installation error: 0x800024420c
Kindly suggest solution for this as tried all but nothing works
^^ Are you sure the error code is 0x800024420c?