Windows 11, the latest operating system from Microsoft, offers a plethora of features and enhancements designed to streamline the user experience. Among the various functionalities available, the ability to disable sound output device has emerged as a valuable tool for users seeking more control over their audio settings. Whether it’s to address compatibility issues, troubleshoot sound-related problems, or simply mute specific devices, the option to disable sound output devices in Windows 11 empowers users with greater flexibility and customization. This article will explore the steps required to disable sound output devices in Windows 11, enabling users to tailor their audio setup to their specific needs and preferences.
Page Contents
Disable sound output device in Windows 11
Option 1: Enable or Disable Sound Output Device in Device Manager in Windows 11
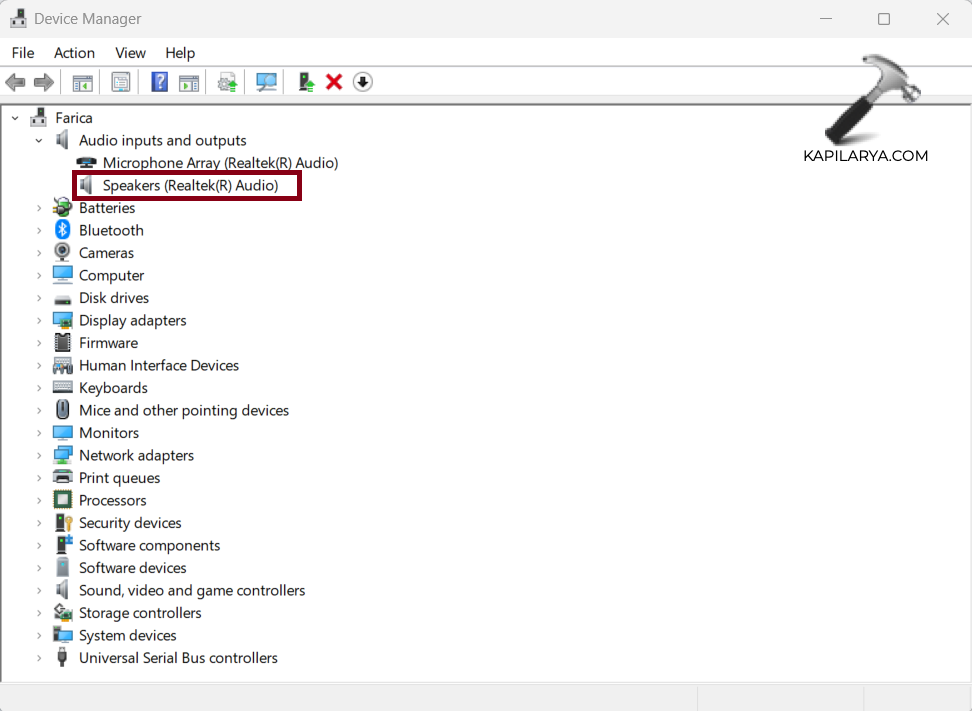
1. Open Device Manager.
2. Then click on the arrow of “Audio inputs and outputs”.
3. Next right-click on the sound output device that you want to enable/disable.

4. Choose “Enable” or “Disable” from the menu that pops out.
5. If you are disabling the sound output device, click/tap on “Yes” to confirm.
6. Close the Device Manager window.
Option 2: Enable or Disable Sound Output Device in Settings
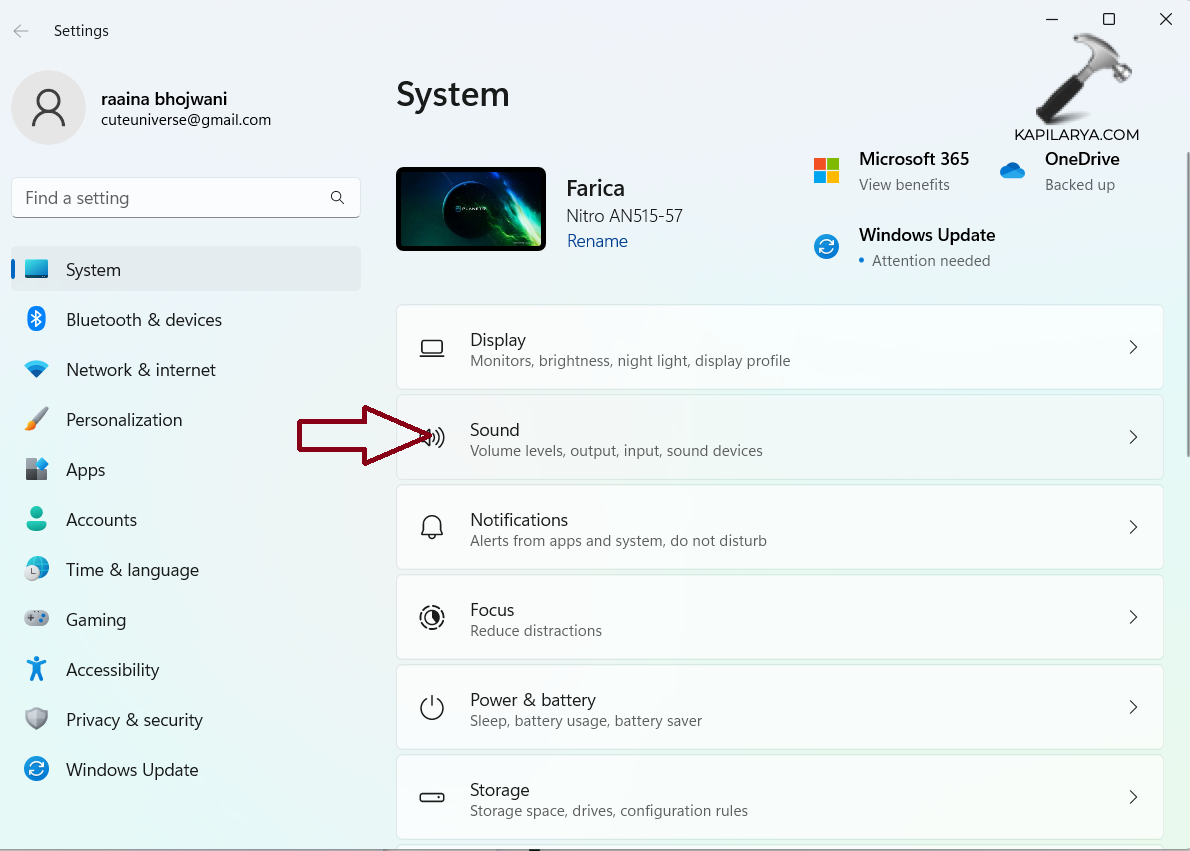
1. Open Settings by pressing the Windows + I keys.
2. Click on “Sound”.

3. Click on the device that you want to disable/enable from the list in the “Output” section.

4. Click on “Don’t allow” to disable the device (the “Allow” button enables the device).

Option 3: Using Control Panel
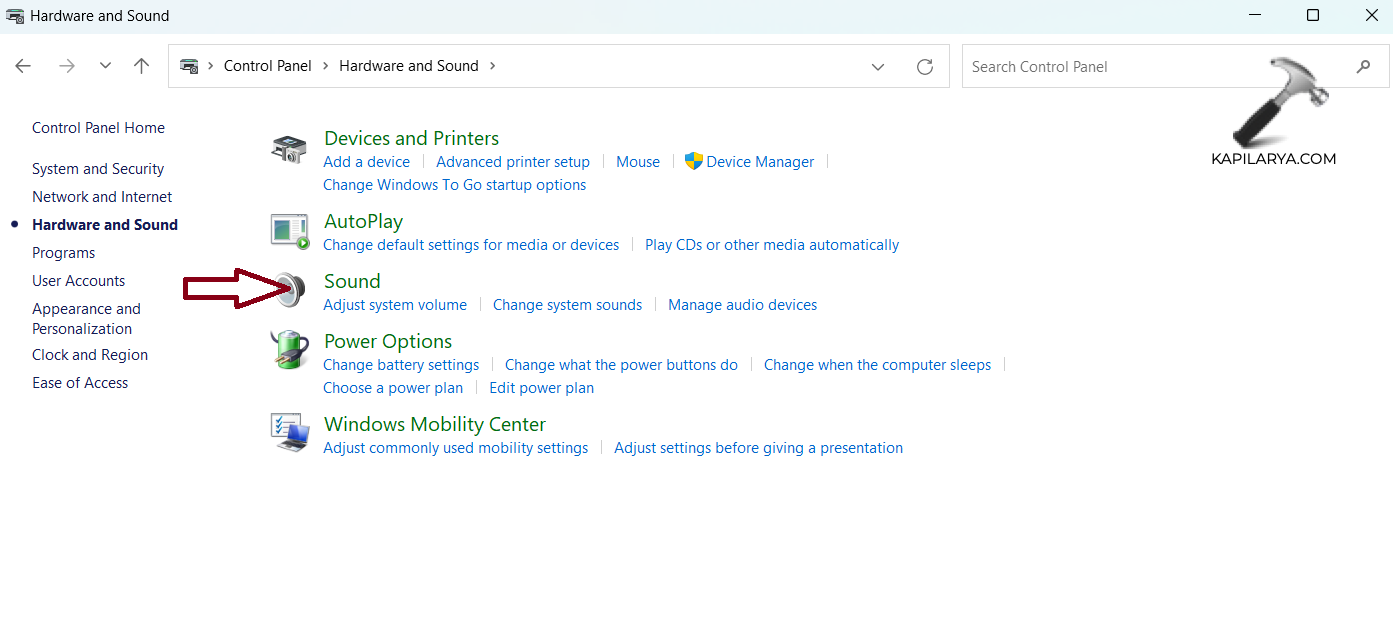
1. Open Control Panel.
2. Click on “Hardware and Sound”.

3. Click on “Sound”.

4. Right-click on the sound device and choose “Disable”.

5. Click on “OK”.
In conclusion, the ability to disable sound output devices in Windows 11 provides users with a valuable tool for managing their audio settings effectively. By following the options outlined in this guide, users can troubleshoot sound-related issues, address compatibility concerns, and tailor their audio setup to their individual preferences.
That’s it!
![KapilArya.com is a Windows troubleshooting & how to tutorials blog from Kapil Arya [Microsoft MVP (Windows IT Pro)]. KapilArya.com](https://images.kapilarya.com/Logo1.svg)


![[Latest Windows 10 Update] What’s new in KB5055612? [Latest Windows 10 Update] What’s new in KB5055612?](https://www.kapilarya.com/assets/Windows10-Update.png)


Leave a Reply