

Built-in administrators in Windows 11 serve the purpose of handling sophisticated administrative procedures as an elevated authority account. The elevated account privileges from the built-in administrator work best when protected by a secure password because it creates security vulnerabilities. The security of the system improves and unauthorized access becomes less likely by disabling the built-in administrator account.
This article explains what the built-in administrator account is before discussing security reasons. Then explore complete explanations along with step-by-step instructions for beginners using different methods.
Page Contents
What Is the Built-in Administrator Account in Windows 11?
As part of Windows 11, Microsoft establishes a built-in administrator account that system administrators need to troubleshoot and handle their devices. User Account Control (UAC) prompts do not constrain the built-in administrator account since its unrestricted system access becomes bypassable. By default, this administrator account remains hidden yet applications or troubleshooting demands may activate it for access.
Why Disable the Built-in Administrator Account?
Disabling the built-in administrator account remains the recommended choice for regular users because of these three fundamental security benefits.
1. Security risk elevates when you keep the account active because potential unauthorized users gain access when password protection is incomplete.
2. Persons who access this account can make unauthorized modifications to system settings which puts the device at risk.
3. Malicious programs seek the built-in administrator account as their primary target because this access allows them to execute harmful instructions without limitations.
4. Regular administrative accounts enabled with UAC offer a safer method for administrative task completion.
Disable built-in administrator account in Windows 11
Method 1: Use Admin Command Prompt
The Command Prompt serves as an efficient tool that lets users manage the Administrator account status under administrative privileges.
1. A user can perform the following sequence of actions: Press Windows + S and type Command Prompt then right-click the selection to choose Run as administrator.

2. Enter this command and press the Enter key.
net user administrator /active:no

Checking the “Account active No” message indicates that the account has been set to disabled status. That means you are successful in disabling the built-in administrator account in Windows 11.
3. After exiting the Command Prompt, you must restart the PC to make the changes take effect.
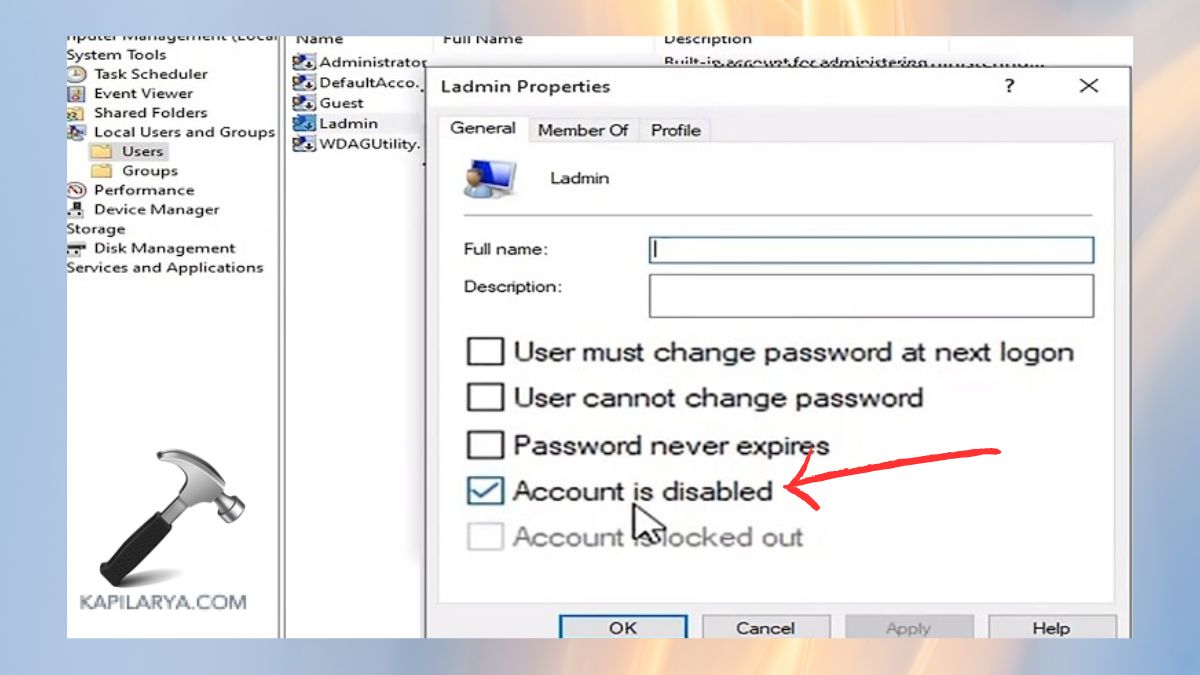
Method 2: Use Local Users and Groups
Users can handle account management through the Local Users and Groups tool using its graphical interface which includes built-in Administrator controls.
1. Users can activate the command window by pressing Windows + R followed by entering the command. Click the Enter key to proceed.
lusrmgr.msc

2. Locate and expand Users before finding an Administrator in the panel. Right-click on Administrator and select Properties. To disable the account click Account is disabled. Click Apply, then OK.
Complete the shutdown procedure by restarting your PC to implement the modifications you made in Local Users and Groups.
Method 3: Disable Default Admin Account via Powershell
User account management becomes simpler through the Windows PowerShell system. You can disable the Windows 11 default Administrator account through one PowerShell command.
1. From the Windows key and X hotkey you should select Windows Terminal (Admin) or PowerShell (Admin) from the options.

2. Enter this command then press the Enter key. Replace “Name” with your admin account’s name.
Disable-LocalUser -Name "Administrator"

3. You can verify account disability by executing this command. The command should display that disabled status.
Get-LocalUser -Name "Administrator"
4. Exit PowerShell to end the program and restart your computer to activate the changes made.
Method 4: Use Group Policy Management Editor
Enterprise users who operate Windows 11 Pro can use the Group Policy Management Editor tool to discover another method for locking the built-in Administrator account.
1. On your keyboard press Windows + R followed by entering the below-given command and pressing Enter.
secpol.msc

2. Open Local Policies from the left-hand side menu then select Security Options.
3. Double-click Accounts: Administrator account status. Follow the sequence Select Disabled > Click Apply followed by hitting OK.

Enforce your system reboot operation to apply the changes.
Method 5: Disable Built-in Administrator via Command Prompt at Boot
You can disable the Windows 11 built-in Administrator account from Command Prompt at boot even when Windows prevents normal access.
1. Select Restart by tapping Shift then left-clicking the Start menu. Select Troubleshoot > Advanced options > Command Prompt.

2. Enter the command through the keyboard then press the Enter key.
net user Administrator /active:no
3. Close the Command Prompt terminal execution then restart your computer system.
Your PC restarts after which the Administrator account disables automatically to enhance system security.
#1 Why should I disable the built-in administrator account?
Security benefits greatly when you disable the built-in administrator account because this prevents unauthorized users from accessing your system.
#2 Can I re-enable the built-in administrator account later?
The directions provided in this guide enable you to restore access to the account whenever needed through Command Prompt or PowerShell.
#3 Is it safe to disable the administrator account?
The account can be disabled safely under the condition your system contains another administrator-level user account.
#4 What if I can’t access my system after disabling the administrator account?
When unable to access your system you should use the recovery menu to run Command Prompt at boot in order to restore your account.
That’s it!


Leave a Reply