We all know that after a system failure, Windows 10 attempts to reboot itself. We have also seen some Blue Screen of Death (BSOD) stop errors, where system restarts automatically when it crashes. For some users, it may be okay that machine recovered itself after the reboot. While in some cases, system condition may get even more worst in successive restarts. This is the case where system has to avoid restart but it can’t.
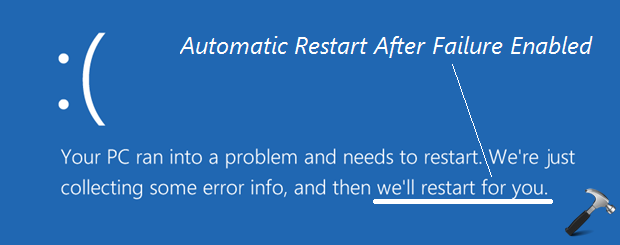
Well, by default, Windows have the policy of keep restarting itself until it is configured for not doing so. So if the system is keep restarting in crashes, users often disconnect it from the power supply. This should be avoided as it may cause critical issues like malfunctioning of hard drive or any other hardware component corruption. Hence, we should configure our system to such that when the crash happens, it avoid automatic reboot. By so, we can make a manual reboot to check if the problem has been resolved or not. If it is resolved, we’re good to go. If it is not resolved, we can do crash analysis and take necessary steps to fix it.
If you’re new to Windows 10 or computing, here is the step-by-step process to disable automatic restart after failure:
How To Disable Automatic Restart After Failure In Windows 10
NOTE: Disabling automatic restart after failure will let Windows freeze on the error message (like the one shown above) for infinite amount of time. You can reboot manually after reading the error message completely, so that troubleshooting steps can be taken out.
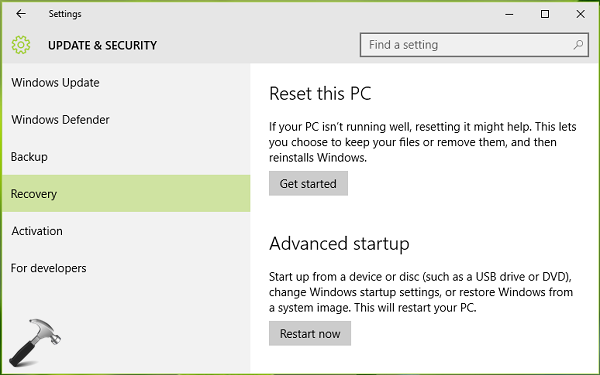
1. Open Settings apps and navigate to Update and security -> Recovery. Then click Restart now button under Advanced startup options.
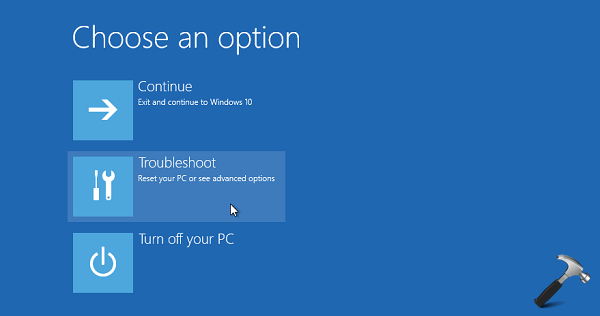
2. Now your system will restart and you’ll see following screen, where you’ve to opt for Troubleshoot option. Click on Advanced options on next screen after this.
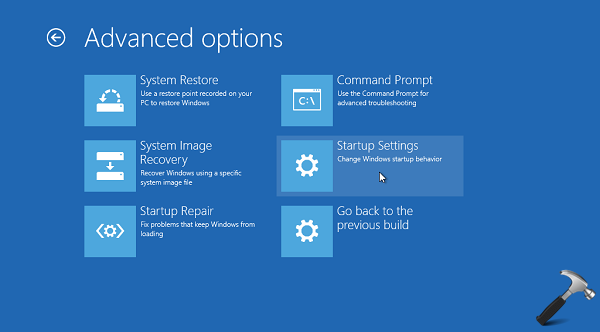
3. Then in the Advanced options screen, choose Startup Settings entry.
4. Moving on, click Restart button on the next screen:
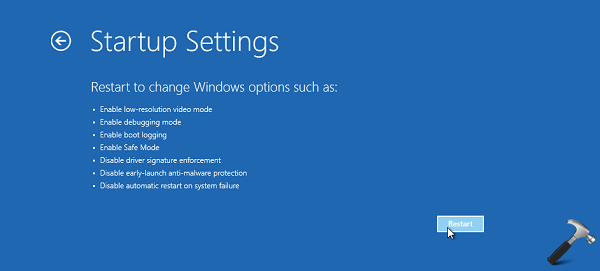
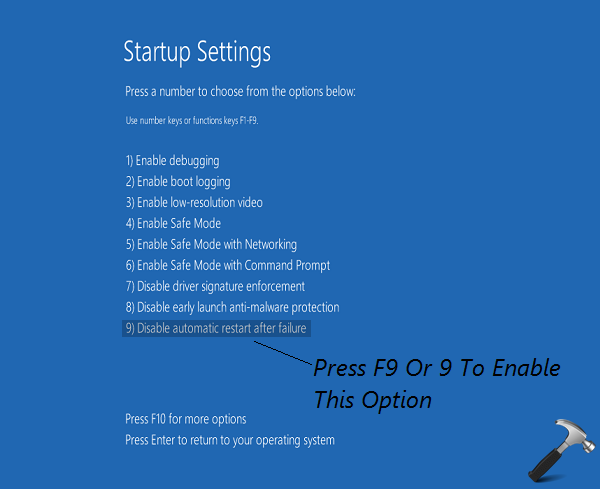
5. Finally, in the Startup Settings screen shown below, press F9 or key 9 to disable automatic restart after failure. Now your PC will restart, making the setting effective.
That’s it!
![KapilArya.com is a Windows troubleshooting & how to tutorials blog from Kapil Arya [Microsoft MVP (Windows IT Pro)]. KapilArya.com](https://images.kapilarya.com/Logo1.svg)


4 Comments
Add your comment
Well, a customer will only come here with a query when he encounters WBOD and it keeps looping. Then, how in the world can he go to Control panel and change these settings.
Its like saying “When the world collapses, go back and re-work on how to avoid it”.
As an end-user, we need real-world solutions. Now, I’m stuck in a non-ending loop and I can only type “Esc” and enter Function keys option in my HP 4540s laptop which now as a BSOD “Critical_Service_Failed” error.
And, just like others, I had updated my Win7 Pro to Win10, so I have neither the Win7 OS not the Win10 OS, nor have I created any backup, nor am I able to connect to internet simply bcoz my network needs log-in before connecting ! And, on top of that, I have some 10 GB data in C drive as well (bcoz my other D drive was loaded fully) ! So, now I am looking for a solution ?
^^ FYI, this is a how-to guide to let users proceed with option available to them 😊 In your case, since you can’t boot inside OS, you need to use recovery media to boot into Advanced Recovery Options: https://www.kapilarya.com/boot-into-system-recovery-options-windows-8.
Hi Kapil,
I had a BSOD on Windows 10 ThinkPad T420 and just used your directions above so I can read the error code or take a picture of the QR code, otherwise it just goes way too fast and you can not read it, much less grab your phone and snap a pic. Your directions are pretty clear, with screen shots and worked and I just wanted to say THANK YOU for posting this! Hope you do get some business out of this – posting advice – as it is a great and organic way to advertise. Kudos!
^^ Glad we could help 😎