If you’re looking for a way to push a default wallpaper to your clients, then this article is for you. Using Group Policy on domain controller or your Windows Server, you can do this very easily.
All you need to do is to create a new GPO and apply the Desktop Wallpaper policy setting under it. Here are the step-by-step instructions, which you can easily follow and make this working.
Deploy Desktop Wallpaper Through Group Policy In Server 2019
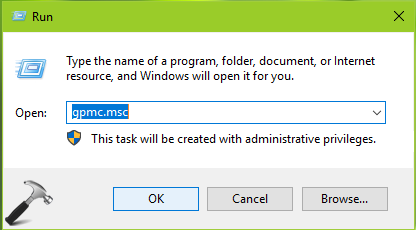
1. Press  + R and put
 gpmc.msc in Run dialog box to open Group Policy Management snap-in. Click OK.
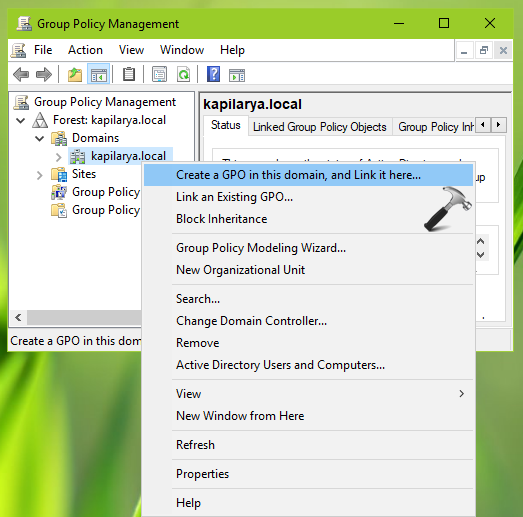
2. In Group Policy Management window, right click on the domain and select Create a GPO in this domain, and Link it here. If you already created a GPO, then you can use Link an Existing GPO instead. Anyway, I selected the former option for this guide.
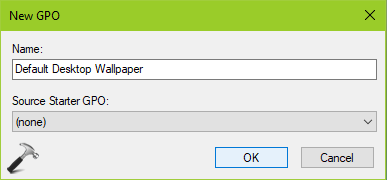
3. Next, type a convenient and relevant name for this GPO and click OK.
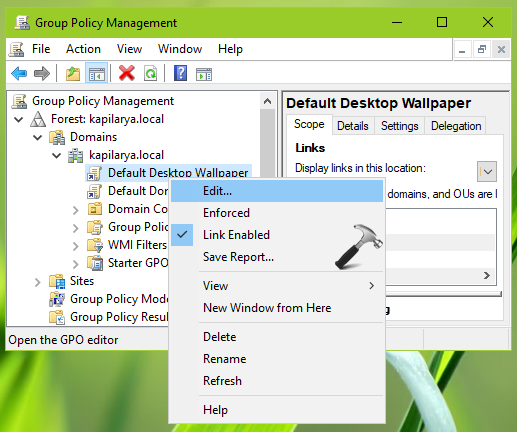
4. Now click on the newly created GPO, and it the right pane it should be corresponding for authenticated users. In case if you want to apply the GPO for selected users, you can do it here. Then right click on the GPO and select Edit.
5. In Group Policy Management Editor window, navigate to following location:
User Configuration > Policies > Administrative Templates:... > Desktop > Desktop
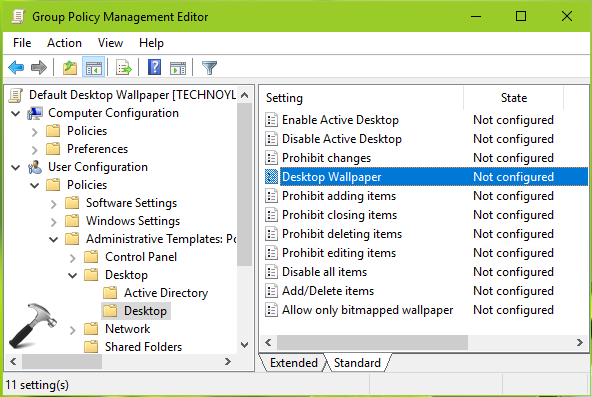
6. Under right pane of Desktop, look for the Setting named Desktop Wallpaper. Double click the policy setting to modify it:
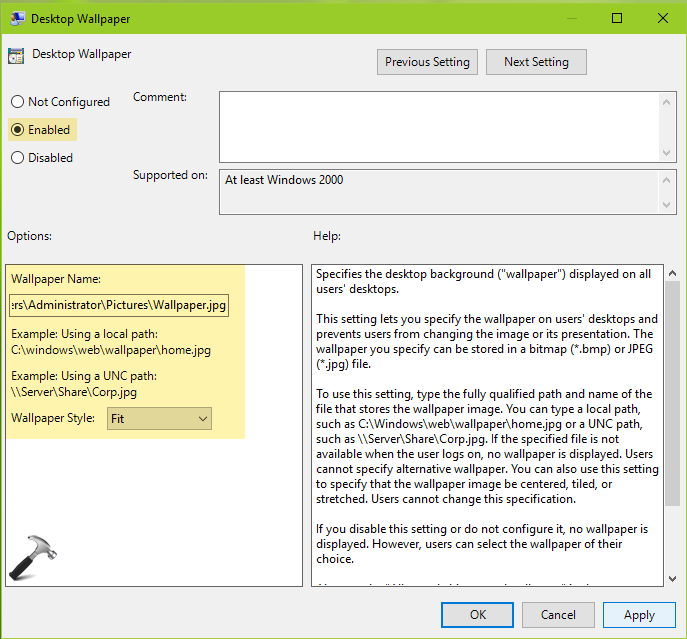
7. Set the policy setting to Enabled. In Options, you can provide path to the default wallpaper. It should be readable location for the wallpaper, existing on your domain controller or server. Additionally, you can set the wallpaper system from drop-down. Click Apply, followed by OK. Close Group Policy snap-in.
8. Press  + R and put
 gpupdate /force to refresh Group Policy engine.
Clients may need to log out and then login back to see the default wallpaper applied via Group Policy.
That’s it!
![KapilArya.com is a Windows troubleshooting & how to tutorials blog from Kapil Arya [Microsoft MVP (Windows IT Pro)]. KapilArya.com](https://images.kapilarya.com/Logo1.svg)


Leave a Reply