Sometimes, there are applications or games that are not accessible in your country. However, they are available in other countries. In that situation, you may like to change Microsoft Store country or region in Windows 11. While setting up Windows, users are usually asked to setup their countries too. The country that you set gets assigned to the Microsoft Store too.
Thus, in case, you change the location to any other country, then the same will be reflected in the Microsoft Store too. You can change to your country in the following manner. In this post, we are going to discuss the easiest way to do it in Windows 11.
Before changing Microsoft Store country or region:

Change Microsoft Store Country or Region in Windows 11
For reference, the current location is United States here and the currency is US dollars. It could be any other country. We are just taking an example of India here.
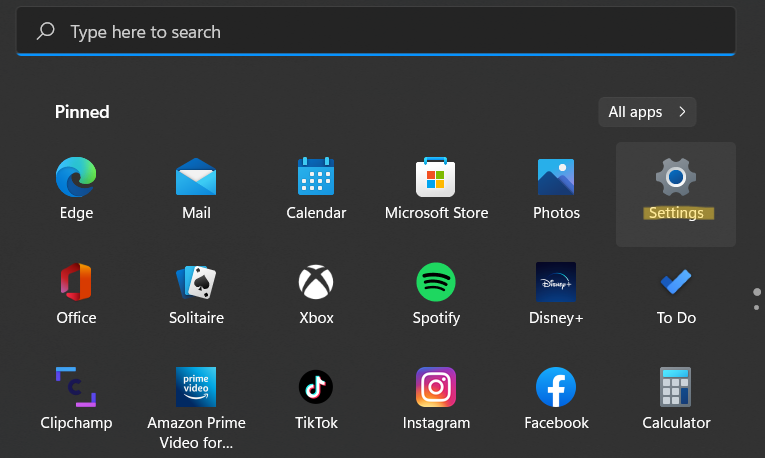
1. In the first place, click on the Start tab and then, tap on Settings.


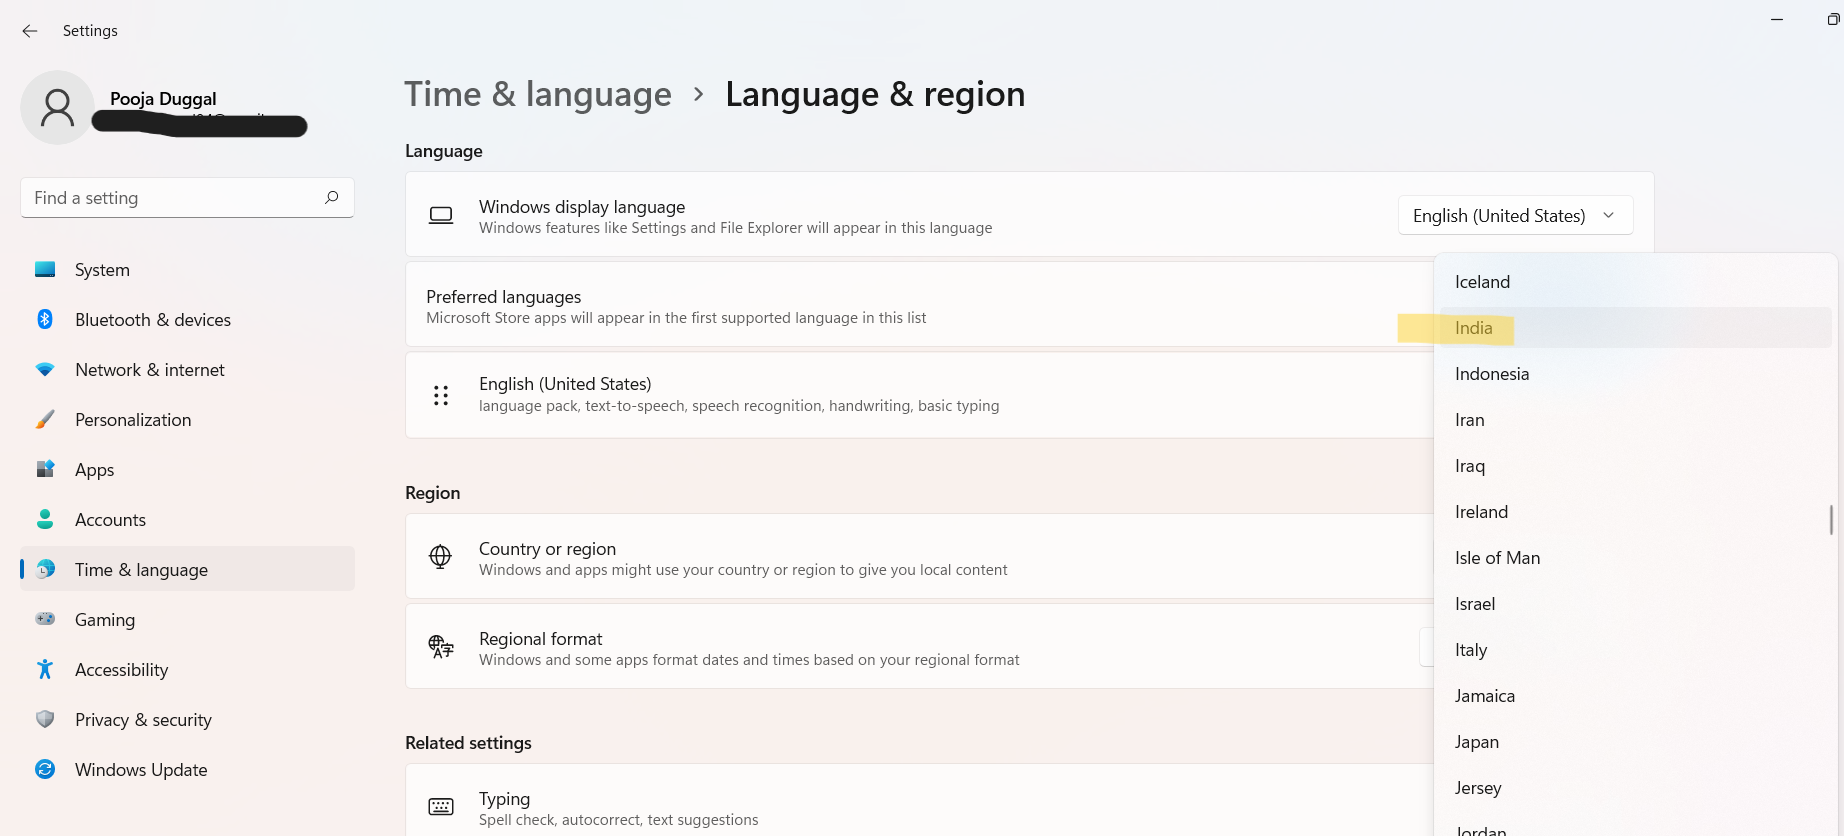
2. Once done, choose the Time & language tab present on the left side and then, select Language & region.

3. In the Region tab, look for the country or region option.

4. Now, you need to click on the drop-down arrow linked to that section.
5. After that, choose the target country from the menu. For reference only, we are choosing India as the target country here. You can change to your country in the same manner.

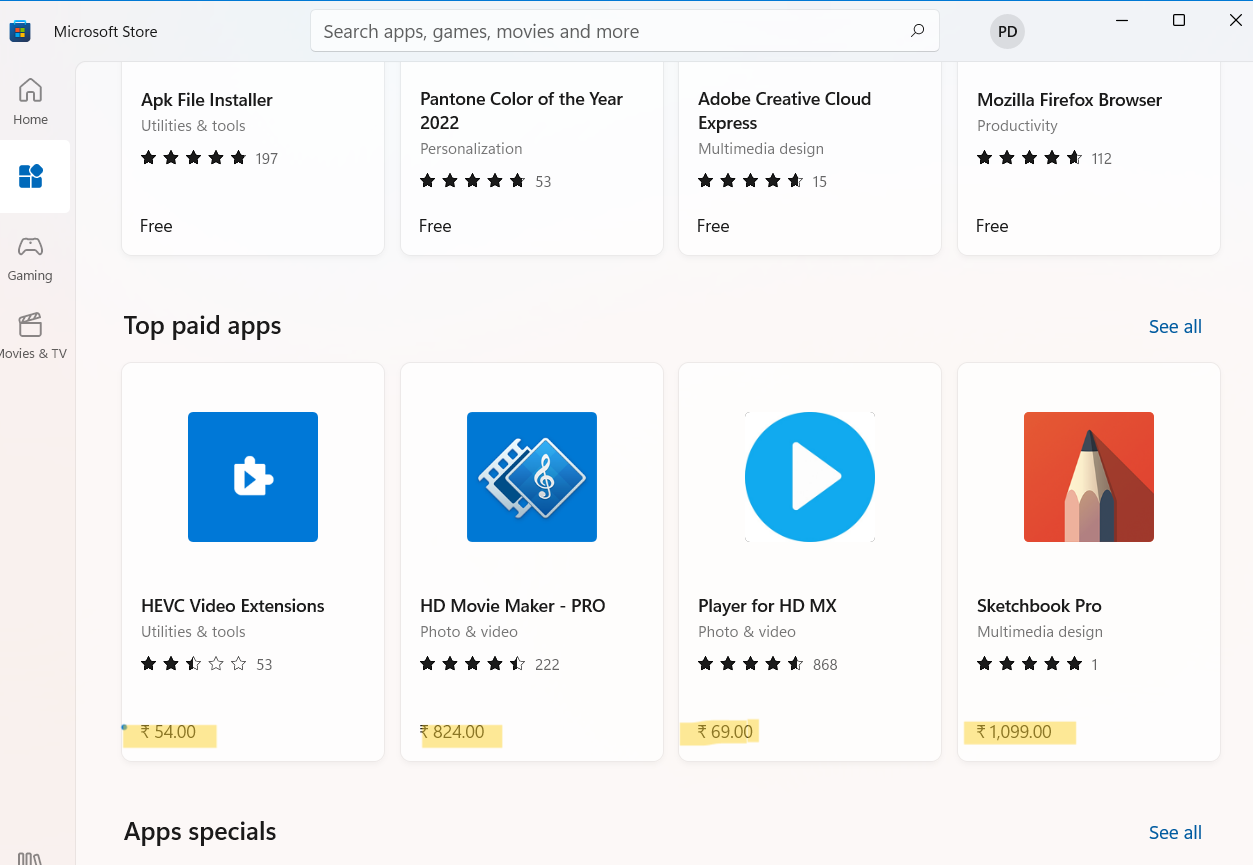
Next, open Microsoft Store again. If it is already open, then close it and open again. Now, your country will be changed to the preferred country. To confirm this, you can look for any paid application and then check out its currency symbol. It will be changed to INR from US dollars. This means that you have successfully changed the country or region in Windows 11 PC.
After changing Microsoft Store country or region:

As compared to earlier, the price for the paid apps will be shown in INR instead of US dollars now.
So, this is how users can change the country or region of Microsoft Store in Windows 11.
![KapilArya.com is a Windows troubleshooting & how to tutorials blog from Kapil Arya [Microsoft MVP (Windows IT Pro)]. KapilArya.com](https://images.kapilarya.com/Logo1.svg)


![[Latest Windows 10 Update] What’s new in KB5055612? [Latest Windows 10 Update] What’s new in KB5055612?](https://www.kapilarya.com/assets/Windows10-Update.png)


Leave a Reply