On Kapil Sparks™, we’ve discussed maximum customization possibilities in Windows 8 with the help of Registry Editor in our past. Yet there are a lot to be still covered. Customization is my first priority to Windows and I love to do it with my Windows 8.
As we all know that imageres.dll is the file located in root directory of Windows and this file is responsible for all icons held associated to Windows. So using it, you can customize default icons with other ones present in that same file. This key concept will illustrate the tweaking of this article.
In simple words, the default Explorer drive icons looks like this:
![]()
And we would replace the drive icons with our desired images, so we have the modified version as per:
![]()
Now here is the how to do this…
How To : Change Drive Icons In Windows 8.1
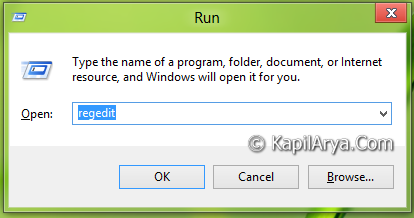
1. Press  + R and put regedit in Run dialog box to open Registry Editor (if you’re not familiar with Registry Editor, then click here). Click OK.

2. Navigate to this location:
HKEY_LOCAL_MACHINE\SOFTWARE\Microsoft\Windows\CurrentVersion\Explorer
![]()
3. In the left pane of this location, create a new key by right click -> New -> Key. Rename it as DriveIcons. Create a subkey of DriveIcons, name it as the drive for which you’re modifying the drive icon. For example, let us take it C. Now finally create a subkey of the key created previously, and name it as DefaultIcon. So, finally the registry location resulted should be HKEY_LOCAL_MACHINE\SOFTWARE\Microsoft\Windows\CurrentVersion\Explorer\DriveIcons\C\DefaultIcon.
4. Moving on, come to right pane of DefaultIcon key, modify the Default string with following data:
%SystemRoot%System32imageres.dll,158
Here %SystemRoot% is the Windows root directory, System32 is the folder containing Windows DLL and necessary stuff and imageres.dll is the file which holds all the icons for a Windows OS. 158 is the number of image present at position 158 in imageres.dll.
![]()
So you can different number to get different icons for the drive, otherwise follow step 5.
5. To display your own image for the drives, create a .ico format file of your image and put the image location at Value data of step 4. Close the Registry Editor and reboot to see your desired icons as drive icons. In case you want to restore default drive icons, just delete the DriveIcons key created in step 3 and reboot hopefully to get things reset.
That’s it!
![KapilArya.com is a Windows troubleshooting & how to tutorials blog from Kapil Arya [Microsoft MVP (Windows IT Pro)]. KapilArya.com](https://images.kapilarya.com/Logo1.svg)


9 Comments
Add your comment
nice tutorial kapil :) :) :-)
I love this kind of articles.. happy to see on your site .thankx
Glad to see yet another clean post.. I changed the icon for my D now will be done it for F also. Thanks Kapil for putting up :)
thank you… nice find
Seems like I have to take ownership of that key Lol :P
^^ You don’t need to take ownership of that key ;)
OK.. if we have to take its ownership what we’do ?
^^ Here it is :
http://www.kapilarya.com/aio-take-restore-ownership-from-trustedinstaller-for-a-file-folder-drive-registry-key-in-windows-8
Gud method to follow.. lastly no need to use killler appps to get this .thank you :)