Many of you might be using Lync application available with Office 2013, to join meetings, conferences on the go. Although Lync is now pronounced as Skype for Business, but whatever it is, I find the Lync application much convenient for this joining conferences.
Recommended : Official Microsoft Outlook App is now available for your iPad
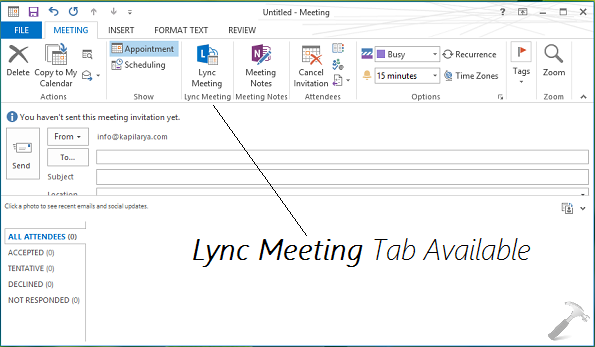
While creating Lync meeting invitation for your colleagues with Outlook 2013, there are some known issues you may came around even if you’ve installed Lync component with Office 2013. For example, when you open the new meeting invitation creation window, you cannot locate the Lync meeting tab. Due to this, you can no longer create a Lync meeting at all.
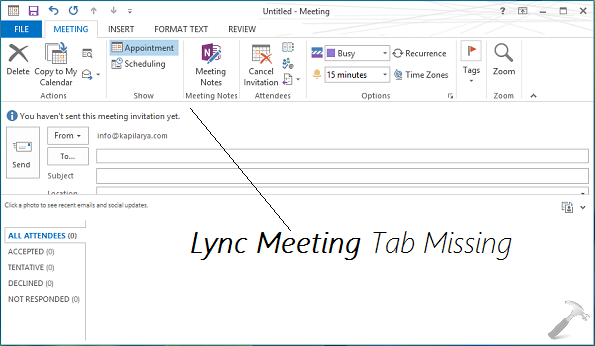
This problem can be faced on Click-to-run based installation as well as on MSI installation. If you can’t figure out which type of installation do you have, go the Office account page of any of the application available in your Office 2013 package. If you can see the Automatically update option in that screen, you’re on Click-to-run based installation, else not.
Page Contents
FIX : Cannot Create Lync Meetings Using Outlook 2013
Well, to fix out the problem of missing Lync meeting tab in ribbon inside Outlook 2013, try out these ways:
WAY 1 – Fix It Manually Using Outlook Options
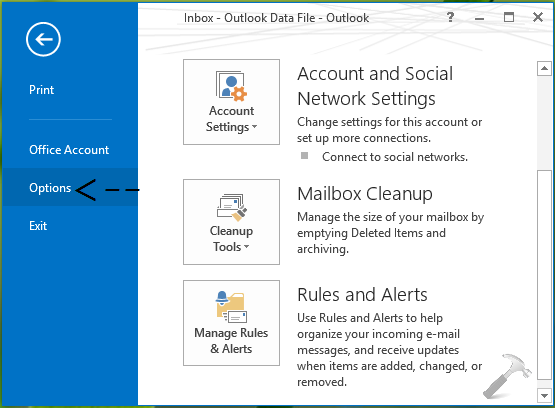
1. Open Outlook and click FILE at top left corner of the screen. Then click on Options in the following window:
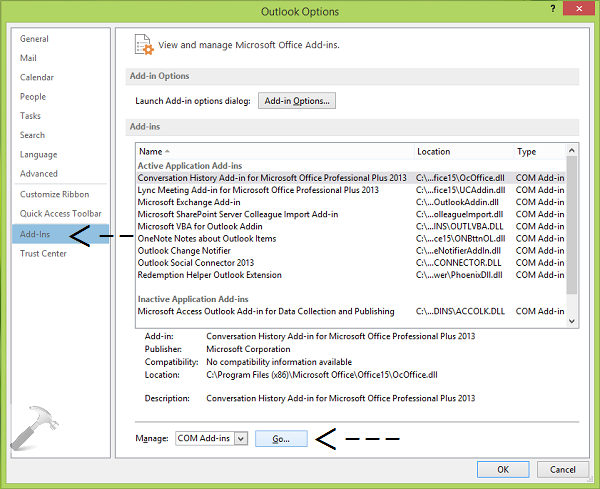
2. In the Outlook Options window shown below, select Add-Ins in the left pane. Then come to the corresponding right pane, pick COM Add-ins against Manage and hit Go button.
3. Finally, enable the Lync Meeting Add-in for Microsoft Office <version> and click OK.
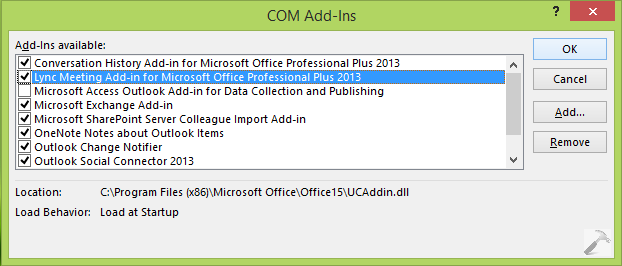
Restart the Outlook application and you should now be able to locate the Lync meeting tab in the ribbon. If this didn’t helped you, try the registry fixed mentioned below:
WAY 2 – Fix It Using Registry Manipulation
Registry Disclaimer: The further steps will involve registry manipulation. Making mistakes while manipulating registry could affect your system adversely. So be careful while editing registry entries and create a System Restore point first.
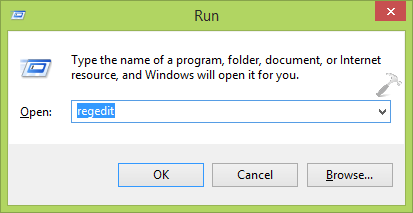
1. Press  + R and put regedit in Run dialog box to open Registry Editor (if you’re not familiar with Registry Editor, then click here). Click OK.
2. In the left pane of Registry Editor, navigate to following key:
HKEY_CURRENT_USER\Software\Microsoft\Office\Outlook\Addins\UcAddin.LyncAddin.1 (for 32-bit Windows, 32-bit Office MSI installation)
HKEY_LOCAL_MACHINE\SOFTWARE\Wow6432Node\Microsoft\Office\Outlook\Addins\UcAddin.LyncAddin.1 (for 64-bit Windows, 32-bit Office MSI installation)
HKEY_LOCAL_MACHINE\SOFTWARE\Microsoft\Office\15.0\ClickToRun\Registry\Machine\Microsoft\Office\Outlook\Addins\UcAddin.LyncAddin.1(for 32-bit Windows, 32-bit Office Click-to-run installation)
HKEY_LOCAL_MACHINE\SOFTWARE\Microsoft\Office\15.0\ClickToRun\Registry\Machine\Wow6432Node\Microsoft\Office\Outlook\Addins\UcAddin.LyncAddin.1 (for 64-bit Windows, 32-bit Office Click-to-run installation)

3. At this registry location, in the right pane of above shown window, look for the LoadBehavior named registry DWORD (REG_DWORD) which must be having its value set to 2. Double click on the DWORD to get this box:

4. Finally, in the Edit DWORD Value box, set the Value data to 3. Click OK. Close the Registry Editor and reboot the machine to make Lync meeting tab available in Outlook 2013.
Hope this helps! Go here if you’re facing Microsoft Outlook has encountered a problem and needs to close error.
![KapilArya.com is a Windows troubleshooting & how to tutorials blog from Kapil Arya [Microsoft MVP (Windows IT Pro)]. KapilArya.com](https://images.kapilarya.com/Logo1.svg)


![[Latest Windows 10 Update] What’s new in KB5055612? [Latest Windows 10 Update] What’s new in KB5055612?](https://www.kapilarya.com/assets/Windows10-Update.png)


2 Comments
Add your comment
I do as you said, but in HKEY_LOCAL_MACHINE\SOFTWARE\Wow6432Node\Microsoft\Office\Outlook\Addins\UcAddin.LyncAddin.1, after I try to change the value to “3”, this change cannot be saved, do you know why?
^^ You may need to take ownership of the “UcAddin.LyncAddin.1” registry key: https://www.kapilarya.com/regownershipex