

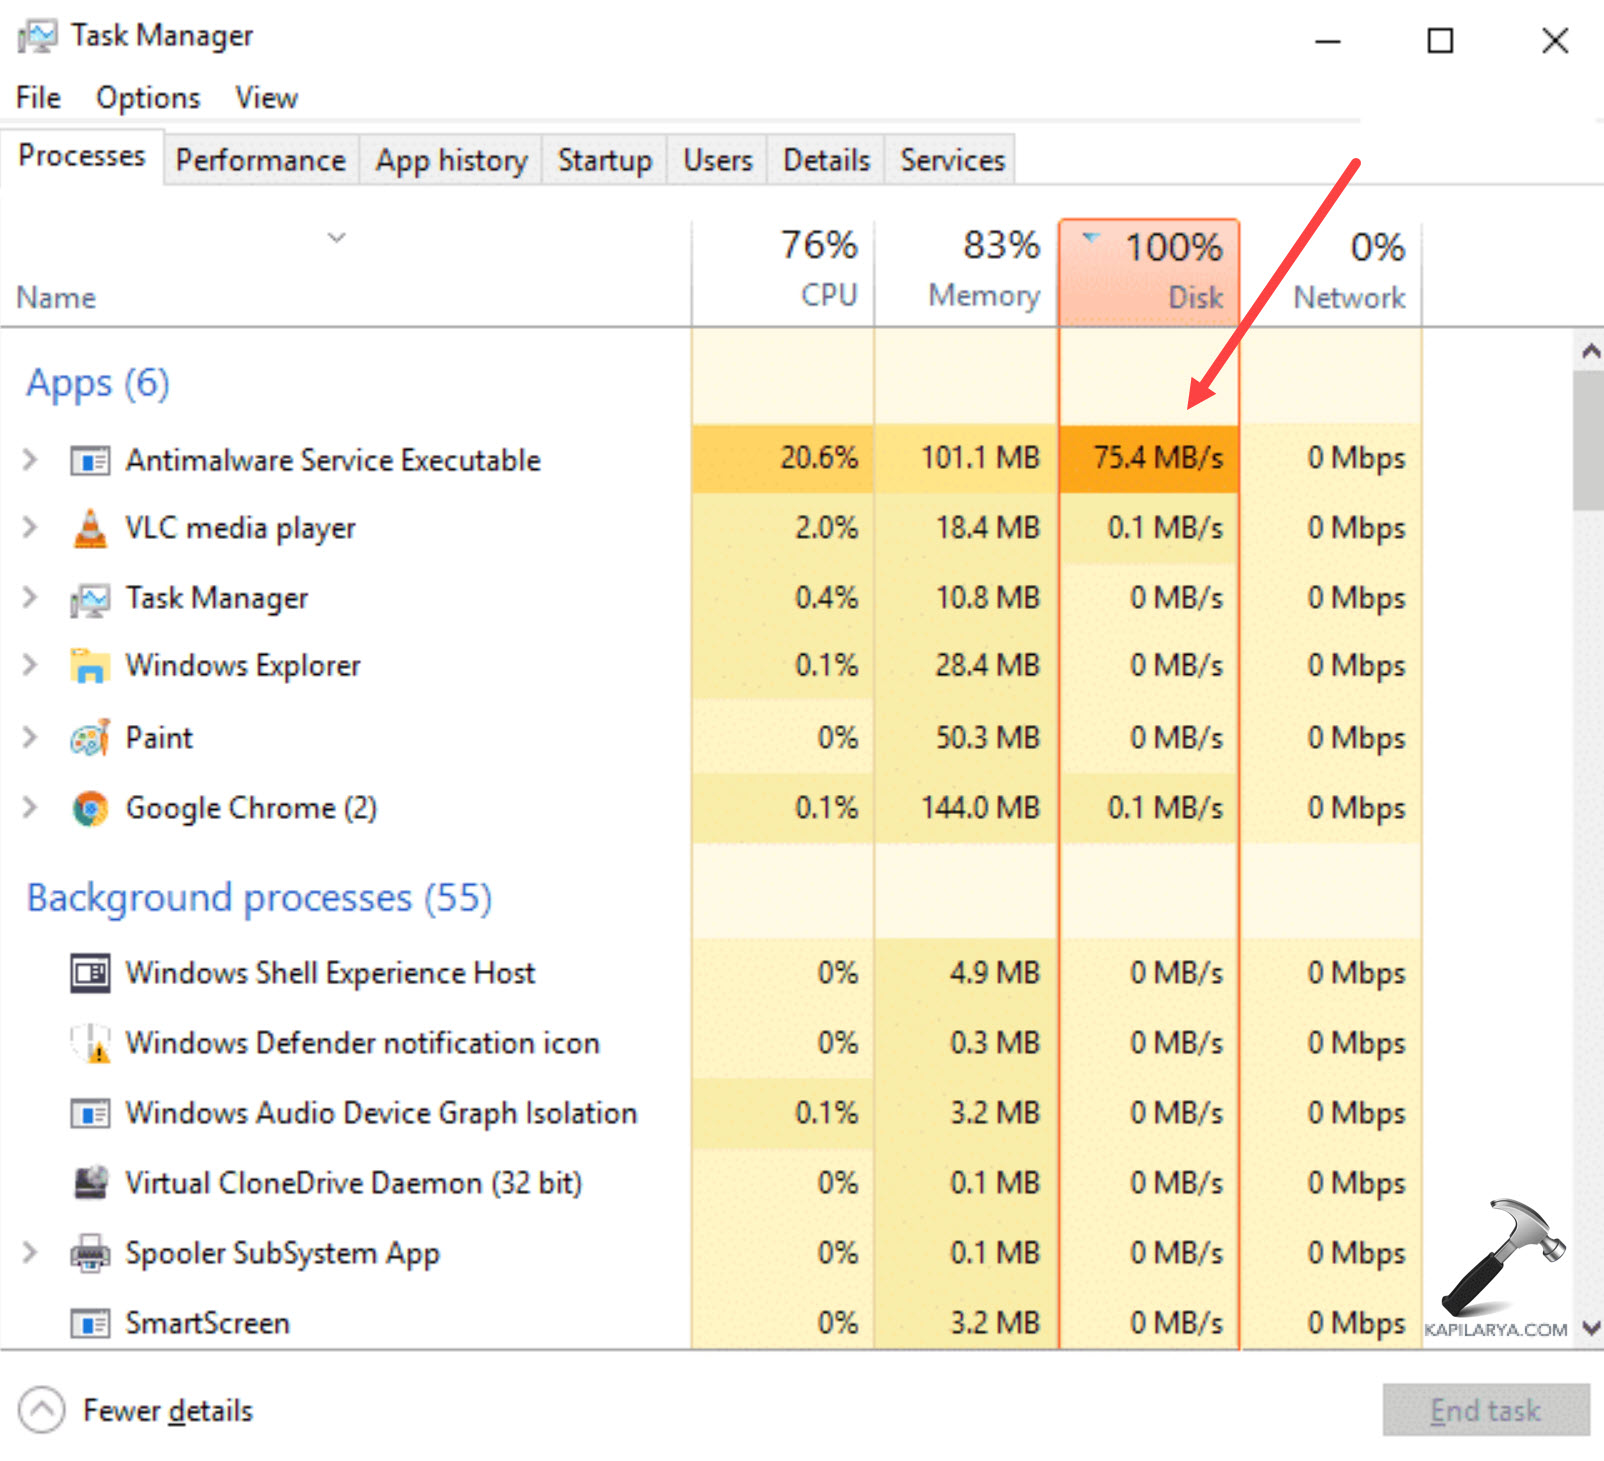
“Antimalware service executable high disk usage” in Windows 11 greatly hampers the system’s performance and slows it down significantly. This process is a module from the built-in Windows Defender Antivirus and it is rather important to ensure safety of your computer and its files against malicious software. Although it is a helpful app, when it starts using substantial amounts of disk space, it is likely to become more of a problem than a solution as it slows down your multi-tasking capability or running other programs.
In this article, let’s discuss why the Antimalware Service Executable is consuming so much space and possible ways to fix this.
Page Contents
Causes of Antimalware Service Executable High Disk Usage
Essentially, it is highly important to know the causes of high disk usage by the Antimalware Service Executable to solve the problem efficiently. Below are typical causes for this process to be consuming lots of disk resources:
1. Antimalware Service Executable is an on-access scanner continuously scanning files and programs for threats and once this is combined with system intensive function this results in high disk usage.
2. Windows Defender’s full scan does this because the process takes a lot of disk resources, making a device slow or showing high disk outputs.
3. Third-party antivirus and security software can interfere with Windows Defender and this can make the Antimalware Service Executable run more and use more disk space.
4. Old or damaged files that are associated with Windows Defender can make Antimalware Service Executable execute high disk usage as it attempts to execute its tasks as expected.
Fix Antimalware service executable high disk usage in Windows 11
Fix 1: Temporarily Disable Real-Time Protection
Although it is very important to have this feature for constant safeguard against the threats, it is possible to switch it off for a while to let the system breathe and not interrupt in completing work.
1. Open the Windows Security app on your PC.

2. From the left side panel, select “Virus & threat protection”. Tap on the “Manage settings” option.
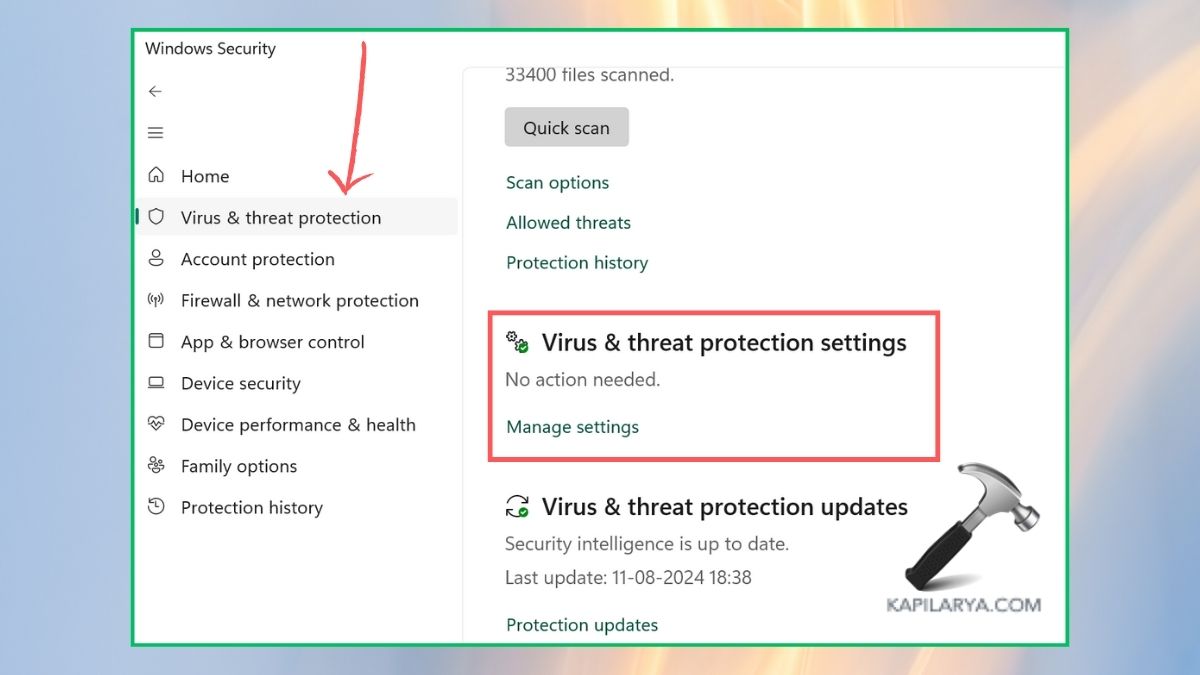
3. Toggle off the “Real-time protection” button.

Fix 2: Update all Available Device Drivers
1. Open “Device Manager” app from the Windows search bar or just press Win+X keys.

2. Select the device you want to update, right-click it, and then point to “Update driver”.

3. Select “Search automatically for updated driver software” to let the Windows to look for the latest driver on the internet.
4. When done updating the drivers, there is always a recommendation of rebooting your computer so that the system can work perfectly.
Fix 3: Temporarily Disable Windows Defender in Registry
1. Open Registry Editor app from the Windows search section.

2. Navigate to the below path in the Registry Editor-
HKEY_LOCAL_MACHINE\SOFTWARE\Policies\Microsoft\Windows Defender
3. Find and double-click the “DisableAntiSpyware” in the list. Now, change its value to 1 and press “OK”.

Fix 4: Change Windows Defender’s Scheduling Options
1. Open “Task Scheduler” app from the Windows search panel.

2. Find Task Scheduler Library > Microsoft > Windows > Windows Defender.

3. Click on “Windows Defender Scheduled Scan”. Check the “Run with highest privileges” option.
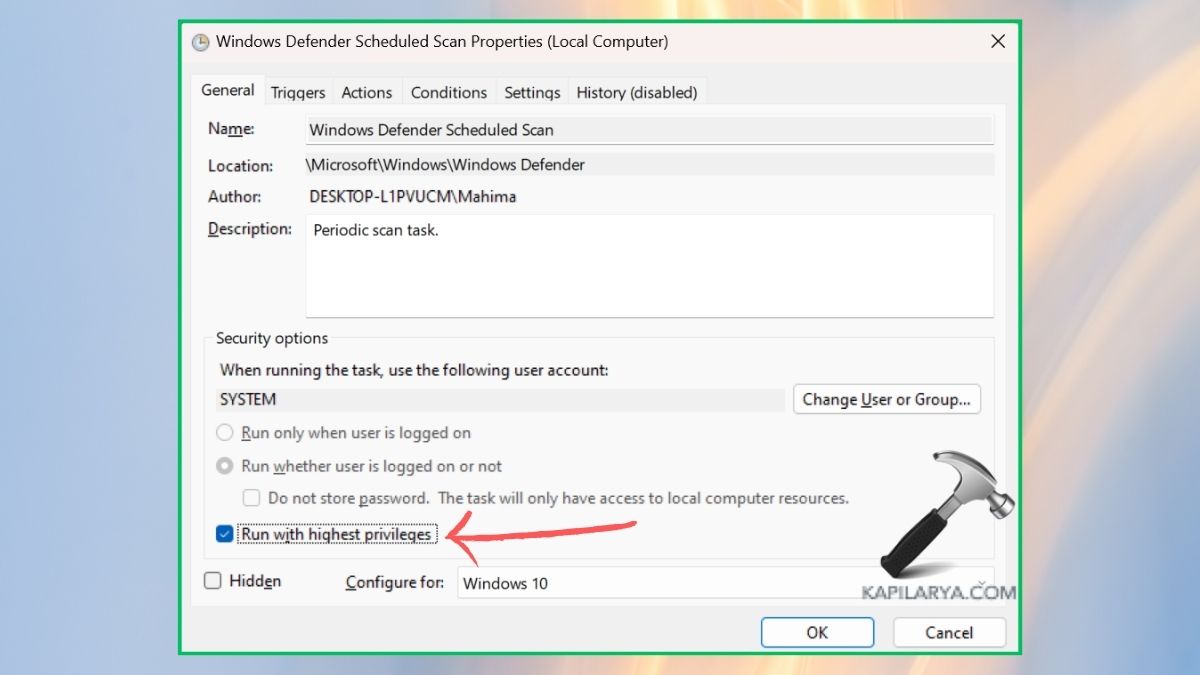
4. In the Conditions section, uncheck the three options as given in the image. Then, tap “OK”.

Fix 5: Disable Windows Defender Temporarily with Group Policy
1. To get to the Local Group Policy Editor, press the Win+R key simultaneously, then type gpedit.msc command and Enter.
2. Next, the Local Group Policy Editor window will appear. In the subordinate window, choose Computer configuration > Administrative Templates > Windows Components and widen it.
3. Select Real-time protection under Microsoft/Windows Defender Antivirus as the best choice in this case. As for the last parameter in the appropriate interface, double-clicking the “Turn off real-time protection option” and the final Enabled choice will suffice.

If you experience any error while performing any of these solutions to fix Antimalware service executable high disk usage in Windows 11, leave a comment below so we can help you out.
That’s it!

 high CPU usage")


Leave a Reply