In Windows 10, Internet Connection Sharing (ICS) will help you to share the network with other devices. This seems pretty useful when you’ve wired or Ethernet connection plugged to your machine and you want to connect other devices such as mobile, tablet to this connection.
Page Contents
Enable Internet Connection Sharing (ICS) On Windows 10
To enable ICS, open Network Connections manager by running ncpa.cpl command. Right click on your network adapter and select Properties. On the property sheet, switch to Sharing tab. Now check Allow other network users to connect through this computer’s Internet connection option. Click OK. This should enable the ICS and you will see ‘Shared‘ term with your network adapter entry in Network Connections manager.
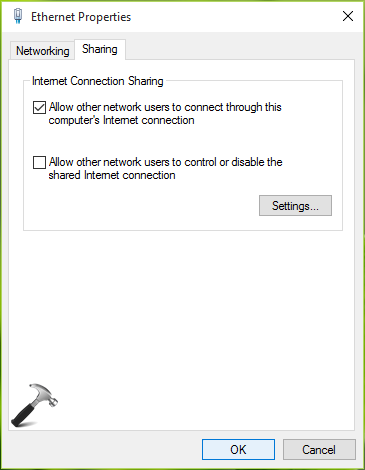
But today, while following above mentioned procedure, I came around following message due to which ICS cannot be enabled:
An error occurred while Internet Connection Sharing was being enabled.
The service cannot accept control messages at this time.
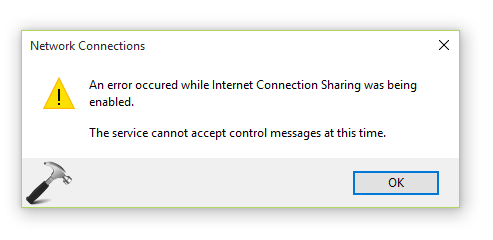
After getting this message, you must first review the Windows Firewall configuration to confirm whether it is not blocking your connection. You may also want to reboot your system and check if you can share the connection then. If issue still persists, go ahead with these steps:
FIX : An Error Occurred While Internet Connection Sharing Was Being Enabled. The Service Cannot Accept Control Messages At This Time In Windows 10
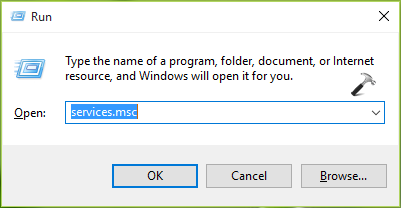
1. Press  + R and type services.msc in the Run dialog box, hit Enter key to open Services snap-in.
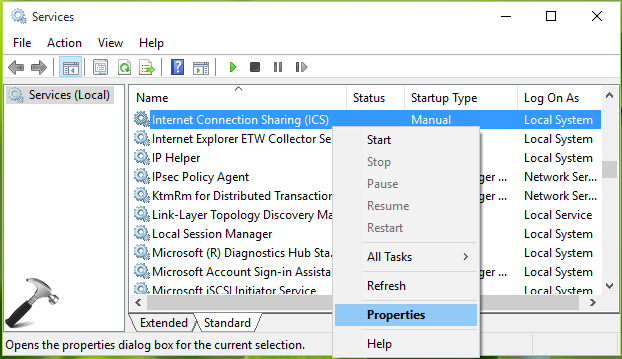
2. In the Services window, scroll down and look for Internet Connection Sharing (ICS) service. Right click on the service entry and select Properties.
3. On service property sheet, at General tab, set the Startup type to Automatic (Delayed Start). Click Apply followed by OK. Close Services snap-in.
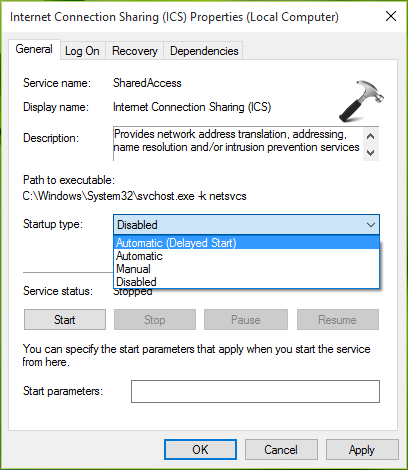
You can now retry to enable sharing on your Internet connection and this time it should work fine.
Hope this helps!
![KapilArya.com is a Windows troubleshooting & how to tutorials blog from Kapil Arya [Microsoft MVP (Windows IT Pro)]. KapilArya.com](https://images.kapilarya.com/Logo1.svg)



![[Latest Windows 10 Update] What’s new in KB5055612? [Latest Windows 10 Update] What’s new in KB5055612?](https://www.kapilarya.com/assets/Windows10-Update.png)


Leave a Reply