In earlier versions of Windows 10, search was integrated with Cortana. With Windows 10 Version 1903, search and Cortana were separated. Since then search is the independent feature and it has its own dedicated settings. For search to provide instant results, it is important that those results are already indexed. The search indexer works in background and keeps indexing, so that you get better experience while searching. In this article, we’ll see how to allow Windows 10 search indexer to respect device power mode settings.
So as I said above, the search indexer keeps running in background. If your system has a lot of content, the search indexer may be using significant power. With that, it might possible that indexer may not be aware of other power settings on device and continue to use more power than necessary. To avoid this, Microsoft has introduced a new setting to search indexer which respect device power mode settings. This setting is available in build 18965 or Version 2004 and later.
Here’s how you can configure it on your system.
Page Contents
Allow Windows 10 search indexer to respect device power mode settings
Method 1 – Using Settings app
1. Right click Start Button or press  + X keys and select Settings.
2. In the Settings app, navigate to Search > Searching Windows.
3. In right pane of Searching Windows, under Indexer Perfomance, turn On the Respect Device Power Mode Settings option.

The setting should be applied now. You can close Settings app and revert to Desktop.
Method 2 – Using registry
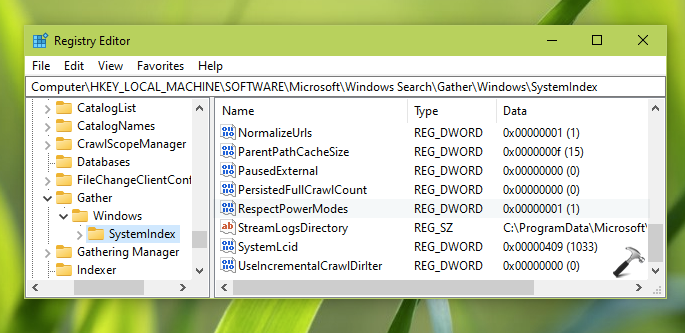
1. Run regedit command to open Registry Editor.
2. In the Registry Editor window, go to following key:
HKEY_LOCAL_MACHINE\SOFTWARE\Microsoft\Windows Search\Gather\Windows\SystemIndex

3. Now, in the right pane of SystemIndex registry key, create a new registry DWORD named RespectPowerModes. If the DWORD exists already, do not create any DWORD and instead edit existing one. Set its Value data to 1 in order to allow search indexer to respect device power mode settings.
4. Close Registry Editor and reboot your system to make changes effective.
That’s it!
Read next: How to disable web suggestions in Windows 10 search.
![KapilArya.com is a Windows troubleshooting & how to tutorials blog from Kapil Arya [Microsoft MVP (Windows IT Pro)]. KapilArya.com](https://images.kapilarya.com/Logo1.svg)


Leave a Reply