Microsoft Teams is one of the popular software right now to schedule and join meetings. Microsoft is continuously developing this software and adding new features in the successive versions. One of the native feature of Microsoft Teams is Desktop or screen sharing. Using this option, users can share their desktop or application during a meeting. In this article, we will learn how you can allow or prevent screen sharing in Microsoft Teams.
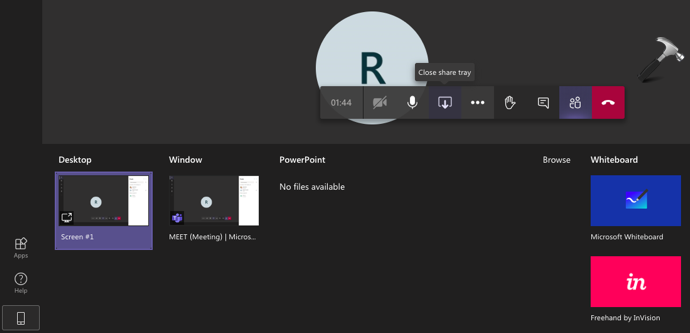
So while in Teams meeting, clients can click on share button and this will open share tray. Now clients can choose any one of the sharing option from Desktop, a particular window or PowerPoint sharing. They can also select an whiteboard or choose to share notes.
As a Microsoft Teams admin, you can select what type of content clients are allowed to share. For that, you need to open Microsoft Teams Admin Centre and configure relevant settings. Step-by-step instructions are mentioned below.
Allow Or Prevent Screen Sharing In Microsoft Teams
1. Go to Microsoft Teams Admin Centre at https://admin.teams.microsoft.com and sign in with your Microsoft/Office 365 account.
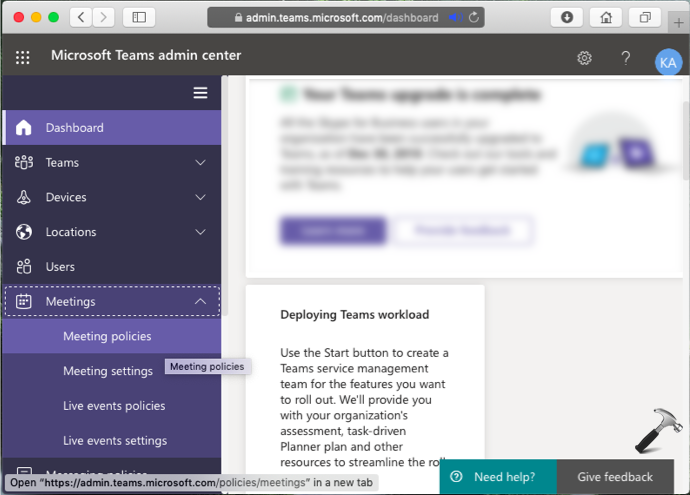
2. In Microsoft Teams Admin Centre, go to Meetings > Meeting policies.
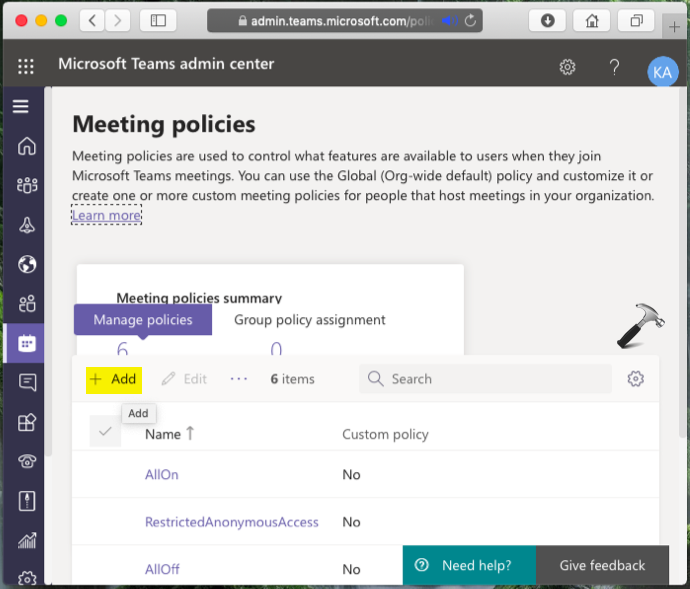
3. Under Meeting policies, click on the Add button.
4. Now provide a title to the policy name, followed by a short description.
5. Then go to Content sharing section, select the Screen sharing mode to Entire screen, Single application or Disabled. By default, the option is set to Entire that means clients can share complete Desktop. If you set it to Disabled, clients can not share screen.
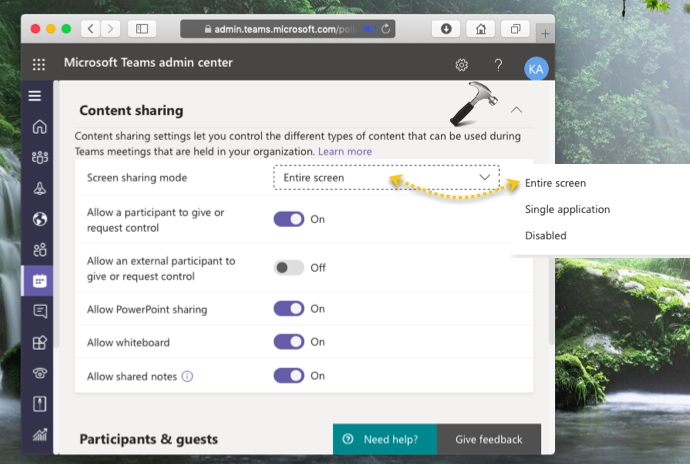
Here, you can also select other sharing options access for clients. You can allow/prevent client to give or request control, allow them to present whiteboard, share notes or PowerPoint slides.
6. Click on Save button (scroll down to locate it) and make changes effective.
So this is how you can configure screen sharing in Microsoft Teams.
That’s it!
![KapilArya.com is a Windows troubleshooting & how to tutorials blog from Kapil Arya [Microsoft MVP (Windows IT Pro)]. KapilArya.com](https://images.kapilarya.com/Logo1.svg)





![[Latest Windows 10 Update] What’s new in KB5055612? [Latest Windows 10 Update] What’s new in KB5055612?](https://www.kapilarya.com/assets/Windows10-Update.png)


Leave a Reply