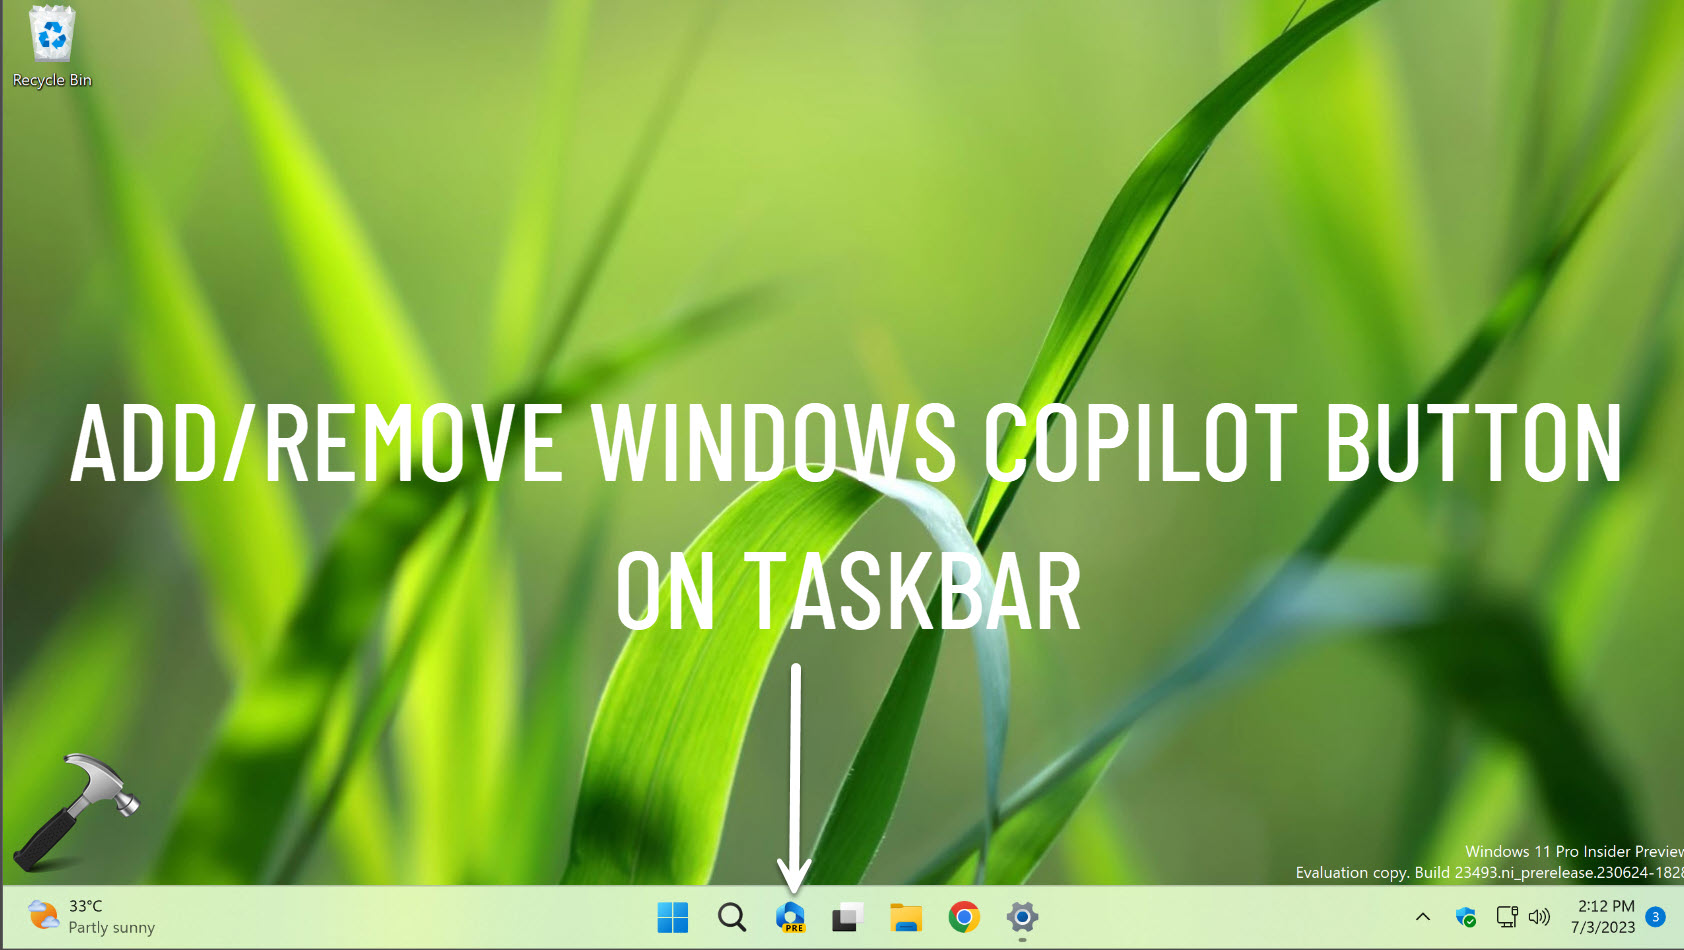
Windows is the first PC platform to provide centralized AI assistance. Thanks to the Windows Copilot feature which brings power of AI to Windows 11. It is also integrated with Bing chat and other third-party plugins. Windows Copilot is the new AI assistance helping you to improve your Windows 11 experience. Windows Copilot was announced back in May 2023. The latest Dev Windows Insider Preview Build as of this writing have the preview of Windows Copilot. In this article, we’ll learn how you can add or remove Windows Copilot button on Windows 11 taskbar.
Page Contents
Add or remove Windows Copilot button on Windows 11 taskbar
Method 1: Using Settings app
- Right click on Start button, select Settings.
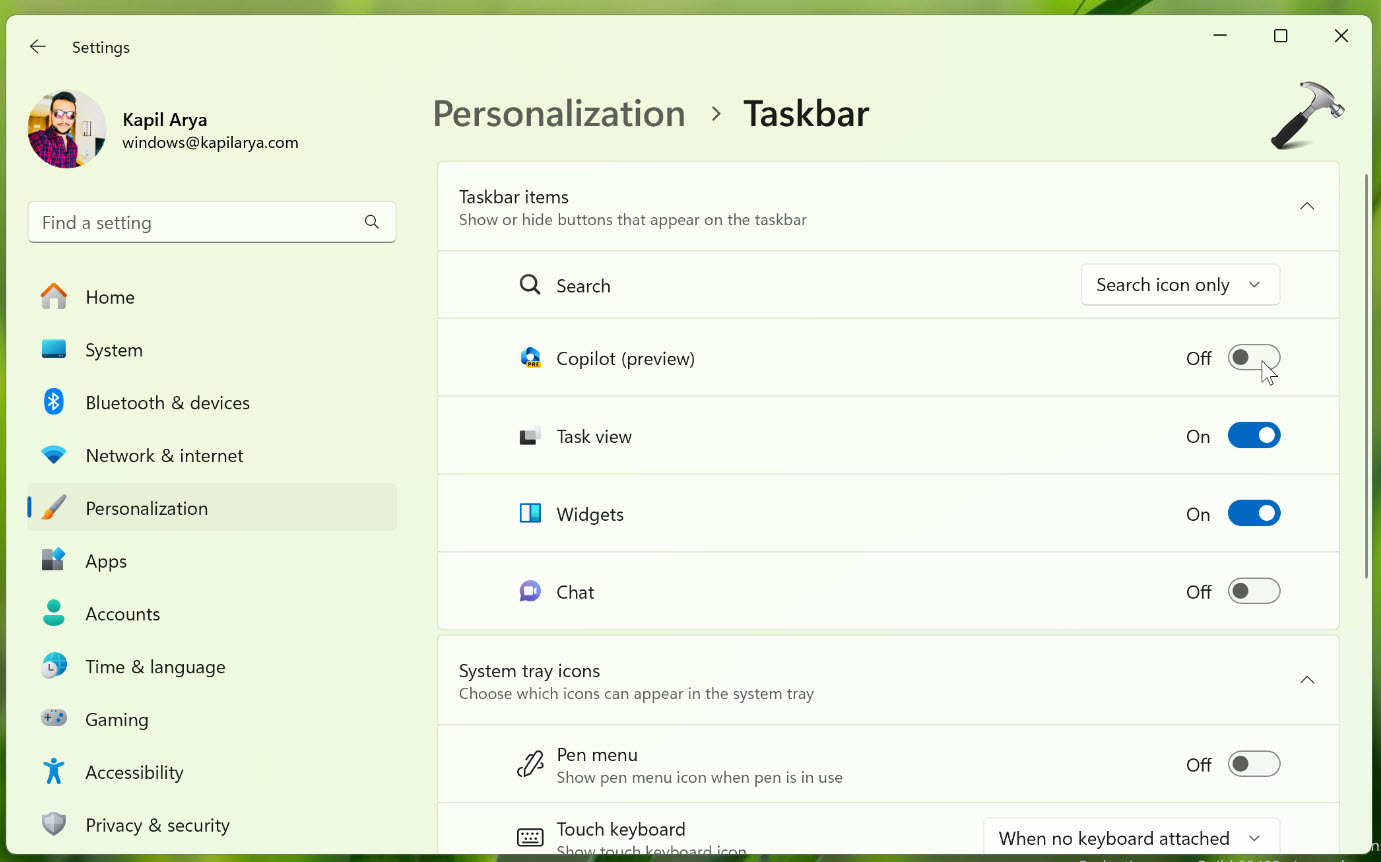
- In Settings app, go to Personalization > Taskbar.
- Under Taskbar items, turn Off Copilot option to remove Windows Copilot button. By default, the option is turned On.
Method 2: Using registry
- Run
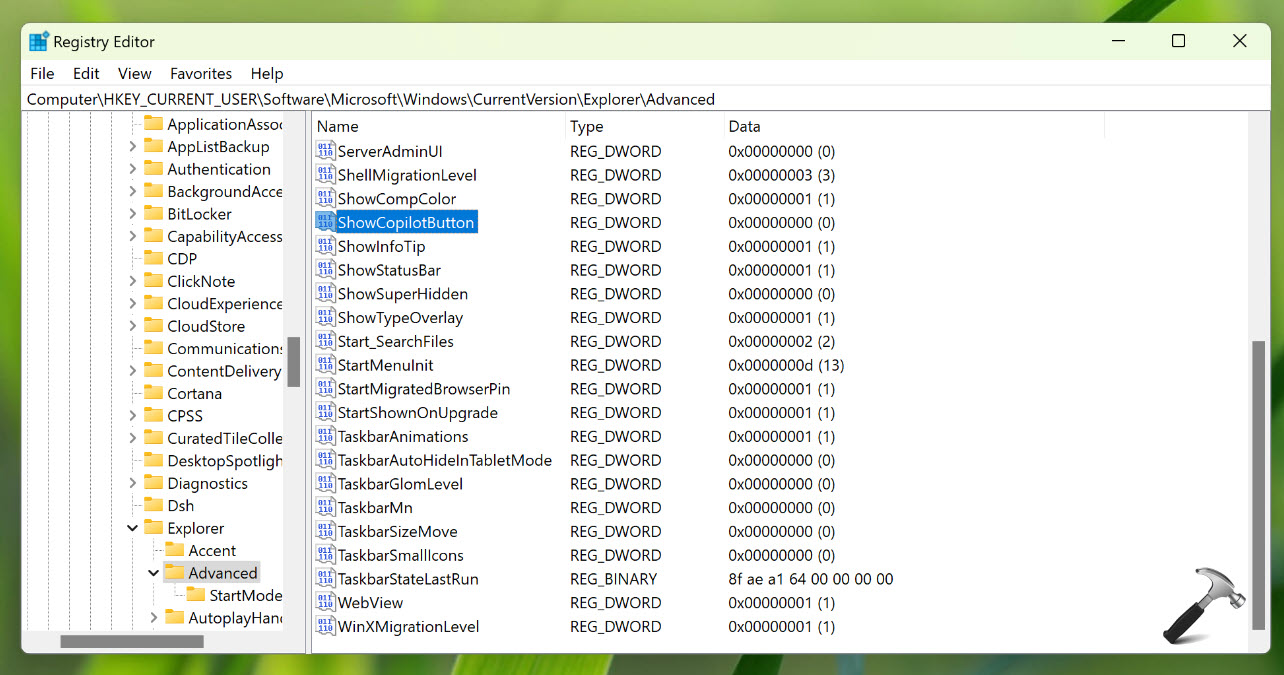
regeditcommand to open Registry Editor. - In left pane of Registry Editor window, navigate to: HKEY_CURRENT_USER\Software\Microsoft\Windows\CurrentVersion\Explorer\Advanced
- In this right pane of Advanced registry key, locate registry DWORD named ShowCopilotButton. By default it is set to 1, double click and set it to 0 to remove Windows Copilot button.

- Once done, close Registry Editor. Changes will be reflected immediately.
Method 3: Using Group Policy
Open GPO Editor by running gpedit.msc in Windows client edition and by using gpmc.msc command in Windows Server. In Windows Server, you need to create a relevant GPO and then right click on it and select Edit.
Next, in the GPO Editor window, navigate here:
Computer Configuration > Administrative Templates > Start Menu and Taskbar
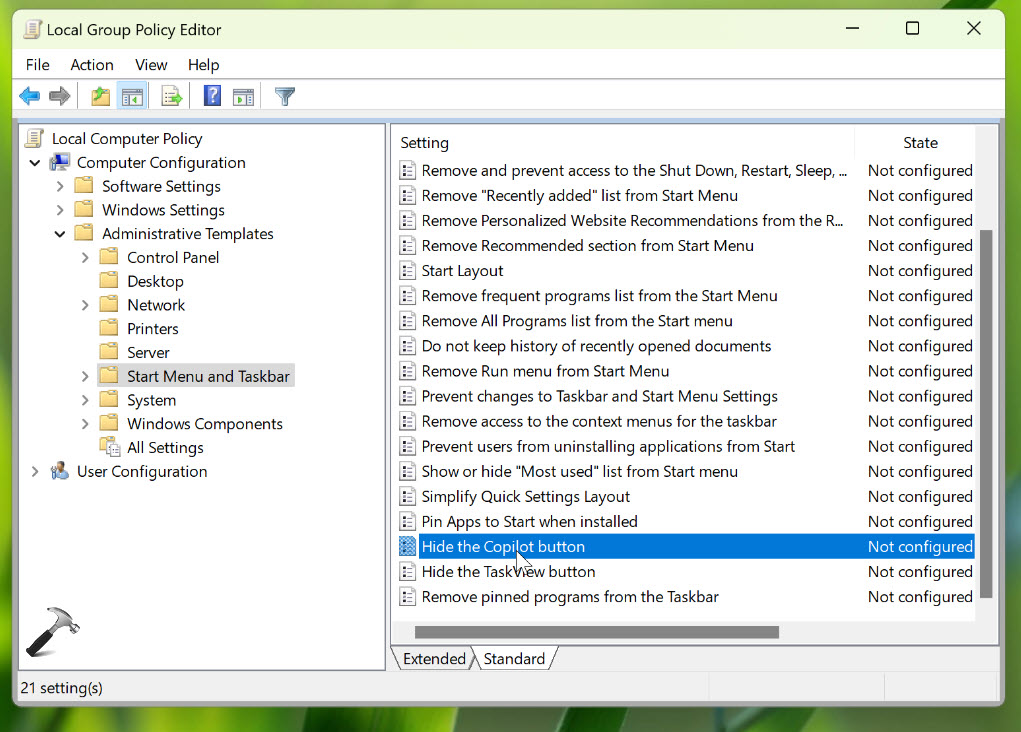
Locate the policy setting named Hide the Copilot button.
Double click on it to modify it. Set the policy to Enabled, in order to hide Windows Copilot button on taskbar.
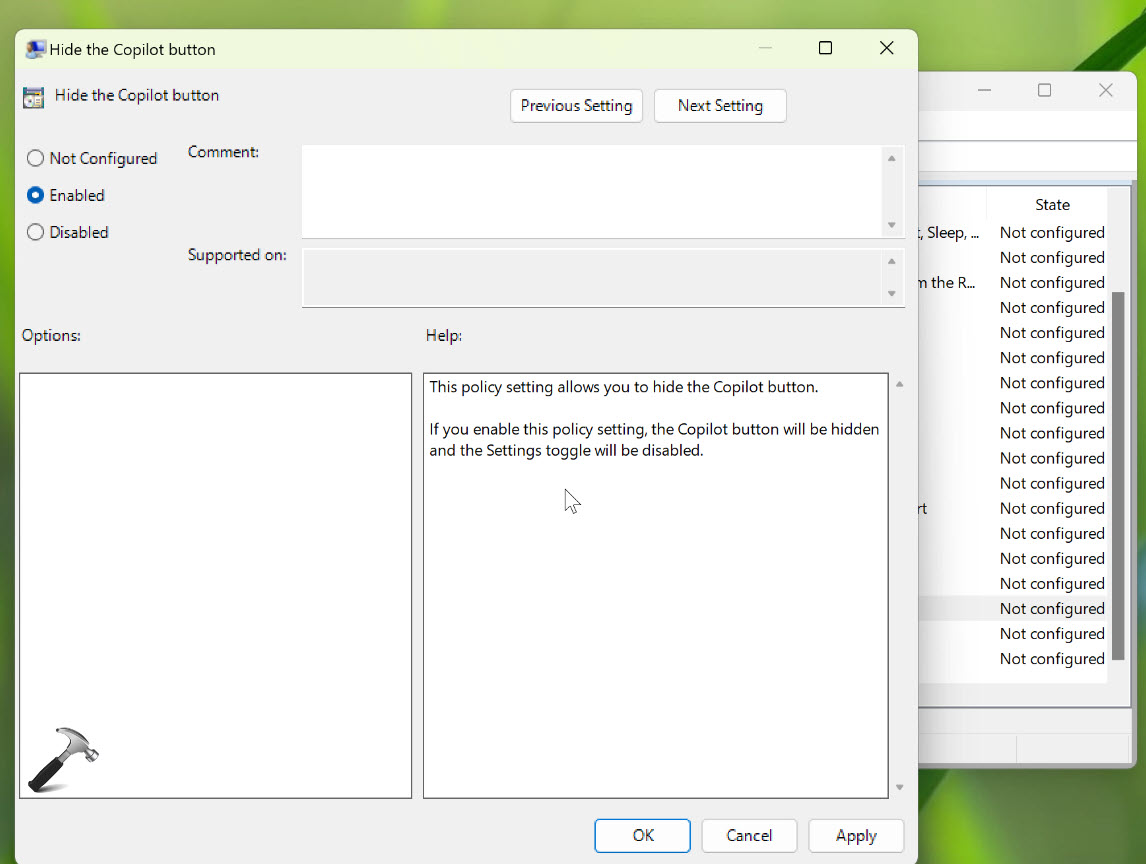
Click Apply, OK.
Close Group Policy Editor.
Video guide
For live demonstration of above shared methods, checkout this video guide:
That’s it!
![KapilArya.com is a Windows troubleshooting & how to tutorials blog from Kapil Arya [Microsoft MVP (Windows IT Pro)]. KapilArya.com](https://images.kapilarya.com/Logo1.svg)




Leave a Reply