Switching to another user account in Windows 11 is not complicated at all. One can sign into another user account without signing out. This is possible due to the Fast User Switching technique in Windows PC, where you can switch between open accounts quickly. In this article, learn about 6 ways to switch user account in Windows 11. Now, let’s get started!
Page Contents
6 Ways to Switch User Account in Windows 11
Method 1: Switch User Account through Ctrl+Alt+Del Screen
1. Firstly, press the Ctrl+Alt+Del tabs together on the keyboard.
2. After that, click on Switch user.
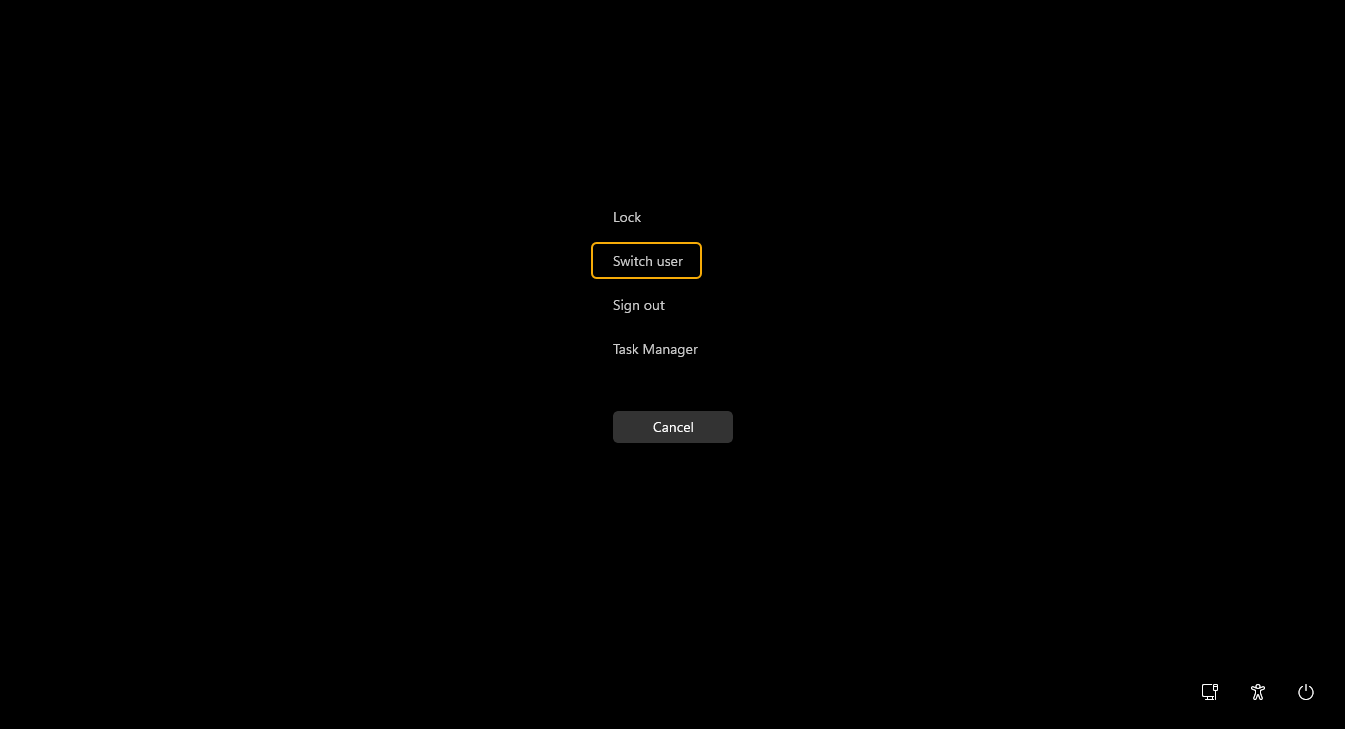
3. Next, you will come across the sign-in screen to sign into the selected user account.
Method 2: Switch User Account through Start
1. Initially, open the Start menu and click on the User icon.
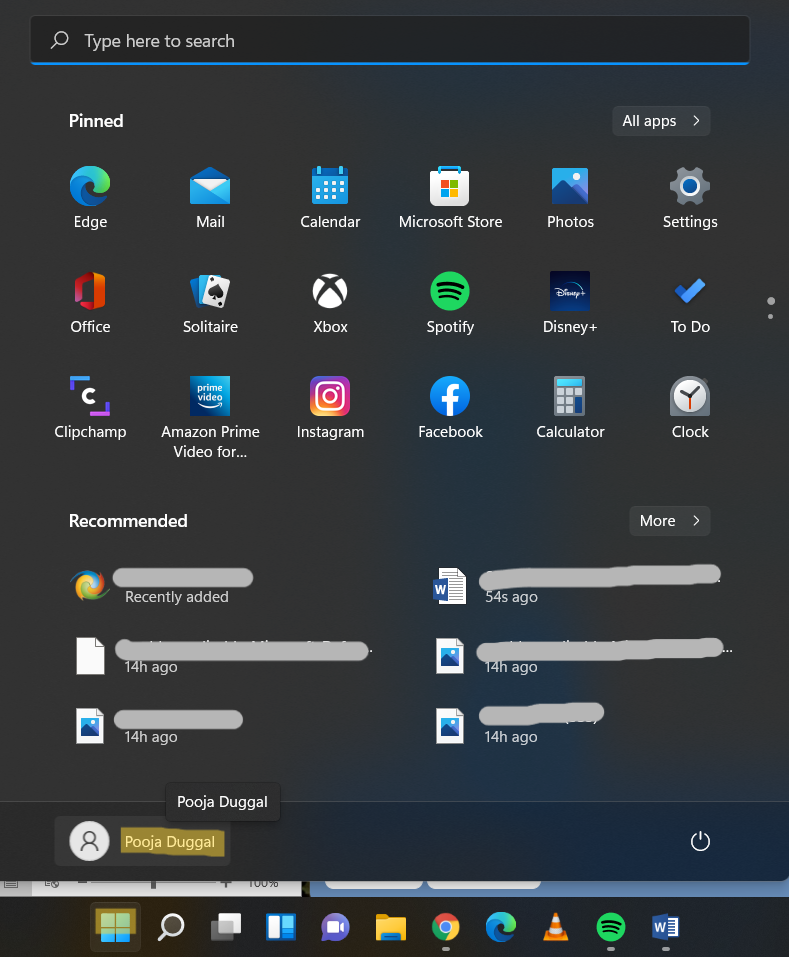
2. Now, select the user account that you like to switch to.
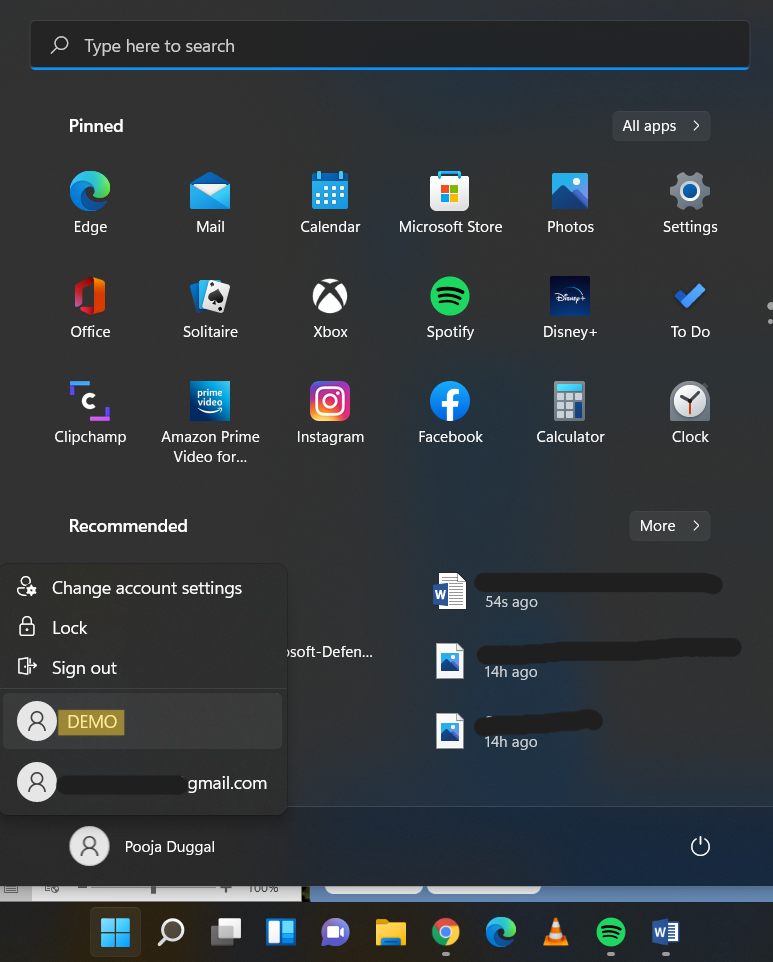
3. Next, you will come across the sign-in screen to sign into the selected user account.
Method 3: Switch User Account through Task Manager
1. Press the Ctrl+Shift+Esc keys together to open Task Manager. Now, go to the Users tab.
2. After that, select the signed in user account you like to switch to. Once selected, click on Switch User present at the bottom.
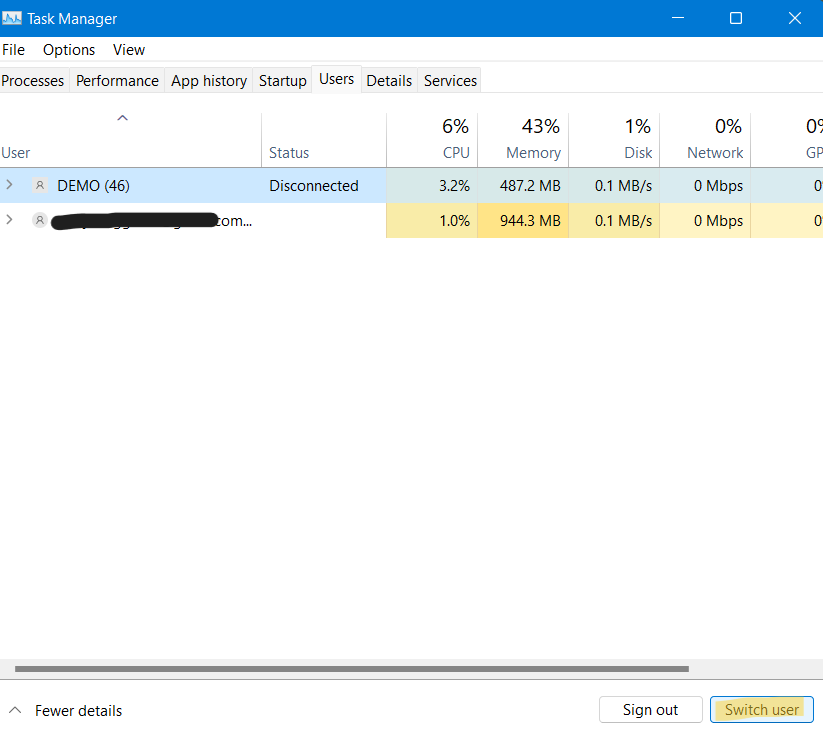
3. Or else, right-click on the signed in user account you like to switch to and choose Switch user account.
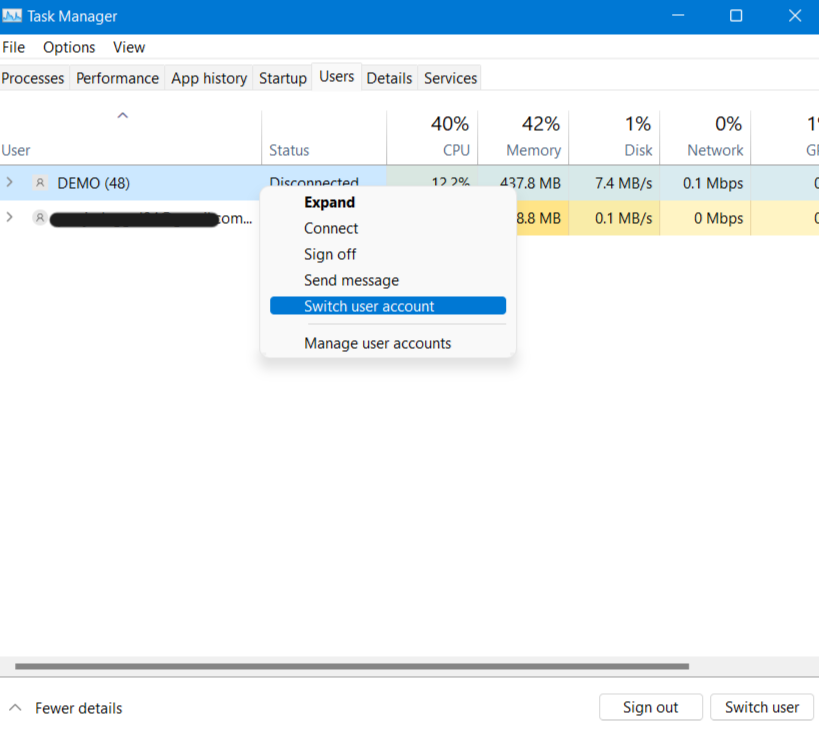
4. Next, you will come across the sign-in screen to sign into the selected user account.
Method 4: Switch User Account by Locking System
1. In the first place, lock your Windows system by pressing the Windows + L tabs together.

2. After that, hit Enter to dismiss the lock screen.
3. Next, you will come across the sign-in screen to select and sign into the user account you like to switch to.

Method 5: Switch User Account through Alt+F4 Shut Down Windows Dialog
1. Firstly, click on your desktop to turn it into the current focused window.
2. Now, press the Alt+F4 tabs together to open Shut Down Windows.
3. Next, choose Switch user and then, press OK.
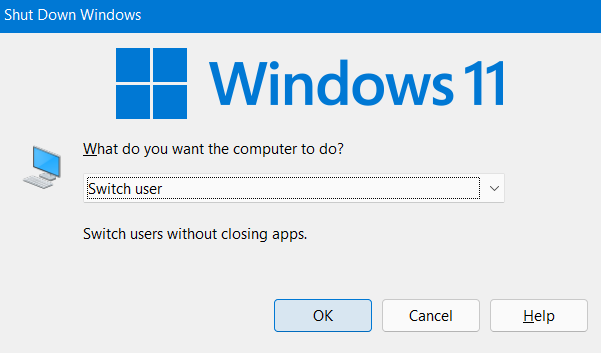
4. After that, press Enter to dismiss the lock screen.

5. Next, you will come across the sign-in screen to select and sign into the user account you like to switch to.

Method 6: Switch User Account through tsdiscon.exe Command
1. In Windows 11 Home edition, the C:\Windows\System32\tsdiscon.exe file is not available. In that case, you can download the zip file of tsdiscon.exe here. Download the tsdiscon.exe file inside ZIP file and unblock it. After that, add the same to the C:\Windows\System32 folder.
2. Once done, run the C:\Windows\System32\tsdiscon.exe

3. Now, press Enter to dismiss the lock screen.

4. Next, you will come across the sign-in screen to select and sign into the user account you like to switch to.

So, these are 6 ways to switch user account in Windows 11. Choose the one that you find the easiest one!
![KapilArya.com is a Windows troubleshooting & how to tutorials blog from Kapil Arya [Microsoft MVP (Windows IT Pro)]. KapilArya.com](https://images.kapilarya.com/Logo1.svg)


1 Comment
Add your comment
Thank you for this tip, but was alarmed because Windows Defender flagged tsdiscon as suspicious and not to run it when I ran the shortcut, due to unknown publisher perhaps?