The Local Group Policy Editor is a powerful tool for administrating Windows 11 Pro and Enterprise editions. It grants granular control over system settings, allowing you to fine-tune user experience, security policies, and more. But with great power comes the question: how do you access it? This guide equips you with 10 methods to open the Local Group Policy Editor in Windows 11, ensuring you can use its potential when needed.
There are a couple of reasons why you might need multiple methods to access something like the Local Group Policy Editor:
- User Convenience: Different people prefer different ways of interacting with their computers. Multiple methods provide options for launching the tool in a way that feels most natural to the user.
- Accessibility: Not everyone interacts with computers in the same way. Having multiple methods ensures someone with motor skill limitations or using a screen reader can still access the tool.
- Contingency Plans: If one method is unavailable due to a bug, shortcut malfunction, or permission issues, having alternative methods allows you to bypass the obstacle and access the tool anyway.
Page Contents
10 methods to open Local Group Policy Editor in Windows 11
Here are 10 different methods for opening the Local Group Policy Editor. Choose the approach that best suits your workflow and needs!
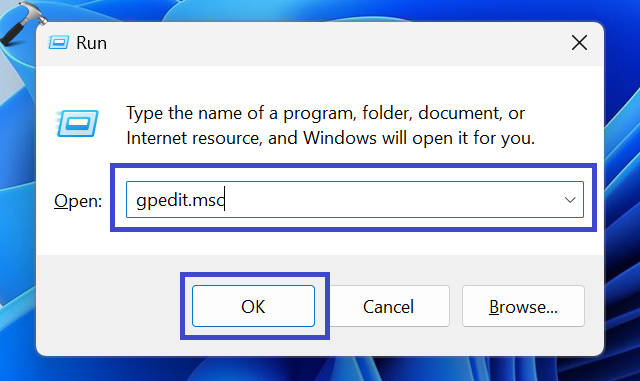
Method 1: Run Command
1. Press the Windows key + R.
2. Type “gpedit.msc” and click OK.

Method 2: Settings App
Open Settings App. In the search bar, type “edit group policy“. Click on the search result to open the local group policy editor.
Note: The Local Group Policy Editor isn’t directly accessible through the Settings app in Windows 11. The functionality is only available in Windows 11 Pro and Enterprise editions, not the Home version.
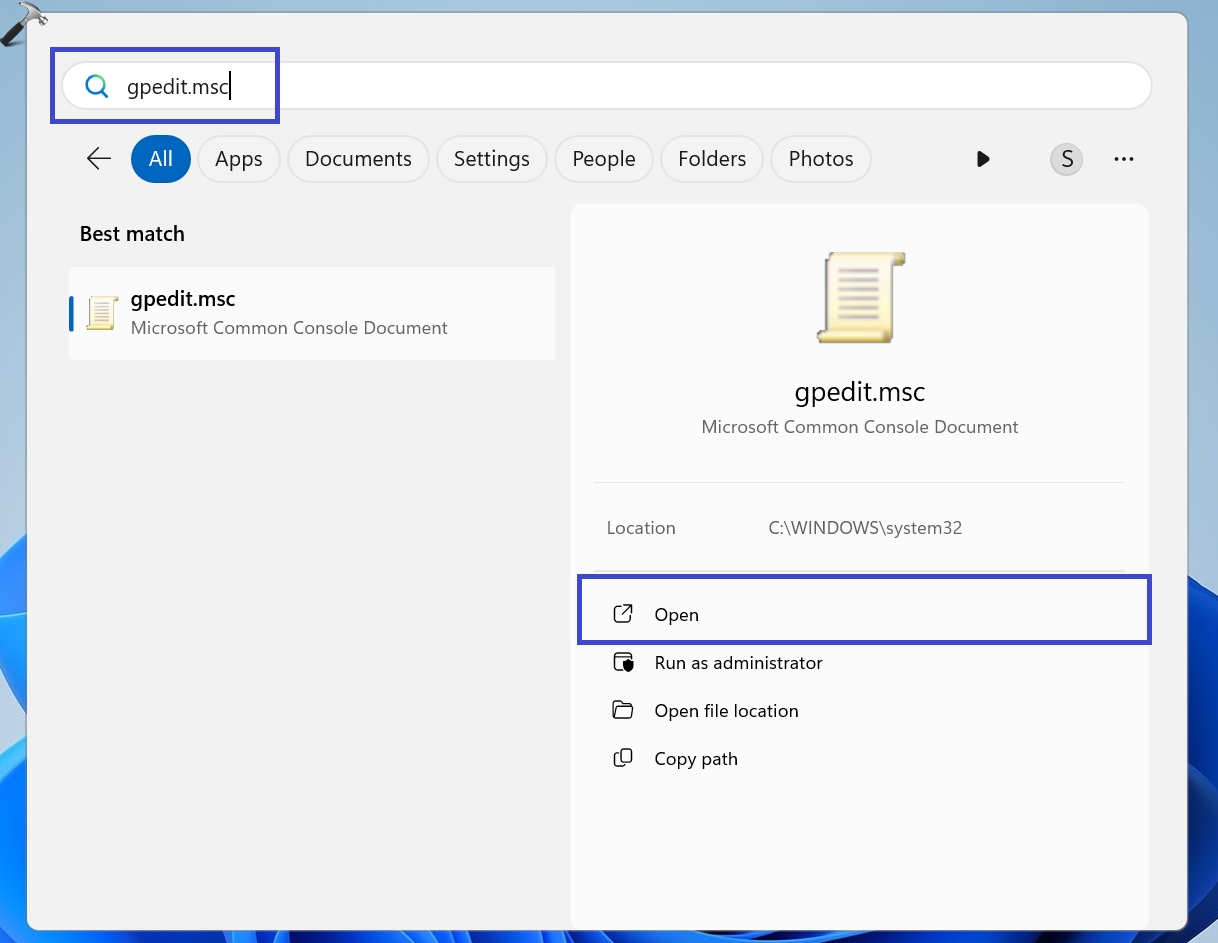
Method 3: Windows Search
1. Click on the Windows icon to open the search menu.

2. Type “gpedit.msc” in the search bar.

3. Click “Open” to open it.
Method 4: Windows Copilot
1. Press the WIndows key + C to open Windows Copilot.
2. Type “Open the local group policy editor” and press Enter.

3. Click “Yes, proceed” option to confirm.

Method 5: System 32 Folder
1. Open File Explorer and navigate to “C:> Windows”.
2. Click on “System32“.

2. Click “gpedit.msc” to open the local group policy editor.

Method 6: Task Manager
1. Press the Windows key + X and select “Task Manager“.

2. Click on “Run new task“.

3. A create new task prompt box will appear. Type “gpedit.msc” and click OK.

Method 7: Desktop Shortcut
1. Right-click on the blank space on the Desktop. Click on “New => Shortcut“.

2. Copy and paste the following local group policy editor location and click Next.
%windir%\System32\gpedit.msc

3. Under the “Type a name for this shortcut“, type “gpedit.msc”.

4. Click “Finish“.
Method 8: File Explorer
1. Open File Explorer. Type “gpedit.msc” in the search box.

Press Enter.
Method 9: Control Panel
1. Open the Control Panel. Type “edit group policy” or “gpedit.msc” in the search box.

2. Click on “Edit group policy“.
Note: This method only works if using Windows 11 Pro or Enterprise. If you’re on the Home edition, you won’t see the “Edit group policy” option within the Control Panel.
Method 10: Command Prompt / PowerShell
1. Open the Command prompt pr PowerShell and type the following command:
gpedit.msc

2. Press Enter
That’s It!
Related: Group Policy Update Hangs In Windows
![KapilArya.com is a Windows troubleshooting & how to tutorials blog from Kapil Arya [Microsoft MVP (Windows IT Pro)]. KapilArya.com](https://images.kapilarya.com/Logo1.svg)


Leave a Reply