When it comes to look for a specific object into a big space such as folders or hard drive, we often use search feature. Indexing helps us to find our aim in few moments and it also helps us to use various filters to narrow our search operation. If you’re facing issues with indexing, then have a look at the fix mentioned here. Well, if you’re having a single system, and many people often refer to use it, there are some things that you want to keep unshared.
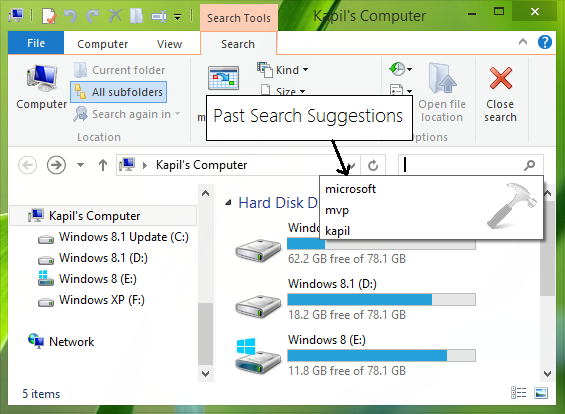
Like, if you want, whatever you search, Windows should not record it and whenever others uses search feature, previous search suggestions shouldn’t be displayed to them. Obviously these suggestions would be those strings which you have used before to search. In such a case, you might want to disable recording of search suggestions so that others wouldn’t get any clue what you’ve searched in past. Here is how to do this:
Page Contents
How To Clear Windows Explorer Search History In Windows 10/8.1/8
WAY 1 – Using Registry Editor
Registry Disclaimer: The further steps will involve registry manipulation. Making mistakes while manipulating registry could affect your system adversely. So be careful while editing registry entries and create a System Restore point first.
1. Press  + R and put regedit in Run dialog box to open Registry Editor (if you’re not familiar with Registry Editor, then click here). Click OK.

2. In the left pane of Registry Editor, navigate here:
HKEY_CURRENT_USER\Software\Policies\Microsoft\Windows
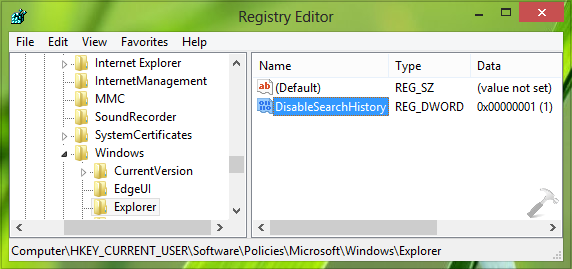
3. In the left pane of this location, create a new sub-key to the Windows key by making a right click over it and select New -> Key. Name this newly created sub-key as Explorer. Now select Explorer and come its right pane which is shown in image above. Right click in the blank space, select New -> DWORD Value. Name this DWORD as DisableSearchHistory. Double click on the same DWORD to get this:
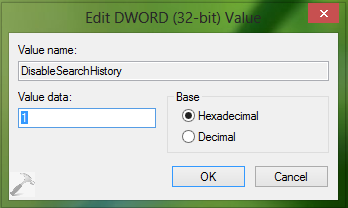
4. In the above shown box, put the Value data as 1 to disable or 0 to enable storage and display of past search suggestions for File Explorer. Reboot the machine to observe changes.
WAY 2 – Using Group Policy
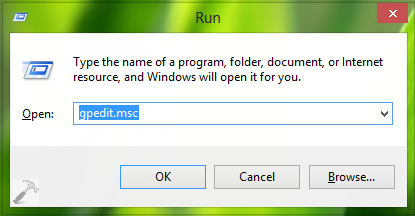
1. Press  + R and put gpedit.msc in Run dialog box to open Local Group Policy Editor. Click OK.
2. In the left pane of Local Group Policy Editor window, navigate here:
User Configuration -> Administrative Templates -> Windows Components -> Search
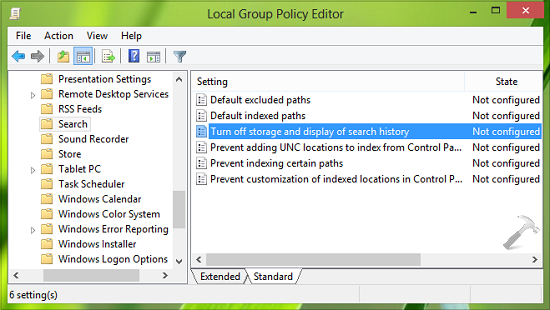
3. Moving on, in the right pane for Search, look for the settings named Turn off storage and display of search history which is showing Not Configured status by default. Double click on the same to modify:
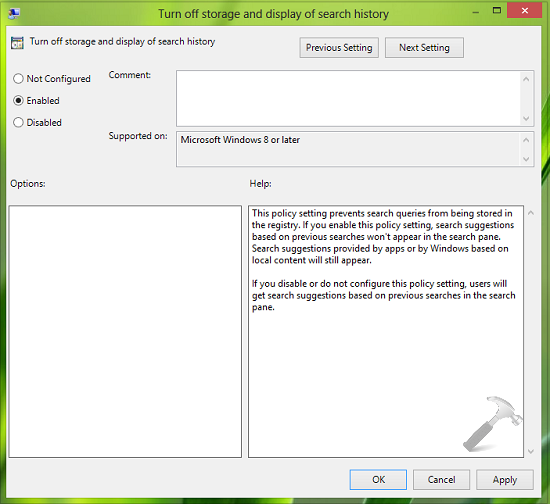
4. In the above shown window, click on Enabled to disable storage and display of past search suggestions for File Explorer or leave this as Not Configured to show past search suggestions. Click Apply followed by OK. Reboot to make changes effective.
That’s it!
![KapilArya.com is a Windows troubleshooting & how to tutorials blog from Kapil Arya [Microsoft MVP (Windows IT Pro)]. KapilArya.com](https://images.kapilarya.com/Logo1.svg)


![[Latest Windows 10 Update] What’s new in KB5055612? [Latest Windows 10 Update] What’s new in KB5055612?](https://www.kapilarya.com/assets/Windows10-Update.png)


Leave a Reply