

The repetition of Windows 11 updates with the same update continues to plague users who experience this problem. Users across Windows 11 platforms experience repeated installation cycles of the same update on their systems. Having this problem leads to bandwidth waste, reduces system performance, triggers update failures, and interferes with daily operations. The following article examines the most effective solutions to address instances where Windows 11 keeps installing same update.
Page Contents
Why Does Windows 11 Keep Installing the Same Update?
Understanding the root causes of Windows 11 repeatedly installing updates should be our first priority. Common causes include:
- Corrupted system files
- Incomplete update installation
- Windows Update service malfunction
- Cached update data conflicts
- Faulty or incompatible update
The following guide shows the necessary steps to resolve the issue.
Fix Windows 11 keeps installing same update
Method 1: Restart Your Computer
A basic restart operation sometimes interrupts the update loop. The operating system continues to update the installation until the system completes a full restart.
1. Click on the Start menu. Click the Power icon from the Start menu and then select Restart.
![]()
2. Check the update status again after Windows completes its boot sequence. Proceed to the following methods if the problem does not resolve.
Method 2: Run the Windows Update Troubleshooter
Windows 11 provides users with a built-in Windows Update Troubleshooter, which automatically detects and repairs typical update issues.
1. Open Settings by pressing Windows + I. Open System from the menu, then select Troubleshoot, followed by Other troubleshooters.
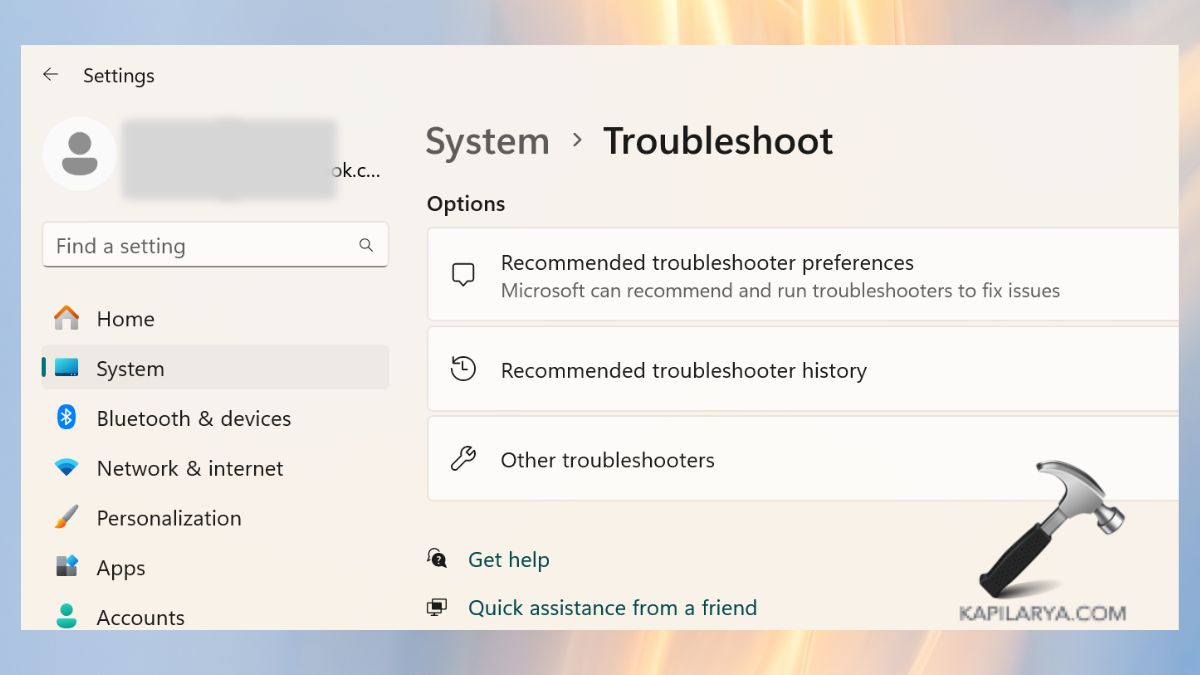
2. Open the Windows Update section and activate the Run function.

Users must follow the displayed instructions while applying all suggested repairs.
Method 3: Clear the SoftwareDistribution Folder
The SoftwareDistribution folder contains temporary update files that Windows uses. Windows will continue attempting to reinstall the same update when the files within the SoftwareDistribution folder become corrupted. Clearing this folder can help.
1. Open the Run dialog by pressing Windows + R, then enter the command followed by hitting Enter.
services.msc
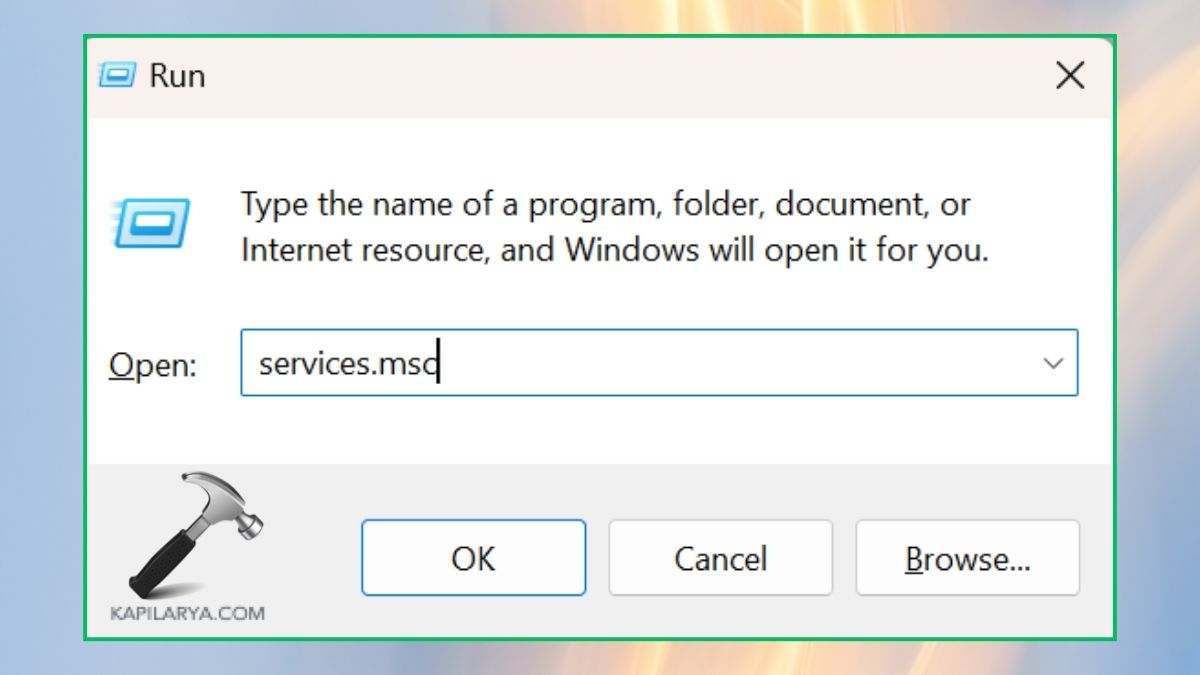
2. Right-click on Windows Update service > Stop.

3. Navigate to-
C:\Windows\SoftwareDistribution
4. Remove all files from the folder but keep the folder itself intact.

5. Return to the Services section to restart the Windows Update service. Restart your PC.
Method 4: Uninstall and Reinstall the Problematic Update
Manually uninstalling and reinstalling a particular update that loops can potentially fix the issue.
1. Access the Settings menu, then navigate to Windows Update, followed by Update history.
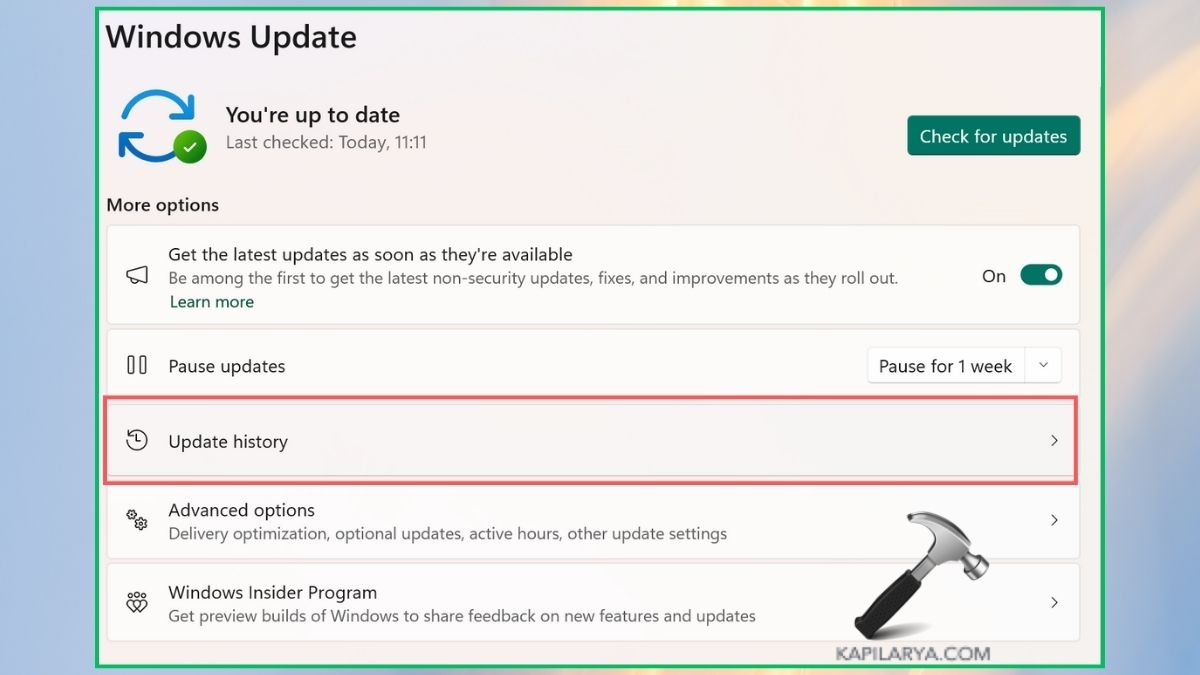
3. Click Uninstall updates.

4. Select the problematic update, then right-click it to choose Uninstall from the menu.

5. Restart your PC.
6. Find the update through the Microsoft Update Catalog website (https://catalog.update.microsoft.com/Home.aspx) to perform manual installation.
Here, paste the update number and install it.

Method 5: Run SFC and DISM Scans to Fix Corrupt System Files
System file corruption stands as a primary reason behind update failures that persist in Windows 11.
Run SFC (System File Checker)
1. Open the search bar and type cmd then right-click Command Prompt and select Run as administrator from the options.

2. Enter the command.
sfc /scannow

The scan process will finish while the system repairs files.
Run DISM
1. The next step after SFC execution requires this DISM command to run.
DISM /Online /Cleanup-Image /RestoreHealth

2. After the process completes, you should restart your computer to verify if updates have become available.
Method 6: Reset Windows Update Components
The process of manually resetting Windows Update components stops the same update from continuously reinstalling itself.
1. Open Command Prompt as an administrator.
2. Enter the following commands one by one through the Command Prompt window.
net stop wuauserv
net stop cryptSvc
net stop bits
net stop msiserver
ren C:\Windows\SoftwareDistribution SoftwareDistribution.old
ren C:\Windows\System32\catroot2 catroot2.old
net start wuauserv
net start cryptSvc
net start bits
net start msiserver

3. Close the Command Prompt application, then restart your computer.
Frequently Asked Questions (FAQs)
#1 Why does Windows 11 keep reinstalling the same update?
The issue occurs primarily because of damaged update files or unfinished installations, or Windows failing to detect successful updates. The continuous reinstallation occurs because of system glitches or unsuccessful previous update attempts.
#2 Is it okay to delete the SoftwareDistribution folder?
The process of deleting SoftwareDistribution folder contents presents no safety risks. The procedure is safe for personal files because it allows Windows to obtain fresh update data, which fixes update errors.
#3 Can I stop a specific Windows update from reinstalling?
Yes. Microsoft’s “Show or Hide Updates” tool enables users to block problematic updates from reinstallation until Microsoft releases a fix.
#4 Will resetting Windows Update components delete any data?
The process of resetting Windows Update components impacts only the Windows Update services and folders. The reset operation leaves your personal files and installed applications, and user settings completely unaffected.
That’s it!


Leave a Reply