

If Excel Find is not functioning properly on your Windows 11 PC and you are searching for solutions to fix find and replace not working, then you are at the right place. This comprehensive easy-to-follow guide will help you to solve the issue without any difficulty.
Page Contents
Fix Excel find and replace not working
Excel may not be able to find or replace the required data due to various reasons. These reasons may consist of wrong formulas, missing data, protected sheets, etc. Apart from all these, it is also important to ascertain that the data entered is right and is same to the searchable data. In fact, even the cases should match appropriately when doing a case-sensitive search.
In some PCs, the ‘Ctrl +F’ option might also not be functioning properly. Keyboard problems, outdated drivers, disabled keys, etc. might be the cause of this issue. Hence, now let us look at 7 effective fixes which will help us solve the mentioned issue.
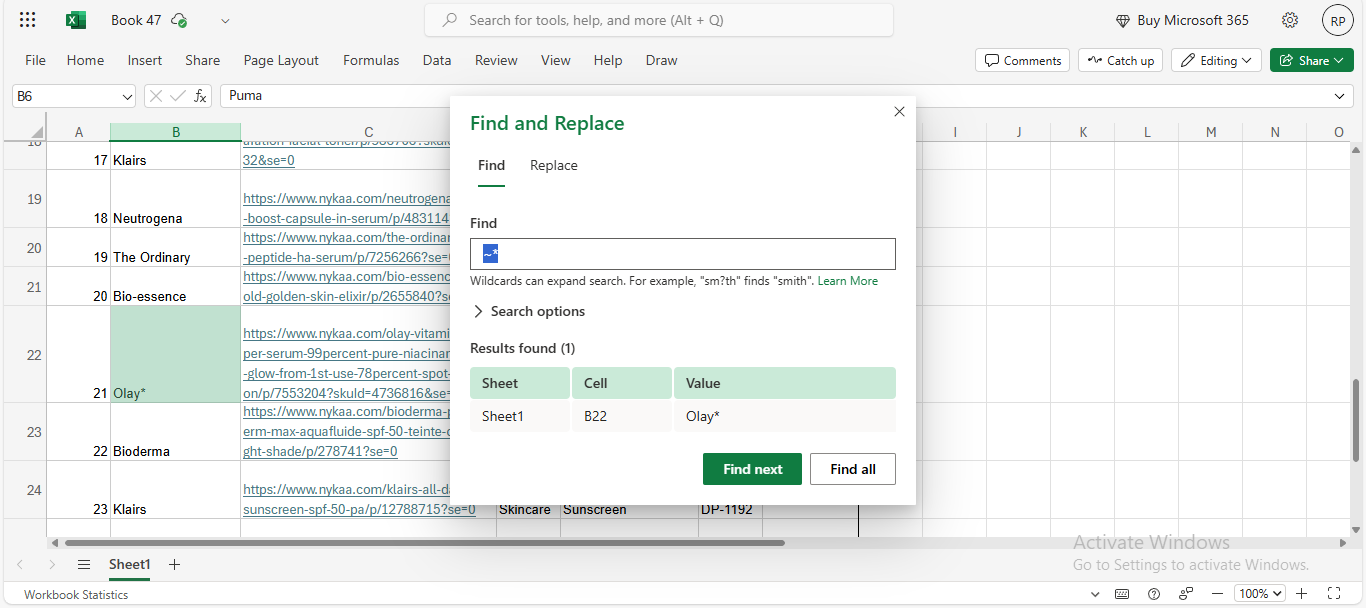
Fix 1: Finding special characters to fix Find and Replace
At the time of searching, Excel treats some special characters such as ‘?, *, and ~’ as wildcards. For instance, if someone searches, ‘Item*ABC’, then Excel will match its value to any value which might be ‘Item1ABC’, ‘Item2ABC’, etc. This is due to the reason that ‘*’ is a wildcard that can match any special character. Hence, to find actual special characters, type a tilde (~) before the specific character.
Fix 2: Repairing and Updating Office and Windows
Installation of latest Windows updates might also aid to solve the issue. Thus, the PC must consist of the latest versions of both the Microsoft Office and Windows. But if the issue still continues try repairing the Office installation.
To Update Windows, go to Settings and then to Windows Update. Check if there is any update available. Thereupon, update if necessary.

The MS Office can easily be repaired by going to the Control Panel> Programs and Features> Microsoft Office product. Thereafter selecting the option of Quick Repair/Online Repair will start the repair process.

Fix 3: Resetting search settings to fix Find and Replace
At times, the Excel Find might also not work when the dialog box of Find has wrong options selected, viz., in place of looking for values, looking for formulas. To avoid this, follow the given steps below.
Step 1- Type Ctrl+F and open the Find dialog box.

Step 2- Select Search Options to open the settings.
Step 3- Selecting only a group of cells in Excel will lead to the Find function search only within those selected cells instead of the whole worksheet. Thus, if a selection exists, deselect it.
Step 5- Next, set the ‘Within:’ to Sheet or Workbook as per requirement in the Options>> menu.
Step 6- Ascertain the ‘Look in:’ option is apt for searching. In Excel, the default option for ‘Look in’ is Formulas. This lets Excel search the real formulas in cells. Change it to Values is looking for displayed values.
Step 7- Uncheck ‘Match case’ and ‘Match entire cell contents’ if case sensitivity is not needed and selective matches are required.
Fix 4: Unprotecting the Worksheet
A ‘protected’ worksheet is subject to various restrictions in editing, searching, formatting, etc. As a result, it leads to the prevention of full functioning of the Find button. Thus, to solve this issue follow these steps-
Step 1- Go to the Review tab and then to the Protection section.

Step 2- Now, select Manage Protection and turn off the Protect sheets.

Step 3- If it was turned on then enter the password which was previously set to unprotect the sheet.
Fix 5: Distortion of Excel Worksheet
The Find & Replace function also may stop working if the searched data is absent from the Excel Worksheet. This happens due to the existence of corruption in the Excel file. To repair a corrupted file, follow the given steps-
Step 1- Go to File> Open in MS Excel.

Step 2- Choose the corrupted file.
Step 3- Now, select the arrow button near the Open option/
Step 4- Lastly, select Open and Repair to begin the repair.
Fix 6: Absence of Find All
Pressing the Replace All or Replace Option without selecting the Find All or Find Next option will lead to the appearance of an error message on the screen saying, ‘We can’t find any matches to replace’. Therefore, to avoid this issue make sure to first press the Find All or Find Next button before pressing the Replace All or Replace button.

Fix 7: Clearance of filters and unhiding hidden data
Excel is not defaulted to search inside hidden or filtered data. Thus, for the function to work properly, unhide any hidden data or clear any existing filters. To do the same, follow the process given below-
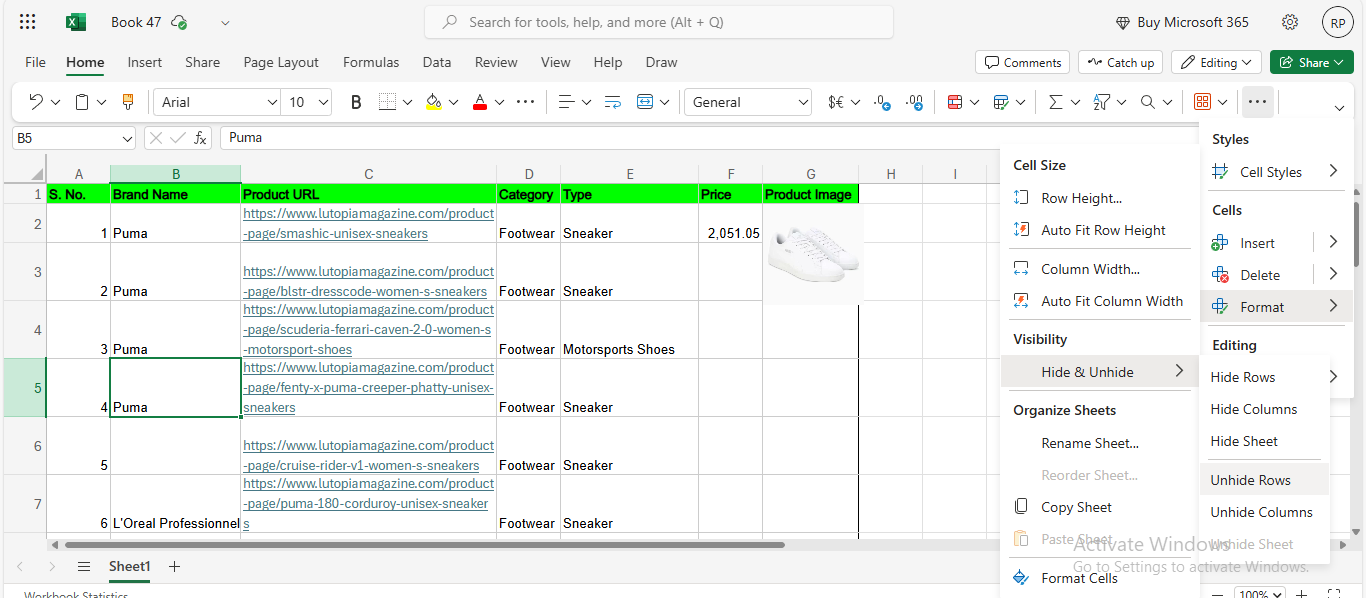
Step 1- Click on the worksheet to find any hidden rows or columns.
Step 2- Go to Format dialog box on the Home tab and select Visibility.
Step 3- Lastly select Unhide Rows/Columns to unhide the required rows or columns.
Hoping that with the help of this post, one can effortlessly tackle the mentioned issue.


Leave a Reply