Windows Recall is a new AI-driven feature in Windows 11 (part of Copilot + PC), which, when turned on, automatically captures and organizes snapshots of your screen every few seconds whenever it detects changes. These snapshots are saved locally on your computer, allowing you to search for and retrieve past activities at any time. However, several users who are concerned about their privacy want to remove or disable the Recall AI feature on their Windows 11 devices. If you’re one of those users, this guide might help you.
Page Contents
Disable Recall Feature in Windows 11
Disable Recall AI using Command Prompt
DISM (Deployment Image Servicing Management) is a built-in command-line tool in Windows computers used to repair Windows images. However, you can also use it to enable or disable Windows Optional features like the Recall. Here’s how you can do this:
1. Open the Start menu, type “cmd” and select “Run as administrator” to launch the Command Prompt with administrative privileges.
2. Type the following DISM command in the Command Prompt to disable the Recall feature:
DISM /Online /Disable-Feature /FeatureName:"Recall"

3. This, restart your PC to apply the changes.
Disable Windows Recall using Windows PowerShell
1. Right-click the Start menu and select “Terminal(Admin)”.
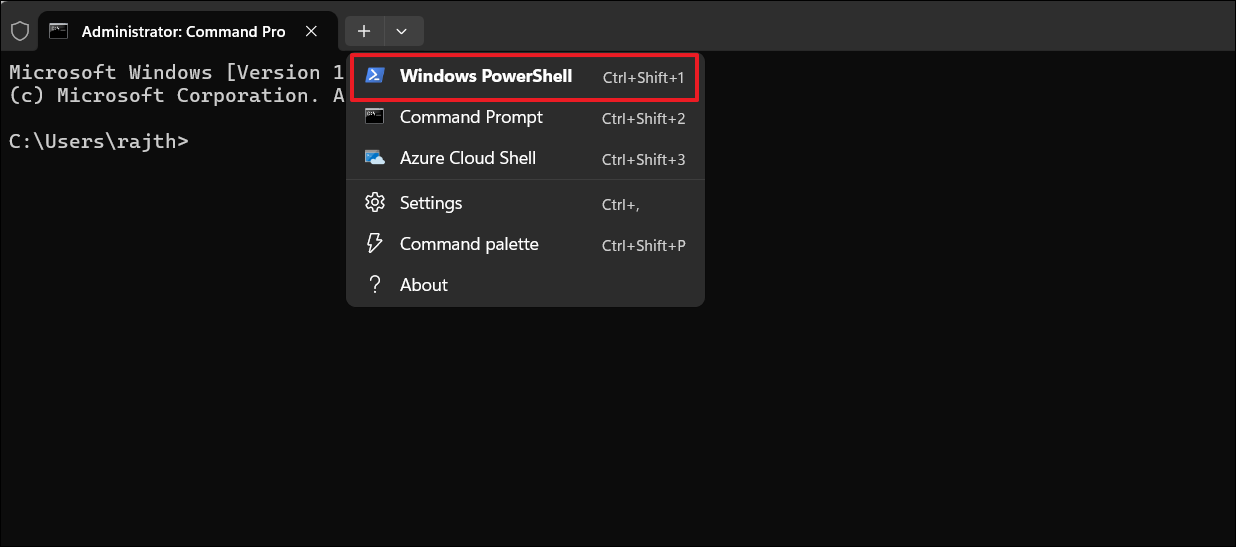
2. If Windows Terminal isn’t open in the PowerShell profile, click the drop-down menu and choose “Windows PowerShell” to launch the PowerShell.

3. In the Windows PowerShell, run the following command:
Disable-WindowsOptionalFeature -Online -FeatureName "Recall"

4. Then, restart your computer.
Remove Recall feature using Windows Features
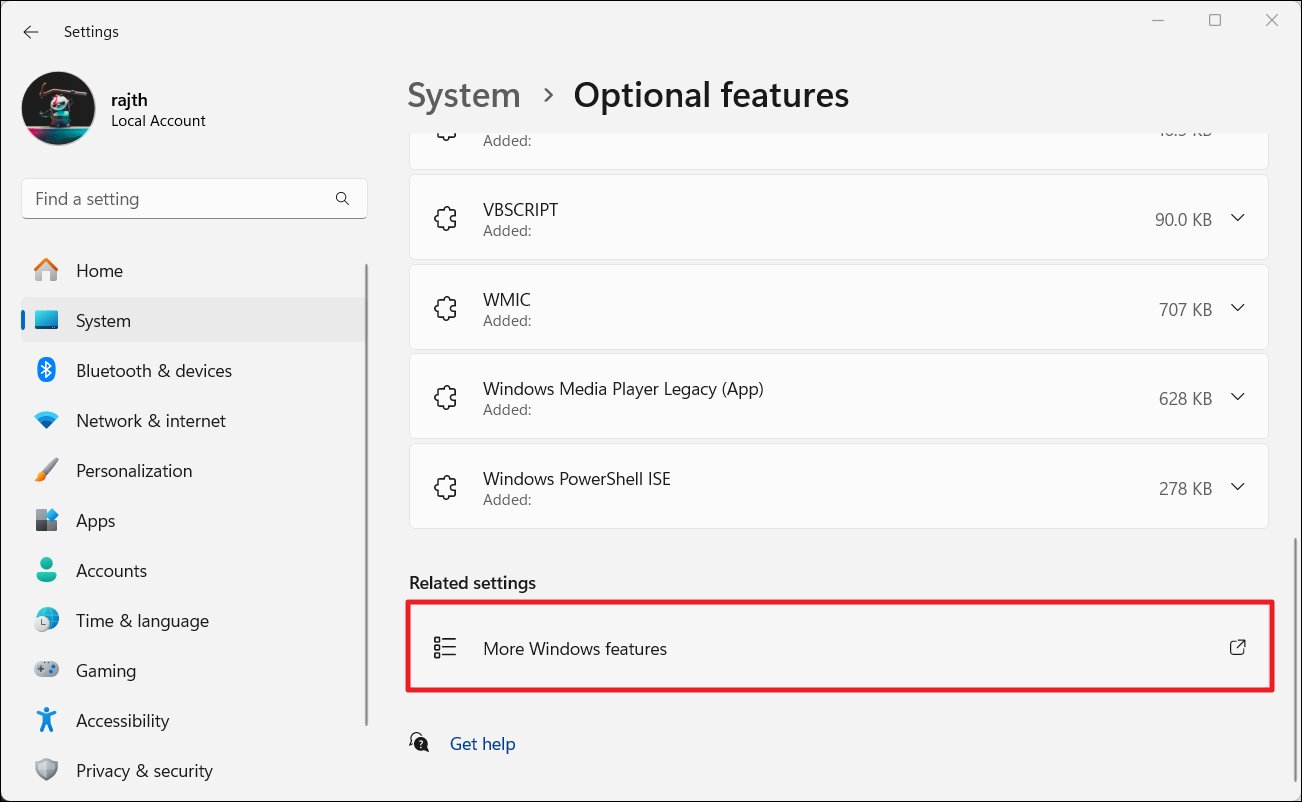
1. Open Windows Settings and navigate to “System” > “Optional features”.
2. Then, scroll down to the bottom of the settings page and click the “More Windows features” button.

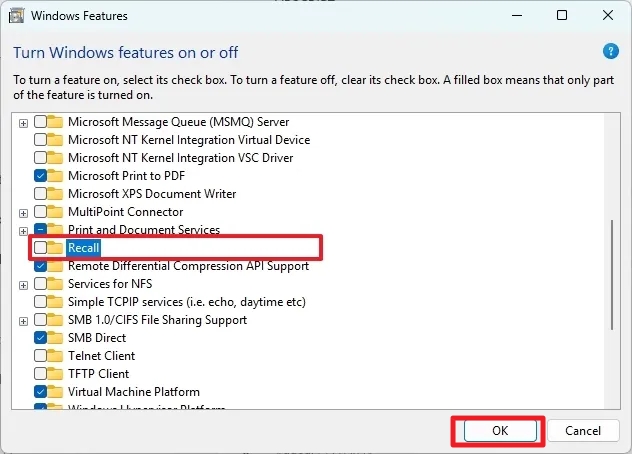
3. Once the Windows Features dialog box opens, find and uncheck the “Recall” option and click “OK“.

4. Reboot your computer.
If you wish to re-enable the Recall feature, all you have to do is open the Windows Features window, check the “Recall” option, and click “OK“.
That’s it.
![KapilArya.com is a Windows troubleshooting & how to tutorials blog from Kapil Arya [Microsoft MVP (Windows IT Pro)]. KapilArya.com](https://images.kapilarya.com/Logo1.svg)


Leave a Reply