The Lock Screen slideshow feature in Windows 11; users appreciate the chance to change the log-in background with the photographs with the help of this function. However, like any other feature, it may sometimes come with some problems that hinder its performance.
The common causes for this error are-
1. Incorrect Settings Configuration
2. Corrupt or Unsupported Image Files
3. Folder Permissions Issues
4. Power Settings Restrictions
5. Software Glitches or System Bugs
If you are one among the users who feel that the Lock Screen slideshow is not working, you are in the right place. This article outlines the potential causes and guides learners on eight possible ways of resolving the issues so as to continue with a captivating and entertaining slideshow in Windows 11.
Page Contents
Fix Lock Screen slideshow not working on Windows 11
Fix 1: Make sure that images are not deleted
In one of the cases, the issue with the Lock Screen slideshow not functioning on Windows 11 could be that the images that are in the folder chosen have been renamed or deleted. To rectify this, ensure that the folder that is set to contain the images for the slideshow has not been deleted. Proceed to the folder and make certain all the files are convert to pictures available. If any files are missing or deleted, retrieve the files or choose another folder with the images to download. Moreover, check that the correct folder path is entered in the settings of the Lock Screen. These files have to be preserved as they enable the slideshow to run smoothly without another error.
Fix 2: Re-add Folders
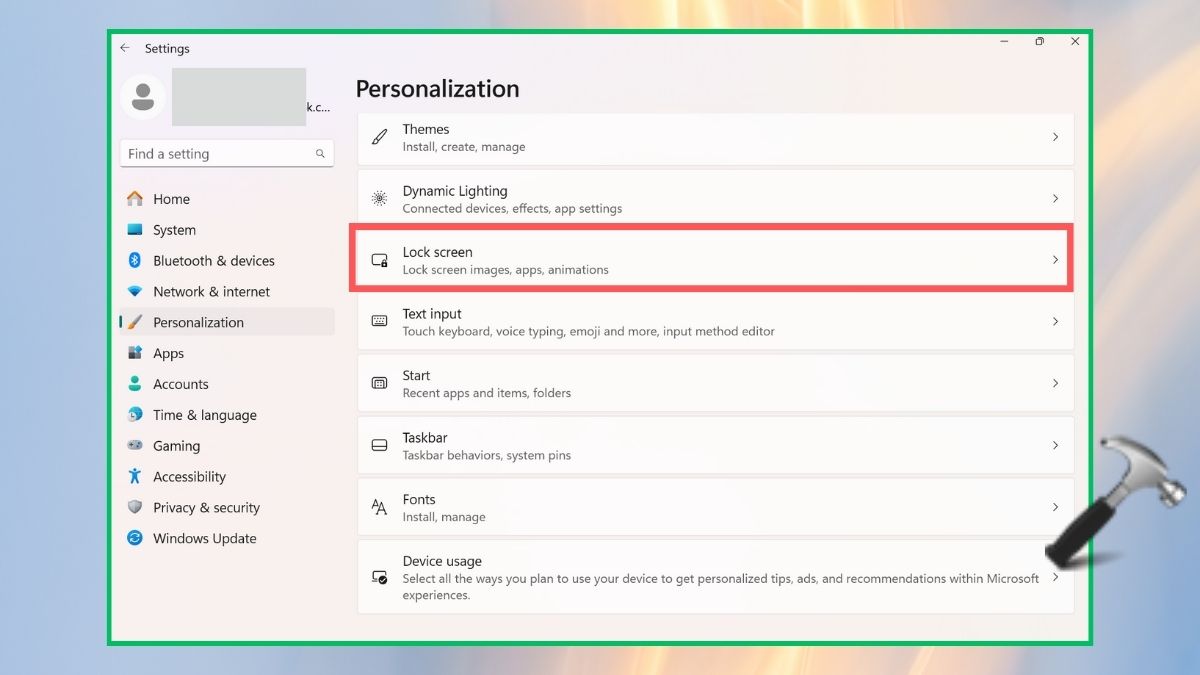
1. Go to Windows Settings > Personalization > Lock screen.

2. Here, if the folder is already added, tap “Remove”.
3. Then, tap “Browse” and re-add the folder.

Fix 3: Manually Enable Slideshow
1. Follow the step 1 of the previous solution.
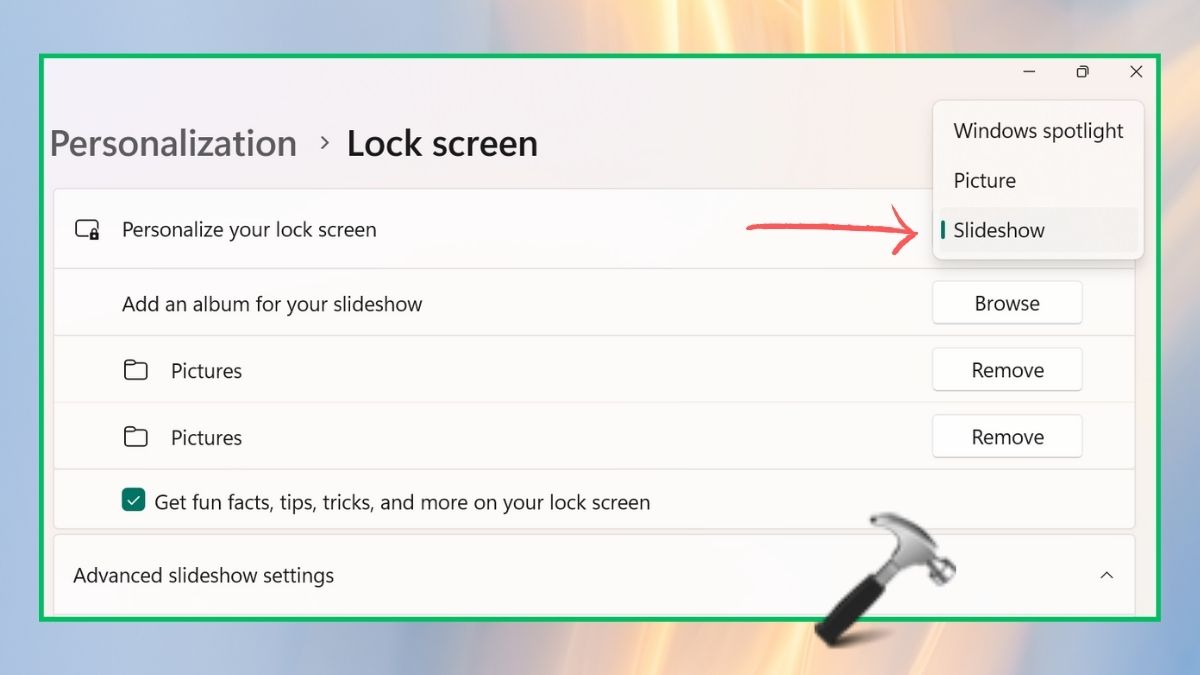
2. From the drop-down of “Personalize your lock screen”, select “Slideshow”.

Fix 4: Don’t turn off the screen after the slideshow has played
1. Again, follow step 1 of the Fix 2.
2. In the “Advanced slideshow settings” section, find “Turn off the screen after the slideshow has played for”. And choose “Don’t turn off”.

Fix 5: Change Power Options Settings
1. Open the Control Panel app.

2. Select Power Options.

3. Select “Change plan settings”.

4. Tap on “Change advanced power settings”.

5. Open Desktop background settings > Slideshow > On battery. Select “Available”.

Fix 6: Verify Indexing Options
1. In the Windows search bar, type “Indexing Options” and select the best match.

2. Select “Advanced” button.

3. In the File Types section, select all the JPG, JPEG, or PNG files and tap “OK”.

Now, restart the PC and check if the Lock Screen slideshow not working on Windows 11 is solved.
Fix 7: Check Registry Editor to fix Lock Screen Slideshow Error
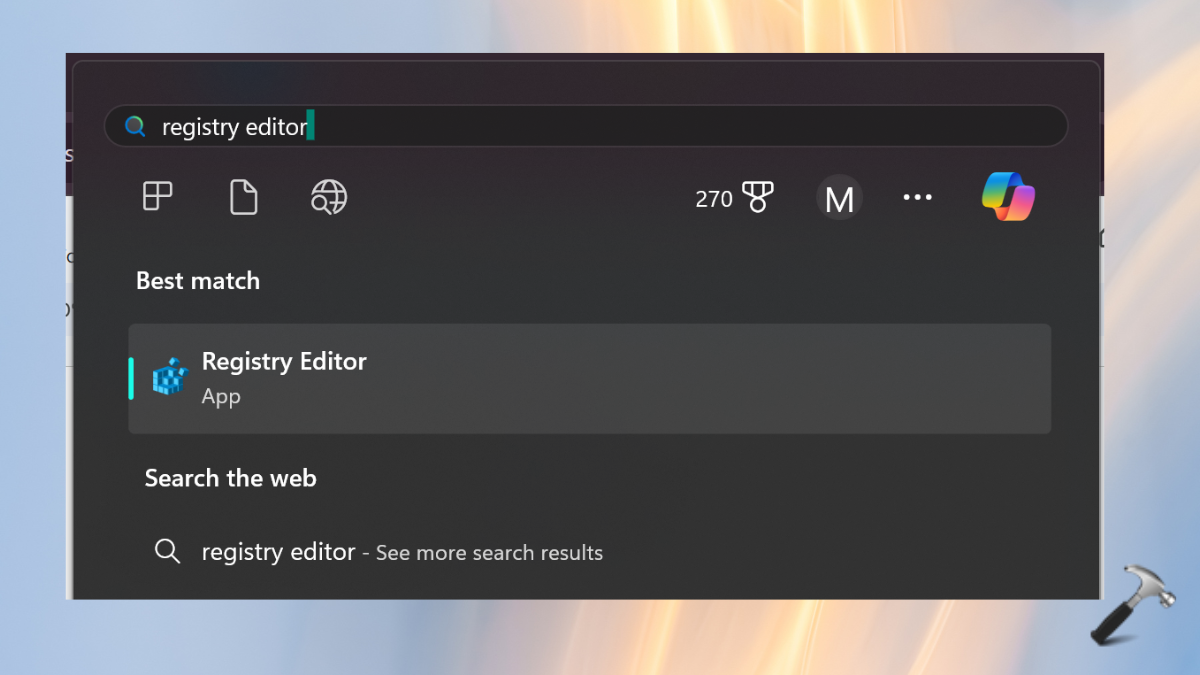
1. Open the Registry Editor app from the Windows search bar.

2. Navigate to this path:
Computer\HKEY_LOCAL_MACHINE\SOFTWARE\Policies\Microsoft\Windows\Personalization
3. Now, find “NoLockScreenSlideshow” and set the value to 0.

Fix 8: Use Group Policy
1. Open the Group Policy editor from the search window.
2. Look for the below path:
Computer Configuration > Administrative Templates > Control Panel > Personalization
3. Find and double-click Prevent enabling the lock screen slide show. Choose “Disabled” or “Not Configured” and tap “OK”.
Though, if you face any queries while performing these solutions, comment down below. We would be happy to help you out.
That’s it!
![KapilArya.com is a Windows troubleshooting & how to tutorials blog from Kapil Arya [Microsoft MVP (Windows IT Pro)]. KapilArya.com](https://images.kapilarya.com/Logo1.svg)


Leave a Reply