Do you wish to improve battery life on Windows 11? Well, you can do it without compromising the PC’s performance. But how? Windows 11 has been designed with ample features and settings to improve the PC’s battery life. This article stacks up eight effective yet easiest methods to get the most out of the battery life on Windows 11.

Page Contents
How To Improve Battery Life On Windows 11
Method 1: Keep Your System Up-to-date
It is essential to keep the system updated to avoid errors and battery drainage issues.
1. Go to the Windows Settings > Windows Update.
2. Click on the “Check for Updates” button.
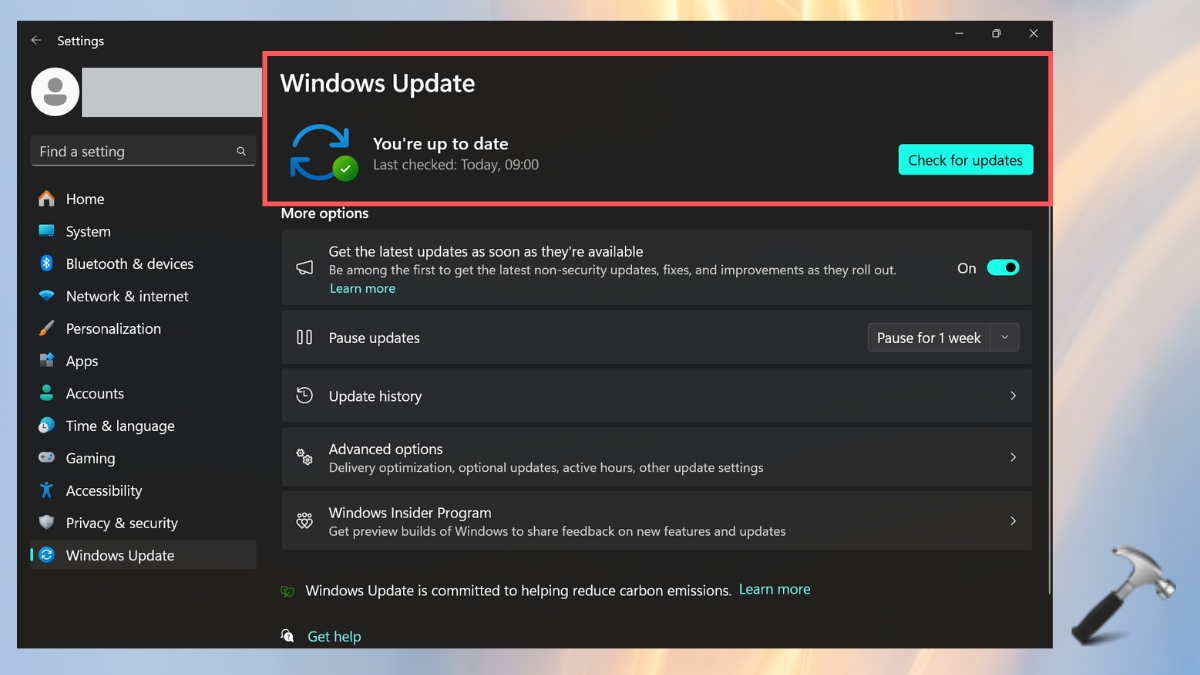
3. If any updates are listed, click download and install. Once it gets installed successfully, give a restart to the PC.

Method 2: Use Dark Theme
A darker theme can reduce battery consumption and easier for your eyes.
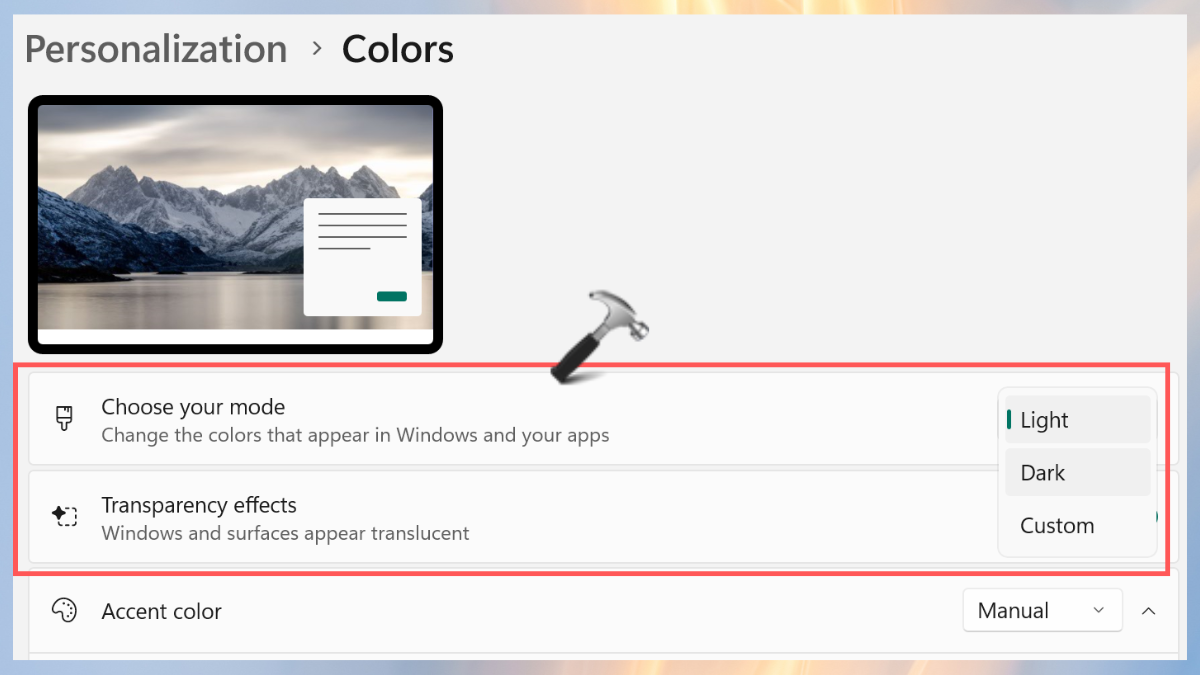
1. Go to Windows Settings > Personalization > Colors.
2. In the “Choose your mode” section, tap the “Dark” theme.
Method 3: Alter Display Settings
Brighter screens consume more battery power. Hence, you can lower the brightness with the below steps:
1. Go to the Windows Settings > System > Display.
2. From the Brightness & Color section, lower the brightness level.

Method 4: Change App Background Activity
To maintain optimal performance of the PC, Windows 11 needs a few apps to run in the background. But, some unnecessary applications can also run in the background activity resulting in battery drainage. To avoid that, get ahead with the following steps:
1. Again, open the Windows Settings or just press the Windows+I keys.
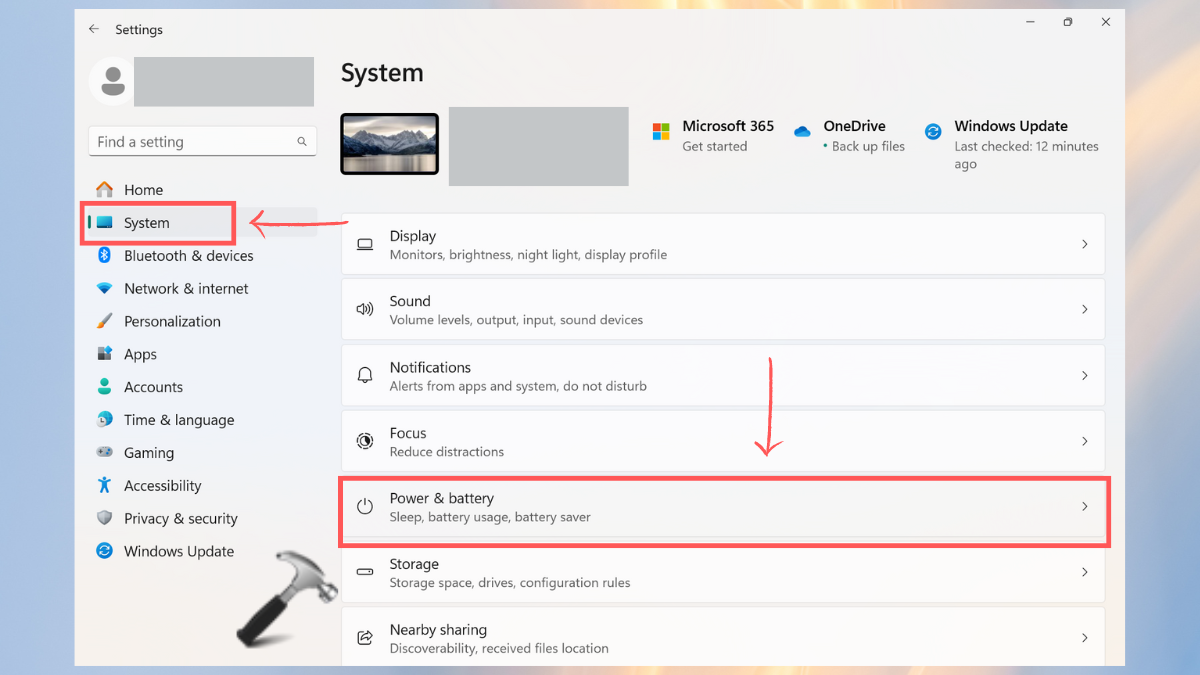
2. From the left panel, go to the System > Power & battery.
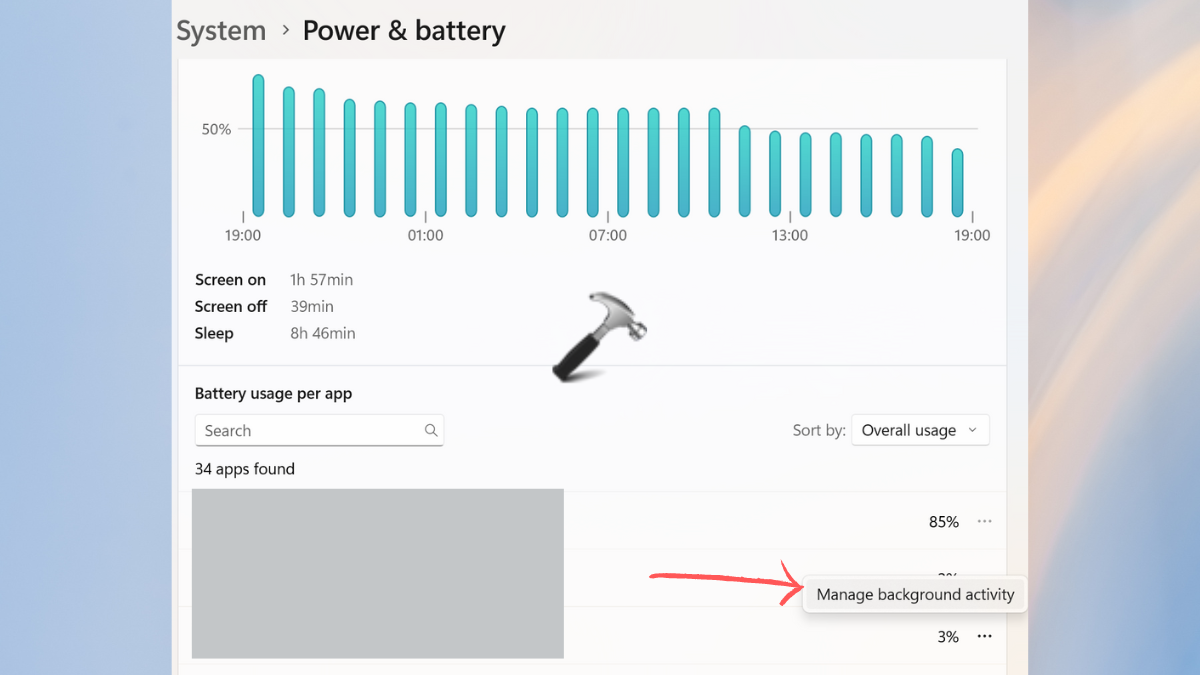
3. Open the Battery Usage section and check the apps consuming more battery.

4. Click the three-dot icon next to the app and tap “Manage background activity”.
5. In the Background app permissions, choose “Never” or “Power Optimized (recommended)”.

Method 5: Use Battery Saver
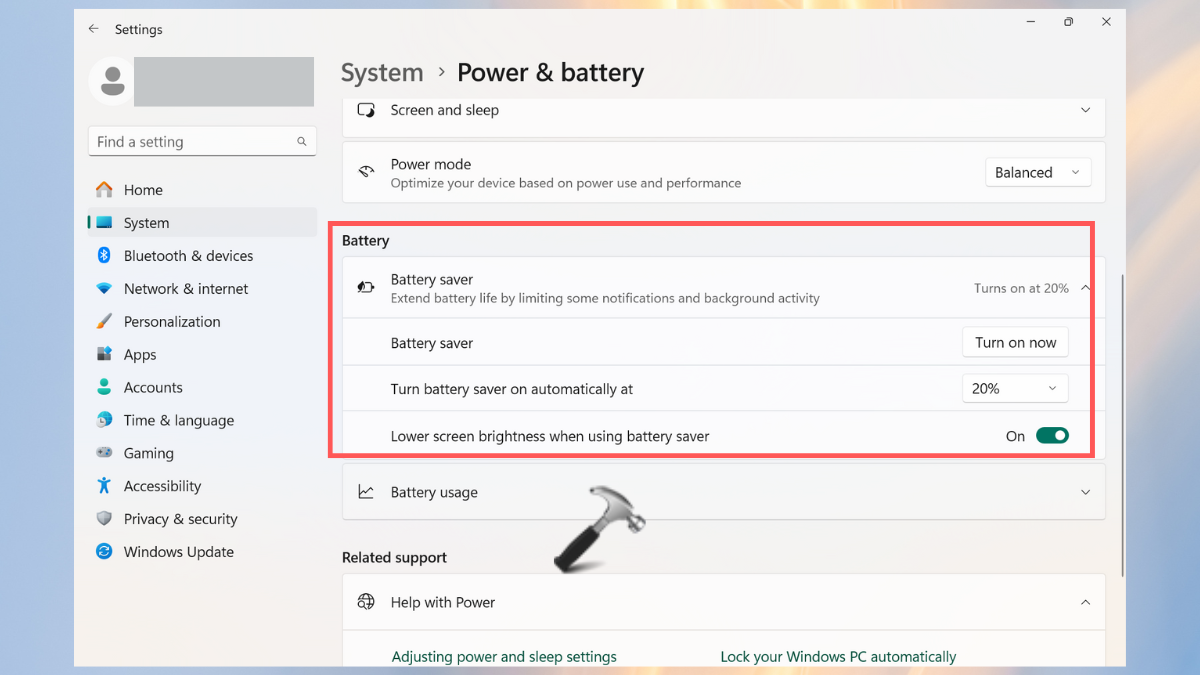
The Battery Saver Mode is an efficacious feature of Windows 11. When turned on, it automatically stops background activities, turns off notifications, and lowers the brightness level. To use a battery saver, follow the below simple steps:
1. Navigate to Windows Settings > System > Power & Battery.
2. Open the drop-down menu of the Battery Saver section and tap “Turn on now”.
Additionally, you can toggle on “Lower screen brightness when using battery saver” option.
Method 6: Turn off the Display
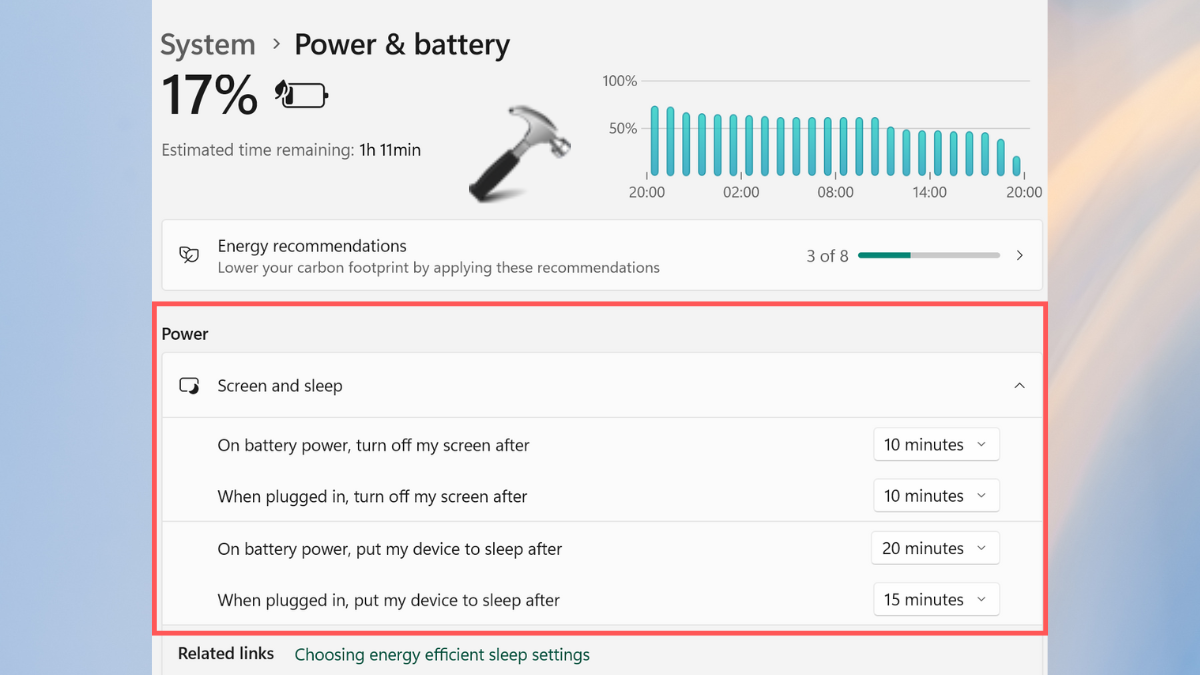
When the system goes into an inactive state, the display can be on and consume battery unnecessarily. To turn off the display, follow the below steps:
1. Open Windows Settings > System > Power & battery > Screen & sleep.
2. Choose the number of minutes you want the display to be on for all four given options.
Method 7: Change the Action of the Closing Lid
1. Search “control panel” on the search bar and select the best match result.
2. Click on Power Options. If the settings are not visible, switch to Large icons mode.

3. From the left panel, select “Choose what closing lid does”.

4. Choose settings for “On Battery” and “Plugged in” in the “When I close the lid” section.

Method 8: Change Power Modes
1. Open Windows Settings or press the Windows+I keyboard keys.
2. Go to System > Power & Battery.
3. In the Power section, choose Power mode from the given 3 options: Best Power Efficiency, Balanced, or Best Performance. It is advisable to choose either Balanced or Best Power Efficiency mode.

That’s it!
![KapilArya.com is a Windows troubleshooting & how to tutorials blog from Kapil Arya [Microsoft MVP (Windows IT Pro)]. KapilArya.com](https://images.kapilarya.com/Logo1.svg)


Leave a Reply