The Access Denied error in Windows 11 can pop up while opening a folder. The reasons for this are inappropriate computer permissions, corrupted files or folders, incorrect folder settings, antivirus interference, or encryption issues. This post gathers the updated solutions to solve the ‘Access Denied’ error in Windows 11.
Page Contents
Fix Folder ‘Access Denied’ Error in Windows 11
Fix 1: Check your permissions
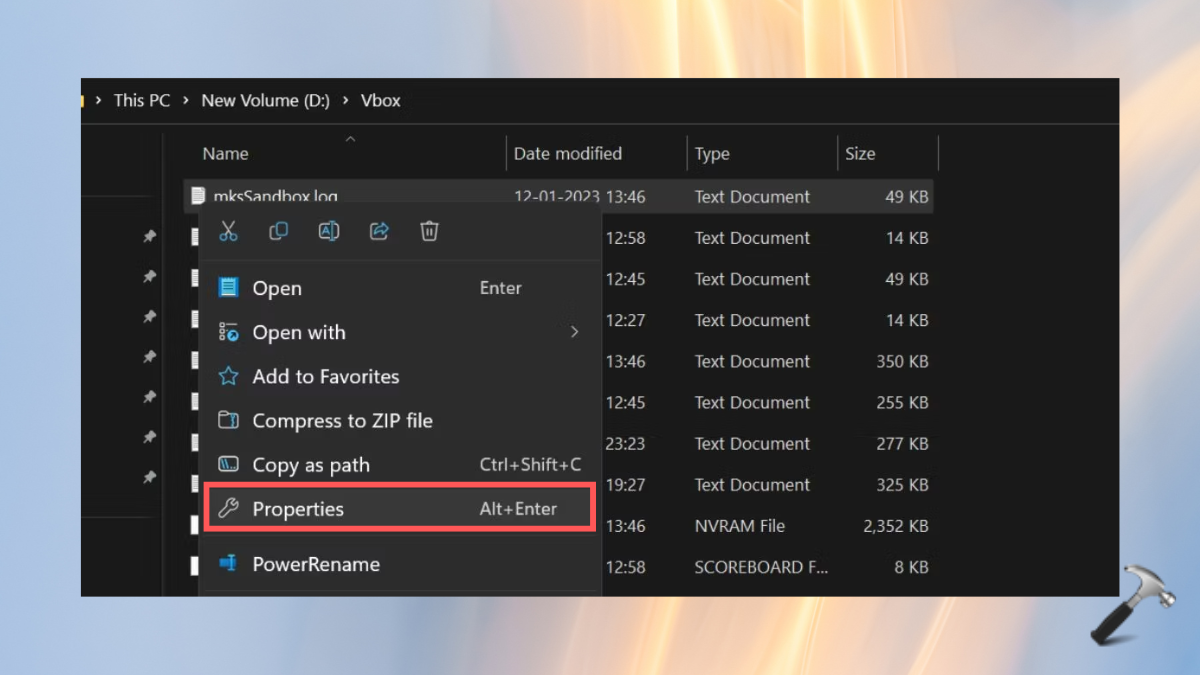
1. Right-click on the folder showing the error, and select “Properties”.
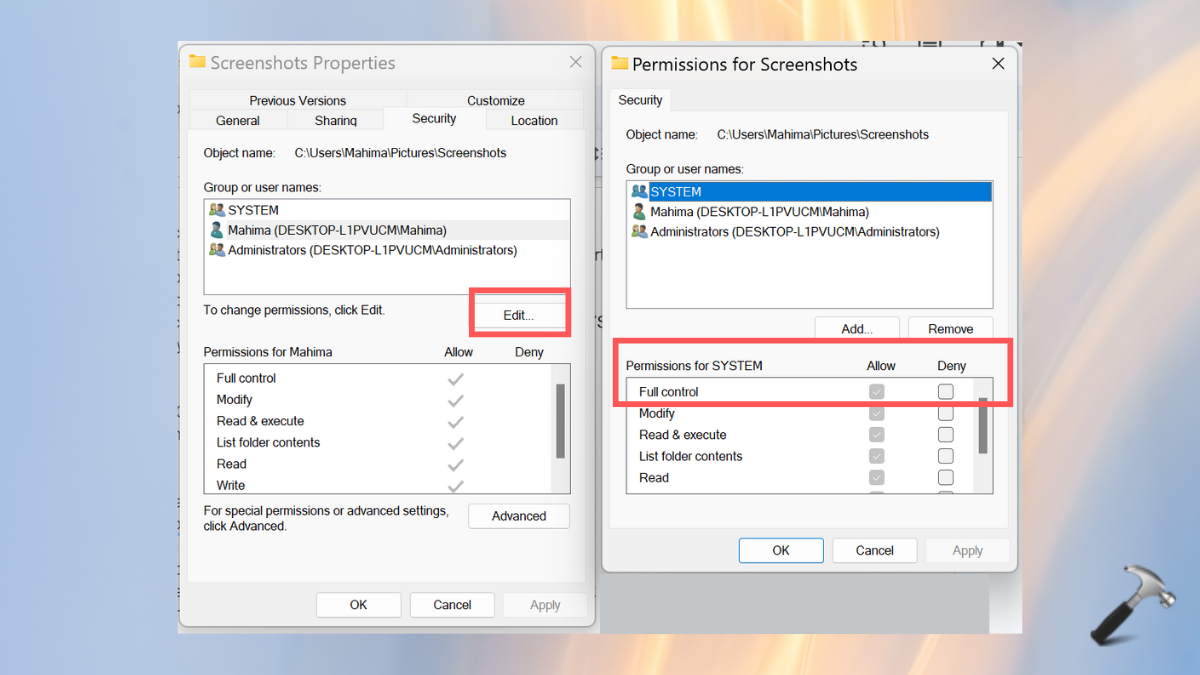
2. Tap on the “Security” tab and click on “Edit”.
3. Select a username from the “Group or user names” section.
4. Check the “Full control” for “Allow” in the “Permissions for SYSTEM”.
5. Lastly, click on “OK” to save the changes done.
Fix 2: Use Computer Management
1. On the Windows Search bar, type “Computer Management”.

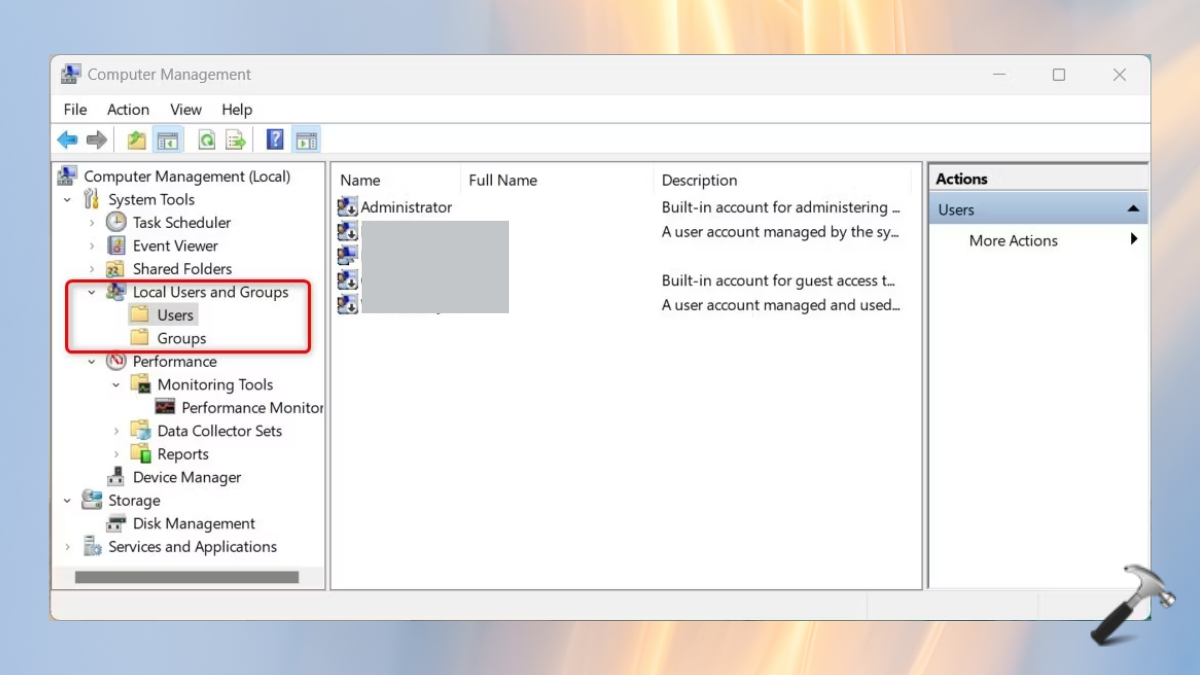
2. Click on Local Users & Groups. Select Users.
3. Click on “Properties” by right-clicking on “Administrator”.
4. In the General section, uncheck the “Account is disabled”.
5. Tap on “Apply” and “OK” to save the changes.
6. Then, in the Groups folder, right-click on “Administrator”.
7. Select “Properties” and click on “Add”.
8. In the “Enter the object names to select”, type “test” and click on Check Names button.
9. Again, click “OK” and “Apply”.

Fix 3: Set your account as administrator
1. Press the Windows+R keys to open the Run box.
2. Type the below command and click “OK”.
control userpasswords2

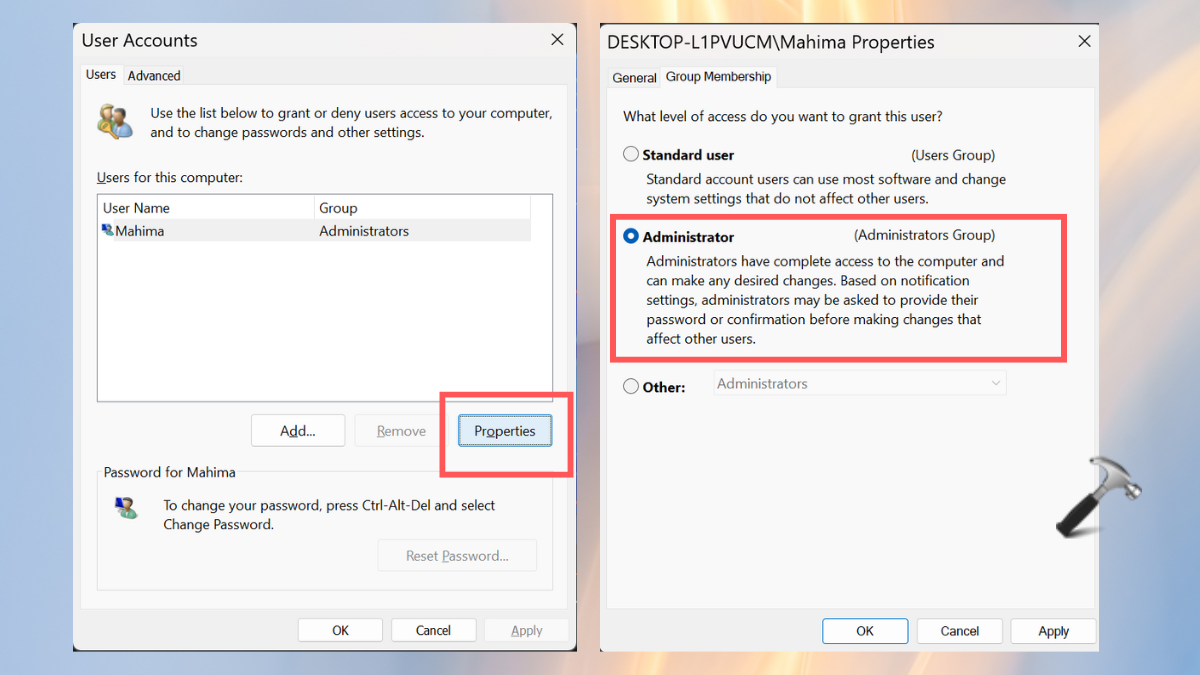
3. Select the account and tap on “Properties”.
4. Go to the “Group Membership” section and choose “Administrator” option.
5. Click on “OK” and restart the system. Try accessing the folder again.
Fix 4: Use the Registry Editor
1. Open the Run box by pressing Win+R keys.
2. Type in “regedit” and click “OK”. Tap on “Yes” to allow it to open.

3. Go to the below-mentioned path:
Computer\HKEY_LOCAL_MACHINE\SYSTEM\CurrentControlSet\Services\LanmanWorkstation\Parameters
4. In the right panel, right-click on the empty space.
5. Type “AllowInsecureGuestAuth” for the new entry.
6. Now, double-click the new entry and type the value to 1. Click “OK”.

Fix 5: Take ownership of the file
5.1 Take ownership via Properties
1. Right-click on the error showing folder, and choose “Properties”.
2. Go to the Security tab and click on “Advanced” button.

3. Click on “Change” at the Owner.
4. Now, in “Enter the name to select field”, type “Administrators”.
5. Select the “Check Names” button and click “OK”.
6. Check the box “Replace all child object permission entries with inheritable permission entries from this object” as done in the image below.
7. Lastly, click “OK”.

5.2 Take ownership via Command Prompt
1. In the Windows search bar, enter “CMD”.

2. Click on Run as Administrator and tap “Yes” on the next screen appears.
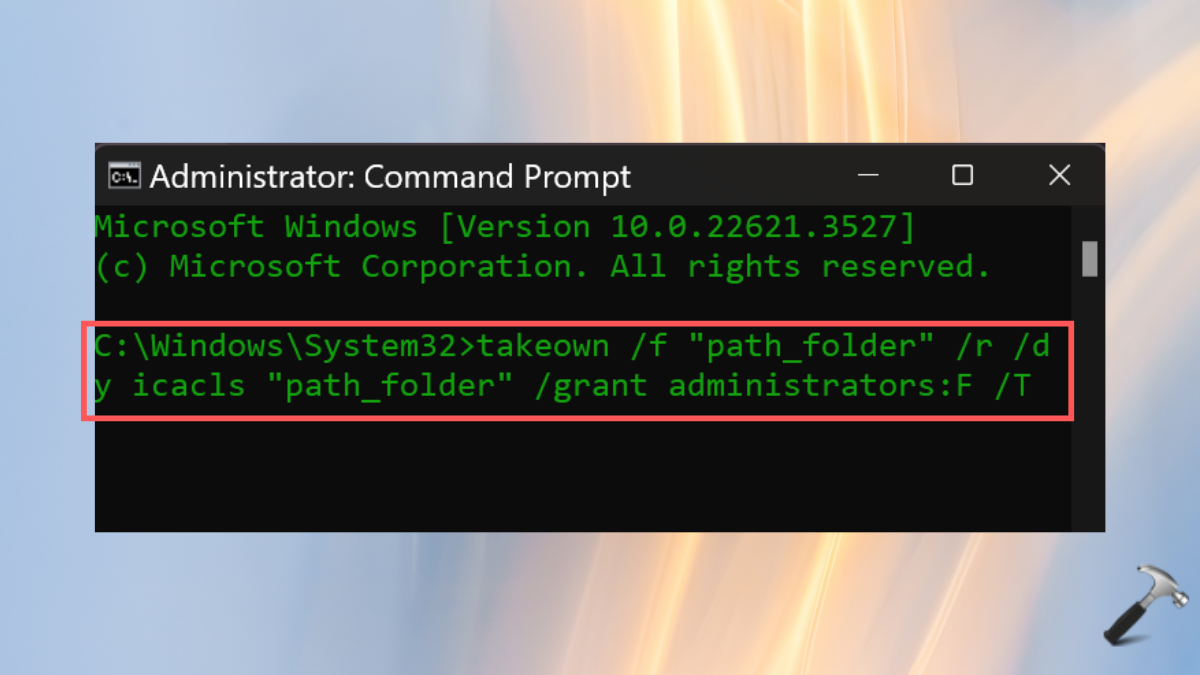
3. Now, copy and paste the below command in the Command Prompt. Also, replace the path_folder with the error showing folder’s path.
takeown /f "path_folder" /r /d y icacls "path_folder" /grant administrators:F /T
4. After entering the command, press Enter.
5. Now, restart the system and again try opening the folder.
Fix 6: Enable the hidden Administrator account
1. Type “cmd” in the Windows search bar and tap “Run as Administrator”.
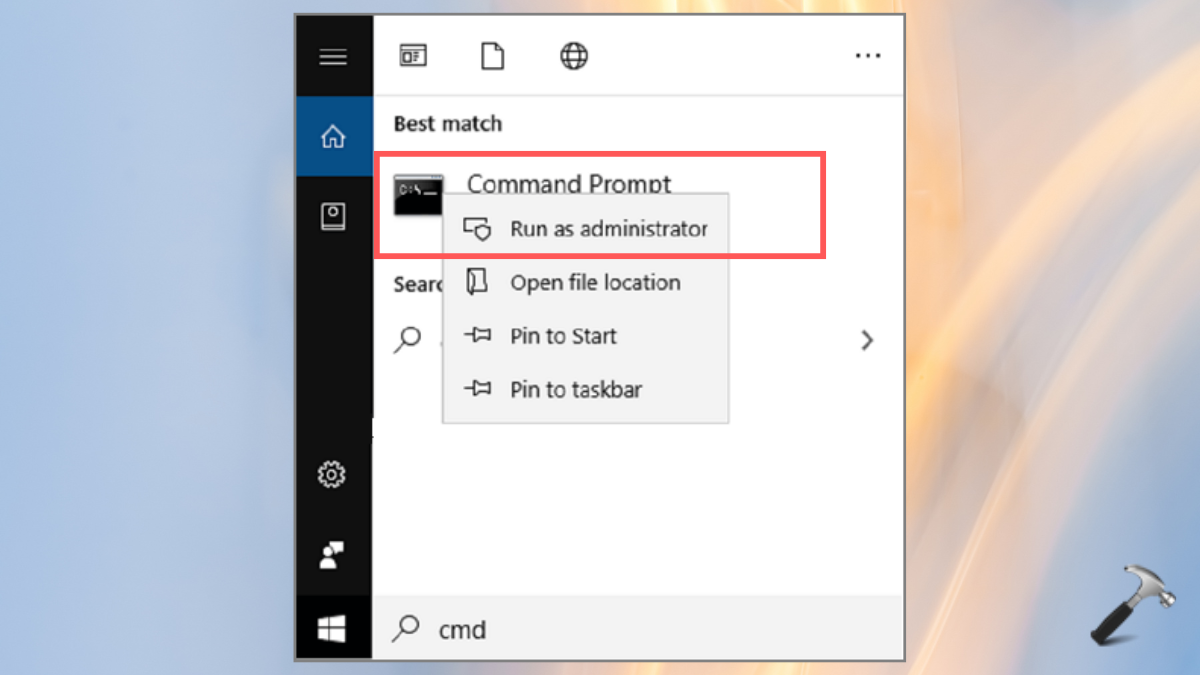
2. Enter the below command and hit Enter:
net user administrator /active: yes
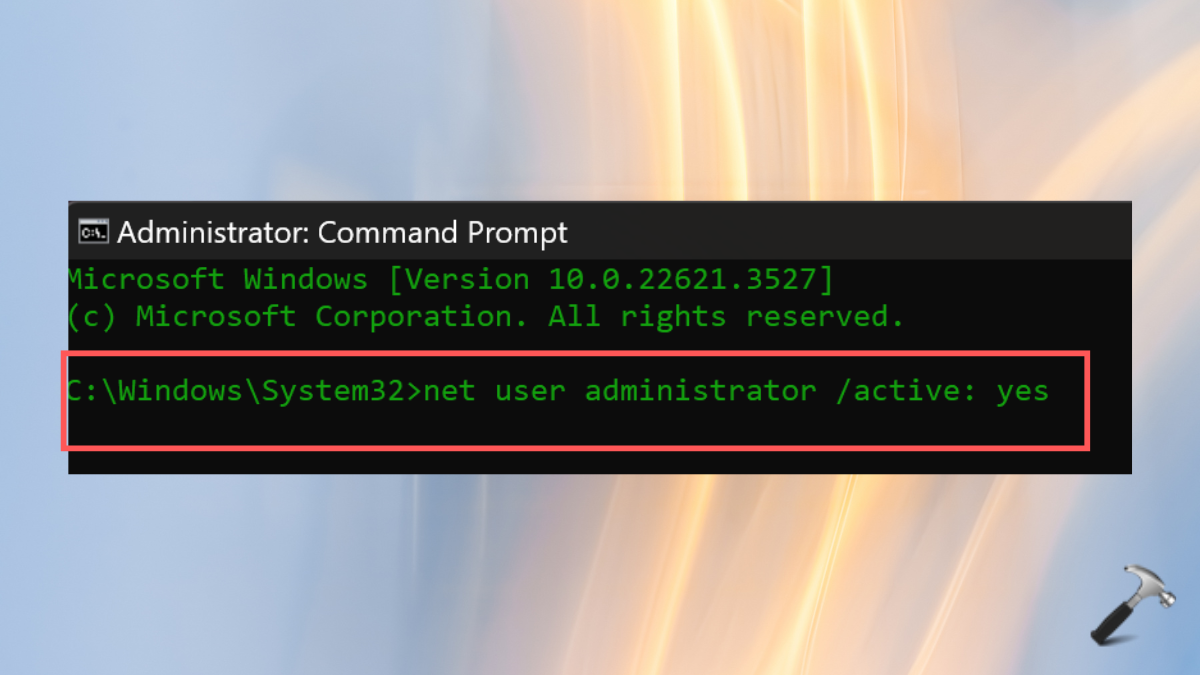
3. Then, log off the account. Switch to the newly created administrator account and try opening the folder.
4. Now, go back to your account and start Command Prompt again.
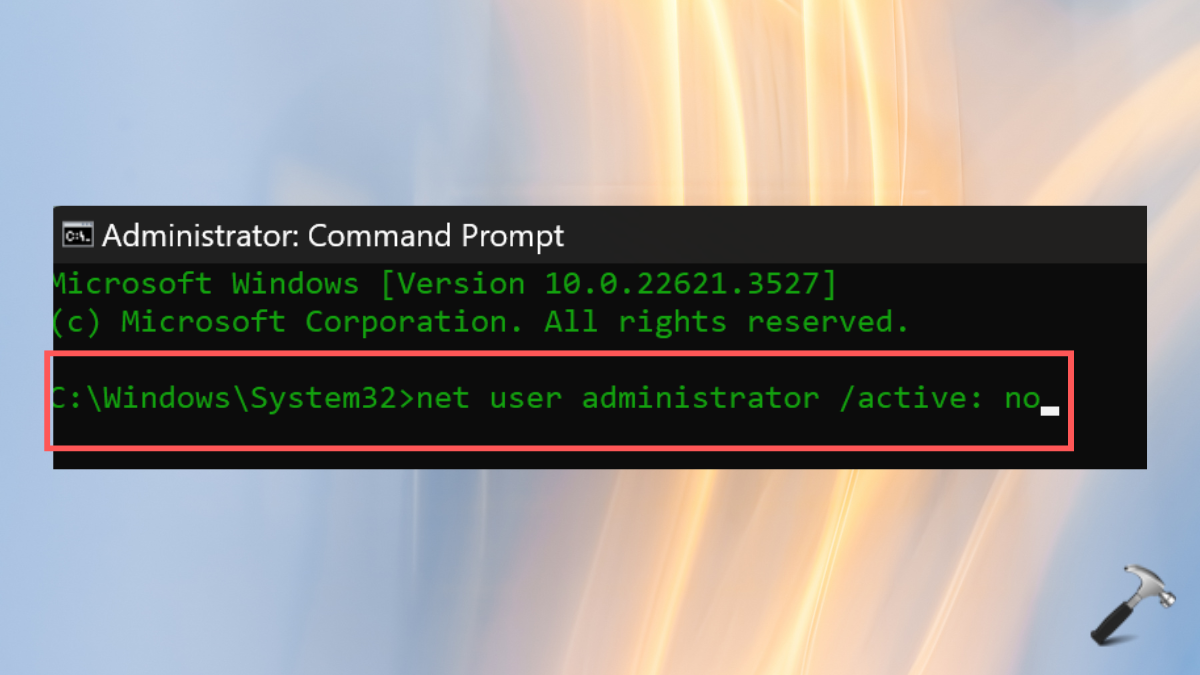
5. Type in the below command and press Enter:
net user administrator /active: no
That’s it!
![KapilArya.com is a Windows troubleshooting & how to tutorials blog from Kapil Arya [Microsoft MVP (Windows IT Pro)]. KapilArya.com](https://images.kapilarya.com/Logo1.svg)


Leave a Reply