In computer troubleshooting, few issues are as perplexing as encountering difficulties with a bootable USB drive. Bootable USB drives are essential tools for installing or troubleshooting Windows 11/10. However, encountering issues with them can be frustrating. In this guide, we’ll explore common causes and provide quick methods to fix Bootable USB not working in Windows 11/10 to get your USB drive functioning seamlessly.
Page Contents
What is a Bootable USB?
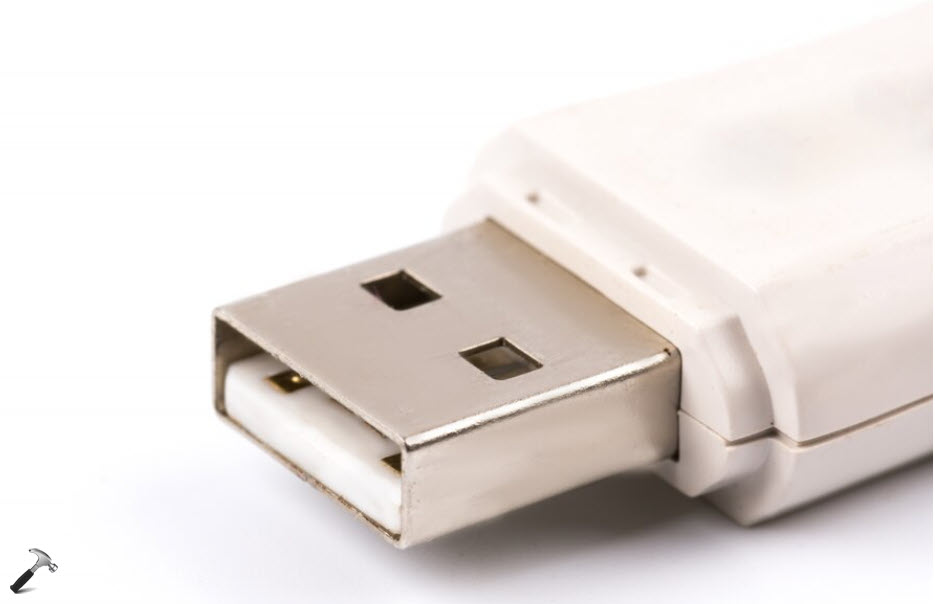
A Bootable USB (Universal Serial Bus) refers to a USB flash drive or external hard drive that contains an operating system’s installation files and is configured to be capable of booting a computer. Creating a bootable USB involves transferring the necessary system files to the USB drive, making it a portable and efficient tool for installing or repairing operating systems.
Bootable USB drives are commonly used for tasks such as installing a fresh copy of an operating system, running diagnostics, or recovering a system that won’t boot from its internal drive. They offer a convenient and flexible way to manage and maintain computer systems.
Here are several factors that may lead to issues with the proper functioning of a Bootable USB:
- Incomplete or corrupted installation files on the USB drive.
- Incorrect settings may prevent USB recognition.
- Malfunctioning ports or using the wrong one can cause connection problems.
- Physical damage or internal issues can render the USB drive non-functional.
- Formatting with an incompatible file system for the OS.
- Interference from security software may block the USB drive.
- Inadequate or outdated drivers on the computer.
- Incorrect boot order settings can skip the USB drive.
- Missing or corrupted boot sector on the USB drive.
- Insufficient power supply, especially for external USB drives.
Fix: Bootable USB not working in Windows 11/10
Explore the following methods to address issues when a bootable USB is not working on Windows 11/10:
Method 1: Settings Boot Priority to USB Drive
If your bootable USB isn’t working, it might be because the computer isn’t configured to recognize it as a boot device.
Follow these steps if you’ve legacy boot enabled:
1. Connect the bootable USB to your computer.
2. Start the device and press F2/F8 to access the BIOS.
3. Navigate to the “Boot option” and select USB as the first boot drive.
4. Save the changes by clicking “Apply changes“.
Now, restart your computer to boot from the USB drive successfully.
Method 2: Change USB Format to FAT32
To resolve bootable USB issues, consider changing the USB format to FAT32 with these steps:
1. Connect the USB drive to your computer.
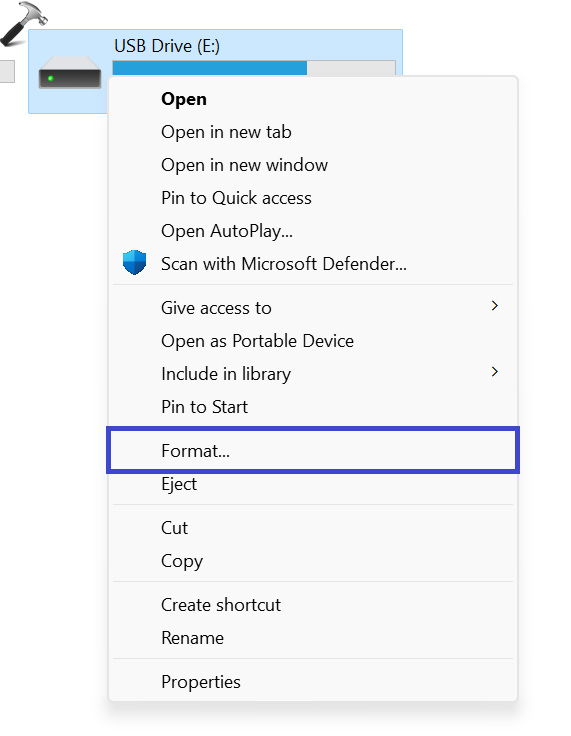
2. Open the File Explorer, right-click on the USB drive, and choose “Format“.
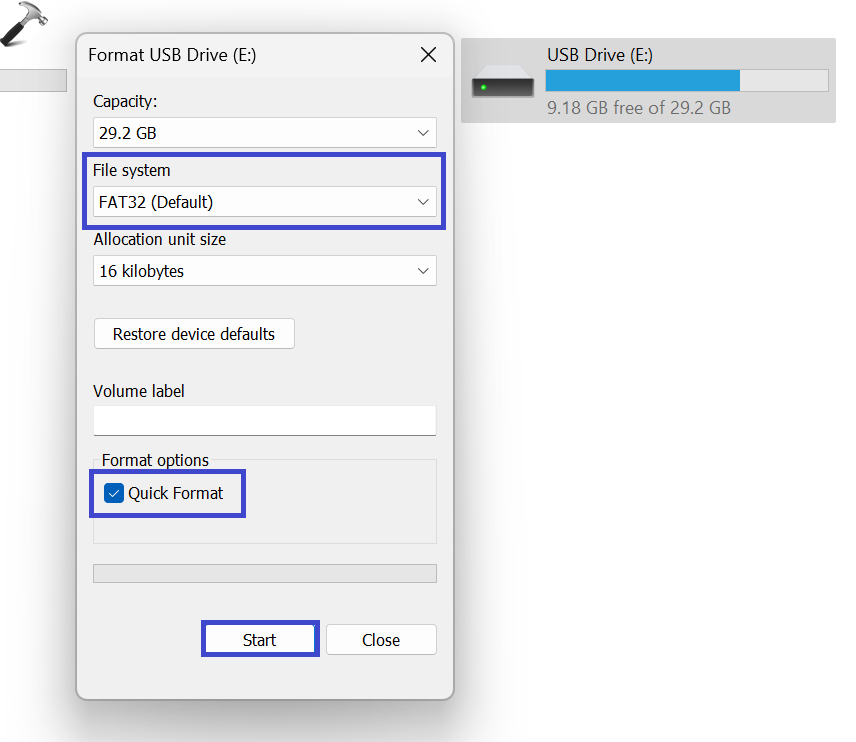
3. Set the file system to FAT32. Ensure the “Quick Format” option is selected, then click “Start.”
Method 3: Disable Secure Boot Control and Enable CSM or Legacy Boot Mode
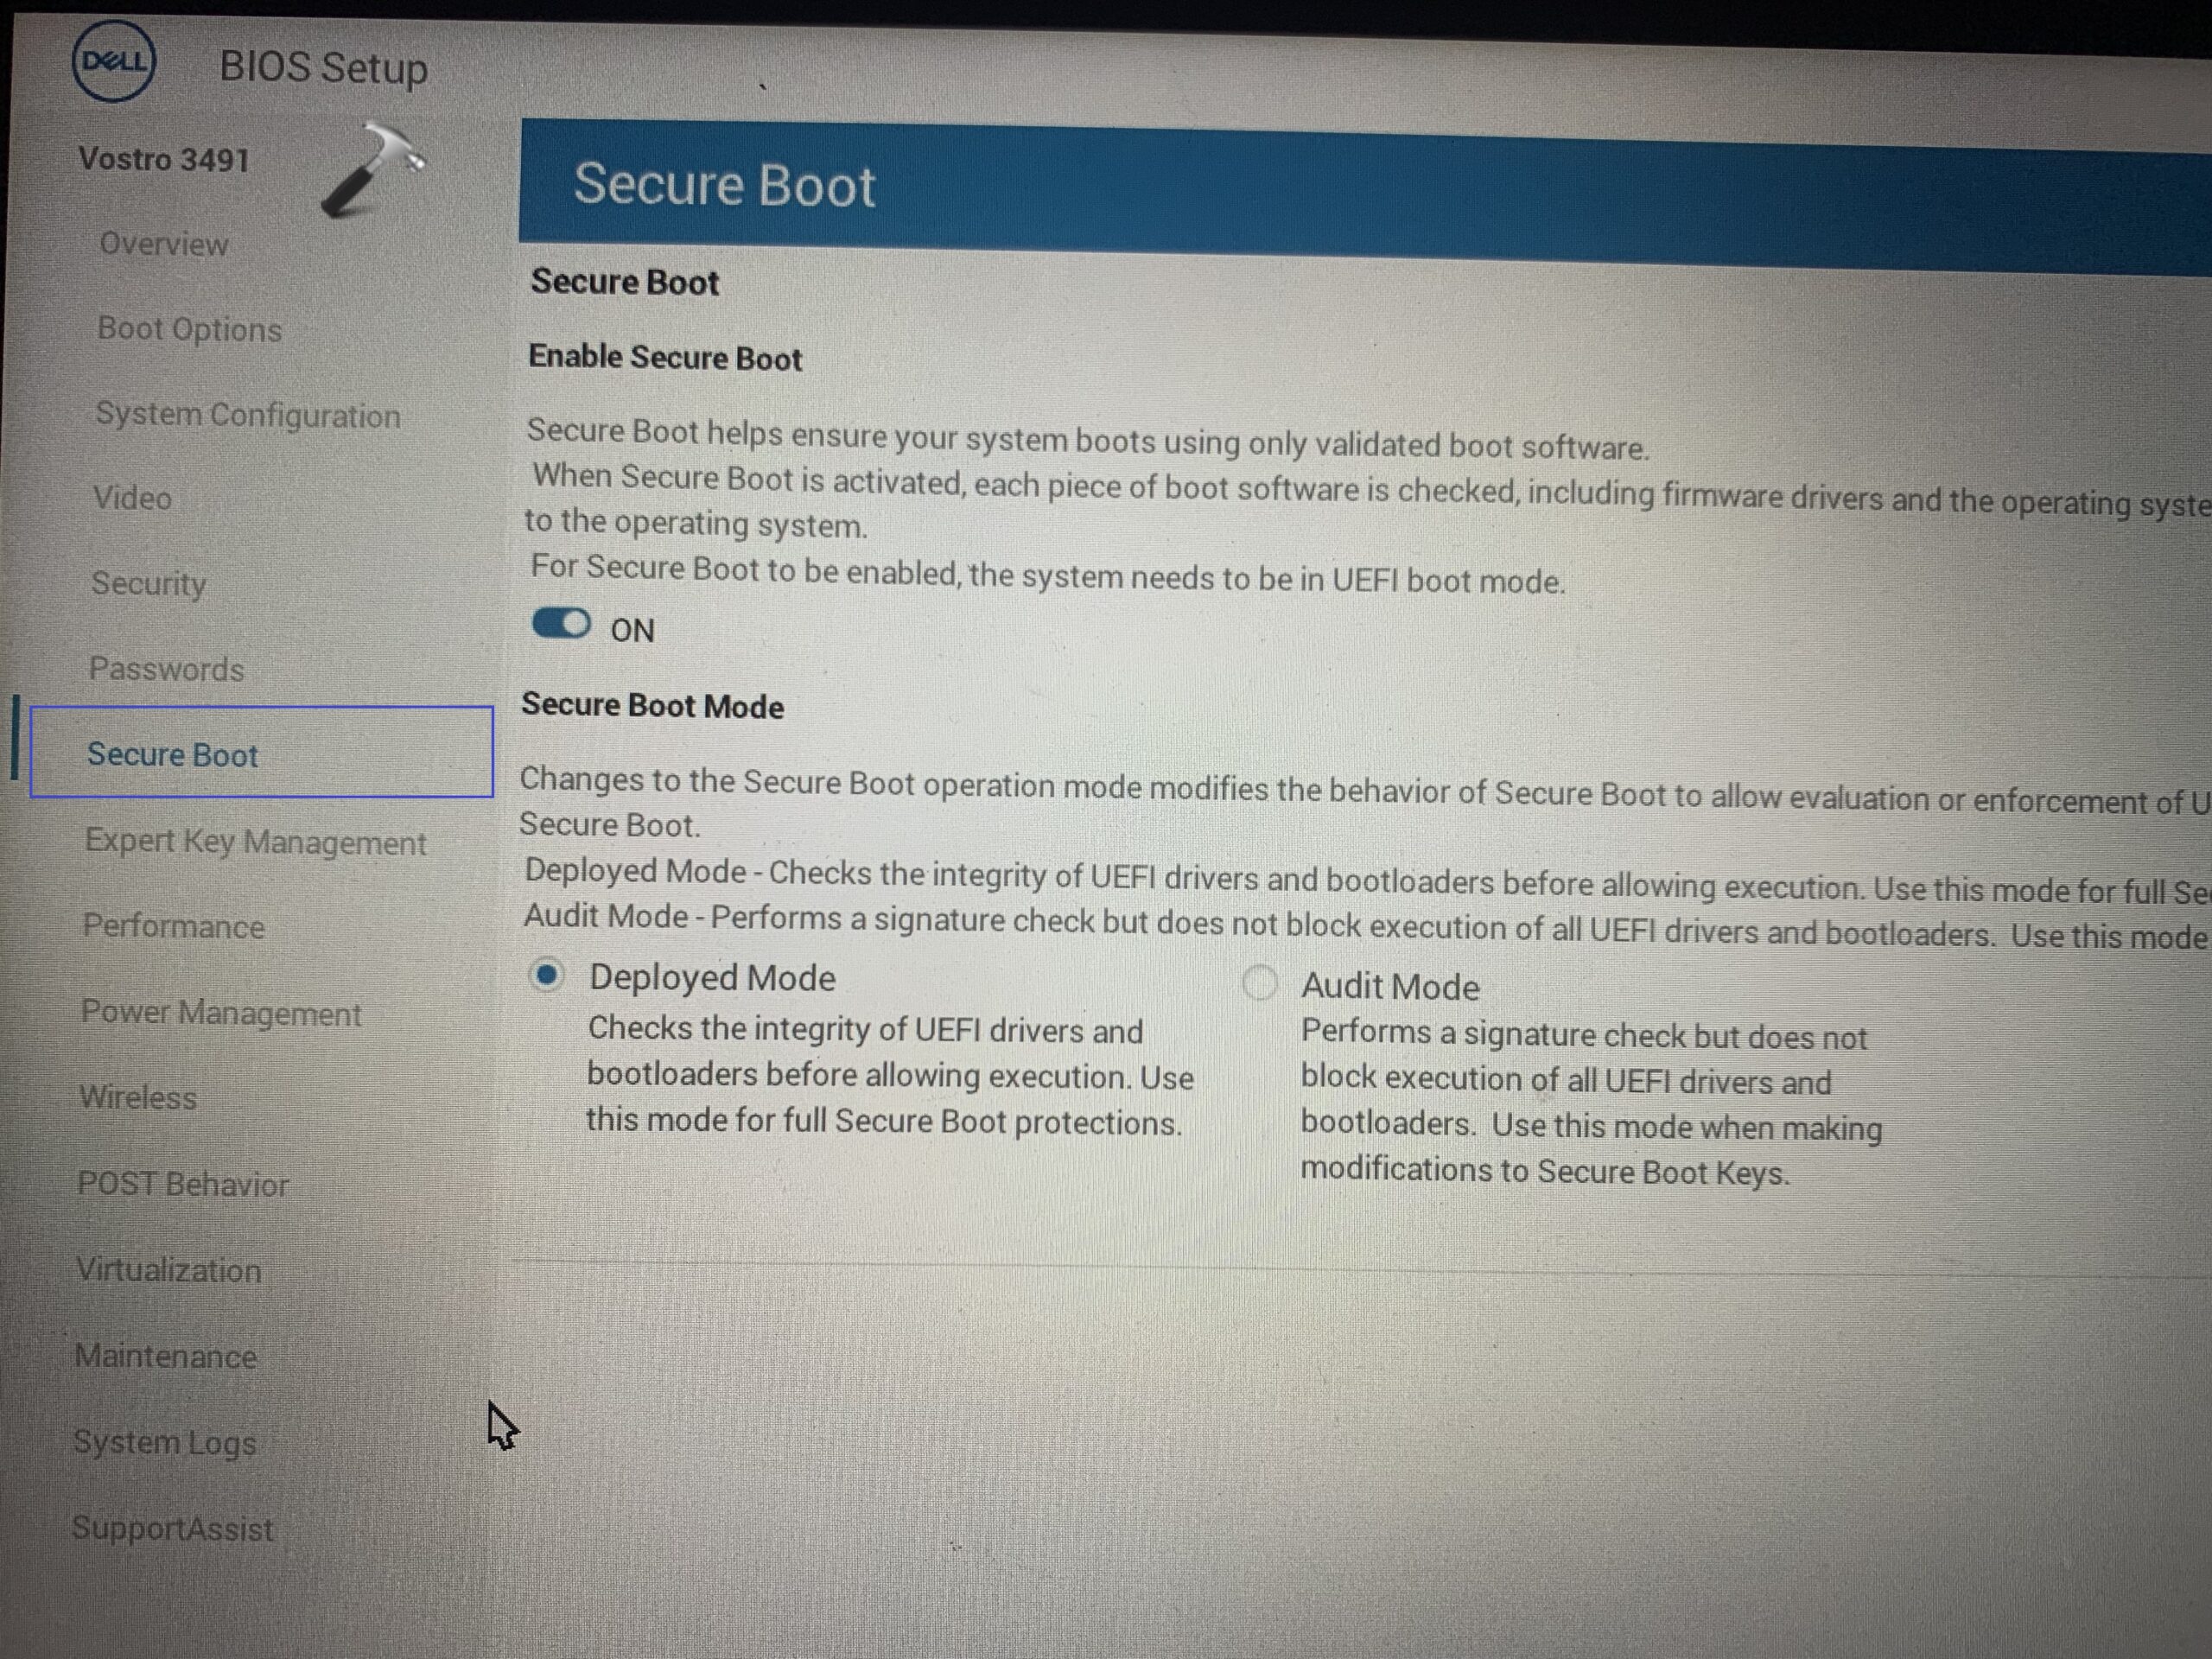
Secure Boot is a security feature designed to prevent unauthorized firmware and operating systems from loading during the system startup process. Disabling it may be necessary to allow booting from certain devices or operating systems that aren’t digitally signed.
Follow the below steps to disable secure boot control:
1. Connect the bootable USB to your computer.
2. Now, start the device and press F2/F8 to access the BIOS.
3. Locate “Secure Boot” and choose “Disabled.”
4. Right-click on “Boot” and select “Launch CSM” Change the settings from Disabled to Enabled.
5. Click on “UEFI/BIOS Boot Mode” and choose “Legacy“.
Method 4: Create a bootable USB with a Windows Media Creation tool
Creating a bootable USB involves installing an operating system or diagnostic tools onto the USB drive, allowing it to function as a portable startup device for your computer.
For an effective resolution to bootable USB issues, follow these steps to create a bootable USB using the Windows Media Creation Tool:
1. Download the Windows Media Creation Tool.
2. Connect your USB drive to your device and double-click to install the Media Creation Tool.
Click Accept.

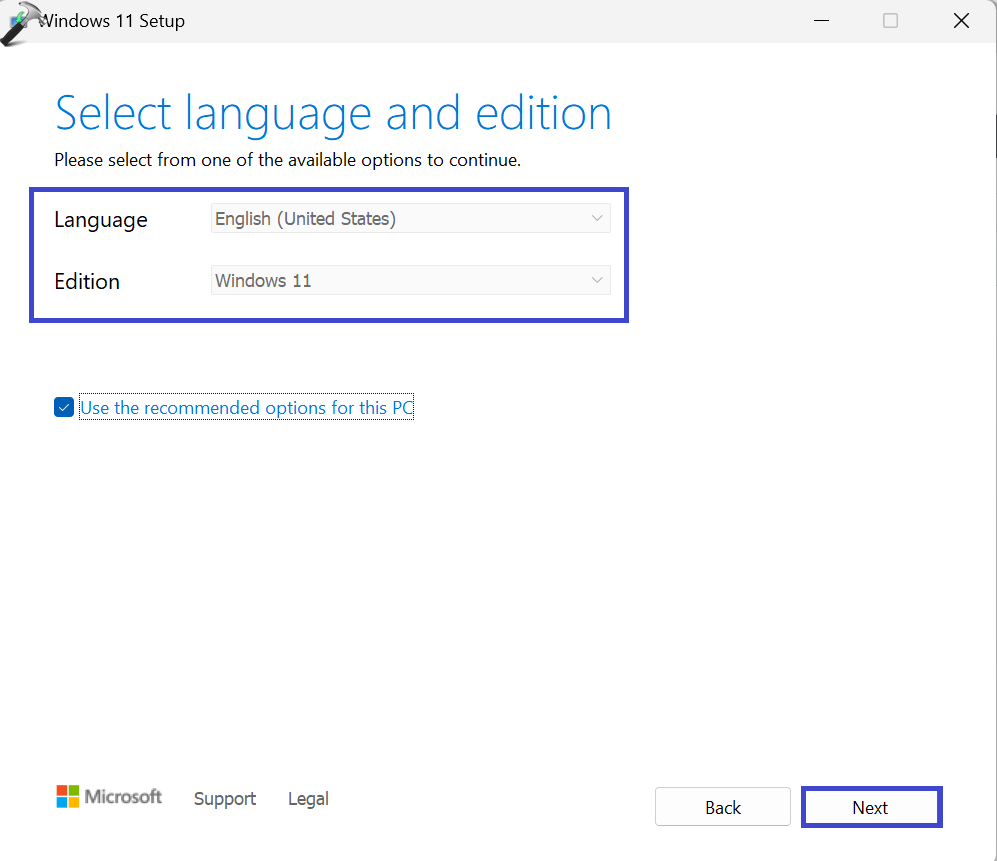
3. Now, select the Language, and Windows Edition. Click Next.
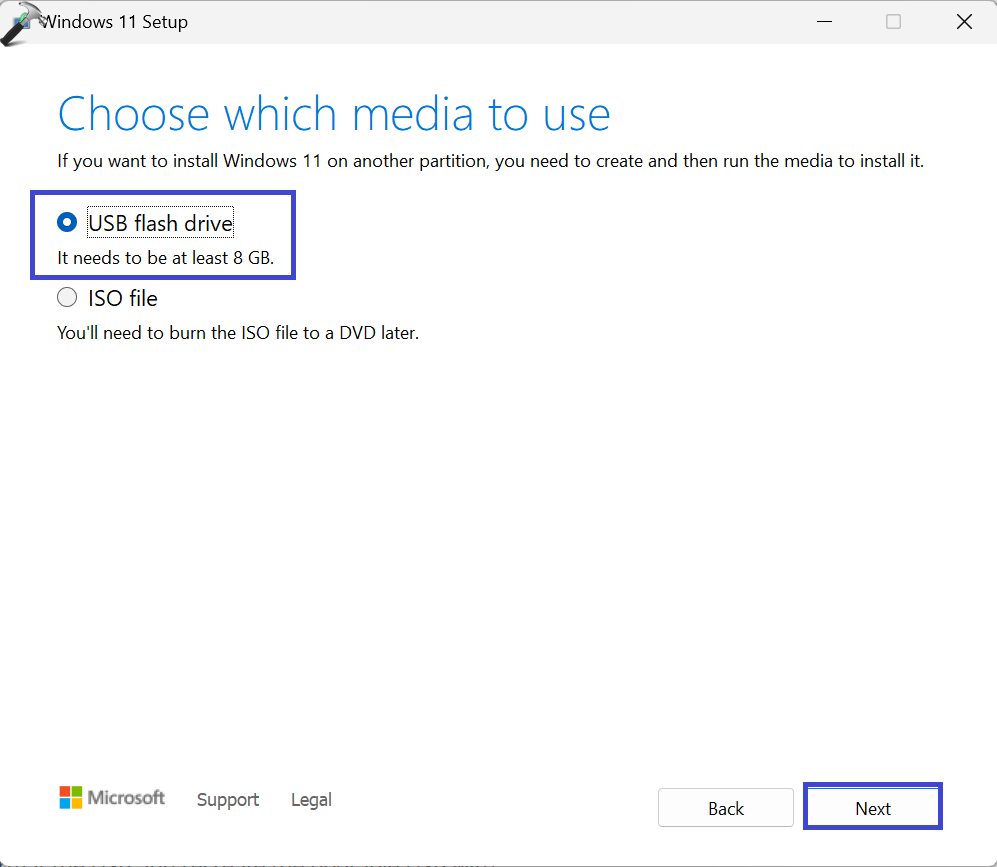
4. Now, select the “USB flash drive” option and click Next.
5. Choose the USB drive and then click Next.
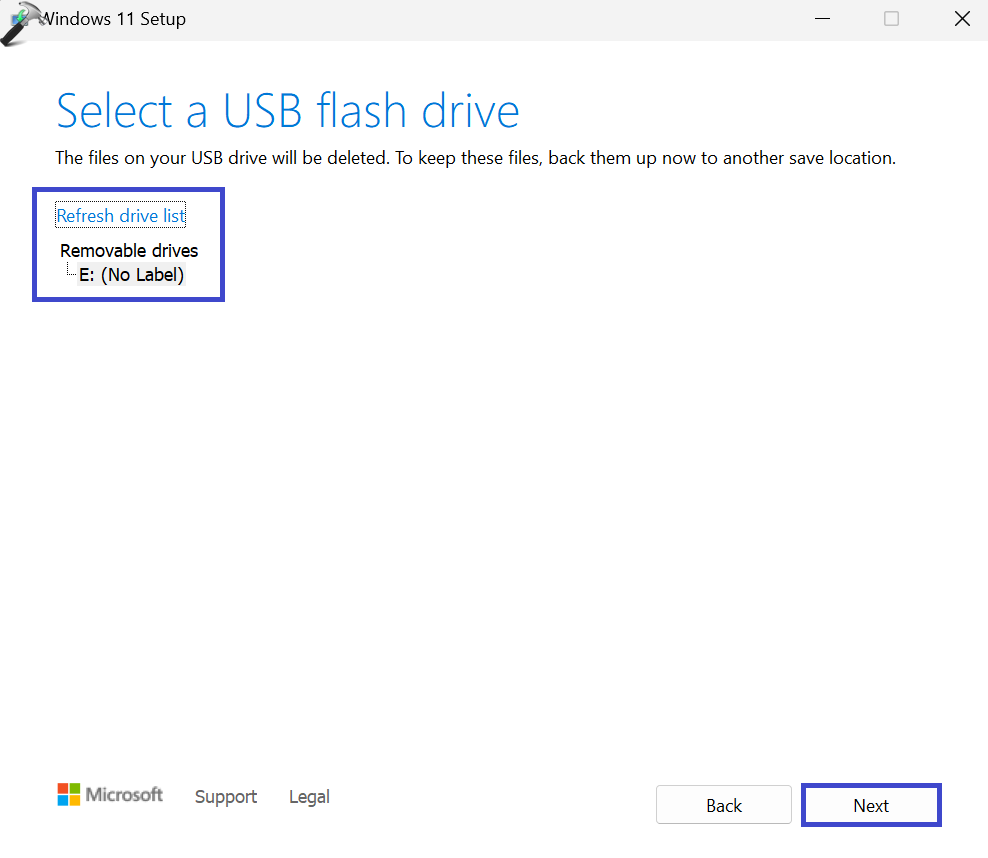
This initiates the process, and depending on the USB drive’s size, it will take some time to download and create the bootable USB flash drive.
Method 5: Create a New Windows Bootable USB
If your bootable USB is facing functionality issues, it might be due to an incorrect initial creation. To address this, reformat the USB and recreate the bootable USB by following this guide.
That’s It!
![KapilArya.com is a Windows troubleshooting & how to tutorials blog from Kapil Arya [Microsoft MVP (Windows IT Pro)]. KapilArya.com](https://images.kapilarya.com/Logo1.svg)






Leave a Reply