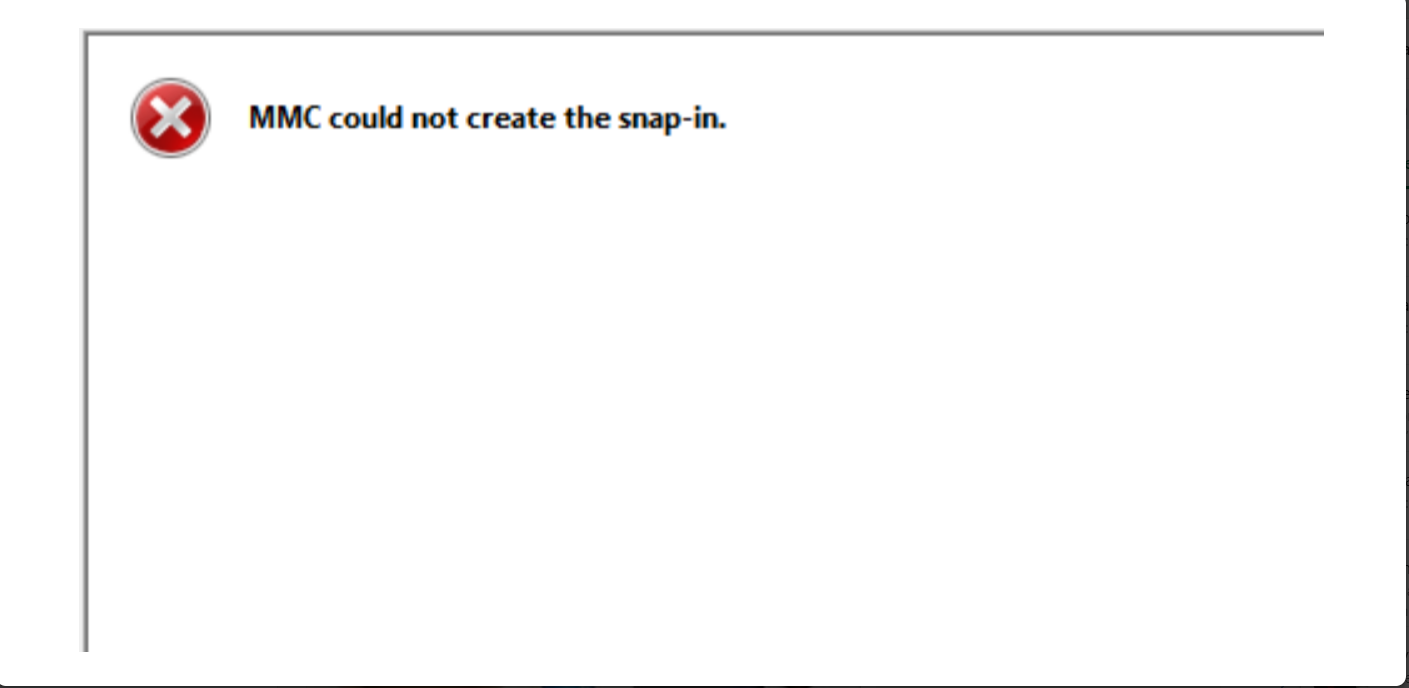
Windows 11 is a highly anticipated operating system that brings a plethora of new features and enhancements to the Microsoft ecosystem. However, like any software, it is not immune to issues and errors. One common problem that users may encounter is the “MMC could not create the snap-in” error. This error message can be frustrating as it prevents users from accessing certain tools and features within the Microsoft Management Console (MMC). This article will provide effective solutions to fix it, allowing users to regain full control of their Windows 11 system.
Page Contents
Fix: MMC could not create the snap-in on Windows 11
Fix 1: Scan system files
1. Open the Command Prompt by Searching it on the Search bar.
2. Click on Run as administrator.
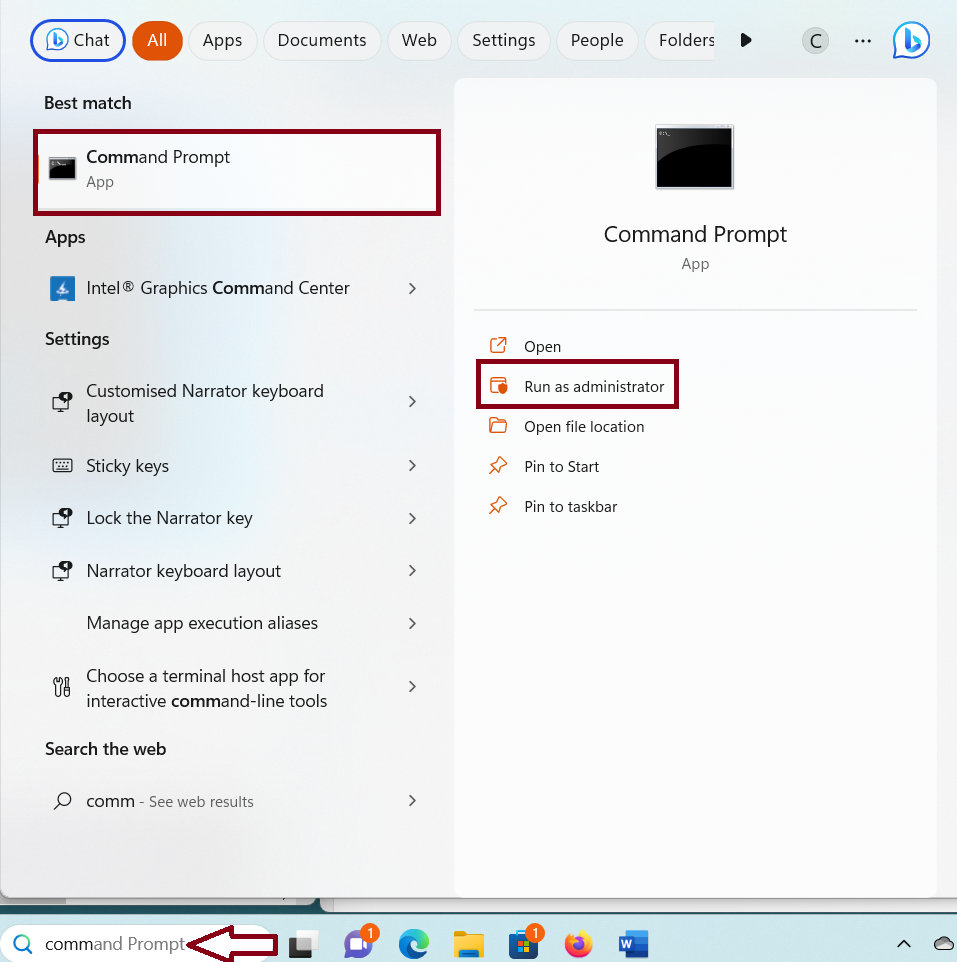
3. Click yes.
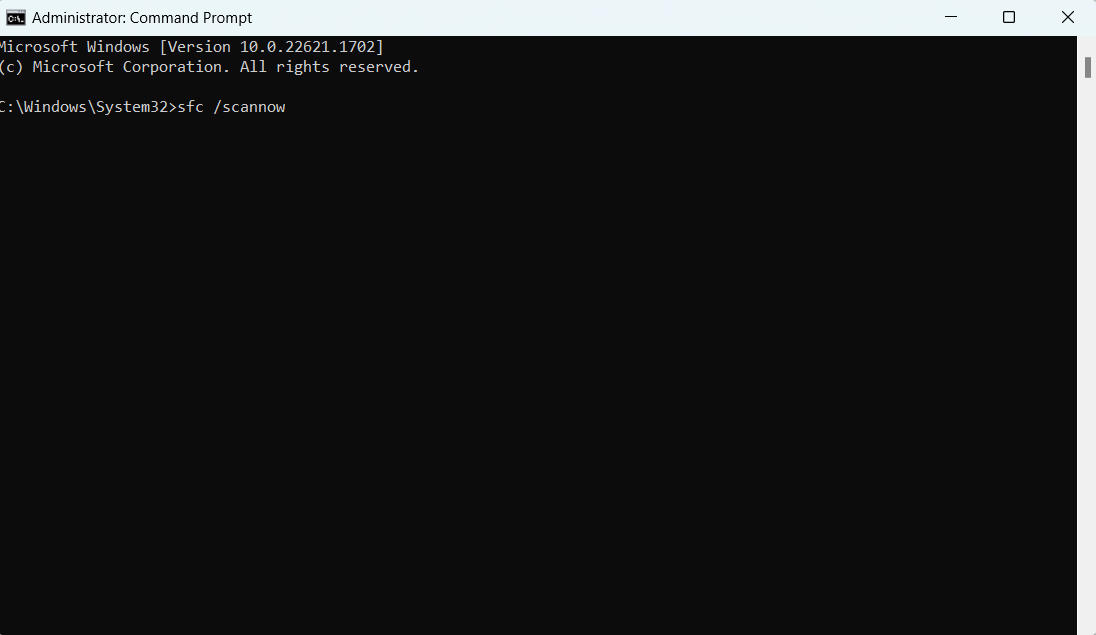
4. Type the command: sfc /scannow and press Enter.
Fix 2: Tweak Windows Registry to fix MMC could not create the snap-in on Windows 11
1. Open Run by typing Win + R keys. Type regedit and press Enter.

2. Copy-paste this path on the address bar of Registry Editor:
HKEY_LOCAL_MACHINE\SOFTWARE\Microsoft\MMC\SnapIns
3. Locate the CLSID folder that was indicated in the error message, for example:
FX:{c7b8fb06-bfe1-4c2e-9217-7a69a95bbac4}
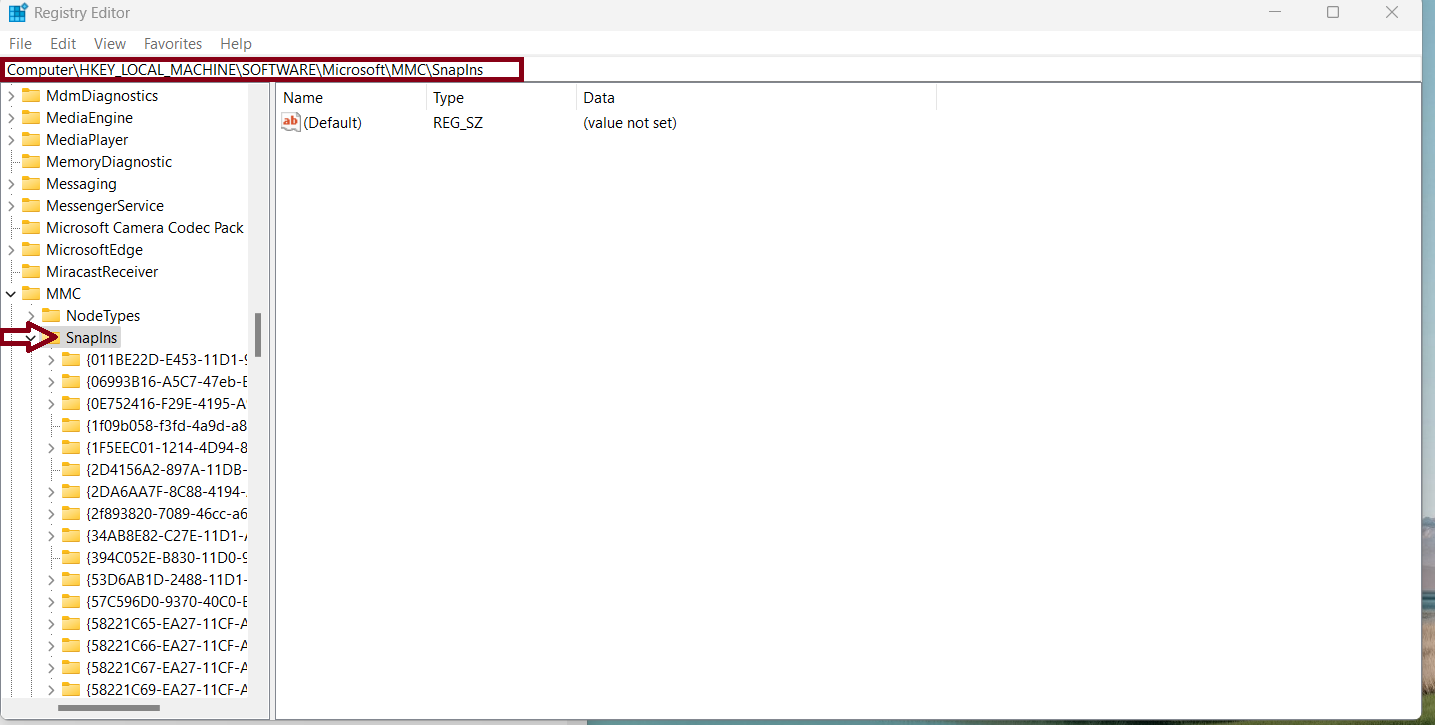
4. Back up the folder by right-clicking on that and choosing an Export option.
5. Again right-click on that folder and select Delete.
6. Restart your computer.
Fix 3: Use Remote Server Administration Tools (RSAT)
1. Open Settings by pressing the win + I keys.
2. Click on Apps > Optional features.
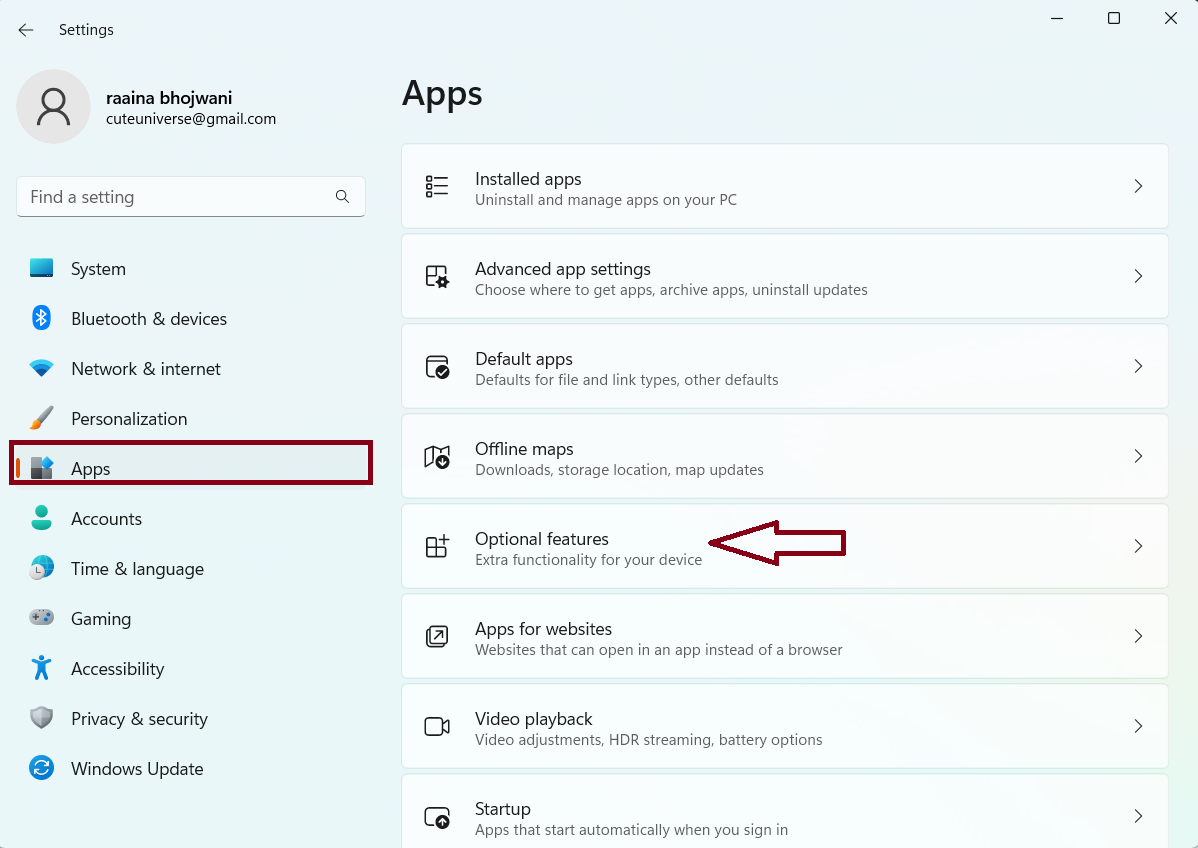
3. Click Add an optional feature.
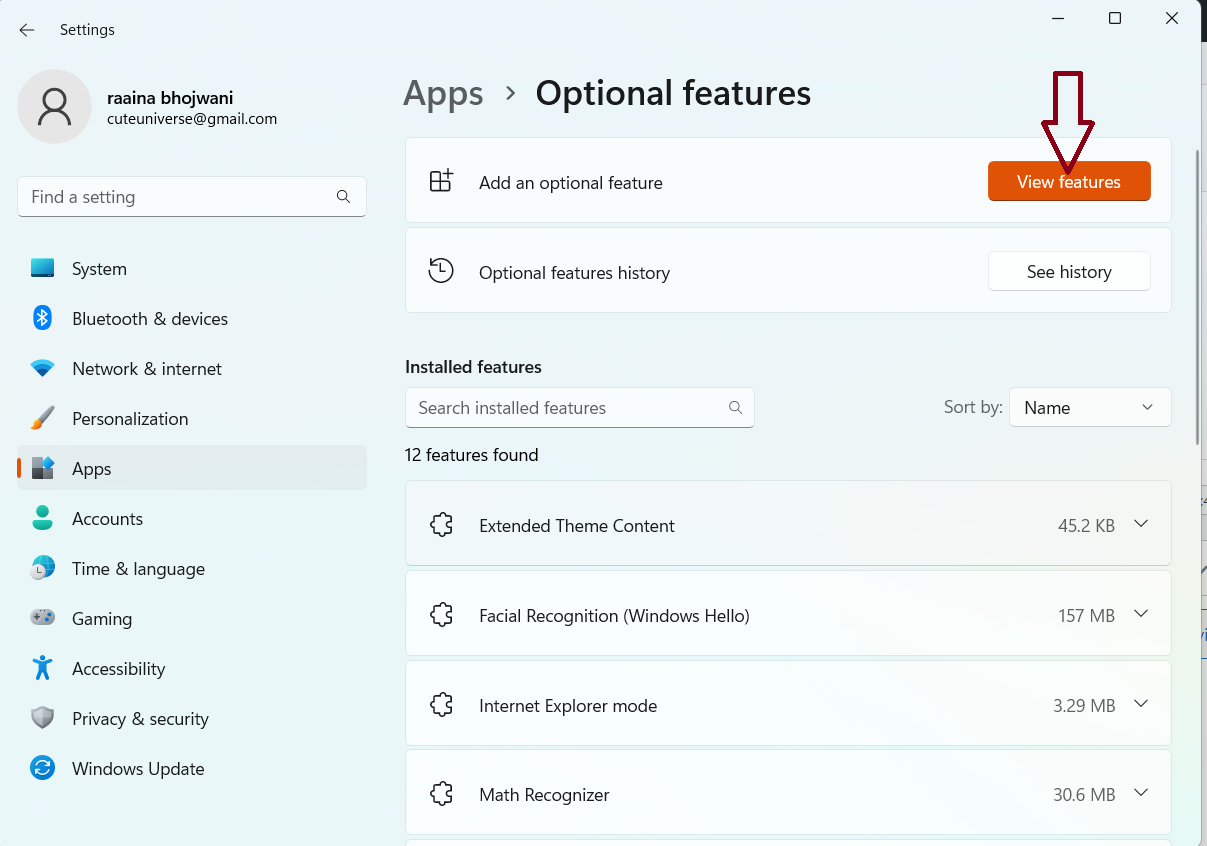
4. Scroll to find the RSAT tools listing. Click on your required RSAT tool and install it.
Fix 4: Enable Microsoft .NET Framework
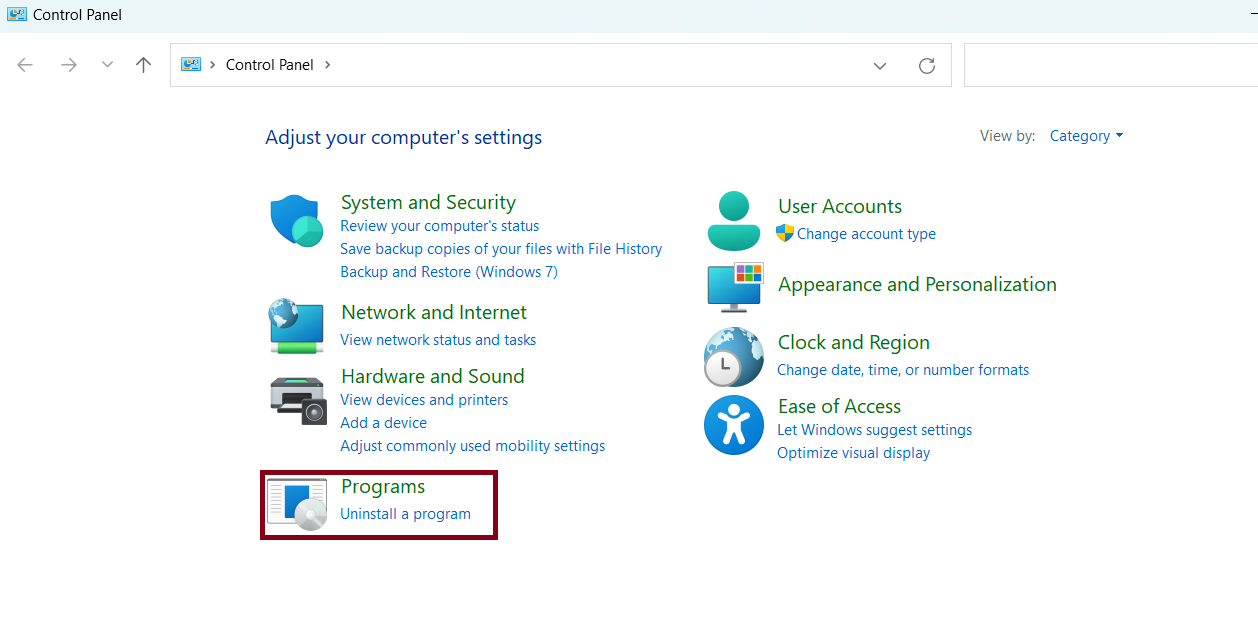
1. Open Control Panel.
2. Click on Programs.
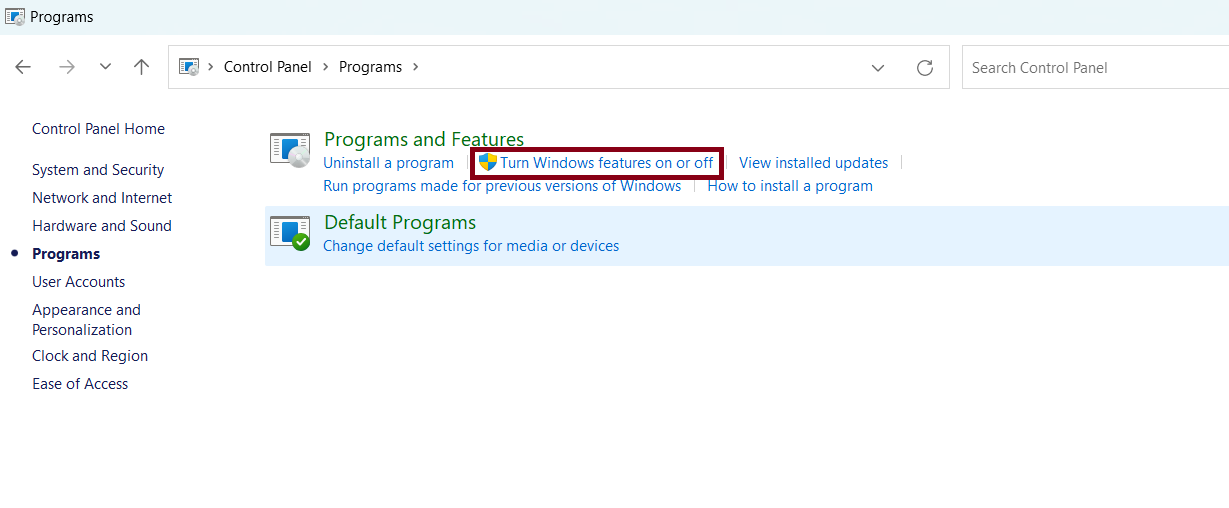
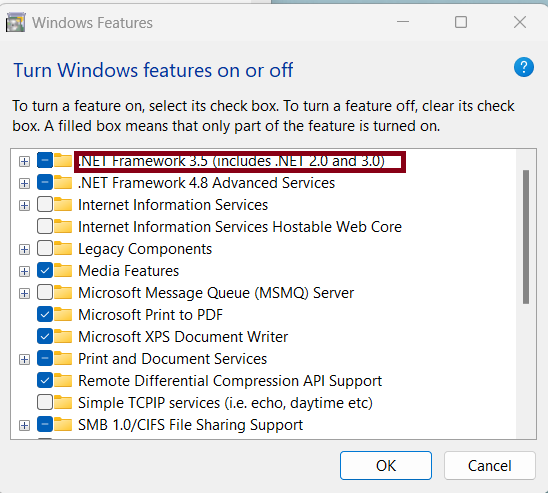
3. Click on Turn Windows features on or off.
4. Select .NET Framework 3.5 (Includes .NET 2.0 and 3.0).
5. Click OK.
6. Restart your computer.
Fix 5: Rename mmc.exe to fix MMC could not create the snap-in on Windows 11
1. Open File Explorer and go to C:\Windows\System32 > mmc.exe.
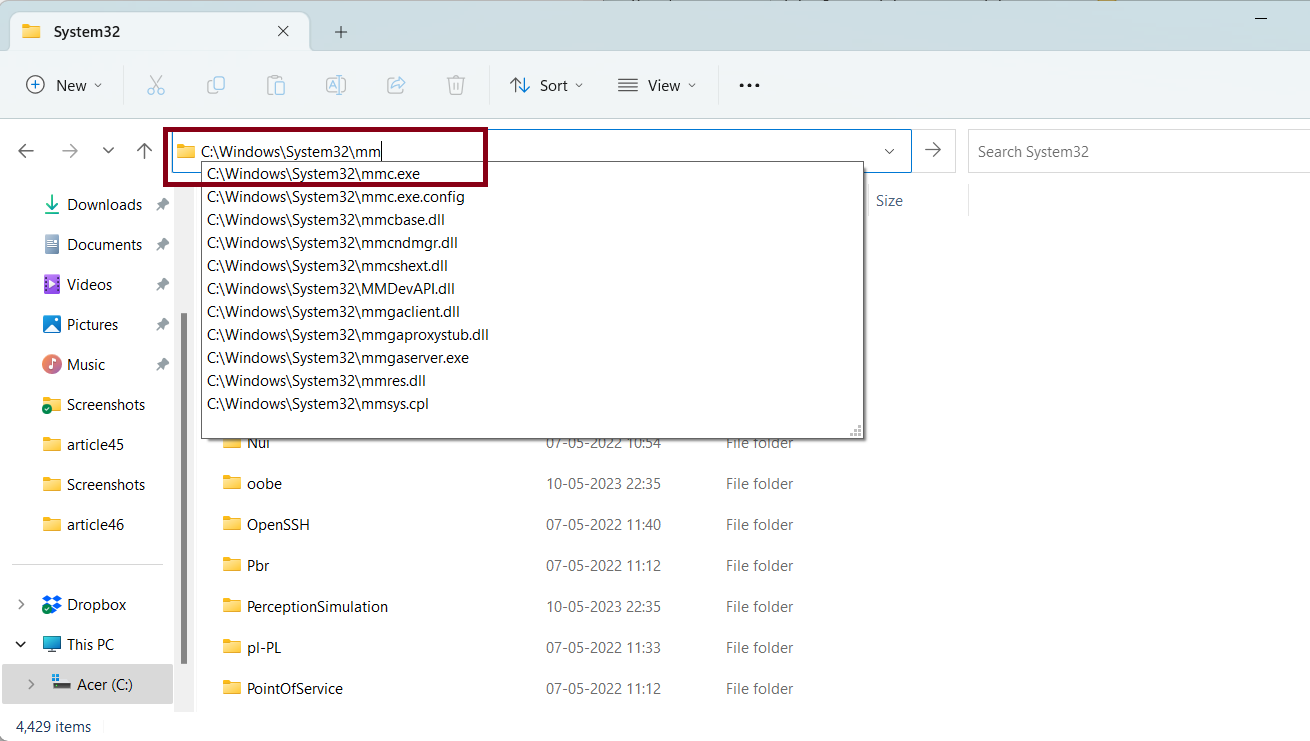
2. Press Enter.
3. Right-click on that file and rename it.
4. Restart your computer.
That’s it!
![KapilArya.com is a Windows troubleshooting & how to tutorials blog from Kapil Arya [Microsoft MVP (Windows IT Pro)]. KapilArya.com](https://images.kapilarya.com/Logo1.svg)


Leave a Reply