For some Windows 11 users, Touchpad gestures can be a source of frustration and even a hindrance to productivity. Fortunately, disabling Touchpad gestures is a simple process and can be done using different methods. This article will discuss two methods for disabling Touchpad gestures in Windows 11 – disable all Touchpad gestures and disable three-finger gestures. By following either of these methods, you can easily turn off the Touchpad gestures that are causing issues and regain control over your touchpad.
Page Contents
Disable Touchpad gestures in Windows 11
Method 1: Disable the three-finger gesture
The Touchpad may recognize your palm as a three-finger gesture and show a task view and switch apps. To fix this problem simply disable the 3-finger gesture in Settings as given in the steps below:
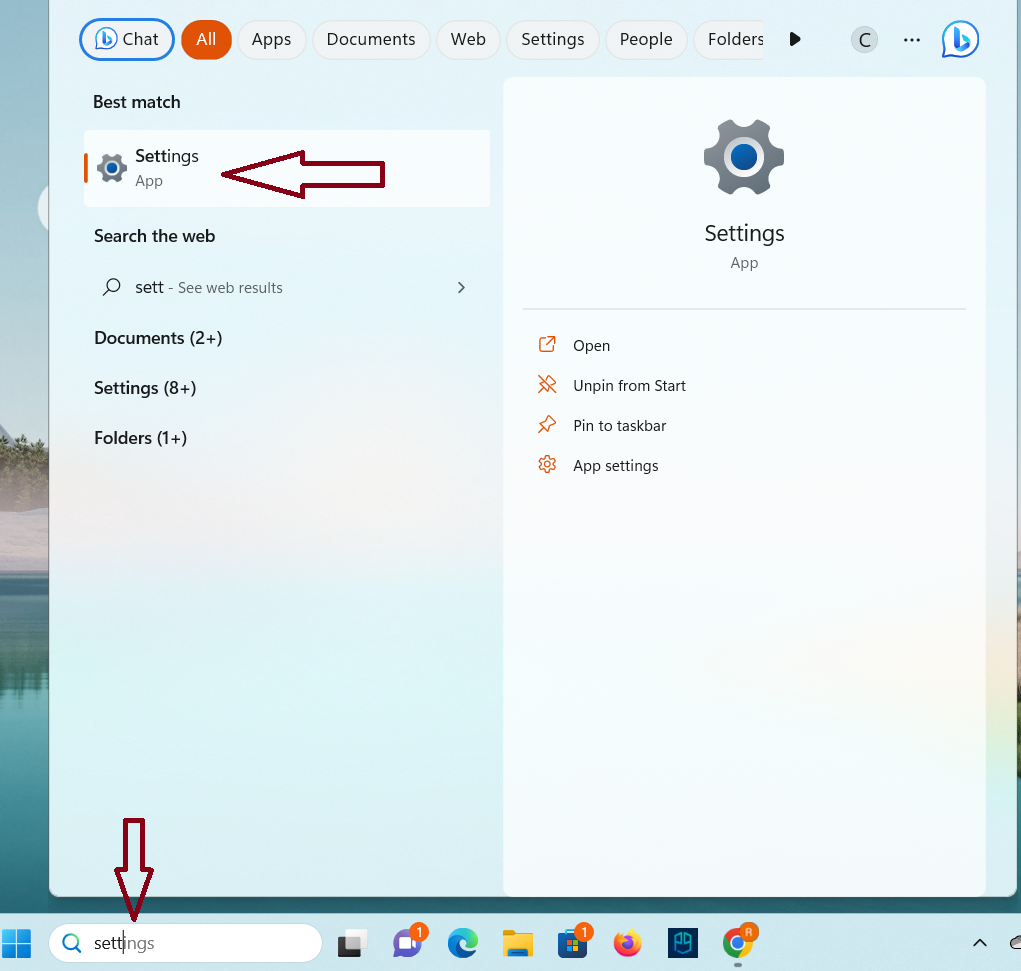
1. Go to the Settings app by searching it from the Start menu.
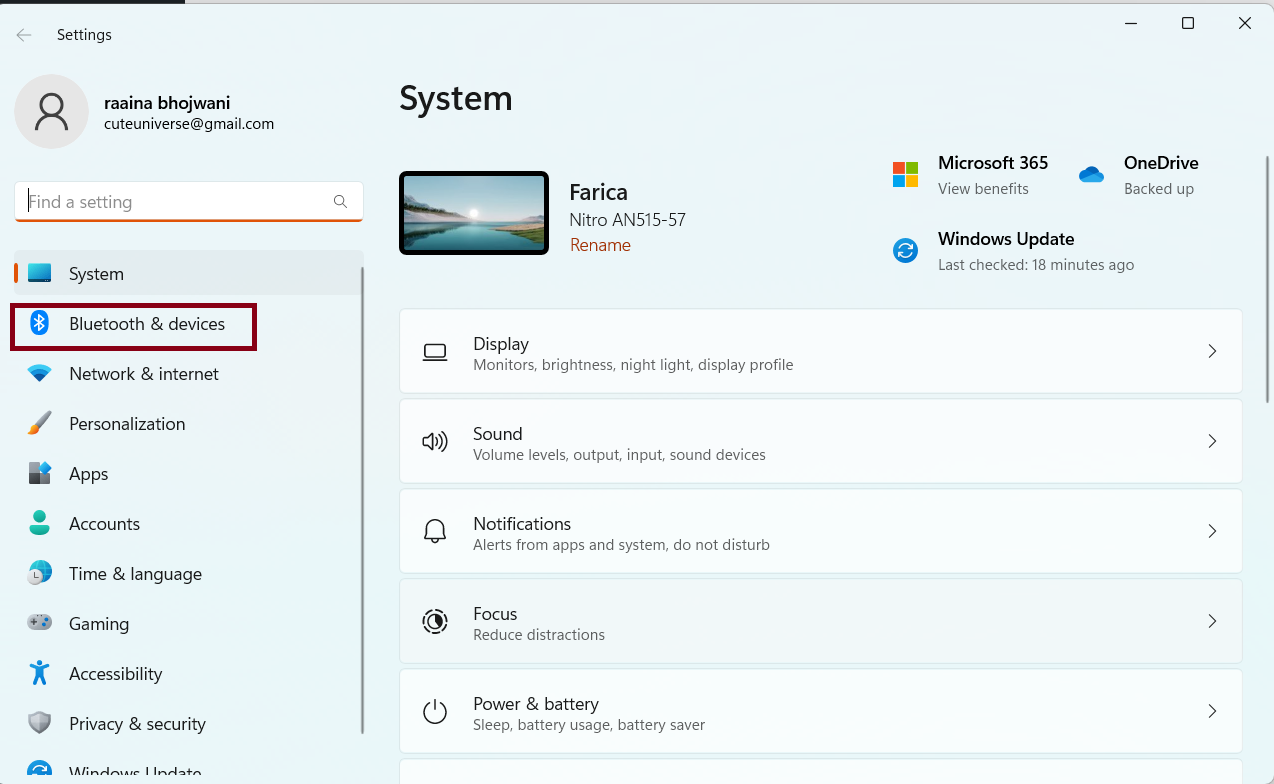
2. Click on Bluetooth & devices option in the left section.
3. Select the Touchpad option in the right section.

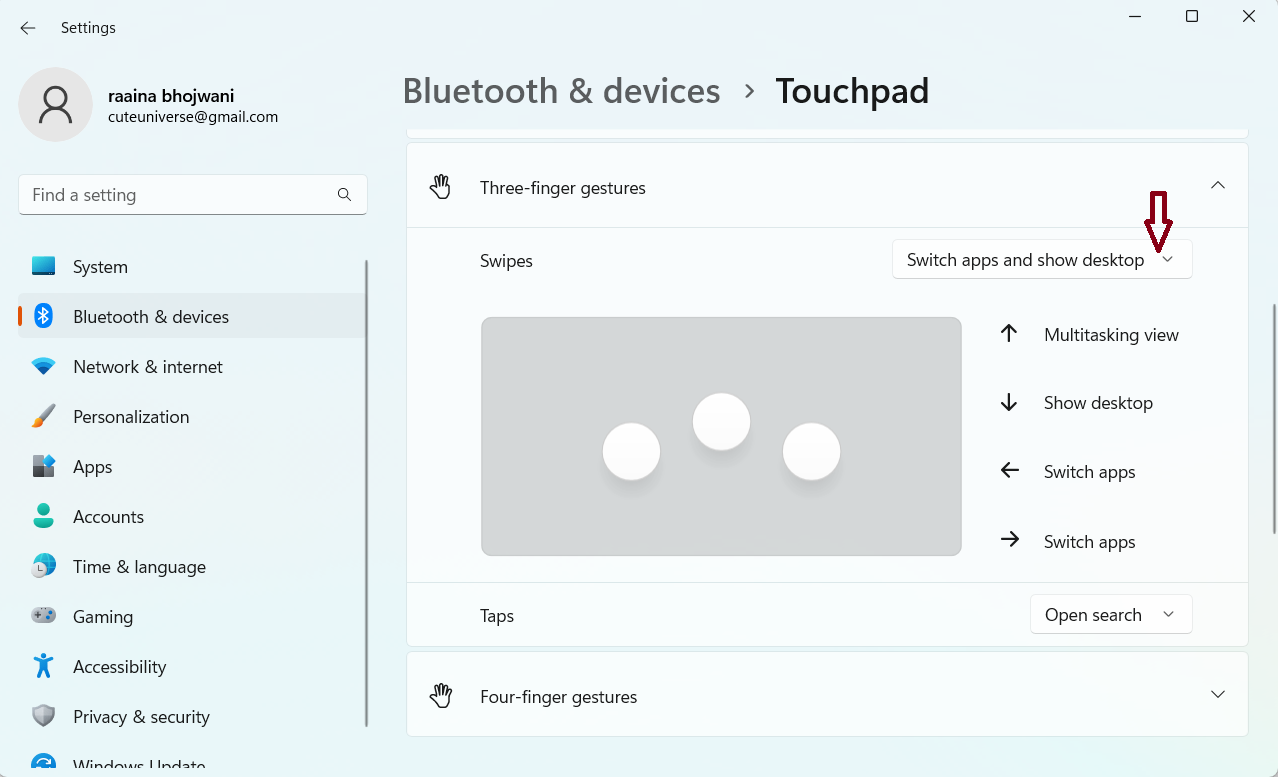
4. Click on Three-finger gestures and then click on Switch apps and show desktop.
5. Select the Nothing option from the list.
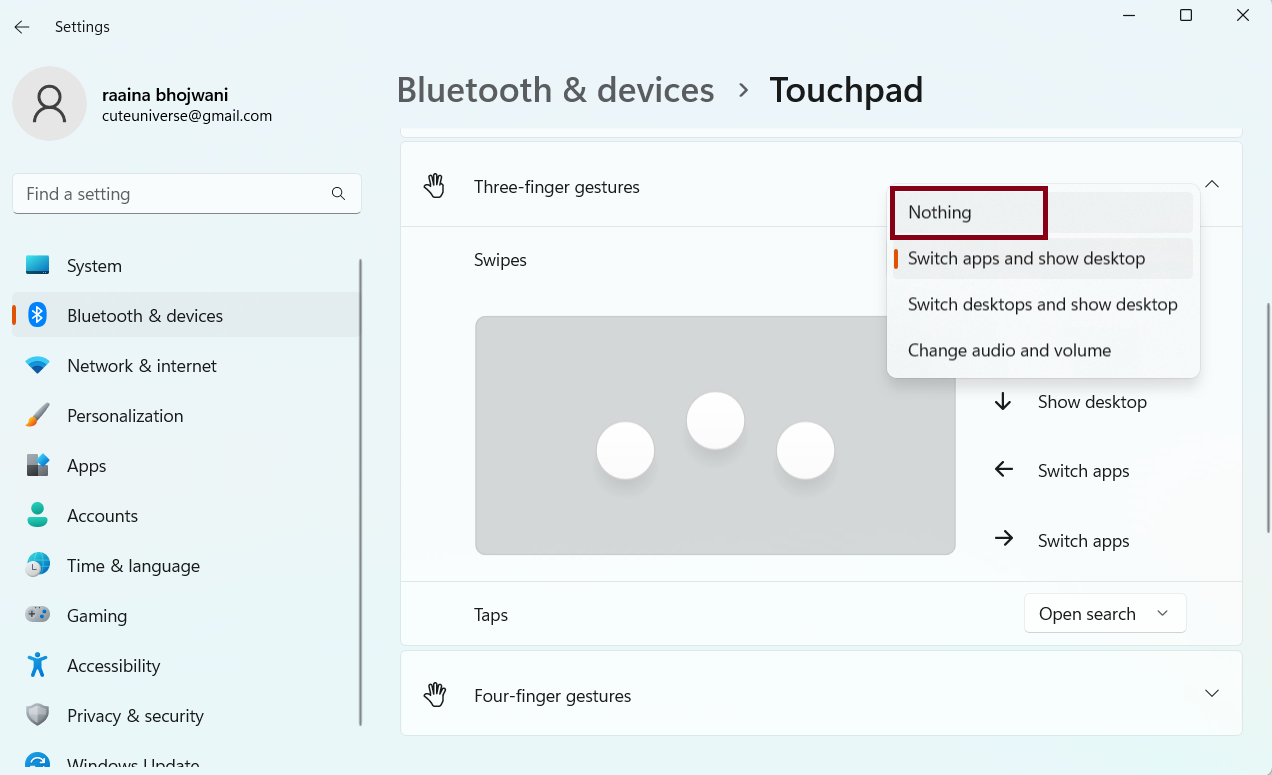
Thus, you have successfully disabled three-finger gestures in Windows 11.
Method 2: Disable all Touchpad gestures
If your issue doesn’t get solved by disabling three-finger gestures then go for disabling all Touchpad gestures as mentioned below:
1. Follow steps 1, 2, and 3 from above Disable the three-finger gesture method.
2. Click on Tap > uncheck all the checkboxes to disable touchpad gestures.
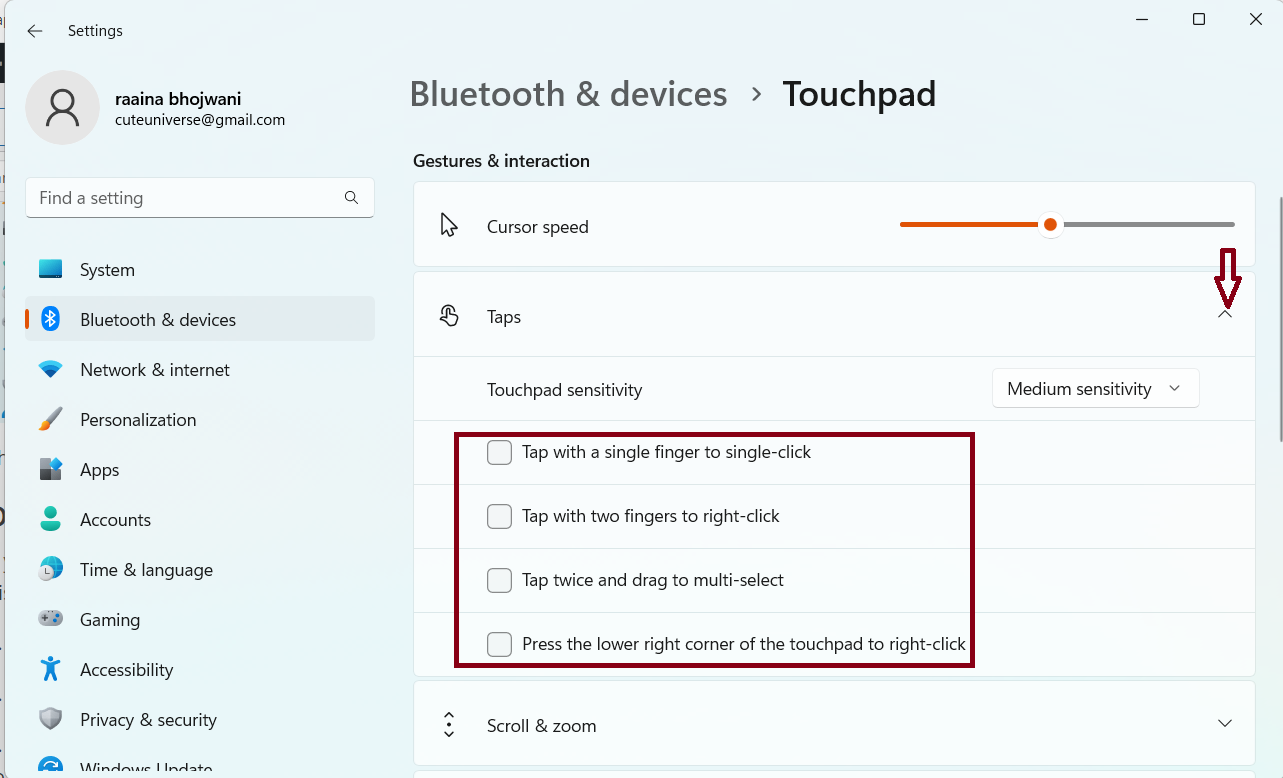
3. Next click on Scroll and Zoom option > uncheck Drag two fingers to scroll and Pinch to zoom checkboxes.
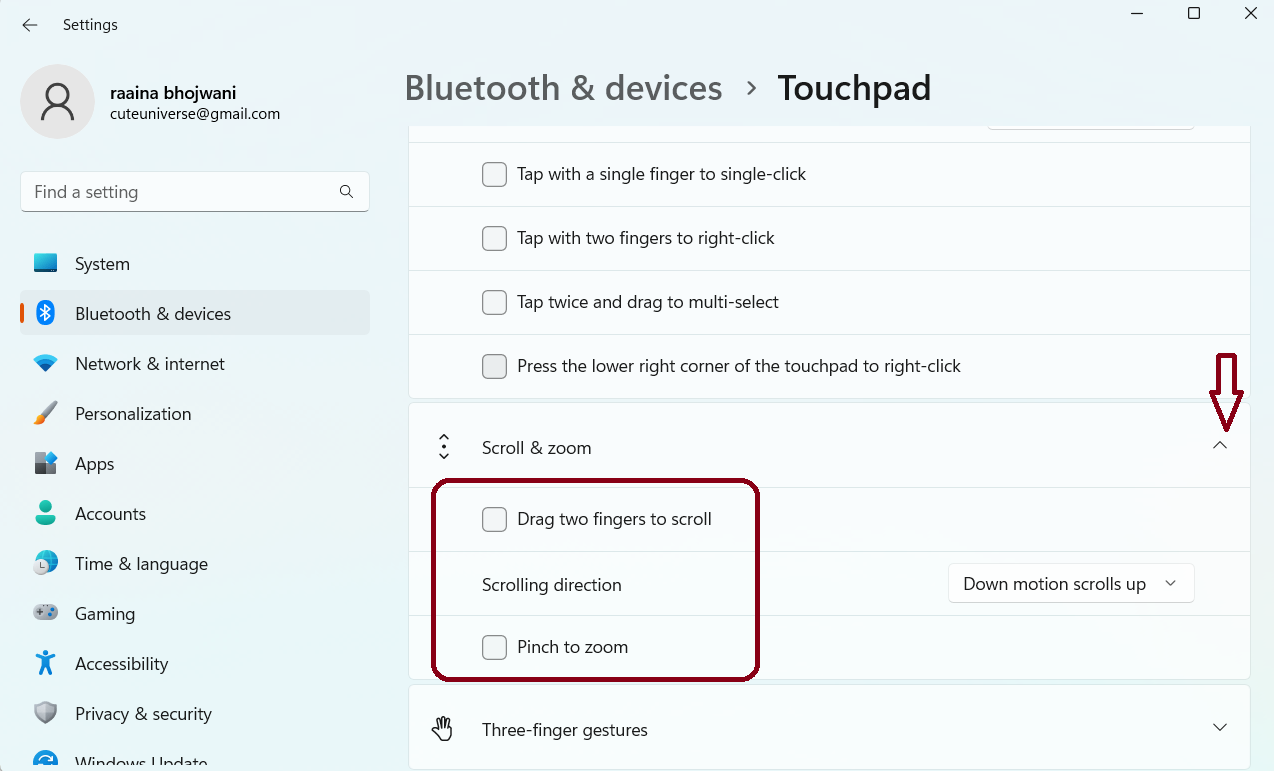
Lastly, close the window.
This will disable all Touchpad gestures in Windows 11.
Reset Touchpad gestures
To reset Touchpad gestures do the following:
Go to Settings > click on Bluetooth and services > then click on the arrow in the Touchpad section as shown in the image.
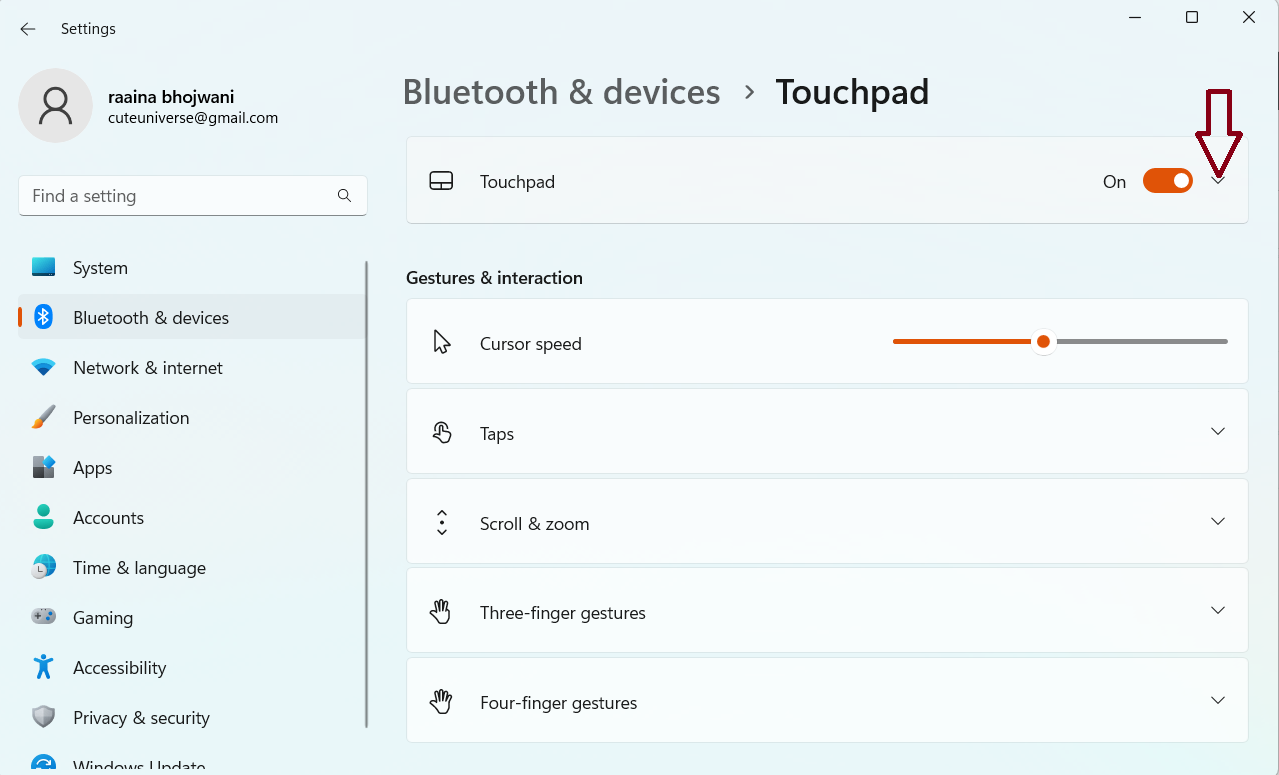 Click on the Reset button to reset all Touchpad gestures to default.
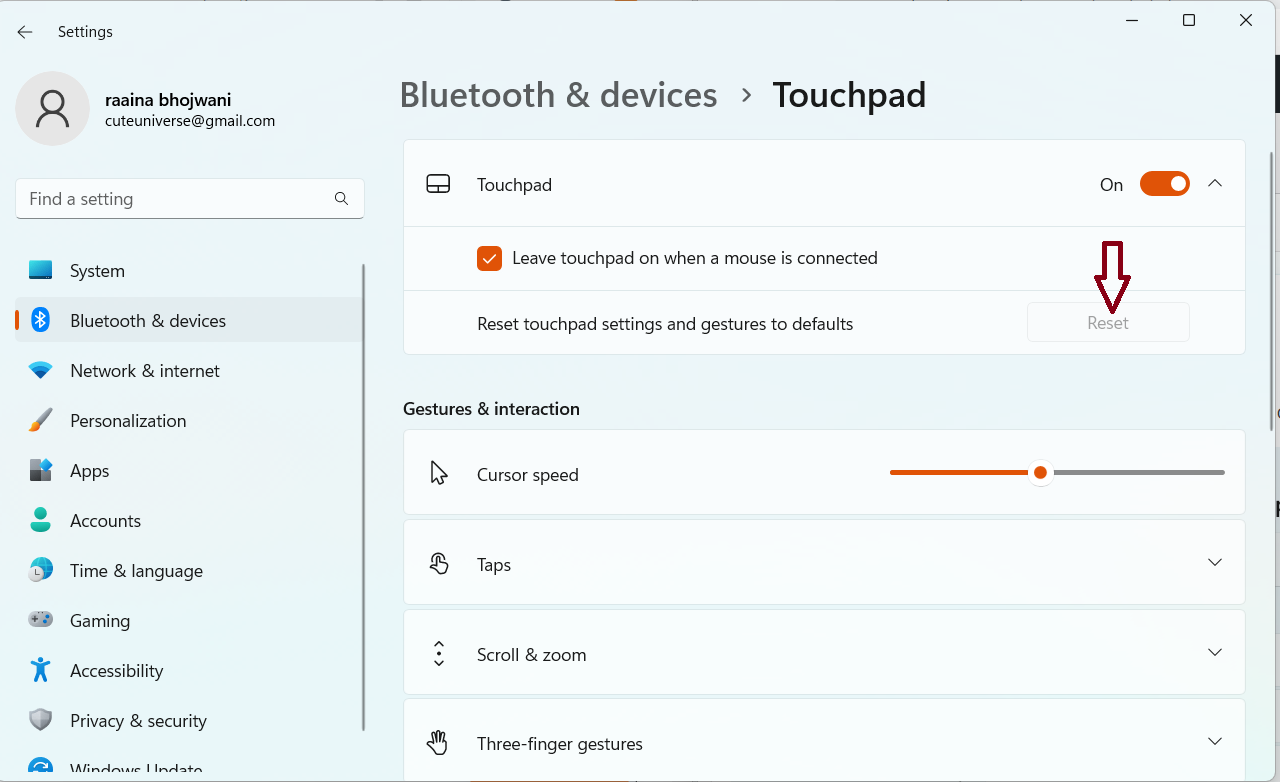
That’s it!
![KapilArya.com is a Windows troubleshooting & how to tutorials blog from Kapil Arya [Microsoft MVP (Windows IT Pro)]. KapilArya.com](https://images.kapilarya.com/Logo1.svg)





Leave a Reply