If you’re not able to start the virtual machine in Hyper-V, then this article will show you the fix. So imagine a scenario that you created Hyper-V. We have already shared you this guide to create the virtual machine in Hyper-V. After creating the new virtual machine, when you first time started, and then you suddenly realized got Virtual machine could not be started because the hypervisor is not running message.
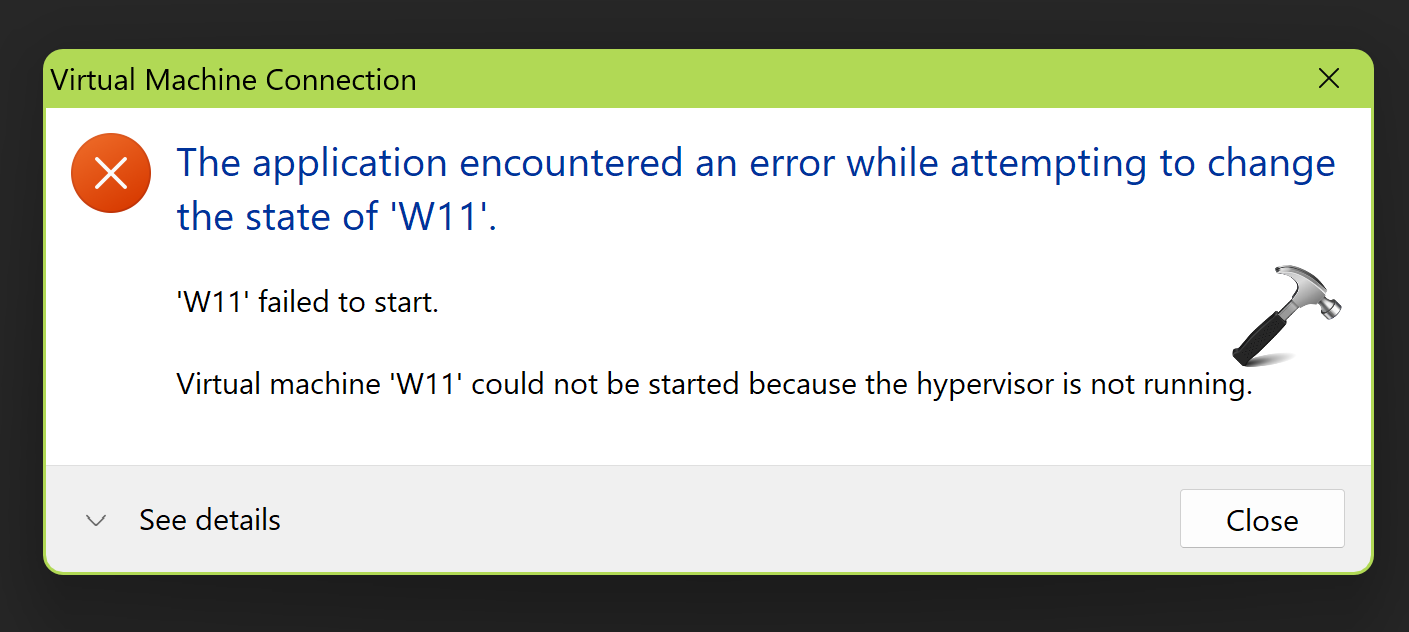
Here is the complete error message with screenshot:
The application encountered an error while attempting to change the state of <VM>.
<VM> failed to start.
Virtual machine <VM> could not be started because the hypervisor is not running.
<VM> = Name of your virtual machine in Hyper-V.
So in case, if you are also receiving the same error on your host system, here are the fixes you can apply to resolve this problem.
Page Contents
Fix: Virtual Machine could not be started because the hypervisor is not running
FIX 1 – Using Services snap-in
1. Right click on Start Button and select Run.
2. Type services.msc and click OK.
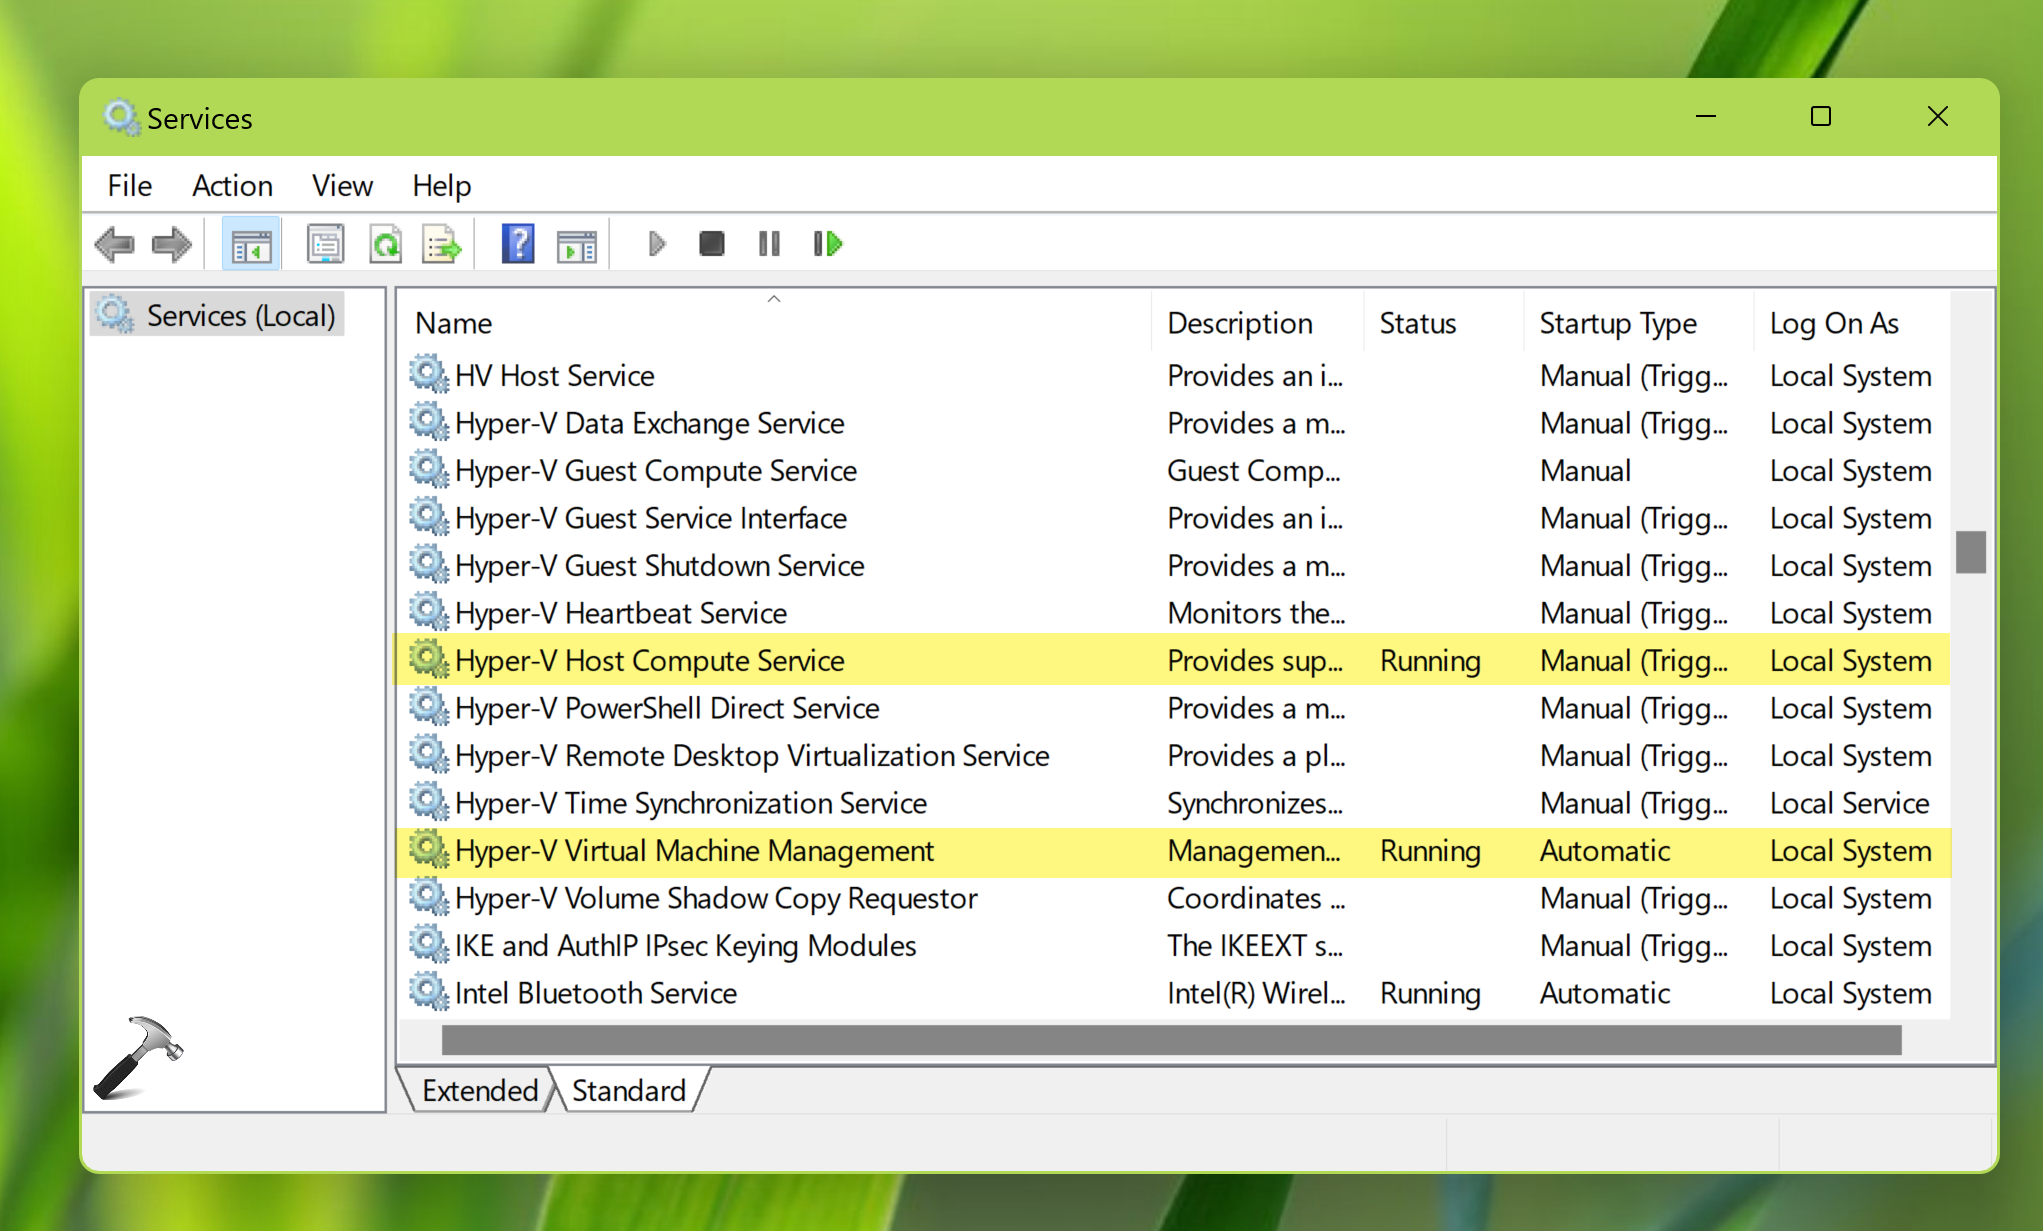
3. In Services snap-in, locate these two services and make sure they’re running:
- Hyper-V Host Compute Service
- Hyper-V Virtual Machine Management
FIX 2 – Resolve Virtual Machine could not be started using Windows Features
1. Press start button and type turn windows features on or off.
2. From the search results, select turn windows features on and off.
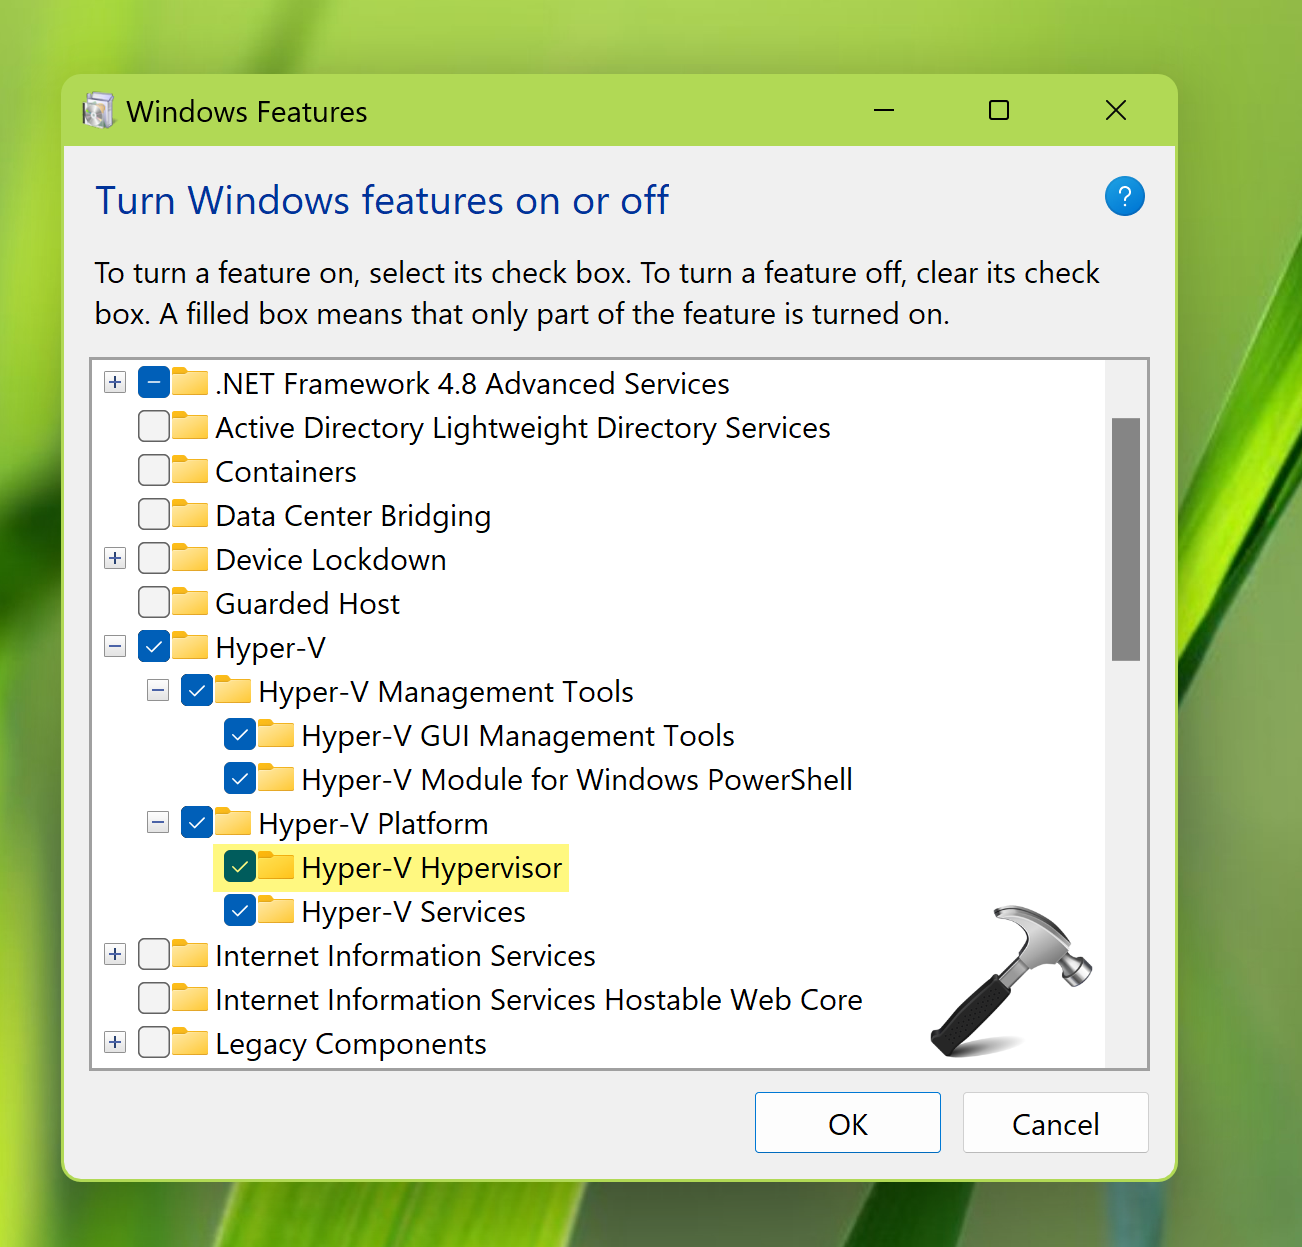
3. In Windows Features, scroll down and expand Hyper-V > Hyper-V Platform.
4. Check Hyper-V Hypervisor here. Also ensure that Hyper-V Services is also enabled.
FIX 3 – Enable DEP
Data Execution Prevention (DEP) is basically the system level memory protection. It helps protect against damage from viruses and security threats. You must have it enabled while using Hyper-V VM.
1. Run sysdm.cpl command.
2. Go to Advanced tab. Click Settings under Performance options.
3. In Performance options, go to Data Execution Prevention tab.
4. Select Turn on DEP for essential Windows programs and services only.
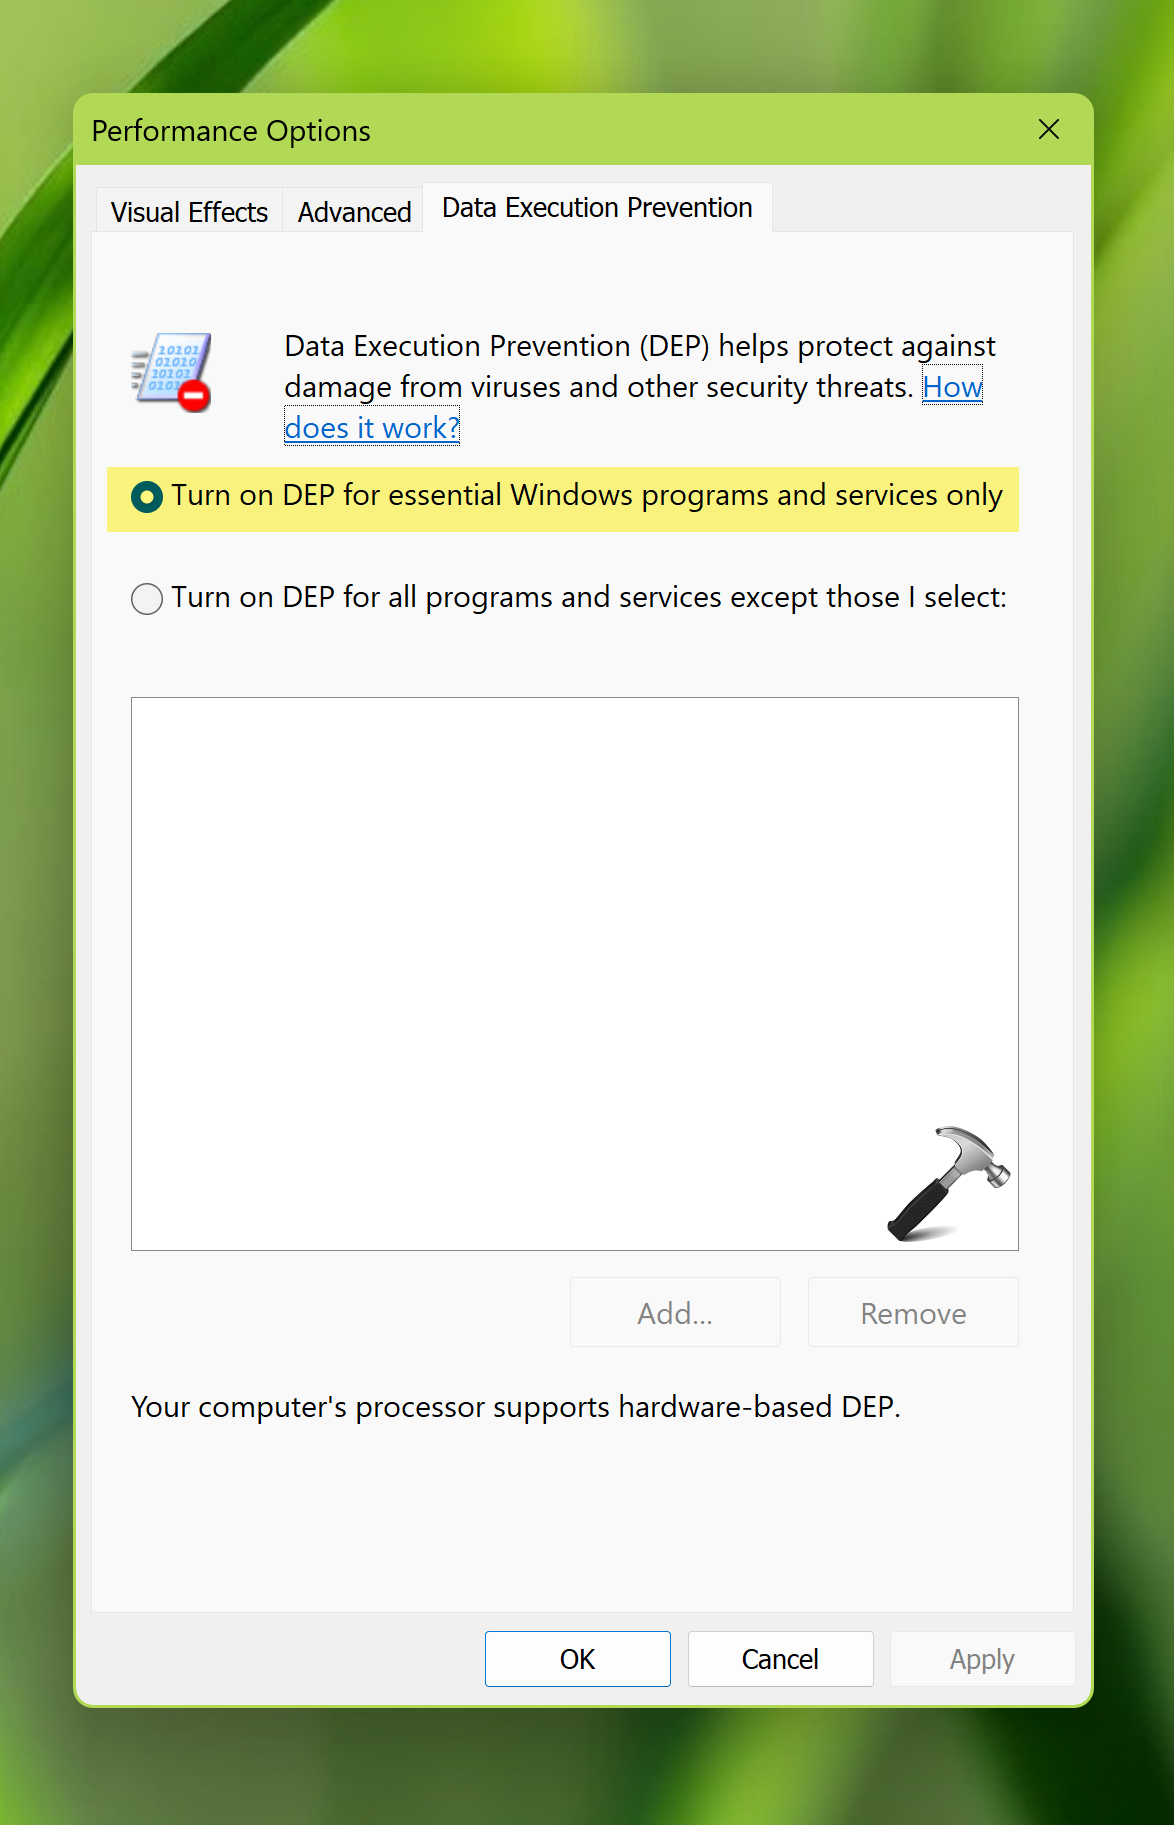
5. Click Apply, OK.
FIX 4 – Enable Hardware Virtualization
You need to enable hardware virtualization in the BIOS settings for your device.
1. Open BIOS settings on your computer.
2. Based upon your system configuration, you need to locate virtualization based settings. It can be found on security, advanced or configuration section. It usually differs with system maker and device model.
3. Once you locate the virtualization based option, make sure it is enabled.
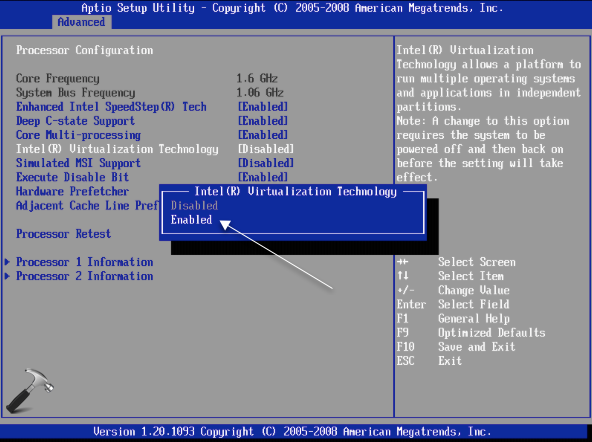
4. After enabling the option, save it and reboot your system.
Hope something helps!
![KapilArya.com is a Windows troubleshooting & how to tutorials blog from Kapil Arya [Microsoft MVP (Windows IT Pro)]. KapilArya.com](https://images.kapilarya.com/Logo1.svg)


Leave a Reply