Users sometimes complaint that their Windows 11 freezes while Starting up. Force Starting is the first thing they do to resolve it. But they face the same issue of Windows freezing again. This article shows five different ways you can fix Windows 11 freezing on startup issue in your device.
Page Contents
Fix: Windows 11 freezing on startup
Option 1: Disable Fast Startup
Windows 11’s Fast Startup feature puts your computer in hibernation rather than shutting down. It increases the startup speed of PCs with hard drives, but it may also cause issues of Windows freezing while starting up. Disabling it may solve your problem. Here’s how to do it.
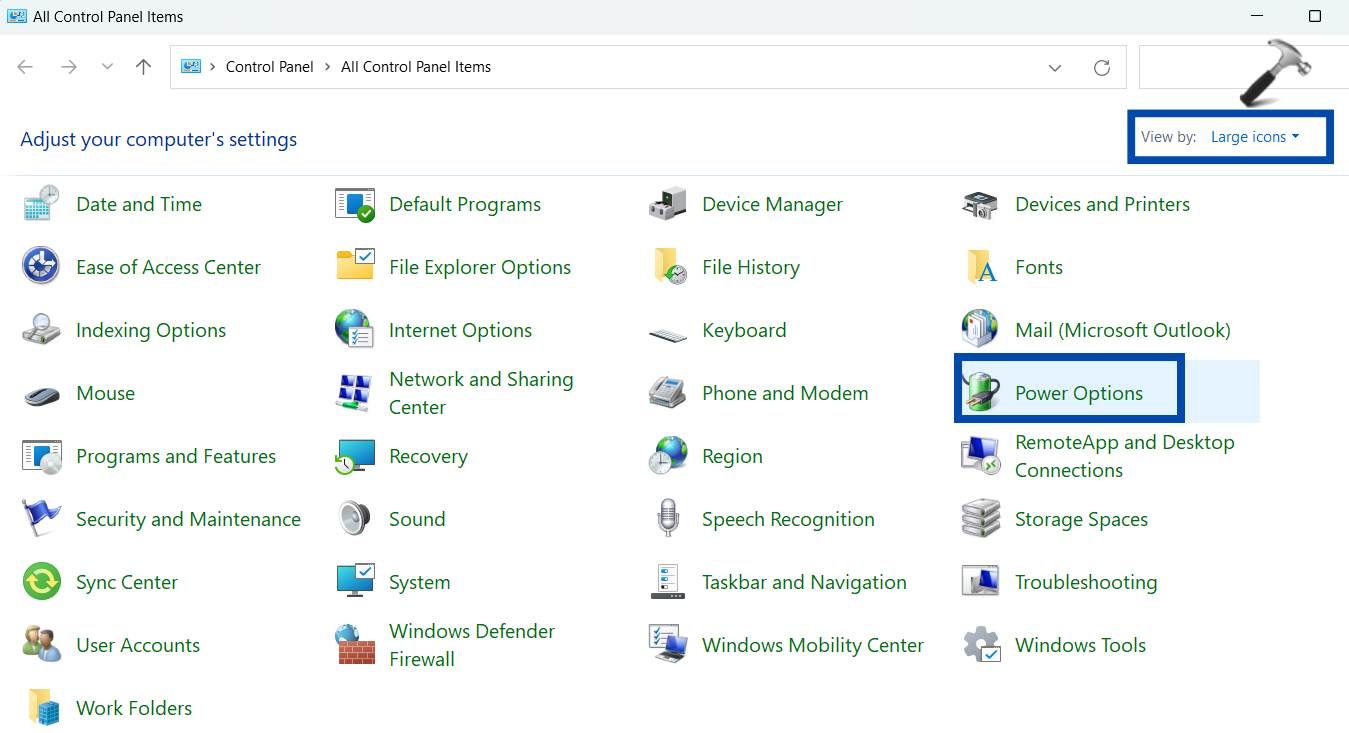
- Open Control Panel and go to Power Options. (Set view as Large icons if you cannot find it.)
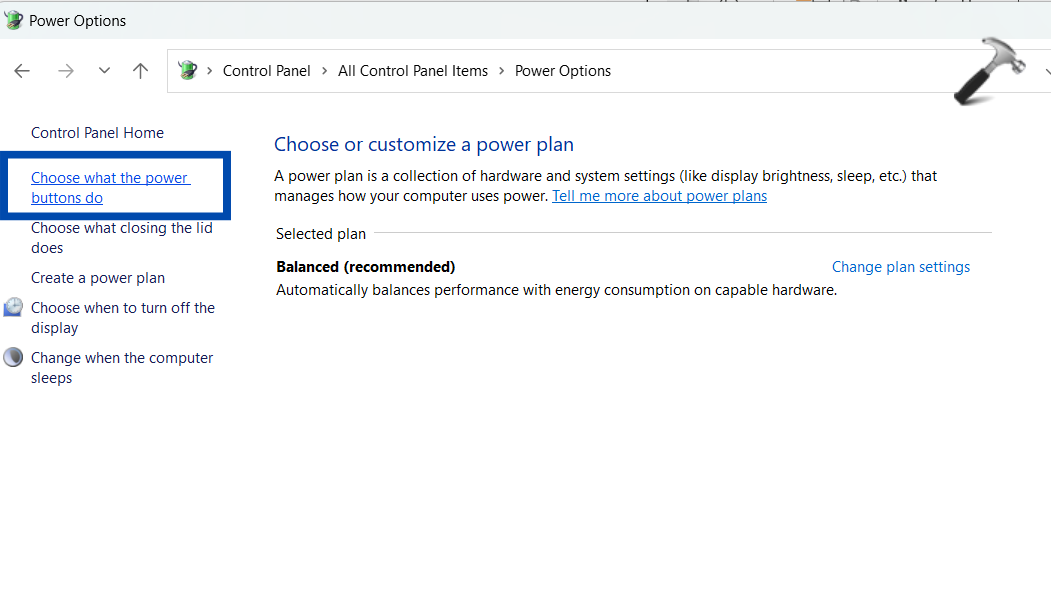
- Click on Choose what the power buttons do.
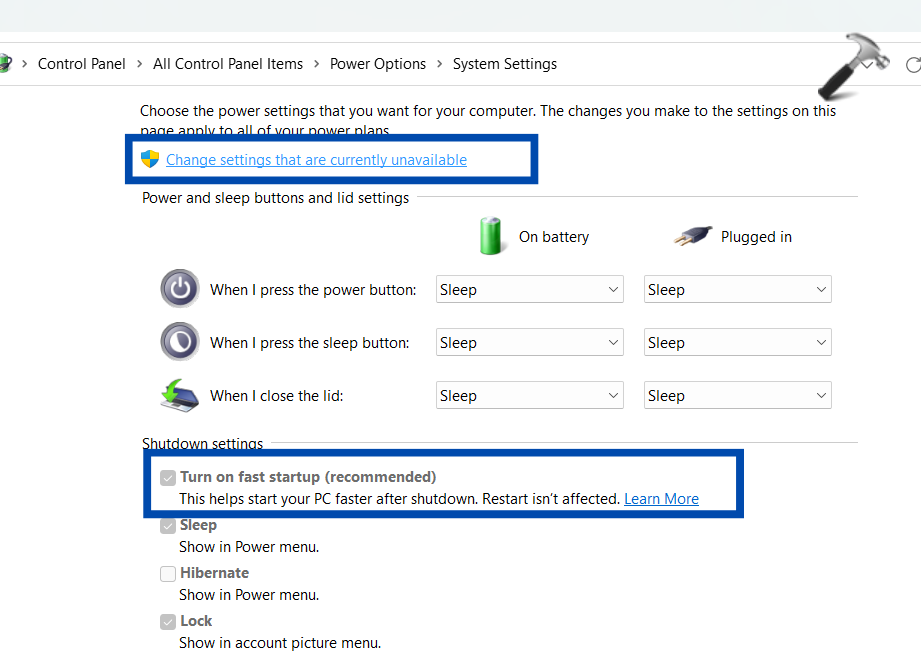
- Here, you need to uncheck the Turn on fast startup button. In case it is greyed out, click on Change Settings that are currently unavailable. Then, uncheck the box.
Option 2: Remove USB Peripherals
Make sure that your PC is not connected to any USB peripherals. If connected hardware devices are corrupt, you may face the issue at hand. Remove these connected devices and check if the issue still persists.
Option 3: Run System Scans
You may be facing this issue because of corrupted files or folders within the system. Fixing this cause of problem is very easy. Follow simple steps below to do it.
- Search for Command Prompt in the Start Menu and click on Run as administrator.
- In the Command Prompt Window, type sfc /scannow. Press Enter.

- Once the scan is completed, type the following command to repair the corrupted system components.
Dism /Online /Cleanup-Image /RestoreHealth
- When it is finished successfully, restart your system and check if the issue is resolved.
Option 4: Perform a Clean Boot
There could be some third-party applications that may be interfering with the system process and causing this problem. You can uninstall any such apps that you recently installed to solve the issue at hand.
Alternatively, you can run your PC in a clean boot state to identify which app is causing the issue. Here’s how to do it.
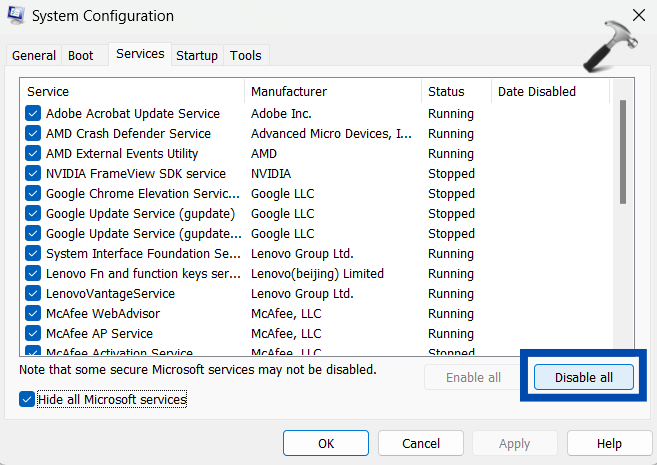
- Search for System Configuration in the Start Menu and open the app.
- Go to Services tab.
- Check the box against Hide all Microsoft services and click on Disable all.
- Now, open task manager by right clicking on the taskbar.
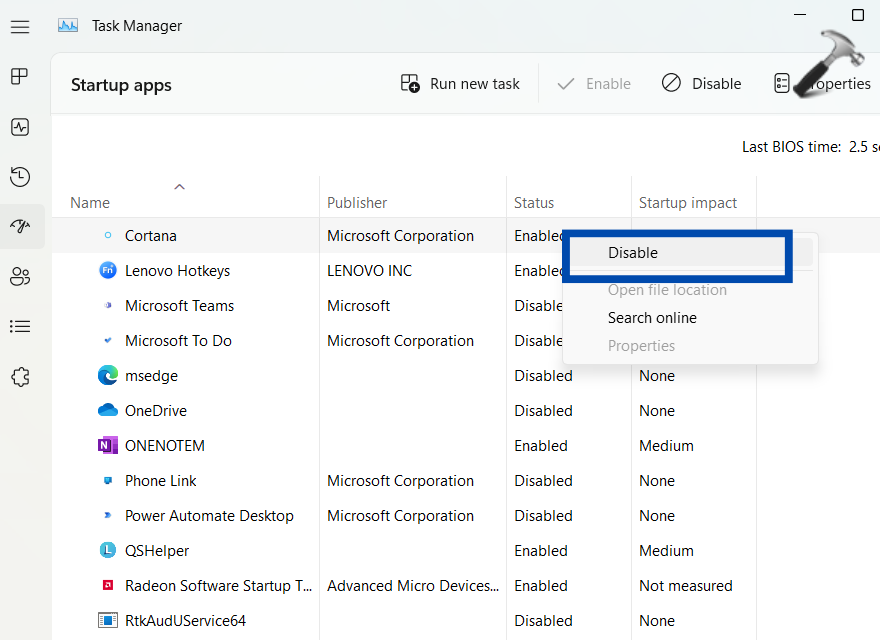
- Go to the Startup apps tab. Then, disable every app by right clicking on them one by one.
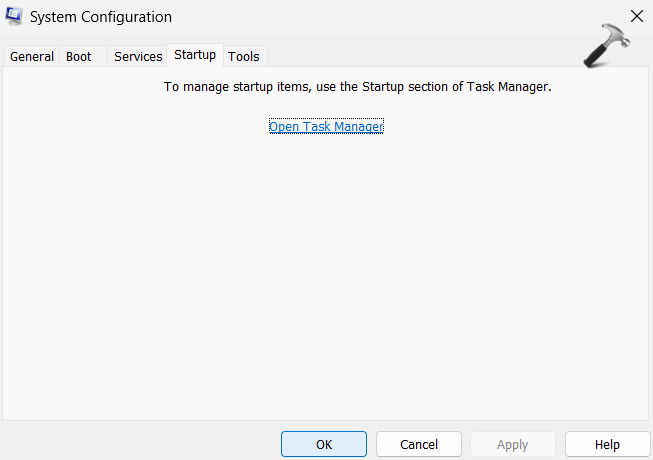
- Now go to the Startup tab in the System Configuration app and click on OK.
Now Restart your PC. The Windows will now launch in a clean boot environment.
Option 5: Update Driver
Another fix that could work is updating your outdated drivers. Here is how you can do it using the Device Manager.
- Search for Device Manager in the Windows menu and open the app.
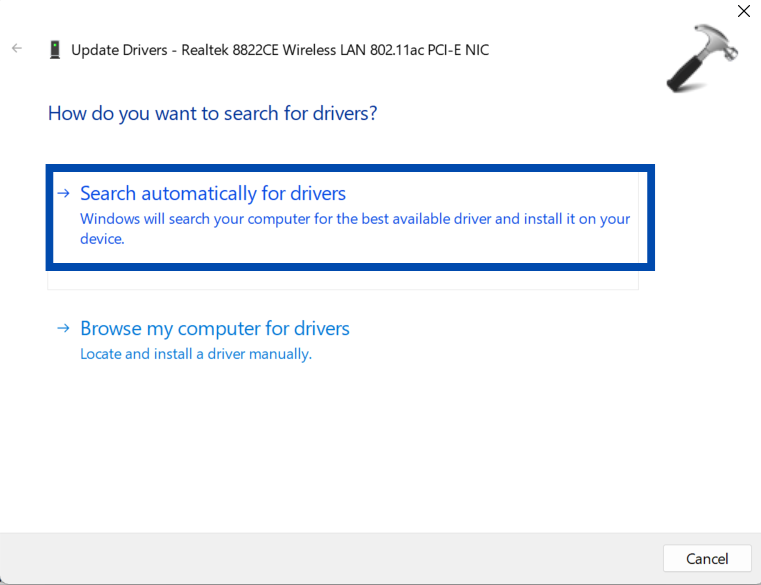
- Expand the Network Adapters section and right click on the Network Driver. Then, click on Update driver.

- click on Search automatically for drivers in the dialog box that opens. Then wait for the system to find the right driver.
They can also update you graphic drivers as well in the same way.
The drivers can also be downgraded if updating fails. Here is how you can roll back the driver to a previous working state.
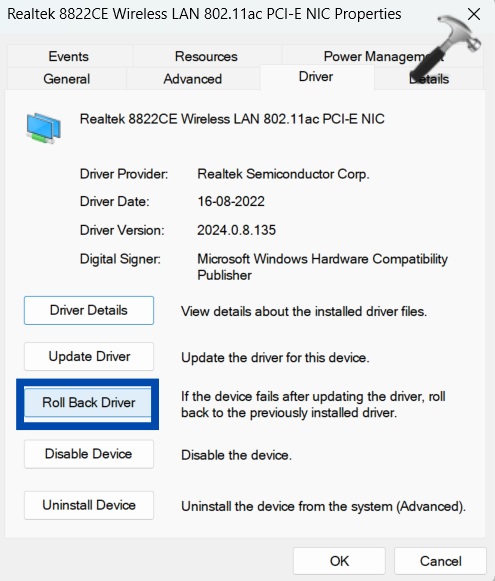
- Expand the Network Adapters section in the Device Manager and right click on the network driver. Click on Properties in the menu you see.
- In the dialog box you see, go to the Driver tab, and click on Roll back driver.
Now, follow the on-screen instructions and check if the issue is resolved. You can also download the latest driver from the official manufacturer’s website instead of using the Device Manager.
Hope one of these ways help you resolve this issue at hand!
![KapilArya.com is a Windows troubleshooting & how to tutorials blog from Kapil Arya [Microsoft MVP (Windows IT Pro)]. KapilArya.com](https://images.kapilarya.com/Logo1.svg)



Leave a Reply