If you want your device to run smoothly and efficiently, then you need to keep it updated. Windows 11 gives its users an access for easy and convenient updates. These updates will increase the efficiency of your device along with keeping it protected. Some of the updates do not get automatically installed in Windows Update, these are known as Optional updates. These are available feature, quality and driver updates. You can easily install optional updates in your device by following the below mentioned steps.
How to install optional updates in Windows 11
Here is the tutorial on How to install optional updates in Windows 11
1. Start by opening Settings app directly or by pressing Windows + I keys together.
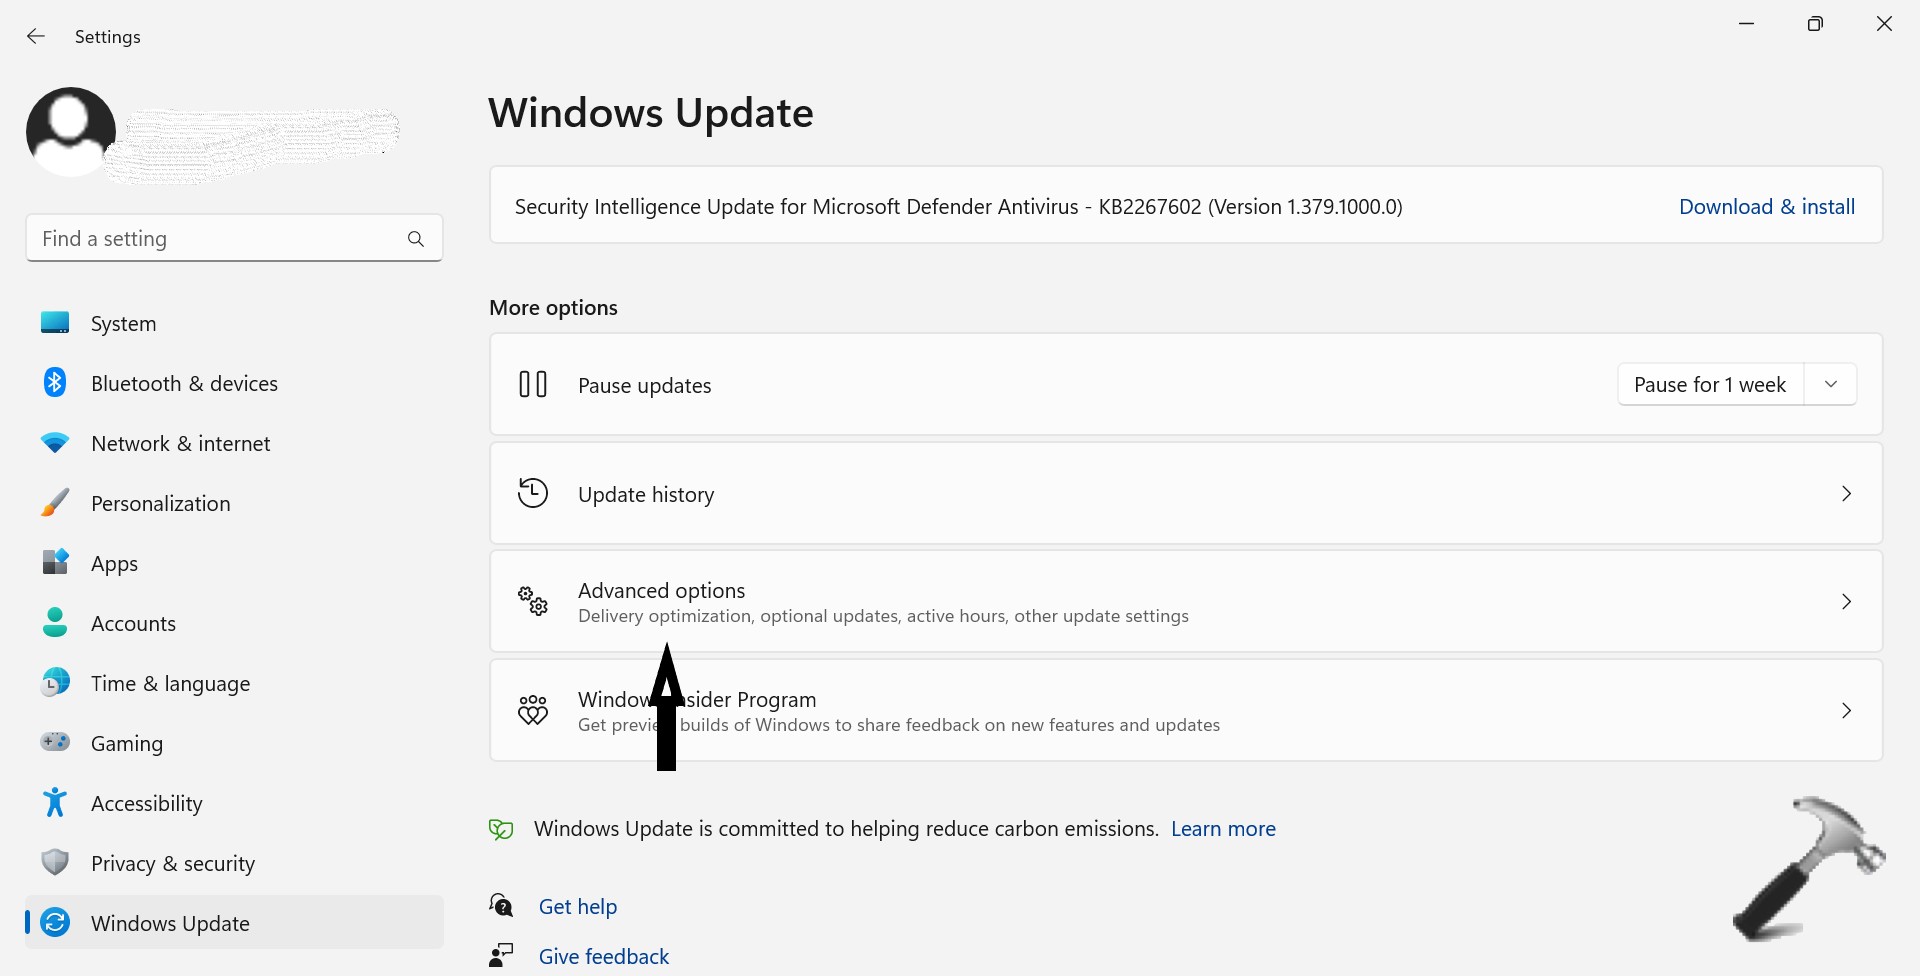
2. Click on Windows Update from the left pane. Then click on Advanced options from the right side.

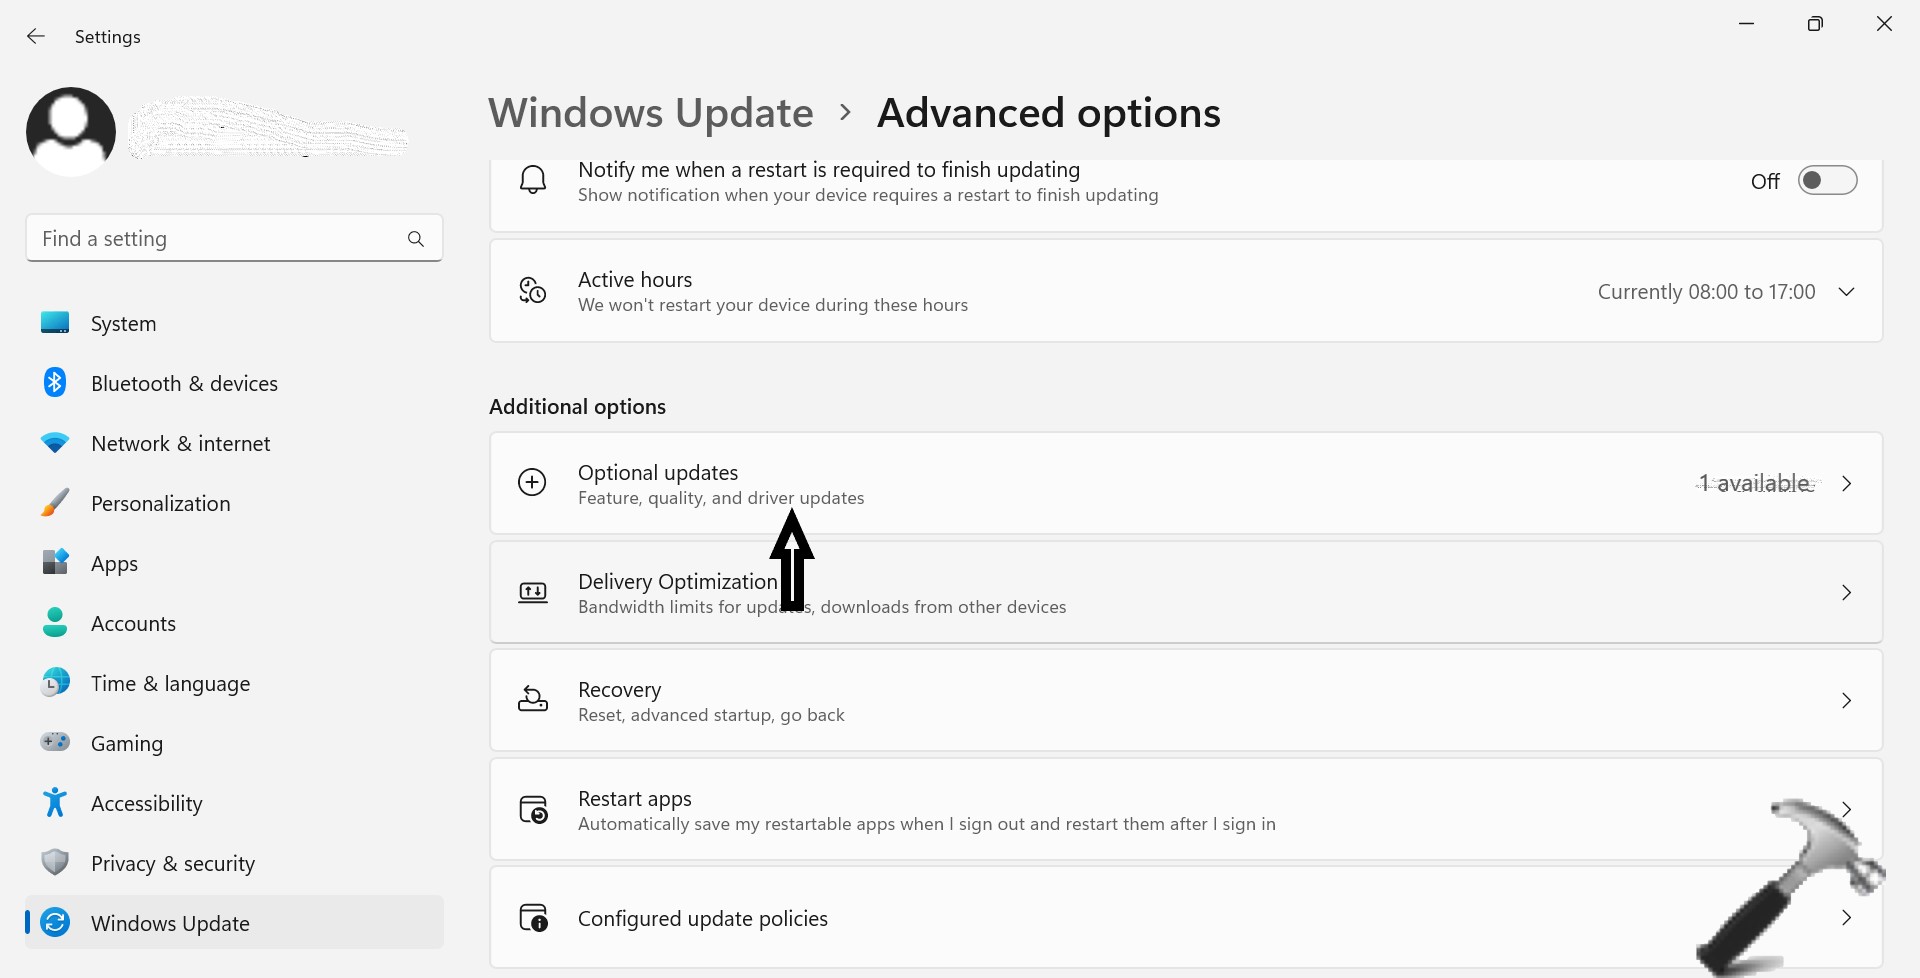
3. Now, click on Optional updates option mentioned below.

4. Next, open the category of optional updates you desire to check and download in your device.
5. Check or uncheck the box beside the available optional updates.
6. Now, click on Download & install button after selecting your desired optional updates.

7. After this you will automatically be taken to the Windows Update page, that shows the selected option updates download and install.
8. Then click on Restart option (if available), to finish installing the option updates.
Here you can Restart your device either by selecting a restart time outside your active hours or by selecting Restart Now.
The former type of Restart can be done by;
1. Opening Settings app directly or by pressing Windows + I keys together.
2. Followed by selecting Windows update from the left pane.
3. Click on Restart Now drop down arrow and select Schedule restart.
4. Now, Switch ON the off button and Pick a day and Pick a time you want to restart your device. Then click on Schedule Restart.

After following these steps the users can effortlessly install optional updates in Windows 11.
![KapilArya.com is a Windows troubleshooting & how to tutorials blog from Kapil Arya [Microsoft MVP (Windows IT Pro)]. KapilArya.com](https://images.kapilarya.com/Logo1.svg)


Leave a Reply