Some users report an issue that Windows Hello keeps on asking to set up PIN in their Windows 11 device. It becomes annoying especially because of frequent notifications on the screen or the prompts to use Windows Hello while opening some program or applications. Some users report this problem even after setting up the PIN login. We have suggested some ways you can fix this issue on your own in this article.
Page Contents
Fix: Windows Hello keeps asking to set up PIN in Windows 11
First and the simplest solution is to remove the PIN login from sign-in options in the settings and setting up Windows Hello again. Hopefully, this simple hack could solve your problem. If not, below are five different ways you can try fixing it.
Fix 1: Disable Windows Hello
Many users receive Windows Hello prompt while opening or signing-in to Outlook or some other Microsoft application/product in their Windows 11. In such as scenario, you can permanently disable Windows Hello Prompt. Here is how to do it using the Registry Editor:
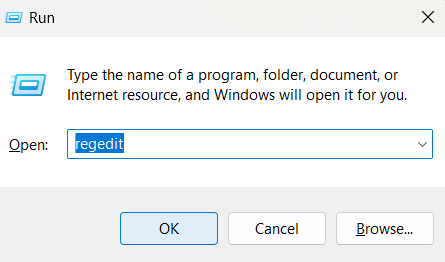
- Press Win + R and search for regedit in Run. Press Yes in the UAC prompt.
- Follow the path below in the Registry Editor.
Computer\HKEY_LOCAL_MACHINE\SOFTWARE\Microsoft\PolicyManager\default\Settings\AllowSignInOptions
- Now, you will find the DWORD named value there. Double click on it to change its value from 1 to 0.
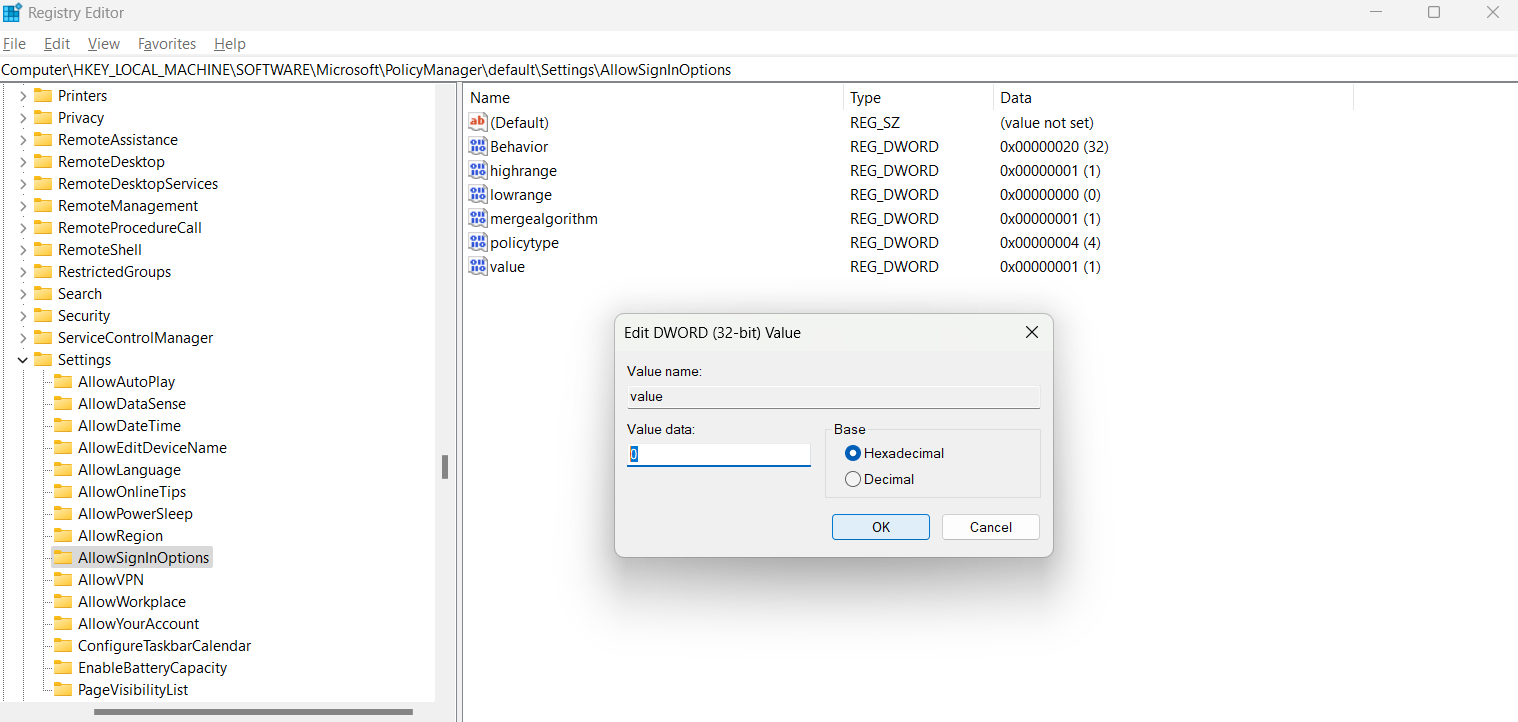
This will disable Windows Hello option for all the user accounts on your device.
Fix 2: Reset Settings
The issue could be caused by some corrupted data or files in the Settings application in Windows 11. The solution for it is to reset the settings app. Here is how to do it:
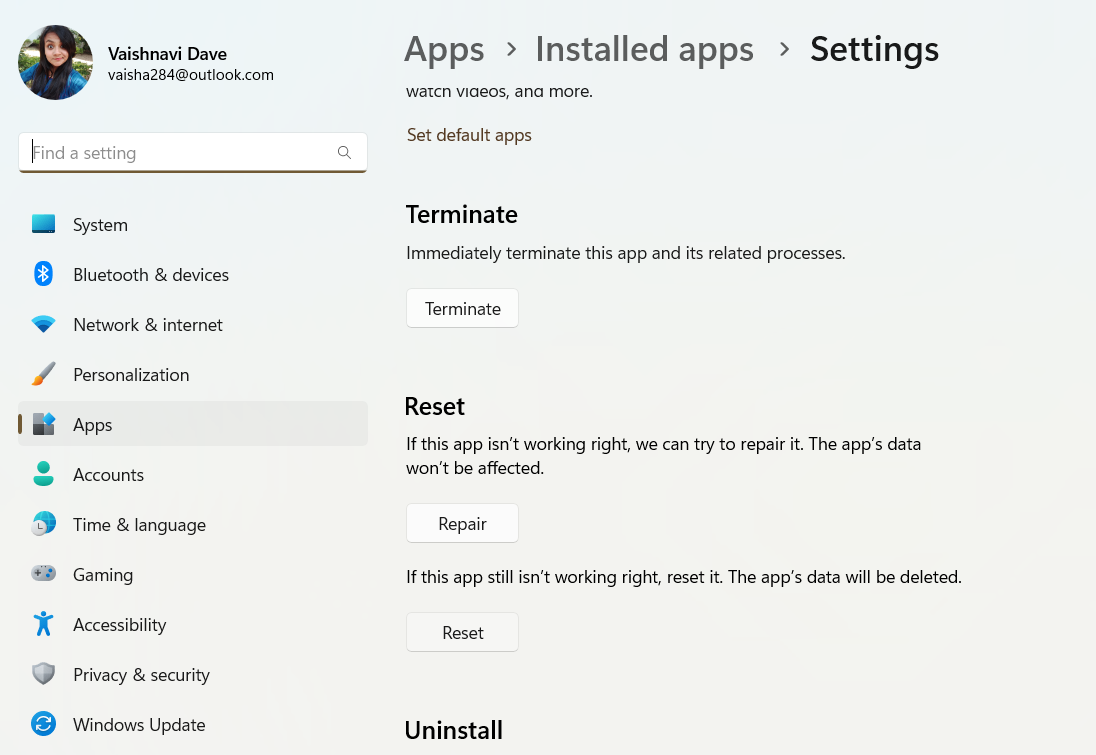
- Right click on the Settings icon in the Start menu and click on App settings.
- the Settings Windows that opens, scroll down to find a Reset Button. Click on it to Reset the Settings app.
Fix 3: Dismiss the message in Windows security
This simple hack could be your problem solver.
- From the Start menu search for Windows Security and open the app.
- Here, you will find an option called Account Protection.
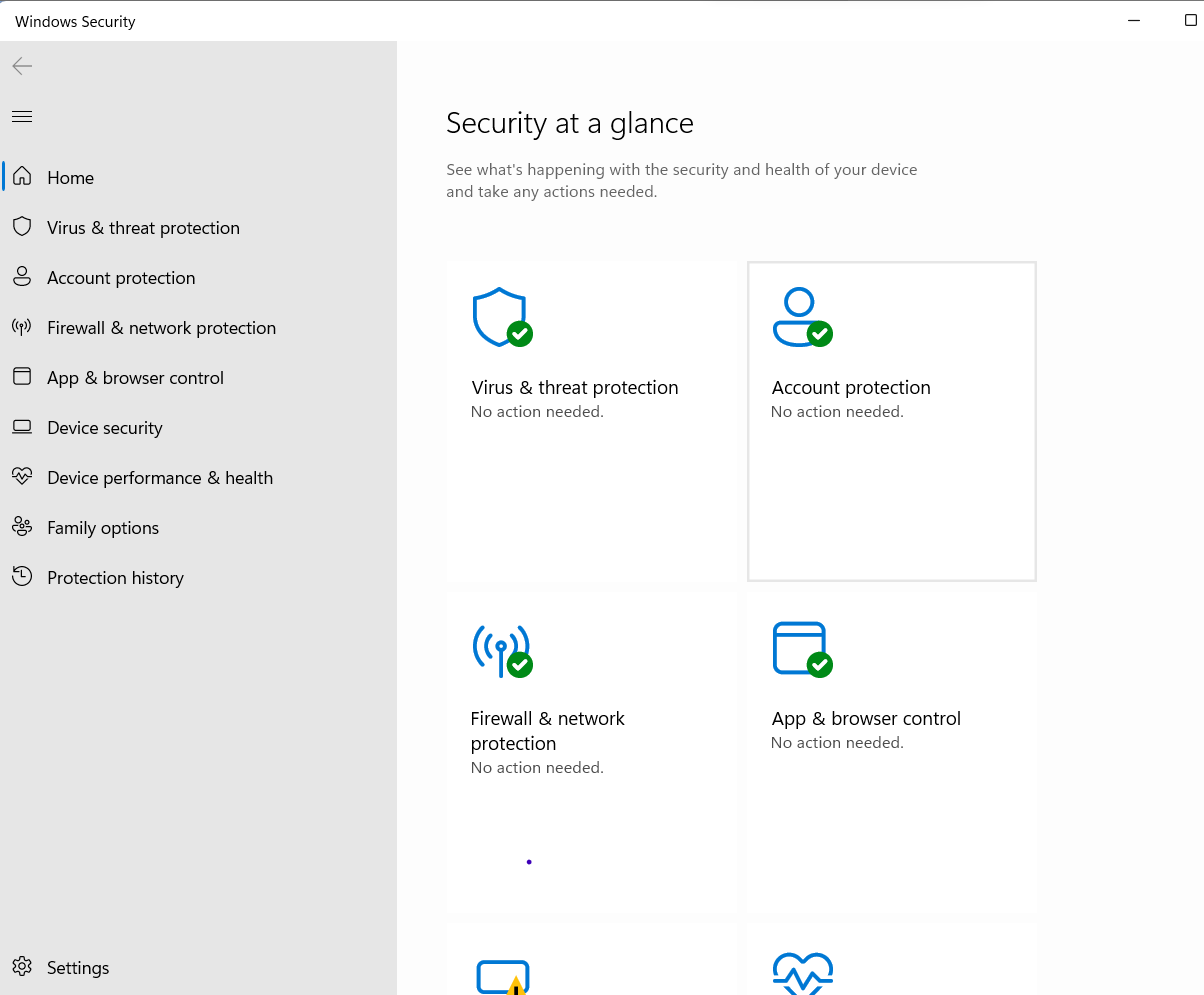
You will see a Dismiss option below it. Click on it.
- Another way is to access the Windows Hello section in Account Protection option and click on the Dismiss option available there.
If you do not find the dismiss option here, try other fixes.
Fix 4: Clear contents from the Ngc folder
The Ngc folder stores and manages all the PIN related information in your Windows 11. If the data or files in this folder are corrupted, it could be causing the issue at hand. Hence, you can clear the contents of this folder. Here is how you do it:
- Search for File explorer options in the Start Menu and open it.
- Go to the view tab where you will see Hidden Files and Folders in the Advanced settings list.
- Select Show hidden files, folders, and drives here, then click on Apply and Exit.

Now, you will be able to access the Ngc folder.
- Next, Open File Explorer and go to the following path:
C:\Windows\ServiceProfiles\LocalService\AppData\Local\Microsoft
- Open Ngc folder you will find here.
If you find that you do not have access to this folder, change the folder ownership by right clicking on it and then going to Properties > security > Advanced. Then, select Change against the Owner label. In the window that opens, select Advanced > Find Now. Select the user you want to give ownership to and then click on OK and OK. Now you will be able to open the Ngc folder.
- Here, select all and delete them.
Fix 5: Sign in with a local account
You can alternatively fix this problem by signing in with a local account (which is not with Microsoft). To do this,
- Open the Settings app and go to Accounts.
- Click on Your info.

- Here, select Sign in with a local account instead.

Now follow the instructions shown on the screen to set up the local account.
We hope these fixes help you resolve the issue!
![KapilArya.com is a Windows troubleshooting & how to tutorials blog from Kapil Arya [Microsoft MVP (Windows IT Pro)]. KapilArya.com](https://images.kapilarya.com/Logo1.svg)




Leave a Reply