You wish to save all your installed drivers on your device? Then, start by backing up all existing device drivers before doing a clean install. This will help you in many ways as you don’t need to spend extra time downloading each driver again, this will even help in avoiding compatibility issues. Thus, we have provided you with an easy, quick and efficient tutorial on how to backup and restore drivers in Windows 11 for your device. In order to perform the required task follow any of the below mentioned methods.
Page Contents
How to backup and restore drivers in Windows 11
Method 1: Using Device Manager
1. Open Run window directly or by pressing Windows + R keys together.
2. Type devmgmt.msc and press OK to open Device Manager.

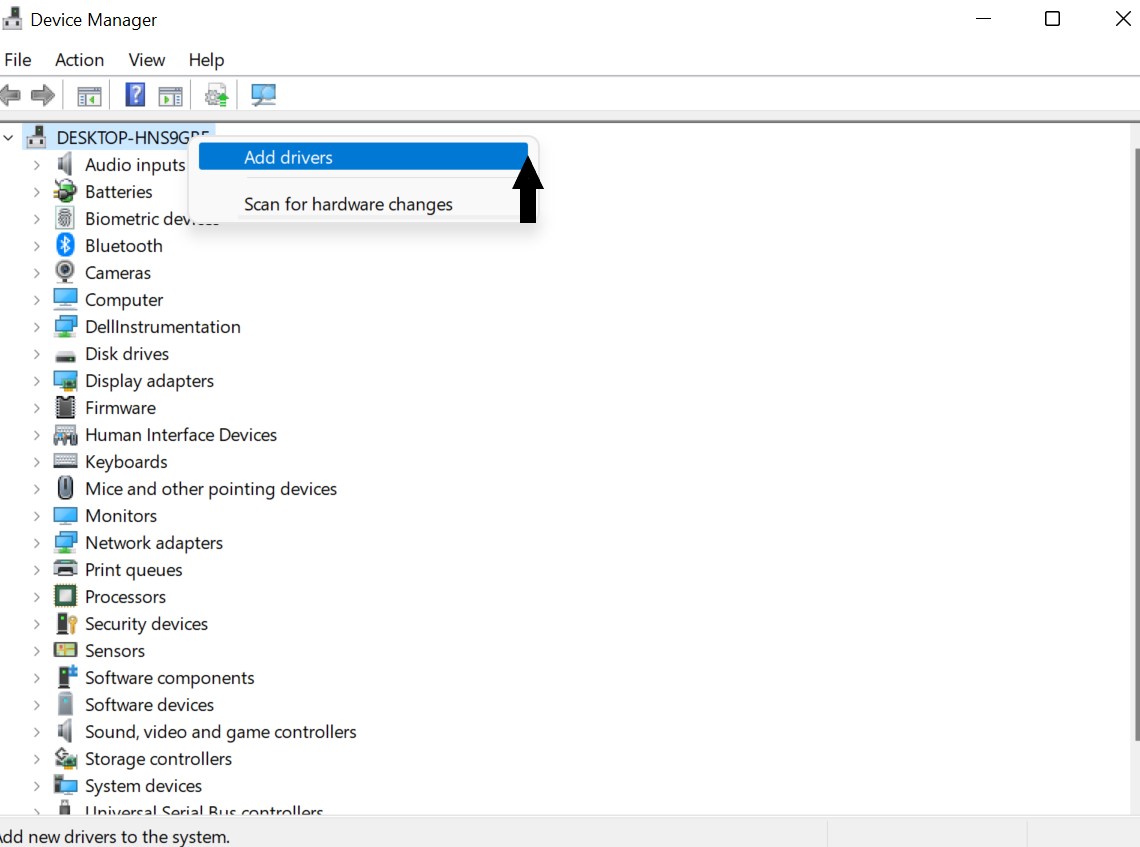
3. Now, right click on your computer’s name, followed by selecting Add drivers.

4. Press or click on Browse in order to select the location where you’ve backed up the device drivers, and tick Include subfolders and press Next.
5. Using this program all the drivers will be restored and installed, Windows 11 can even identify the unknown devices associated with their proper drivers.
Method 2: Using Windows Terminal to backup and restore drivers
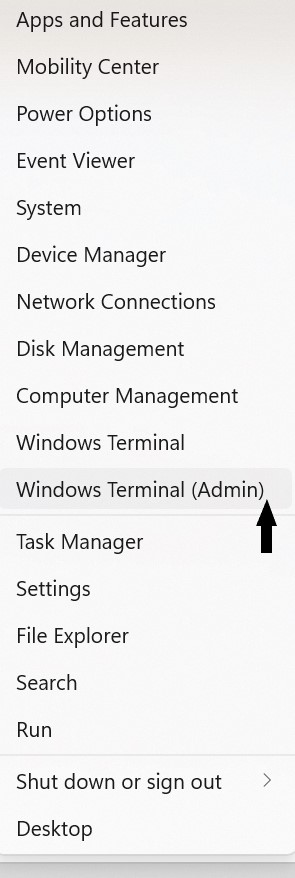
1. Start by right clicking on the Start button on the taskbar and selecting Windows terminal (Admin).

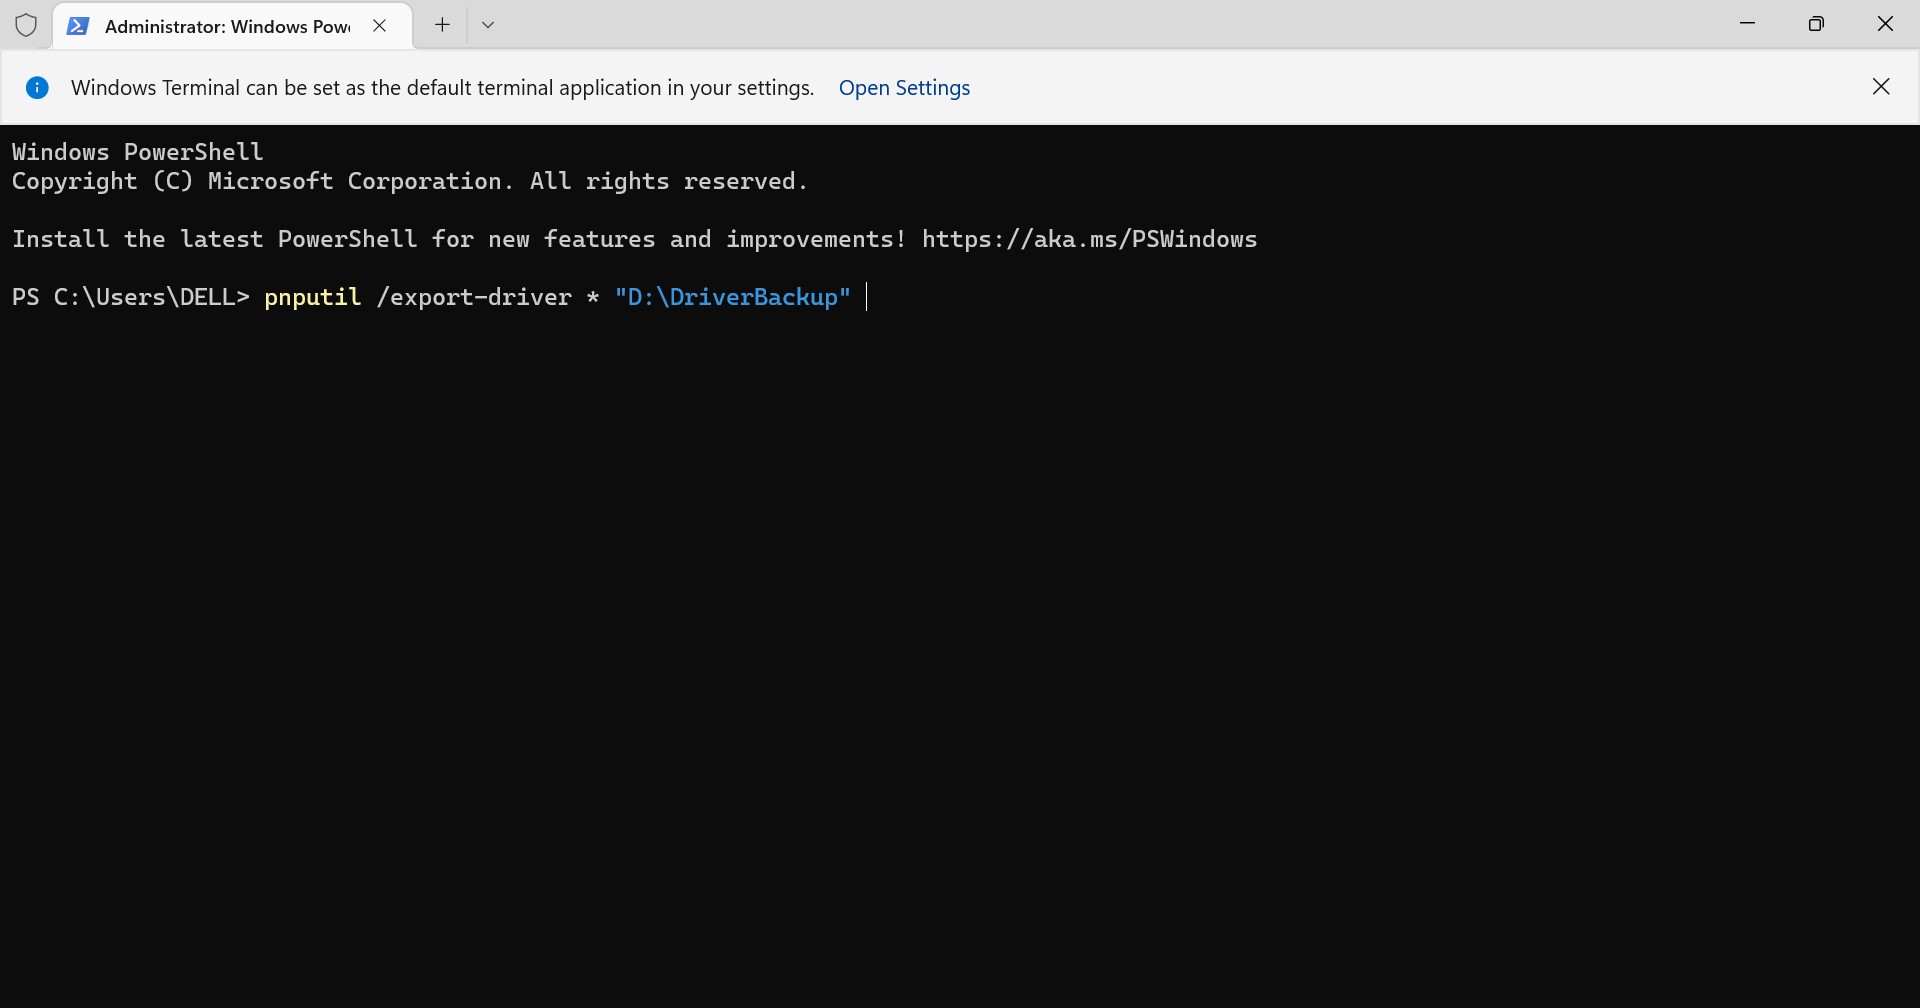
2. Now, Command Prompt or Windows PowerShell launches, enter the below mentioned command and press Enter to backup all your device drivers. This should be done by replacing D:\DriverBackup with the folder you created for saving the exported drivers.
pnputil /export-driver * “D:\DriverBackup”

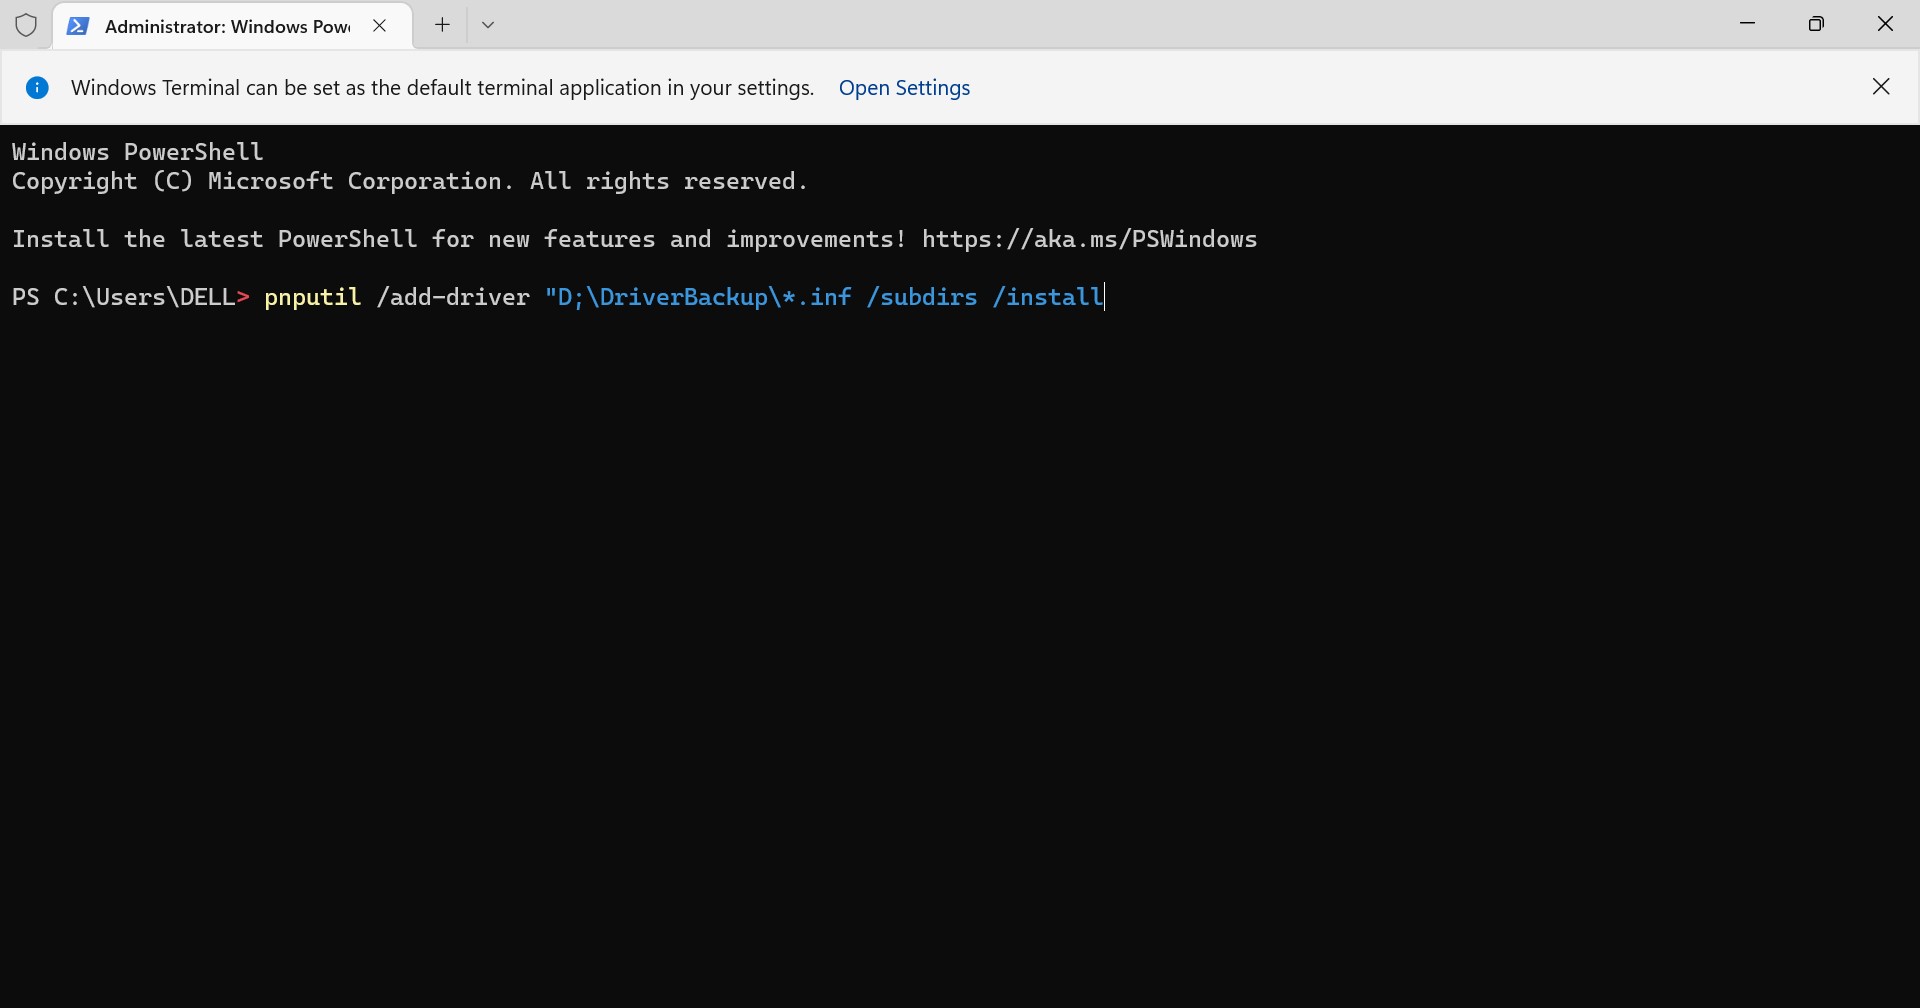
3. This backup can even be restored easily. You can do this by using.
pnputil /add-driver “D:\DriverBackup\*.inf” /subdirs /install

Either of the above mentioned methods can conveniently be selected if you wish to backup and restore drivers in Windows 11 of your device. These methods will certainly prove to be very helpful if your device drivers go out of support.
![KapilArya.com is a Windows troubleshooting & how to tutorials blog from Kapil Arya [Microsoft MVP (Windows IT Pro)]. KapilArya.com](https://images.kapilarya.com/Logo1.svg)


Leave a Reply