Is the WiFi option missing on your Windows 11 system? It could happen due to many reasons. Your system may not display a WiFi connectivity option because of hardware problems, corrupt drivers or other issues related to the Windows OS. Now, how to fix WiFi missing from Windows 11?
In this article, we will discuss some troubleshooting tips for fixing this issue hassle-free. So, let’s have a look at them without further ado!
Page Contents
Fix: WiFi missing from Windows 11
Fix 1 – By running the Internet Connection Troubleshooter
1. Firstly, open Settings and go to the System After that, click on Troubleshoot.
2. Next, select the Other troubleshooters option under Options.
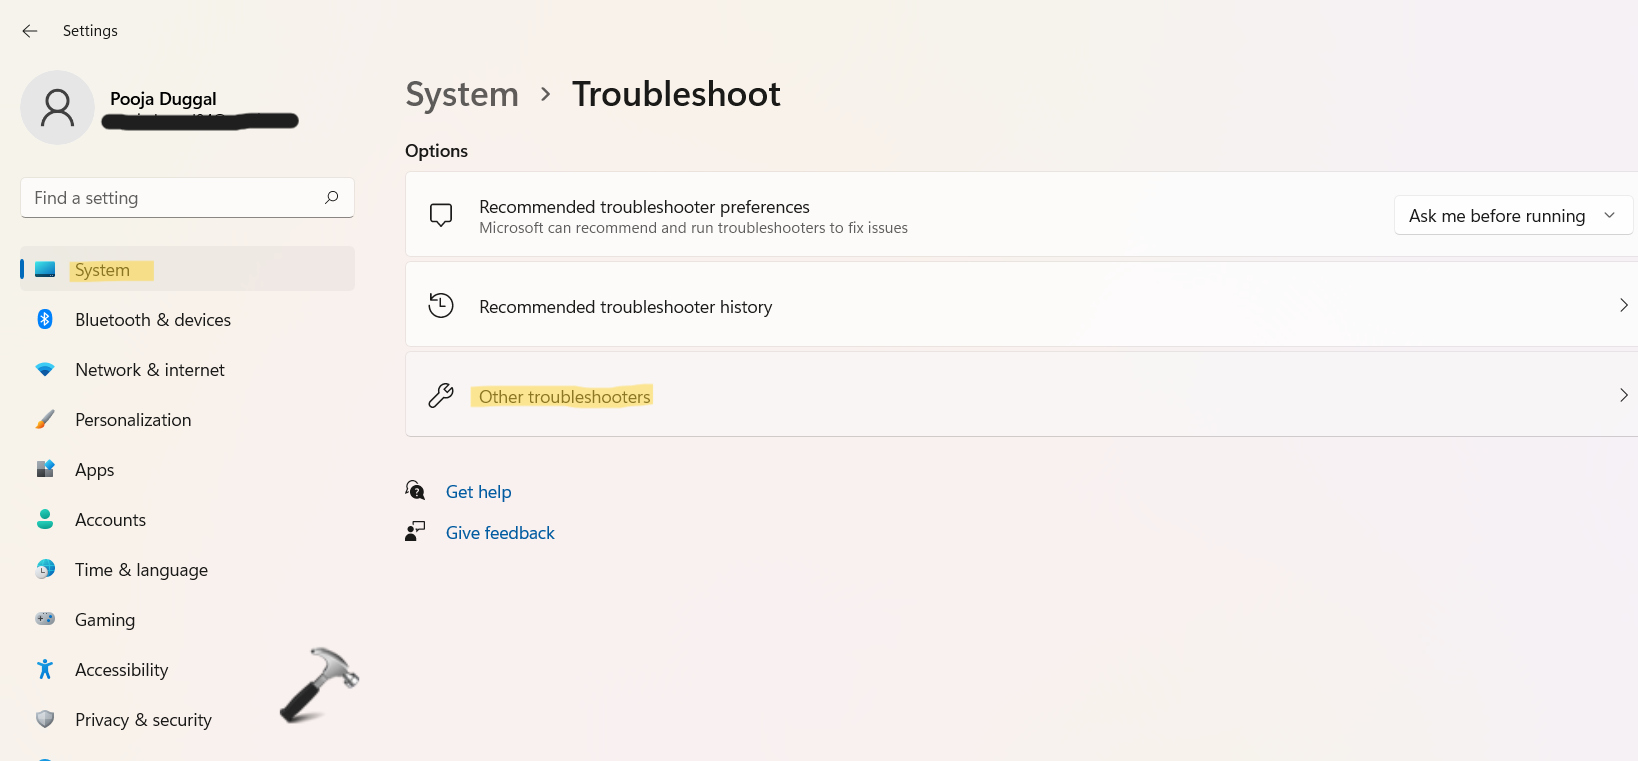
3. Now, click on the Run tab present next to Internet Connections.

Once done, the troubleshooter will look for issues and fix them if any.
Fix 2 – By enabling Wi-Fi Adapter in Network Connections
1. Open Control Panel and go to Network and Internet. Next, click on Network and Sharing Center.
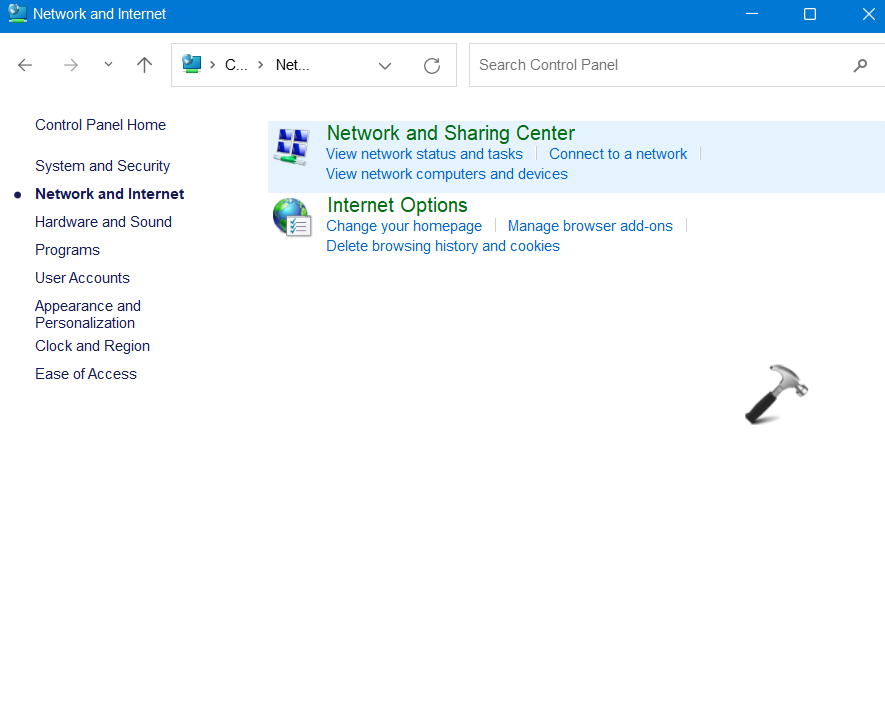
2. After that, click on Change adapter settings present on the left.
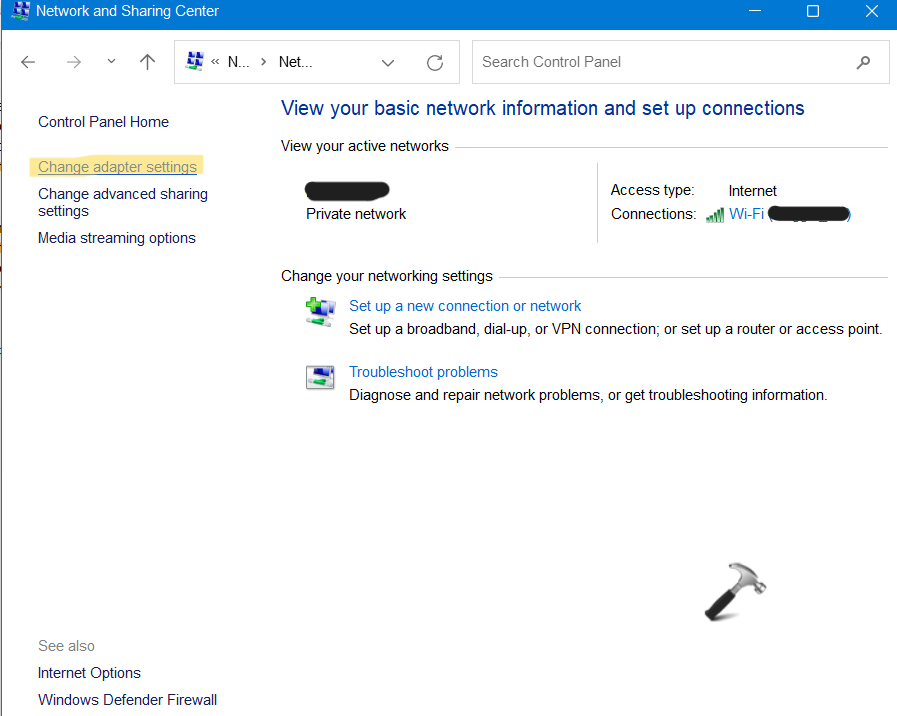
3. Now, right-click on WiFi and select the Enable option.

Fix 3 – By updating Network Adapter Drivers
1. Firstly, open Device Manager by right-clicking on Windows Start.
2. Once opened, expand Network adapters and right-click on the Wireless Network Adapter you like to update. Now, choose Update driver from the context menu.
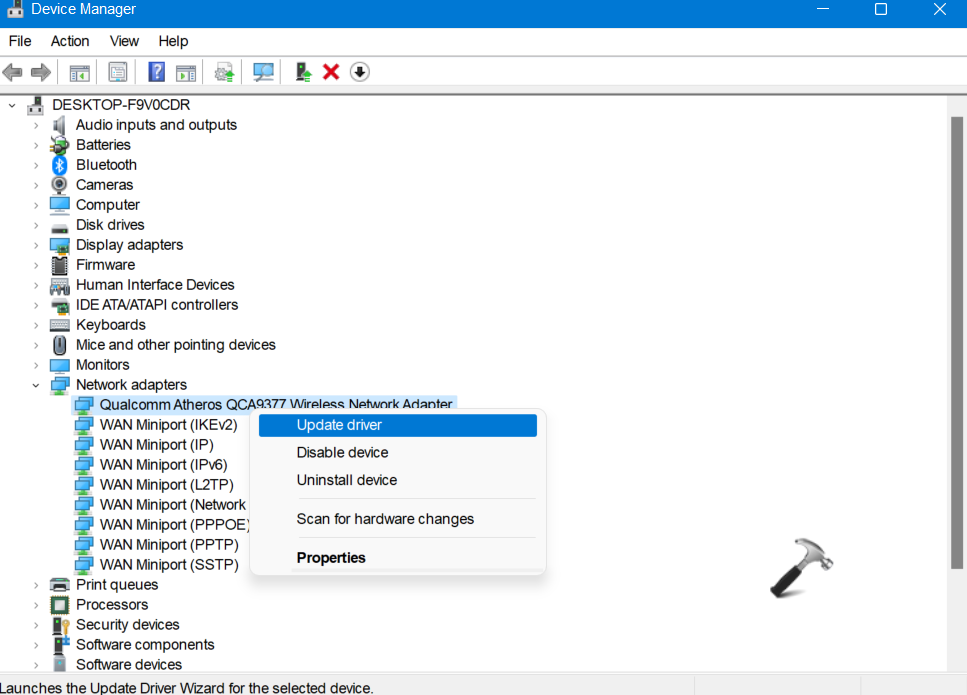
3. Next, select Search automatically for drivers.
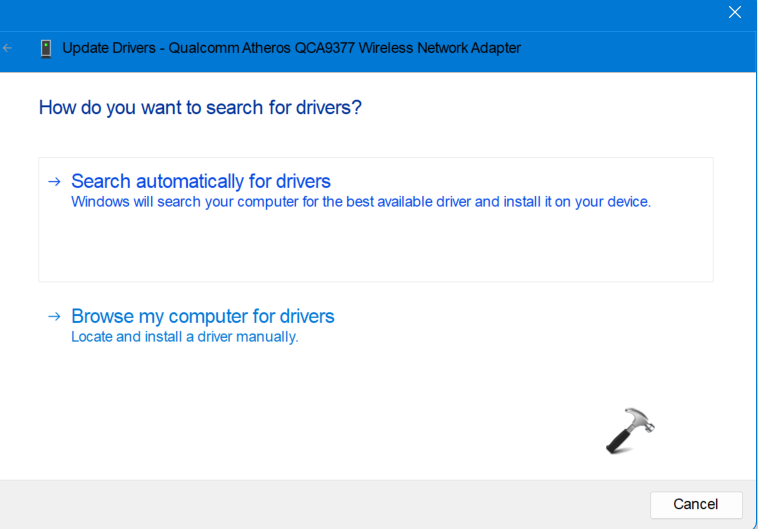
Now, the system will look for the driver automatically and install it on your system.
Fix 4 – By reinstalling the Network Adapter Device
1. Firstly, open Device Manager by right-clicking on Windows Start.
2. Once opened, expand Network adapters and right-click on the Wireless Network Adapter you like to reinstall. Now, choose Uninstall driver from the context menu.
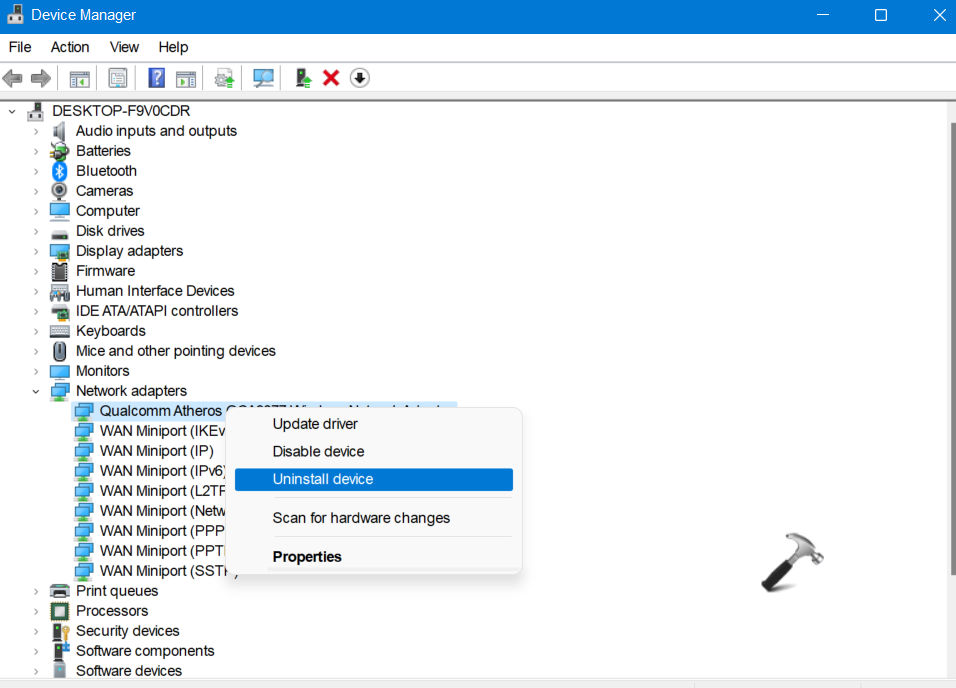
3. After uninstalling it, reinstall the network adapter device.
Fix 5 – By checking for Windows Updates
1. Open Settings by pressing the Windows + I tabs together on your keyboard. After that, go to the System tab and then, choose Windows Update present on the left.
2. Next, click on Check for updates. If available, the system will download the updates.
3. Now, restart your system and check if the issue has been fixed.
Fix 6 – By performing a Network Reset
1. Open Settings and go to the Network & internet After that, click on Advanced network settings.
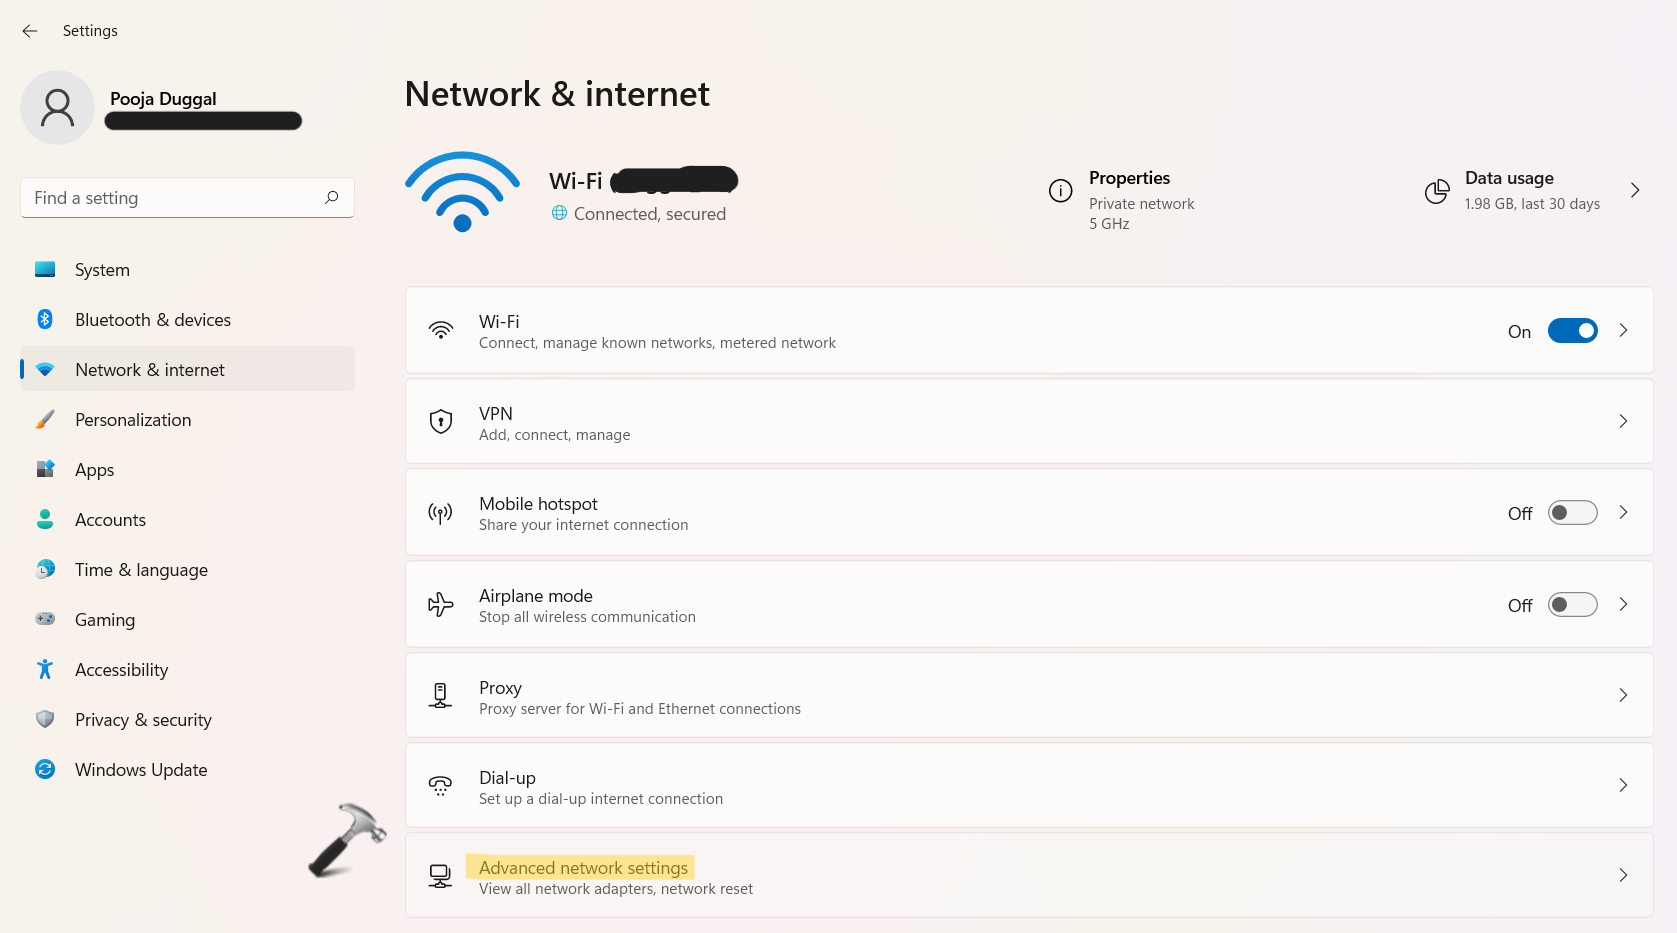
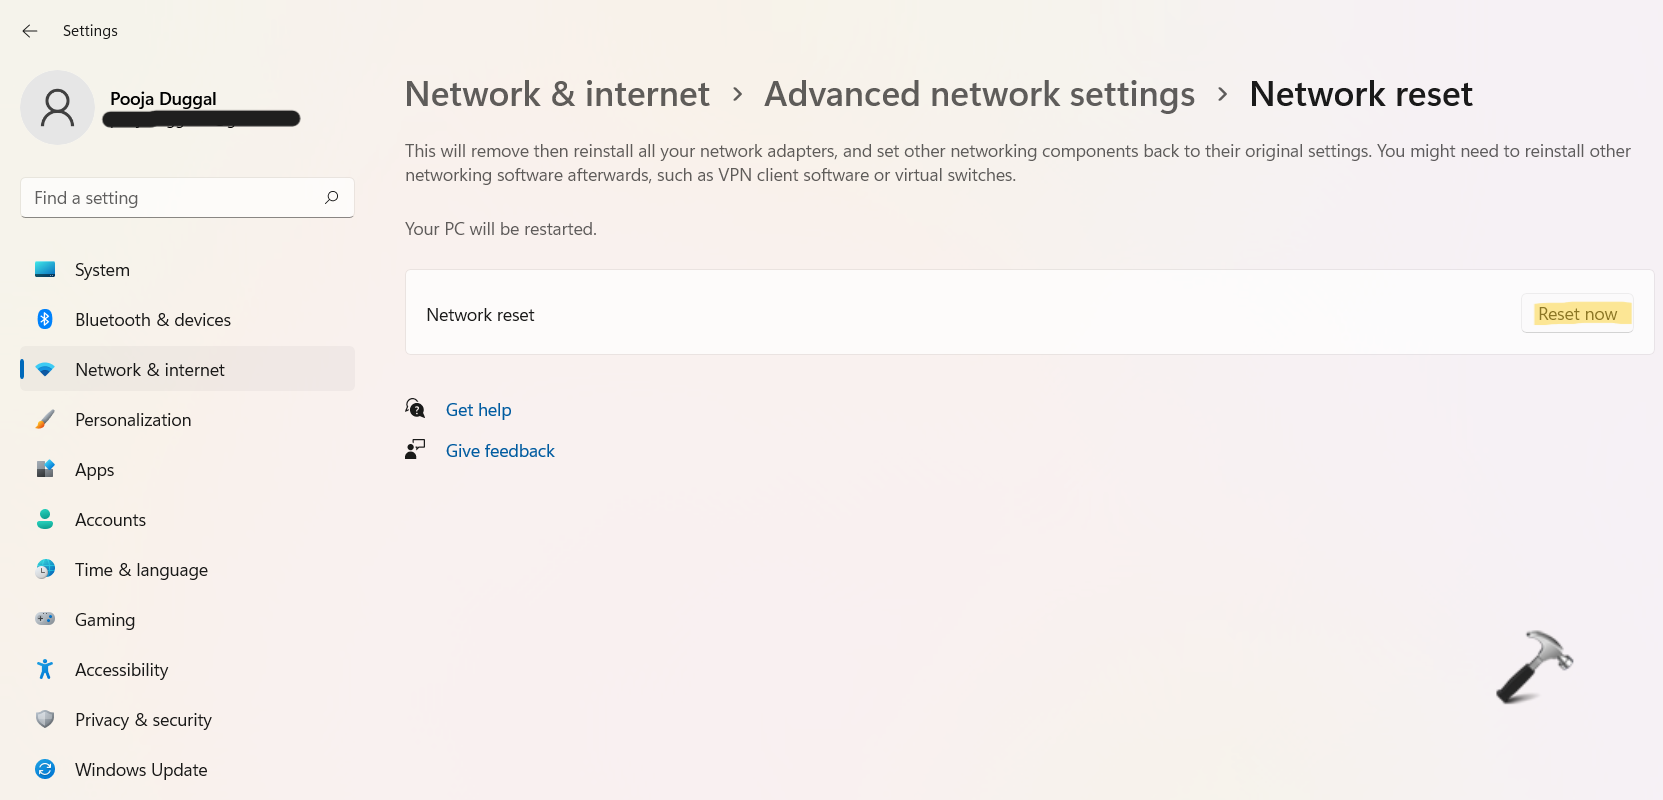
2. Next, select the Network reset option.

3. Now, click on the Reset now tab present next to Network reset.
So, this is how to fix WiFi missing for Windows 11 issue. Try these troubleshooting fixes now!
Also checkout this video for live troubleshooting:
![KapilArya.com is a Windows troubleshooting & how to tutorials blog from Kapil Arya [Microsoft MVP (Windows IT Pro)]. KapilArya.com](https://images.kapilarya.com/Logo1.svg)


Leave a Reply