Earlier, people have to use a third-party tool to compress files. With Windows 11, there is no such requirement. In Windows 11, there’s amazing feature called New Technology File System (NTFS) compression that shrinks the size of folders and files. This feature comes handy to users who have large files on their system.
In this post, learn how to use file compression in Windows 11.
Page Contents
How to use file compression in Windows 11
Part 1 – How to compress a file
1. In the first place, you need to go to the folder and then, right-click on the file that you like to compress. Now, select Properties from the context menu.
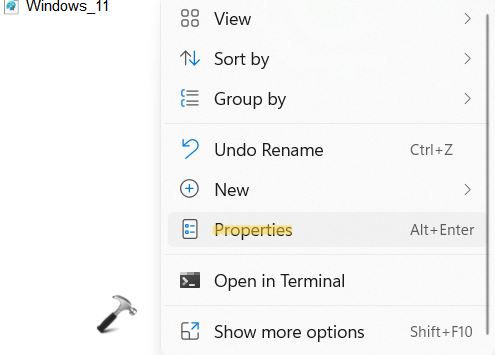
2. Now, go to the General tab and then, click on the Advanced tab present at the bottom.

3. Next, check the box present next to Compress contents to save disk space. Then, press OK.

4. Lastly, click on Apply and then, on OK.
Part 2 – How to compress a folder
1. Initially, right-click on the folder that you want to compress. Now, select the Properties tab from the context menu.
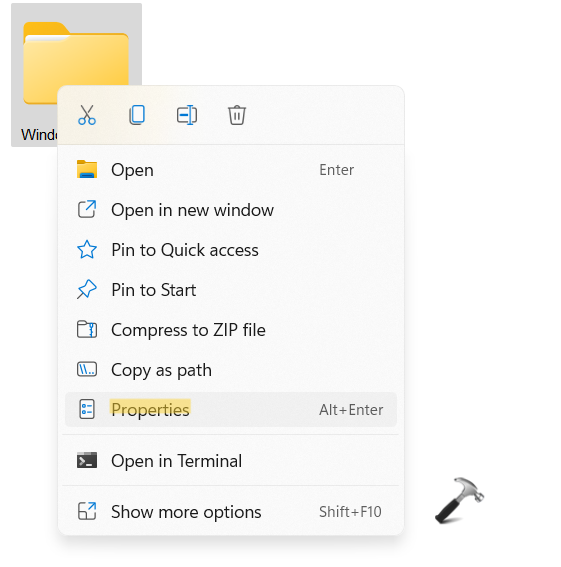
2. Now, go to the General tab and then, click on the Advanced tab present at the bottom.
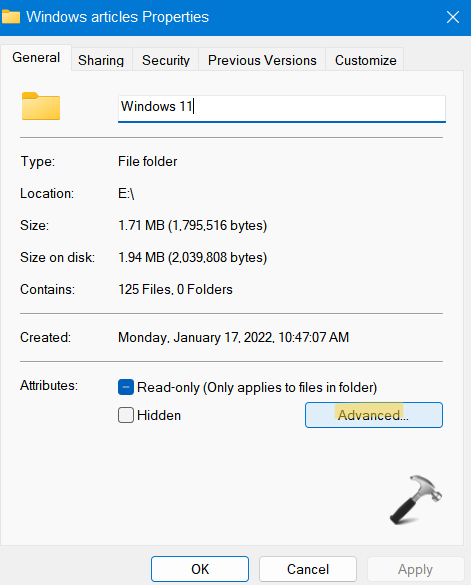
3. Next, check the box present next to Compress contents to save disk space. Then, press OK.
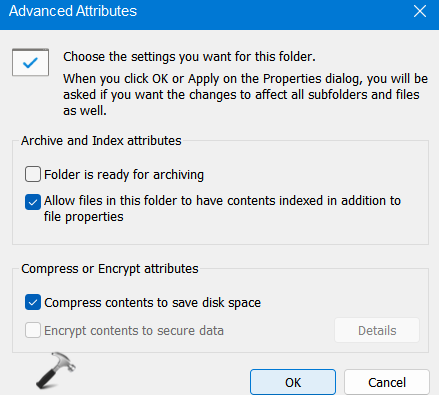
4. After that, click on Apply. Select the radio button next to Apply changes to this folder, subfolders and files when a prompt appears. Press OK.
Part 3 – How to compress a drive
1. Firstly, right-click on the drive that you want to compress. Now, select the Properties tab from the context menu.
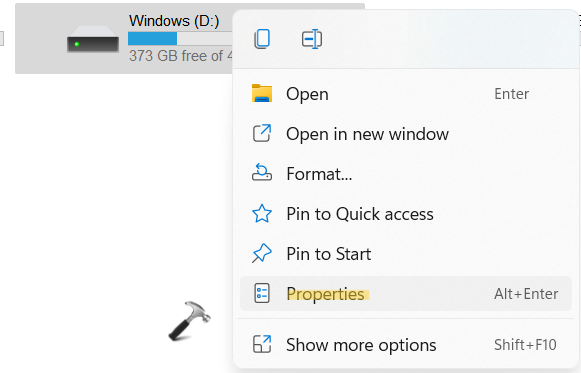
2. Now, go to the General tab and then, check the box next to Compress this drive to save disk space. Click on Apply.
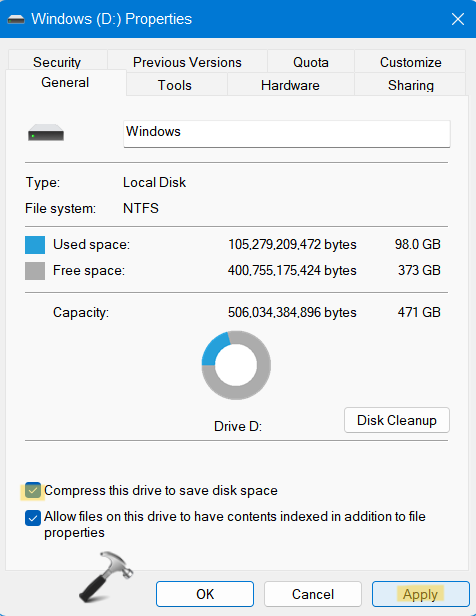
If a prompt shows up, select the radio button next to Apply changes to drive D:\, subfolders and files.
3. Lastly, click OK.
So, this is how to use file compression in Windows 11.
Read next: Enable or Disable Memory Compression in Windows 11/10.
![KapilArya.com is a Windows troubleshooting & how to tutorials blog from Kapil Arya [Microsoft MVP (Windows IT Pro)]. KapilArya.com](https://images.kapilarya.com/Logo1.svg)


Leave a Reply