Previously, we’ve seen how to enable clipboard history in Windows 11. Now in this article, we’ll see how to enable clipboard sync across your devices in Windows 11. When you enable clipboard sync then you can easily copy content (such as images) and text from one system to another using a cloud-based clipboard. For the clipboard sync to work, you must be signed in with the same Microsoft account on your devices. So if you’ve a primary Microsoft account not local account on your different systems, this feature would be more helpful for your work.
You can enable clipboard sync across your devices either using Settings app or via registry. Note that you can have clipboard history size maximum 4 MB per copied item. Clipboard history have limit of 25 copied entries. For clipboard sync to work seamlessly, keep signed in with your Microsoft account.
Page Contents
Enable clipboard sync across your devices in Windows 11
Method 1: Using Settings app
Make sure you’re signed in with Microsoft account. If you’re on local account, use this guide to switch to Microsoft account.
1. Press  + I keys to open Settings app.
2. In Settings app, go to System > Clipboard.
3. Under Clipboard, click on Get started.

4. If you’re asked to sign-in again to verify your Microsoft account, do that.

5. Now turn On Clipboard history option. Then turn On Sync across your devices option. Make sure you select Automatically sync text that I copy here.

In this way, you’ve enabled clipboard sync across your devices in Windows 11.
Method 2: Using Registry
 Registry Disclaimer: It is recommended to create a System Restore point first, if you’re not familiar with registry manipulation.
1. Run regedit command to open Registry Editor.
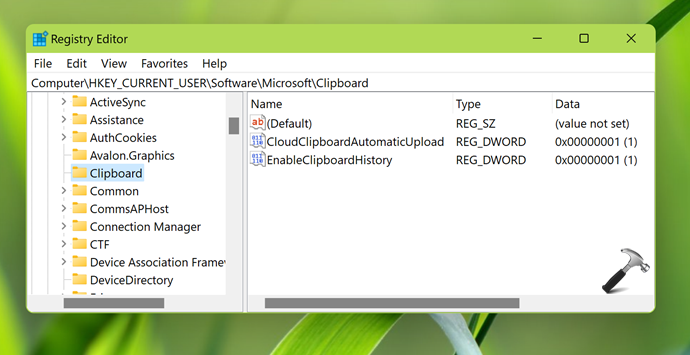
2. In left pane of Registry Editor window, navigate to:
HKEY_CURRENT_USER\Software\Microsoft\Clipboard
3. In the right pane of Clipboard, create registry DWORDs named CloudClipboardAutomaticUpload and EnableCloudClipboard and make sure you set it to Value data 1.

4. Close Registry Editor, sign out and sign in back to make changes effective.
That’s it!
![KapilArya.com is a Windows troubleshooting & how to tutorials blog from Kapil Arya [Microsoft MVP (Windows IT Pro)]. KapilArya.com](https://images.kapilarya.com/Logo1.svg)


Leave a Reply