Sometimes, users come across an issue, where the WiFi option not showing in Settings for Windows 11. It could be annoying as you could not enable or disable WiFi on your system. So, how to fix this issue?
In this post, learn how you can resolve this issue in different ways!
Page Contents
Fix: WiFi option not showing in Settings for Windows 11
Fix 1: Restart the WLAN Autoconfig Service
1. Open Run by pressing the Windows + R tabs together on your keyboard. Type services.msc in the Run dialog box and hit Enter to open Service Manager.
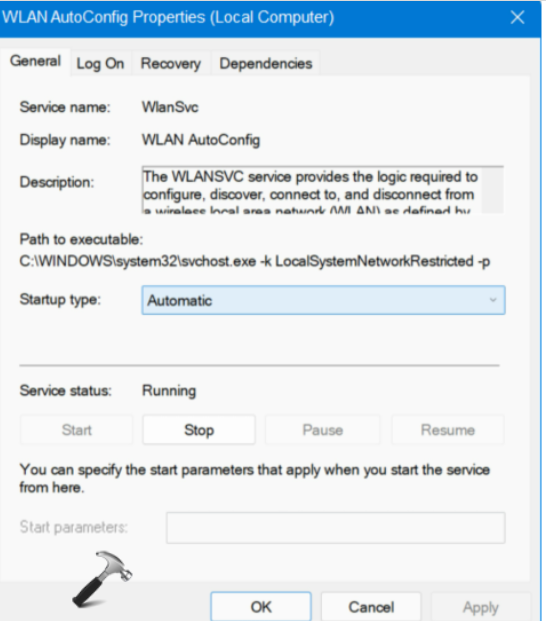
2. Next, double-click on WLAN AutoConfig to open its Properties From there, go to the General tab and ensure that the Service status is running. If not, then click on Start to initiate the service.

3. Now, go to Startup type and choose Automatic from the dropdown menu. Once done, select Apply and then, OK.
Fix 2: Set IP Assignment to Automatic in Settings
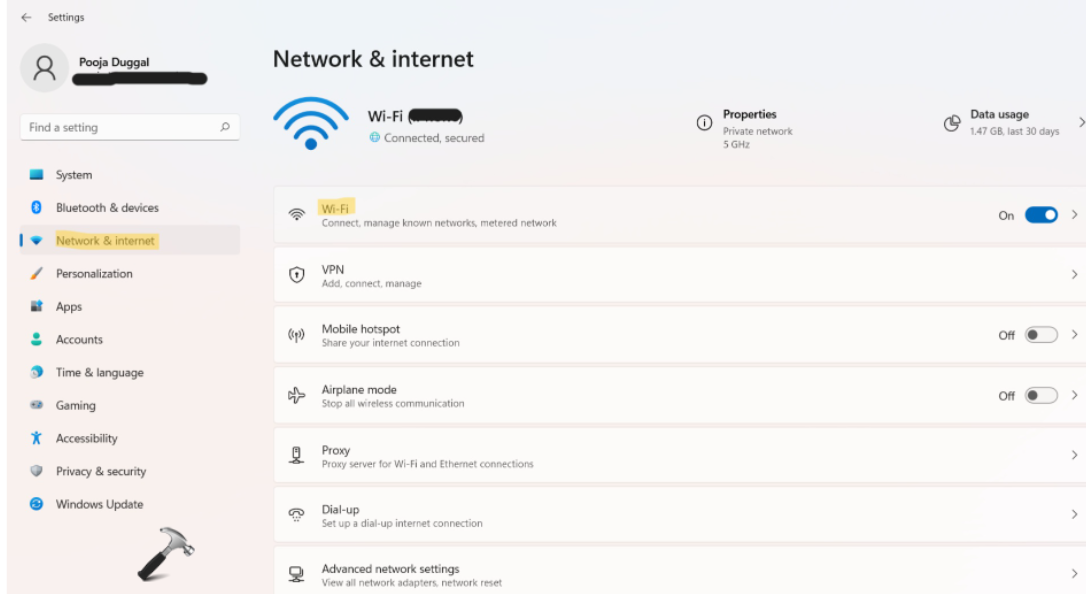
1. Open Settings and go to the Network & internet After that, click on WiFi present on the right.
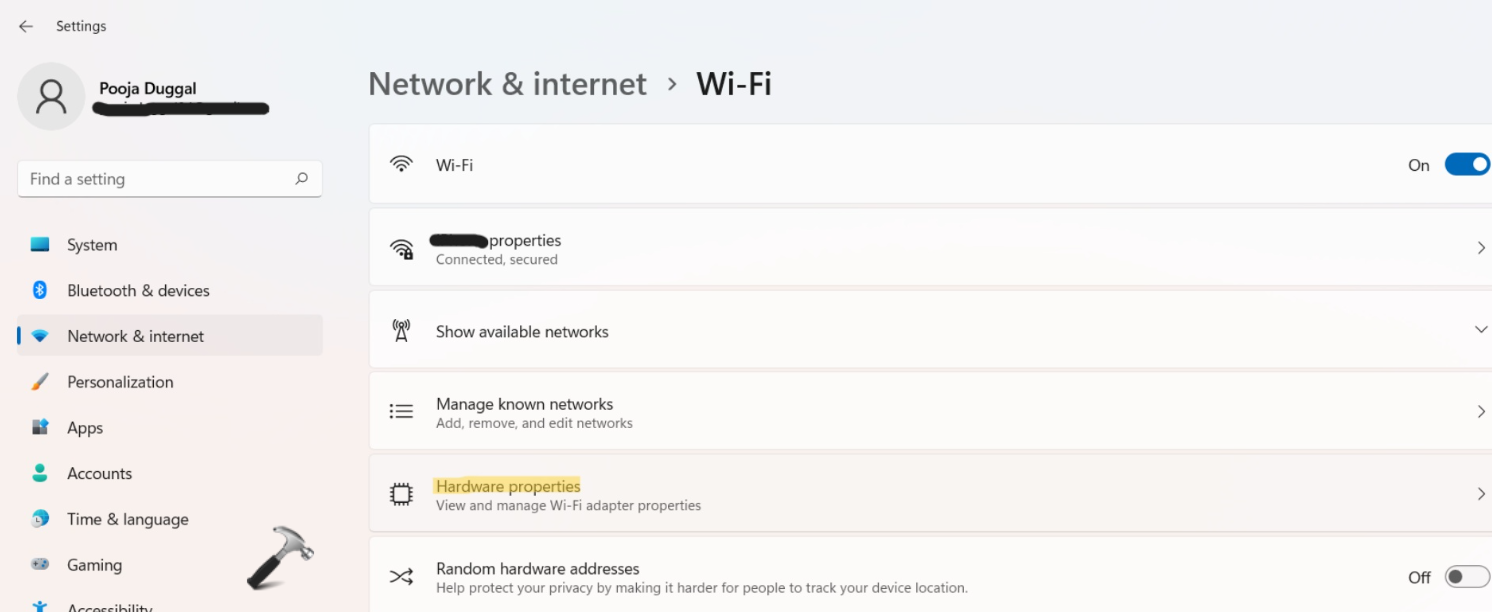
2. After that, click on Hardware properties.
3. Under the properties tab, click on the Edit button present next to the IP assignment.
4. Now, choose Automatic (DHCP) from the drop-down in the Edit Settings pop up. Then, click on Save.
5. Next, click on Edit present next to DNS server assignment and choose Automatic (DHCP). Then, click on Save.

Fix 3: Update the Network Driver
1. Firstly, right-click on the Windows icon and choose Device Manager.

2. After that, choose Network adapters.
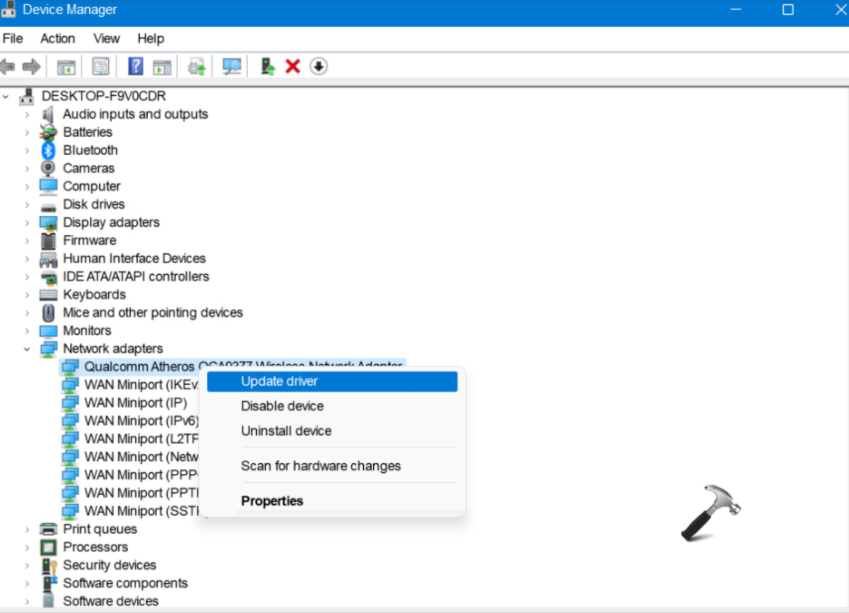
3. Once expanded, right-click on your network adapter and then, choose Update driver.
4. In the next window, select Search automatically for drivers. Windows will automatically look for the latest driver and update it.

Fix 4: Uninstall/Re-install the Network Driver
1. Open Run and type devmgmt.msc in the Run dialog box. Press Enter to open Device Manager.

2. After that, expand the Network adapters section and locate your wireless device. Right click on it and choose Uninstall device.
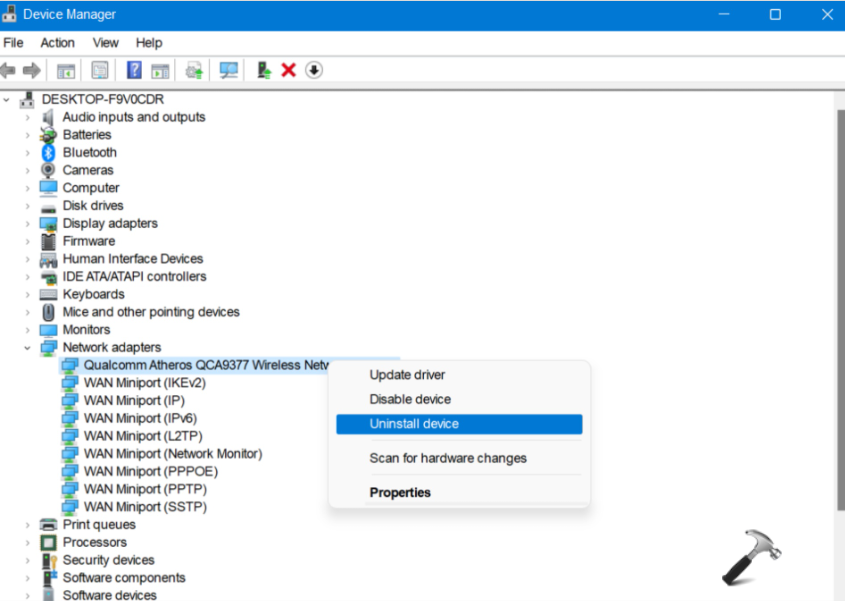
3. Once done, check the box present next to Attempt to remove the driver for this device and then, select Uninstall.
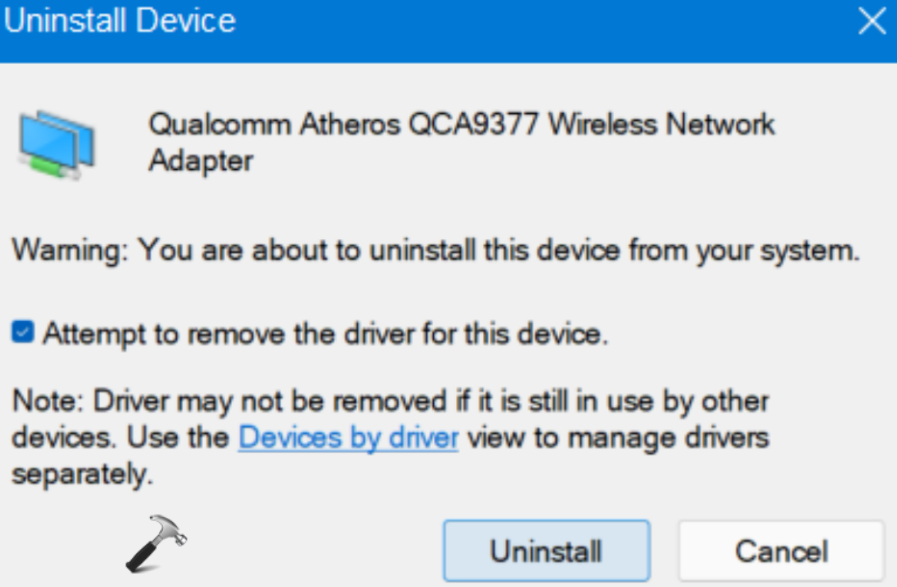
4. Lastly, reboot your system.
Fix 5: Make Changes to Power Management
1. Open Device Manager by pressing the Windows + X tabs together on your keyboard.

2. Next, expand the Network adapters section and right-click on the network adapter. Then, choose Properties.
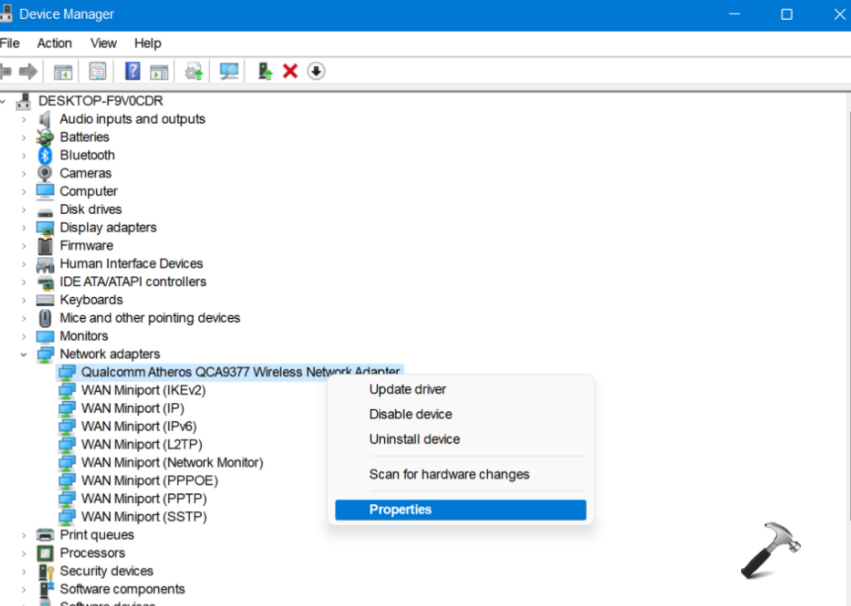
3. Now, choose Power Management and uncheck the box present next to Allow the computer to turn off this device to save power.

4. Press OK and restart your device.
Fix 6: Reset Network Adapter through Command Prompt
1. Open Run and type msconfig in the Run dialog box. Press Enter to open System Configuration.
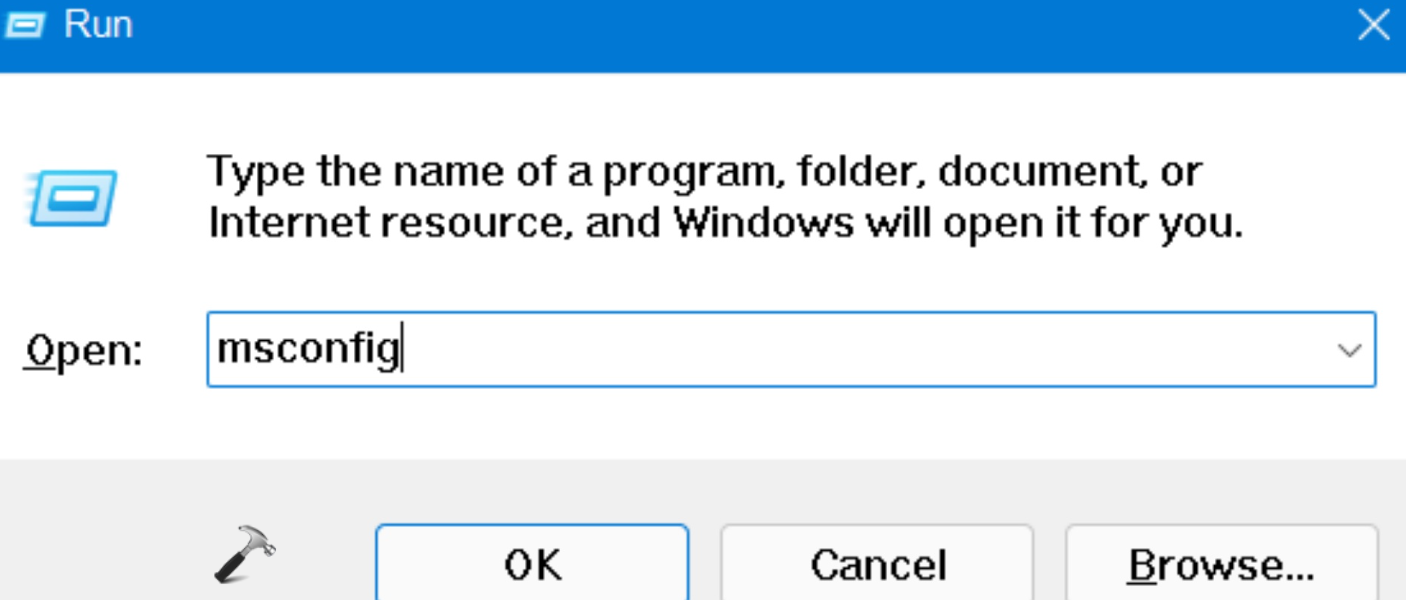
2. Now, go to the Services tab and click on Enable all present at the bottom.
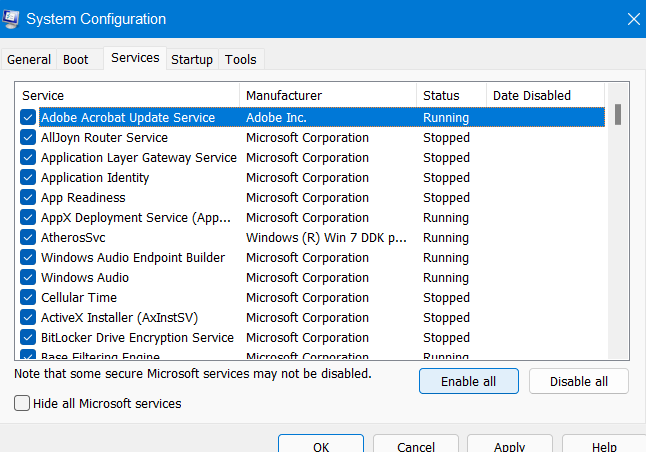
3. Once done, press Apply and then, OK.
Fix 7: Enable All Services in System Configuration
1. Open Run and type cmd in the Run dialog box. Press the Ctrl+Shift+Enter tabs together on your keyboard to open elevated Command Prompt.
2. Now, execute the following command:
Netsh winsock reset
3. After that, execute the following command:
Netsh int ip reset resetlog.txt
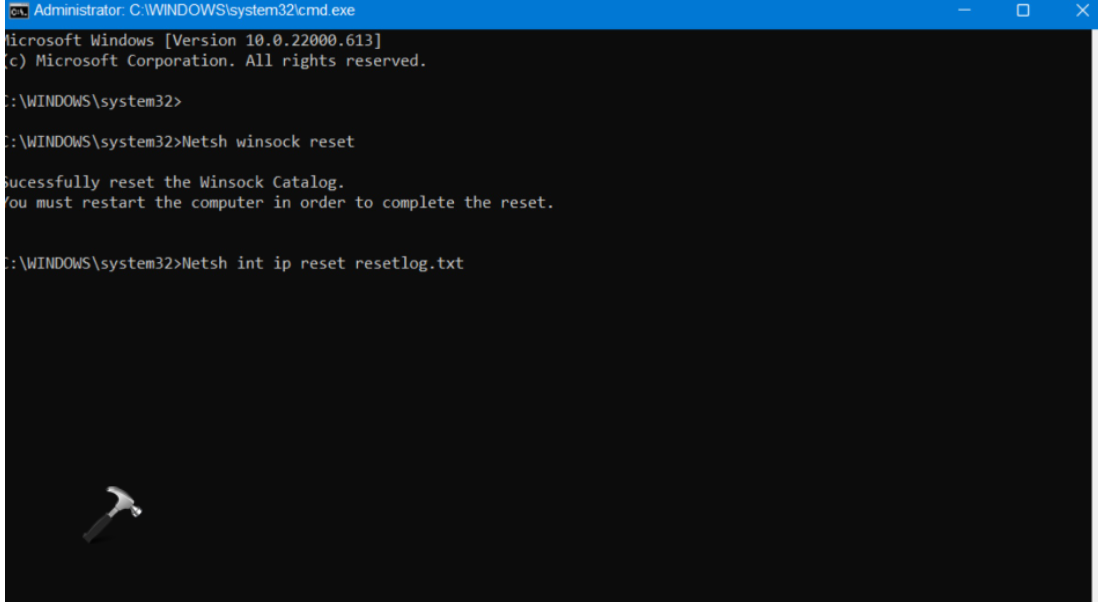
4. Once done, close Command Prompt.
So, this is how to fix WiFi option not showing in Settings for Windows 11.
![KapilArya.com is a Windows troubleshooting & how to tutorials blog from Kapil Arya [Microsoft MVP (Windows IT Pro)]. KapilArya.com](https://images.kapilarya.com/Logo1.svg)


2 Comments
Add your comment
haii, thanks for help.
but my laptop didn’t work. i already use the Fix 1 (Restart the WLAN Autoconfig Service) & 2 (Set IP Assignment to Automatic in Settings), but the network adapter for Wi-Fi didn’t shown. what should i do for this trouble?
Thanks.
^^ In that case, you need to get wireless driver from your device manufacturer’s website.